Introduction
If you love Tex-Mex food but want a lighter, oven-baked version without losing flavor or crunch, these Baked Chicken Chimichangas will quickly become a go-to recipe in your kitchen. Traditionally, chimichangas are deep-fried, but baking them gives you all the crispiness with far less oil. Filled with tender shredded chicken, creamy cheese, and bold taco seasoning, this dish makes a perfect weeknight dinner that the whole family will devour. Plus, they’re customizable—whether you like it spicy, mild, or loaded with toppings, you can adjust it to your taste.
My recipe story
My love for chimichangas started years ago at a small family-owned Tex-Mex restaurant. They served the most delicious, deep-fried chimichangas smothered in sauce and cheese. I adored them, but I wanted to enjoy the same flavors at home without the heaviness of frying. That’s when I began experimenting with baked versions. Over time, I perfected a filling that’s creamy, flavorful, and satisfying while still being easy enough to prepare on a busy weeknight. Today, this recipe is one I often share with friends and family, and it never fails to impress at gatherings. It’s hearty, comforting, and best of all, baked to golden perfection in the oven.
💡 Why You’ll Love This Recipe
- Baked instead of fried, making it lighter and healthier without sacrificing crispiness.
- Filled with a creamy, cheesy chicken mixture that’s packed with flavor.
- Perfect for meal prepping and freezer-friendly.
- Customizable with different proteins, cheeses, or spice levels.
- A family-friendly recipe that’s fun to make and eat.
Ingredient breakdown
The magic of baked chicken chimichangas lies in a few simple yet flavorful ingredients. The combination of cream cheese and pepper jack cheese creates a creamy, slightly spicy filling that perfectly coats the shredded chicken. Cream cheese brings richness and helps bind everything together, while pepper jack adds a hint of heat and that signature melty texture we all crave in Tex-Mex dishes.
Shredded chicken forms the hearty base of the filling, and you can use rotisserie chicken for convenience or cook chicken breasts or thighs ahead of time. Taco seasoning ties it all together with a balanced blend of spices—cumin, chili powder, garlic, and paprika—that delivers bold Tex-Mex flavor in every bite. All of this goodness gets wrapped in soft flour tortillas, which crisp up beautifully in the oven with just a light spray of cooking oil. The result is golden, crunchy chimichangas that are lighter than fried versions but every bit as satisfying.
Equipment you’ll need
- Mixing bowls
- Wooden spoon or spatula
- Baking sheet
- Parchment paper or aluminum foil
- Cooking spray
- Sharp knife
- Cheese grater (if shredding cheese at home)
Step-by-step directions
Step 1: Prepare the filling. In a large mixing bowl, combine softened cream cheese, shredded pepper jack cheese, and taco seasoning. Mix until smooth and well combined. Add the cooked shredded chicken and fold it into the creamy mixture until the chicken is fully coated. This ensures every bite has flavor and texture.
Step 2: Assemble the chimichangas. Lay out your flour tortillas on a clean surface. Spoon a generous amount of the chicken mixture into the center of each tortilla. Fold in the sides, then roll the tortilla tightly like a burrito. The goal is to keep the filling sealed inside so it doesn’t spill while baking.
Step 3: Prepare for baking. Place the rolled chimichangas seam-side down on a parchment-lined baking sheet. Lightly spray the tops with cooking spray, which helps them crisp up in the oven. Space them apart so they bake evenly without sticking together.
Step 4: Bake to golden perfection. Preheat your oven to 400°F (200°C). Bake the chimichangas for about 20–25 minutes, flipping them halfway through to ensure all sides get crisp and golden brown. The cheese filling will melt beautifully while the tortillas become crunchy.
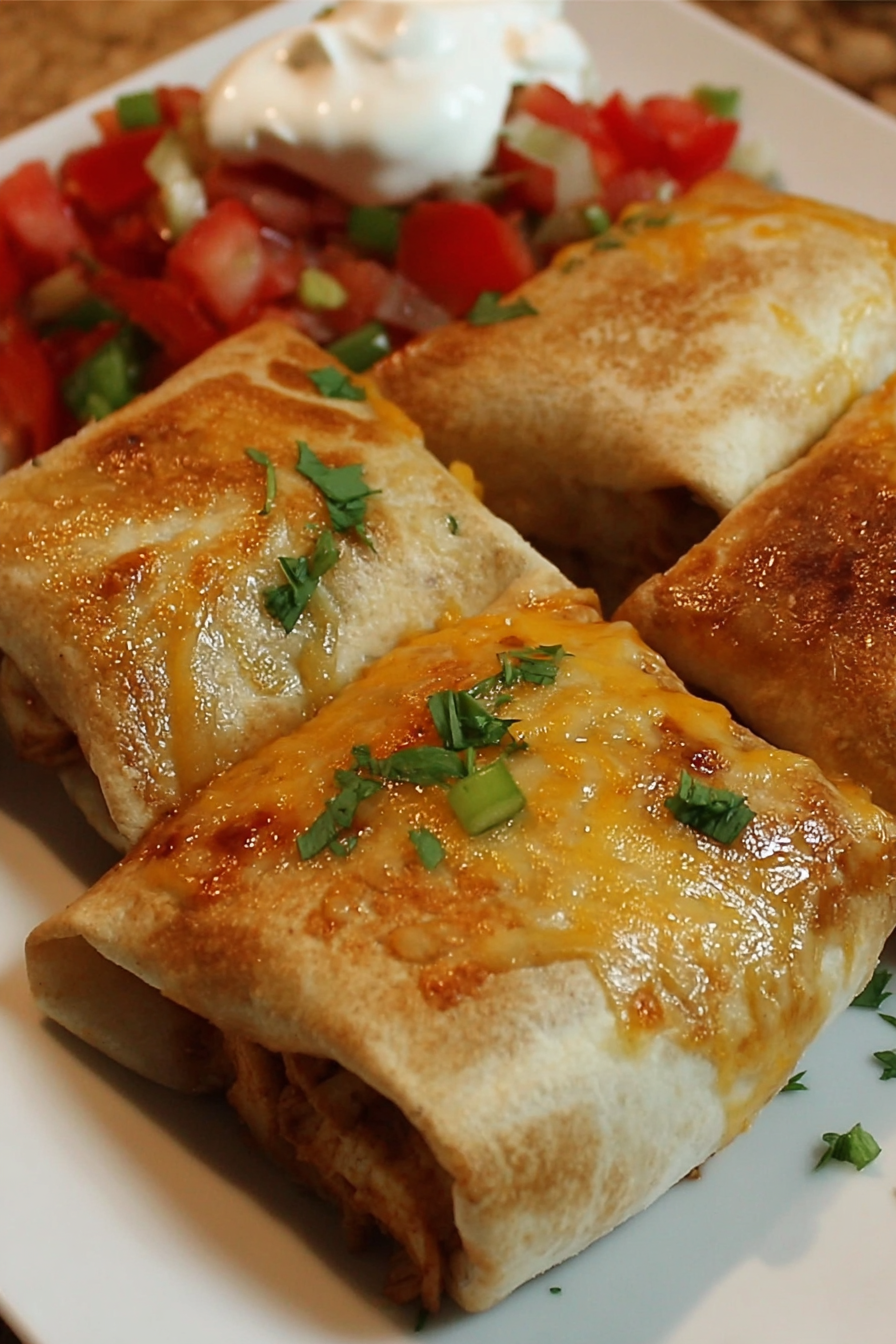
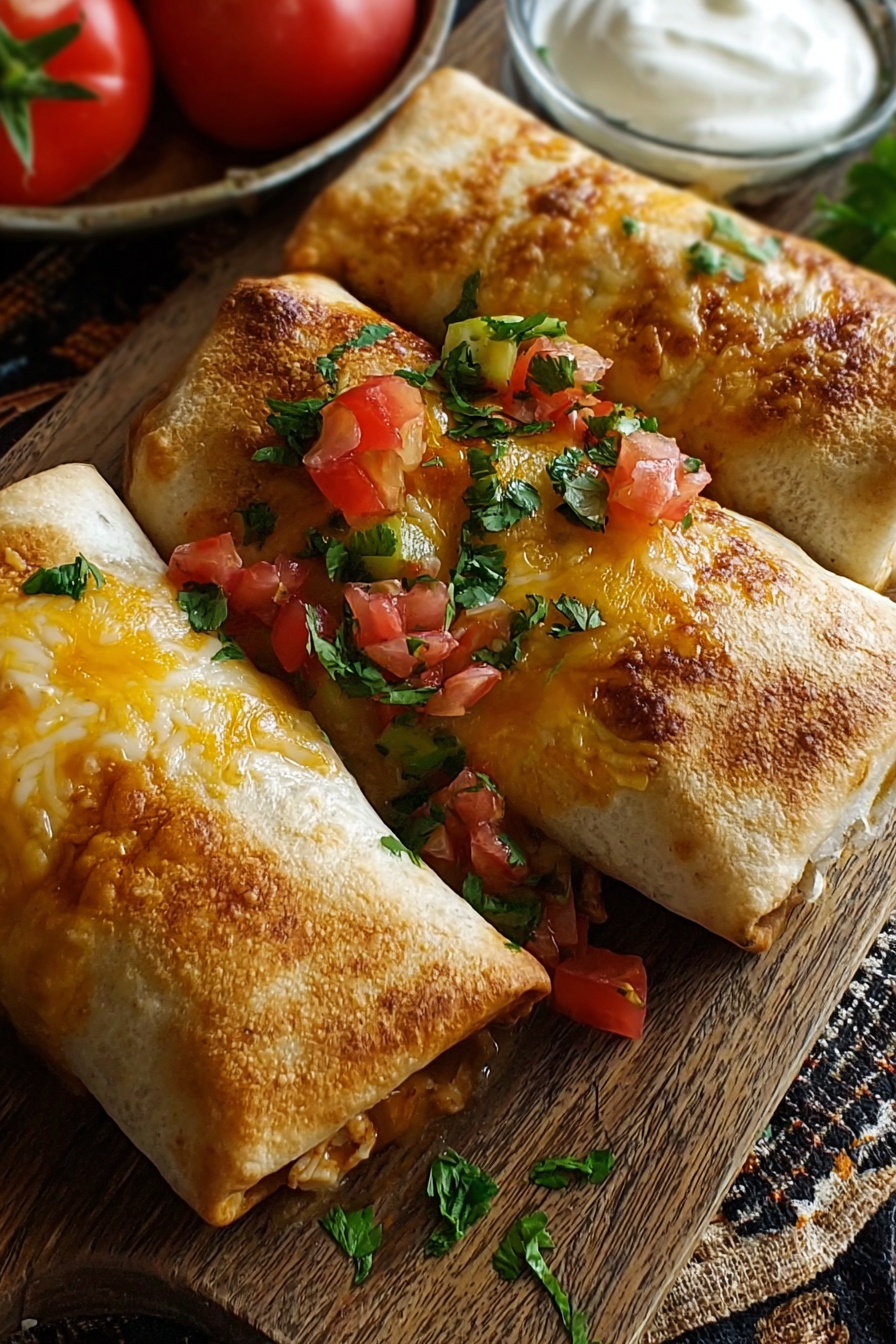
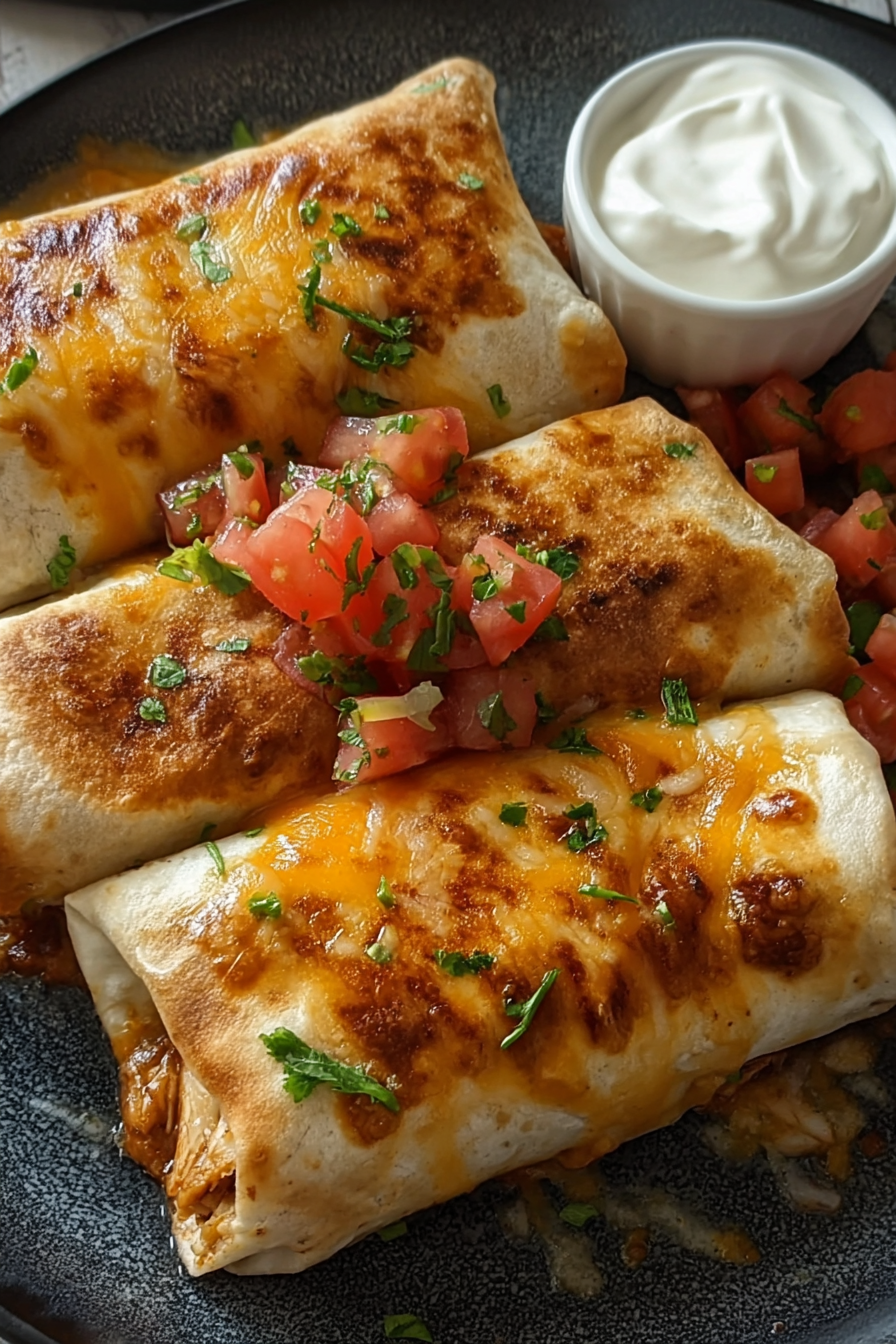
Step 5: Serve and enjoy. Once baked, remove from the oven and let cool slightly before serving. Top with sour cream, salsa, guacamole, or shredded lettuce for extra flavor and freshness. These toppings not only add color but also enhance the overall dining experience.
Variations & substitutions
You can make endless variations of baked chimichangas to fit your preferences. Swap the chicken for ground beef, pulled pork, or even shredded turkey for different protein options. If you prefer a vegetarian version, substitute beans, sautéed vegetables, or plant-based meat alternatives. For the cheese, cheddar or Monterey Jack work wonderfully if you don’t have pepper jack on hand. Adjust the taco seasoning to your taste—add more chili powder for extra heat, or go mild with just garlic and cumin. You can also add corn, black beans, or jalapeños to the filling for extra flavor and texture.
💡 Expert Tips & Troubleshooting
- Make sure your cream cheese is softened at room temperature for easier mixing.
- Don’t overfill the tortillas—this makes them harder to roll and more likely to burst open during baking.
- If your chimichangas aren’t crisp enough, broil them for 2–3 minutes at the end of baking.
- To prevent sogginess, serve immediately after baking while they’re still hot and crispy.
- Use parchment paper instead of foil for easier cleanup and even browning.
Storage, freezing & make-ahead
Leftover baked chimichangas can be stored in an airtight container in the refrigerator for up to 3 days. To reheat, place them in the oven at 350°F (175°C) for 10–15 minutes to restore crispiness. For freezing, wrap each chimichanga tightly in plastic wrap and store in a freezer-safe bag. They’ll keep well for up to 2 months. To reheat from frozen, bake at 375°F (190°C) for 25–30 minutes. You can also assemble chimichangas ahead of time and refrigerate them unbaked for up to 24 hours before popping them into the oven when ready.
Serving ideas & pairings
These baked chicken chimichangas pair beautifully with classic Tex-Mex sides. Serve them alongside Mexican rice, refried beans, or a fresh corn salad for a complete meal. For toppings, you can’t go wrong with guacamole, pico de gallo, sour cream, or shredded lettuce. If you’re entertaining, create a toppings bar so guests can customize their chimichangas with sauces, jalapeños, or shredded cheese. Pair with a refreshing drink like horchata, margaritas, or sparkling lime water to balance the richness of the dish.
FAQ
Can I use corn tortillas instead of flour?
Flour tortillas work best for chimichangas because they’re pliable and crisp nicely in the oven. Corn tortillas are more fragile and may crack when rolled.
Can I make these ahead of time?
Yes! You can assemble them up to a day in advance and refrigerate until ready to bake. This makes them perfect for meal prep or entertaining.
Are baked chimichangas healthier than fried?
Absolutely. Baking reduces the amount of oil while still giving you that golden, crispy texture, making them a lighter alternative to fried versions.
What toppings go best with baked chimichangas?
Salsa, sour cream, guacamole, shredded lettuce, and diced tomatoes are classic choices. You can also drizzle queso over the top for extra indulgence.
Can I make them spicier?
Yes! Add diced jalapeños, hot sauce, or extra chili powder to the filling for more heat. Pepper jack cheese also adds a nice spicy kick.
Final thoughts
Baked chicken chimichangas are the perfect balance of comfort food and healthier cooking. They’re crispy on the outside, creamy on the inside, and endlessly versatile. Whether you’re feeding a hungry family, prepping meals ahead of time, or hosting friends for a Tex-Mex night, this recipe delivers big flavor with minimal effort. Once you try this baked version, you may never go back to fried chimichangas again. Give them a try, experiment with toppings, and enjoy a satisfying dish that will surely become a staple in your kitchen.
Print
Baked Chicken Chimichangas
- Total Time: 40 minutes
- Yield: 8 chimichangas
Description
Crispy, golden tortillas filled with creamy, cheesy shredded chicken make these baked chimichangas a lighter Tex-Mex favorite. Perfect for family dinners or meal prep.
Ingredients
- 8 oz cream cheese, softened
- 8 oz pepper jack cheese, shredded
- 1 1/2 tbsp taco seasoning
- 1 lb cooked chicken, shredded
- 8 flour tortillas
- Cooking spray
Instructions
- Preheat oven to 400°F (200°C) and line a baking sheet with parchment paper.
- In a bowl, mix cream cheese, pepper jack cheese, and taco seasoning until smooth. Stir in shredded chicken until fully coated.
- Place filling in the center of each tortilla, fold in sides, and roll tightly like a burrito.
- Arrange chimichangas seam-side down on the baking sheet and lightly spray tops with cooking spray.
- Bake for 20–25 minutes, flipping halfway through, until golden and crispy.
- Serve warm with sour cream, salsa, guacamole, or your favorite Tex-Mex toppings.
Notes
These chimichangas can be assembled ahead and refrigerated for 24 hours before baking. Freeze unbaked for up to 2 months, then bake from frozen. For extra crispiness, broil for 2–3 minutes at the end.
- Prep Time: 15 minutes
- Cook Time: 25 minutes
- Category: Main Course
- Method: Baking
- Cuisine: Tex-Mex