1. Introduction to the Recipe
If you adore the rich flavors of classic Boston Cream Pie but want a treat that’s easier to share, Boston Cream Pie Cookies are destined to become your new favorite dessert. These cookies are a delightful mash-up of soft vanilla cookies, silky cream filling, and a glossy chocolate topping that mimics the iconic layers of the beloved cake. What makes them even more irresistible is that they’re handheld, easy to assemble, and perfect for gatherings, holidays, birthdays, or when you simply want to impress guests with a nostalgic twist on a traditional dessert.
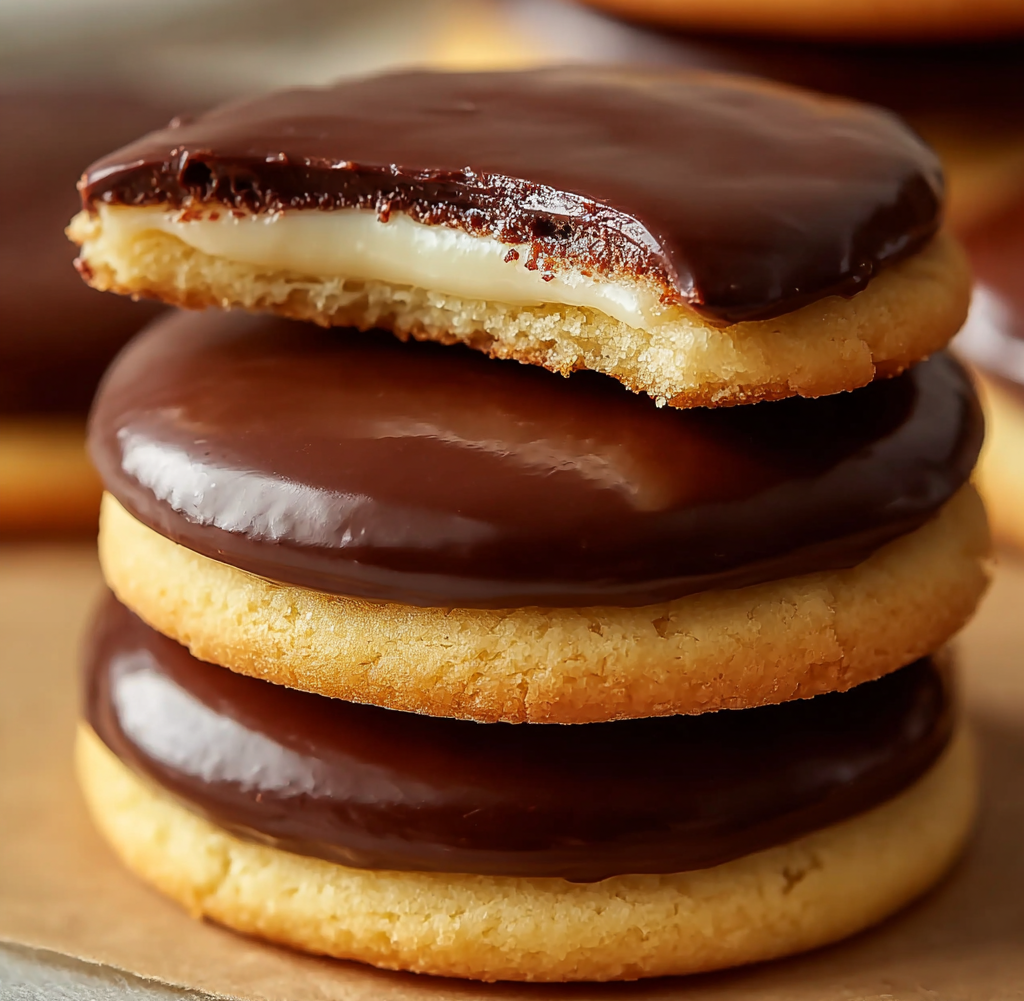
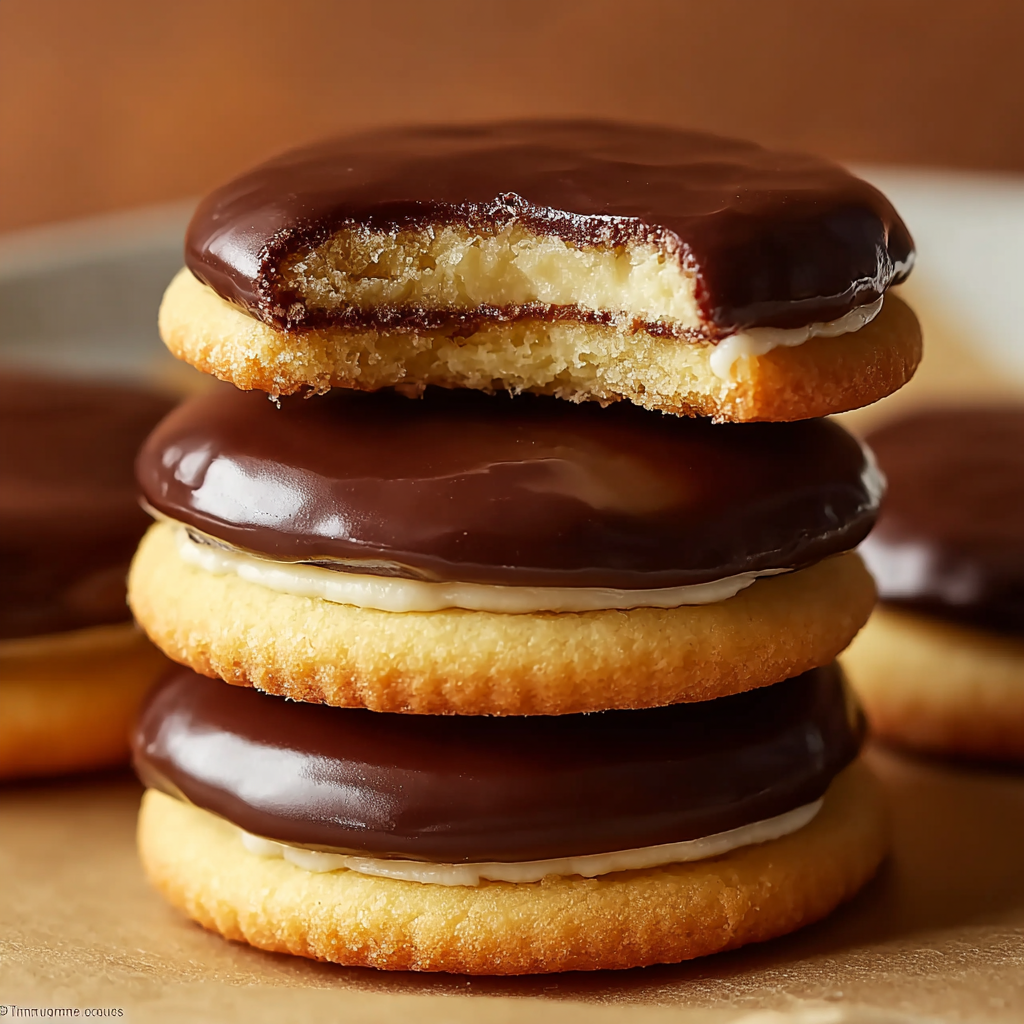
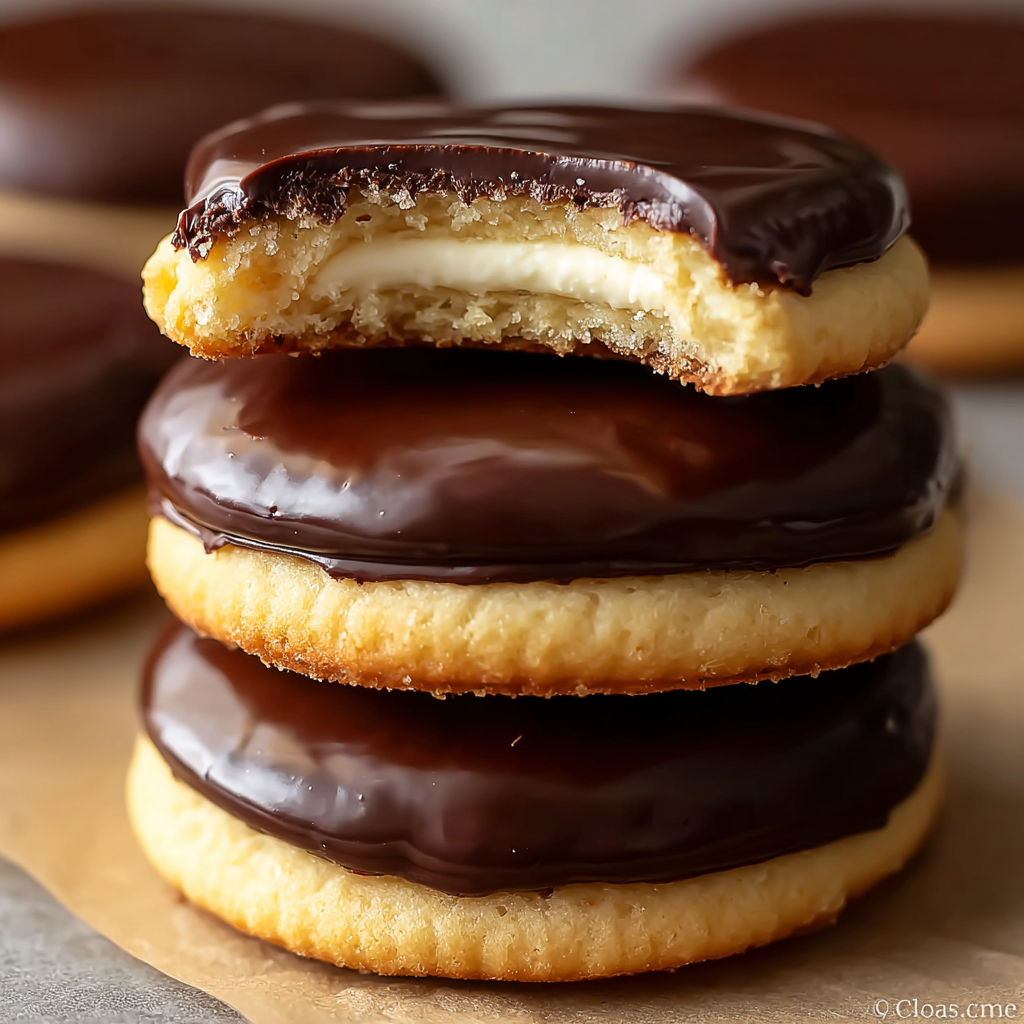
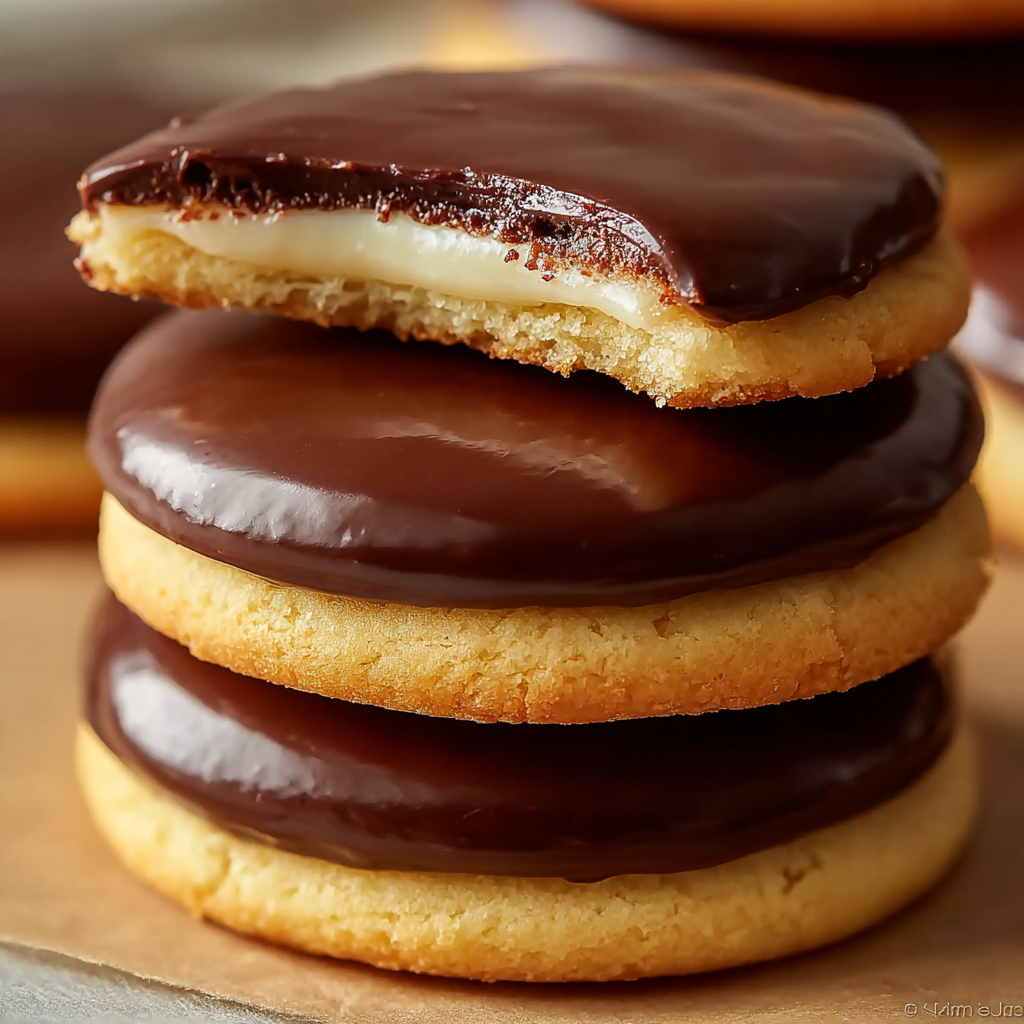
This recipe brings together simple pantry ingredients to deliver a decadent outcome. The cookies provide a tender, lightly sweetened base, reminiscent of sponge cake but richer. The cream filling—made from whipped heavy cream, powdered sugar, and vanilla—is lush and stable enough to sandwich between the cookies. Finally, the chocolate glaze ties everything together with a smooth finish that sets beautifully and adds that unmistakable Boston Cream flavor profile. For readers interested in improving their cookie-making techniques, you might appreciate resources like tips for achieving perfect cookie textures or a helpful guide on melting chocolate for desserts, both of which complement this recipe nicely.
These Boston Cream Pie Cookies offer the satisfaction of a layered dessert in a fun, bite-sized format. They’re easier to transport, simpler to portion, and more beginner-friendly than a full cake. Whether you’re preparing a dessert tray, planning a party, or just craving something indulgent, this recipe delivers all the nostalgic flavors you love in a more practical and playful presentation.
2. Basic Recipe: Ingredients and Instructions
Print
Boston Cream Pie Cookies Recipe
Description
Boston Cream Pie Cookies combine soft cookies, creamy filling, and chocolate topping for a decadent dessert twist on the classic cake.
Ingredients
Cookies
- 1 cup unsalted butter, softened
- 1 cup granulated sugar
- 2 large eggs
- 1 teaspoon vanilla extract
- 2 cups all-purpose flour
- 1 teaspoon baking powder
- ½ teaspoon baking soda
- ¼ teaspoon salt
Cream Filling
- 1 cup heavy cream
- ½ cup powdered sugar
- 1 teaspoon vanilla extract
Chocolate Topping
- 1 cup semi-sweet chocolate chips
- 1 tablespoon vegetable oil
Instructions
- Prepare the Cookie Dough
Cream butter and sugar together until light and fluffy. Add eggs and vanilla, mixing well. - Combine Dry Ingredients
Whisk flour, baking powder, baking soda, and salt. Gradually add to the wet mixture until a dough forms. - Scoop and Bake
Drop spoonfuls of dough onto a lined baking sheet. Bake at 350°F (175°C) for 9–11 minutes or until lightly golden. - Make the Cream Filling
Whip heavy cream, powdered sugar, and vanilla until thick and stable. - Melt the Chocolate Topping
Melt chocolate chips with vegetable oil until smooth and glossy. - Assemble the Cookies
Spread cream filling onto the flat side of one cookie. Top with another cookie. - Finish with Chocolate
Dip or drizzle each sandwich with the melted chocolate topping. - Chill and Serve
Refrigerate briefly to allow the chocolate to set, then enjoy.
Notes
Avoid overbaking; the cookies should remain soft.
Chill the cream filling before assembling for cleaner layers.
Add a teaspoon of cornstarch to stabilize the whipped cream even further.
3. Advanced Techniques
1. Achieving the Perfect Soft Cookie Base
The foundation of Boston Cream Pie Cookies is a soft, tender cookie that mimics the texture of sponge cake but retains the sturdiness needed for sandwiching. To achieve this, ensure your butter is properly softened—not melted—and cream it thoroughly with the sugar. This process incorporates air, contributing to a pillowy texture. Avoid overmixing once you add the flour, as too much gluten development can result in dense, dry cookies. Chilling the dough briefly before baking also prevents spreading, giving the cookies a thick, uniform shape ideal for filling.
2. Making a Stable Cream Filling
A successful cream filling needs to be fluffy yet firm enough to hold its shape between cookies. Whipping heavy cream until stiff peaks form is essential, but incorporating powdered sugar slowly ensures smoothness without deflation. Adding the vanilla at the end helps maintain structure. For added stability, chill your mixing bowl and beaters beforehand. If you prefer an even firmer filling, fold in a tablespoon of softened cream cheese or a teaspoon of instant vanilla pudding mix.
3. Creating a Smooth, Shiny Chocolate Finish
For the signature glossy topping, melt chocolate chips with a small amount of vegetable oil. This prevents the chocolate from hardening too firmly and gives it a beautiful sheen. Melt chocolate gradually at low heat to avoid burning. Stir constantly until silky smooth. When dipping cookies, allow excess chocolate to drip off to prevent pooling. If drizzling, use a warm spoon or piping bag for clean, thin lines. Properly tempered chocolate elevates presentation and taste significantly.
4. Preventing Cookie Softening After Assembly
Moisture migration from the cream filling can soften cookies over time. To prevent this, ensure cookies cool completely before assembling. Chilling the filling helps maintain its structure and keeps the cookies crisp longer. For added protection, brush a thin layer of melted chocolate onto the bottom of each cookie before adding the filling. This creates a moisture barrier and enhances flavor.
5. Building Height and Structure in Cookie Sandwiches
Uniform cookie size is essential for maintaining a professional appearance. Use a cookie scoop to portion dough evenly. When assembling, pipe the cream filling instead of spreading to create consistent height. Press cookies gently together without squeezing filling out the sides. This method produces elegant, bakery-style sandwiches that hold up beautifully on dessert trays.
4. Storage, Shelf Life, and Maintenance Tips
1. Refrigeration for Freshness
Due to the cream filling, Boston Cream Pie Cookies must be refrigerated. Store them in a sealed container to prevent absorbing fridge odors. Refrigeration keeps both the filling and chocolate topping firm, preserving the cookie structure. They remain fresh for several days and taste even better after chilling.
2. Freezing for Long-Term Storage
These cookies freeze exceptionally well. Place them on a tray to freeze individually before transferring to an airtight container. Separate layers with parchment to prevent sticking. When ready to enjoy, thaw in the fridge to maintain the integrity of the cream filling. The cookies retain flavor and texture beautifully after freezing.
3. Preventing Condensation on Chocolate
Condensation can dull the chocolate surface. To avoid this, thaw frozen cookies gradually inside the refrigerator rather than at room temperature. Keep them covered during the thawing process to prevent moisture build-up. This technique ensures your cookies stay attractive and glossy.
4. Maintaining Cookie Softness Over Time
If the cookies begin to firm up, place a slice of bread or a few marshmallows in the container. These release moisture slowly, keeping the cookies soft without affecting the cream filling. This method helps maintain bakery-style texture even after a day or two.
5. Storing Components Separately
For ultimate freshness, bake cookies and prepare filling separately when making ahead. Assemble just before serving. This prevents any softening or structural changes and keeps chocolate perfectly glossy. It’s an ideal approach for events or gifting.
5. Dietary Adaptations and Substitutions
1. Gluten-Free Version
Substitute the all-purpose flour with a gluten-free flour blend that includes xanthan gum to maintain structure. The cookies remain soft and flavorful without gluten. Ensure all other ingredients, including chocolate chips, are certified gluten-free.
2. Dairy-Free Variation
Replace butter with vegan butter and heavy cream with coconut cream. Use dairy-free chocolate chips and vanilla-safe ingredients. The resulting cookies still offer a rich texture and excellent structure, with a slightly tropical undertone from the coconut.
3. Low-Sugar Modification
Use granulated monk fruit or a sugar substitute in the cookie dough. Swap powdered sugar in the filling for its sugar-free equivalent and use low-sugar chocolate chips. This adaptation maintains delicious flavor while significantly reducing sweetness.
4. Higher-Protein Version
Add one scoop of vanilla protein powder to the cookie dough, increasing flour slightly if needed. Incorporate a spoonful of Greek yogurt into the filling for extra protein and creaminess. This version transforms the cookies into a more satiating snack.
5. Egg-Free Option
Replace eggs with a combination of yogurt or unsweetened applesauce. For a richer alternative, use store-bought egg replacer. Adjust baking time slightly if necessary. The cookies still achieve a soft, tender crumb that pairs well with the filling.

6. FAQs About the Recipe
1. Why Did My Cookies Spread Too Much?
Cookies often spread when the dough is too warm or the butter is overly soft. Chill the dough for at least 20 minutes before baking. Using a silicone baking mat instead of parchment can also reduce spreading. Accurate measuring of flour helps maintain proper structure.
2. Can I Use Pudding Mix for the Filling?
Yes, instant vanilla pudding mix offers a thicker, more stable filling. Mix it with heavy cream to create a pastry-cream-like texture. This option is excellent when transporting cookies or serving them at events.
3. Why Is My Chocolate Topping Dull?
Dull chocolate usually results from overheating. Melt chocolate gently, stirring frequently, and add a bit of oil for shine. Rapid cooling can also dull it, so let it set at room temperature when possible before refrigerating.
4. Can I Make the Cookies Ahead?
Absolutely. Bake cookies and store them in an airtight container, then prepare filling and assemble when ready to serve. This prevents softening and ensures the freshest results.
5. How Do I Make the Cookies Uniform in Size?
Use a cookie scoop for consistent portions. Press or smooth dough as needed before baking. This ensures each cookie pairs neatly when assembling sandwiches.
7. Conclusion & Final Thoughts
Boston Cream Pie Cookies take everything that makes the classic Boston Cream Pie irresistible—the airy vanilla base, creamy center, and rich chocolate topping—and present it in a fun, portable, and crowd-pleasing form. They bring together nostalgic flavors with an approachable technique, making them ideal for bakers of all skill levels. Whether you’re preparing them for a family event, special celebration, or a simple weekend treat, these cookies both delight the palate and add elegance to your dessert spread.
What sets these cookies apart is their perfectly balanced layers. The soft vanilla cookie provides a sturdy yet tender foundation. The cream filling adds a luxurious texture reminiscent of pastry cream without requiring any stovetop cooking. Finally, the glossy chocolate topping completes the experience with a decadent finish that feels both classic and comforting. Together, these elements create a dessert that feels elevated yet accessible.
This recipe also offers excellent adaptability. You can adjust sweetness, play with flavor variations, or adapt it to fit dietary needs. Whether you choose to make them gluten-free, dairy-free, or lower in sugar, the cookies maintain their soft, satisfying structure and delicious flavor profile. They store well, assemble cleanly, and are visually impressive, making them ideal for gifting or showcasing at parties.
In the end, Boston Cream Pie Cookies embody the joy of transforming a well-loved dessert into a new format that’s easier to enjoy and share. They are charming, indulgent, and guaranteed to become a favorite in any household that appreciates creative twists on timeless desserts.