1. Introduction to the Recipe
Craving a sweet treat that’s quick to make, requires no baking, and delivers serious flavor? Look no further than Butterfinger Balls—a perfect mashup of creamy peanut butter, crispy graham crackers, powdered sugar, and crushed Butterfinger candy, all rolled into bite-sized balls and coated in chocolate. This is one of those effortless desserts that manages to taste like it came from a gourmet candy shop, yet comes together in under 30 minutes with basic pantry ingredients.
These bite-sized candies are ideal for holidays, potlucks, dessert trays, or even late-night snack cravings. They’re also freezer-friendly, making them a great make-ahead option for parties or edible gifts. The flavor is rich and nutty with the unmistakable crunch and toffee sweetness of Butterfinger throughout. The chocolate shell seals the deal, making them as pretty as they are delicious.
What makes this recipe stand out is the no-bake factor. You don’t need an oven or a candy thermometer—just a mixing bowl and a microwave for melting chocolate. Plus, you can easily tweak it by using different coatings or nut butters.
If you enjoy classic peanut butter ball recipes, you’ll love this fun variation that levels up the nostalgia with a Butterfinger twist. Need tips on how to perfectly melt chocolate for dipping? This chocolate melting guide will help. And if you’re curious about homemade graham cracker crumbs, check out this DIY graham cracker crust guide.
2. Basic Recipe: Ingredients and Instructions
Print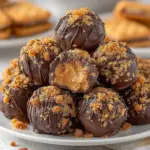
Irresistible No-Bake Butterfinger Balls
Description
Easy no-bake Butterfinger Balls made with peanut butter, graham crackers, and chocolate. Perfect candy bites for holidays or snacking.
Ingredients
-
1 cup creamy peanut butter (avoid natural peanut butter)
-
¼ cup salted butter, softened
-
1 teaspoon pure vanilla extract
-
1 cup powdered sugar
-
¾ cup graham cracker crumbs
-
½ cup crushed Butterfinger candy (about 6 fun-size bars)
-
Extra crushed Butterfinger for optional garnish
-
10 ounces chocolate-flavored almond bark (divided: 8 oz for coating, 2 oz for drizzling)
Instructions
-
Mix Wet Ingredients
In a large mixing bowl, beat together the peanut butter, softened butter, and vanilla extract until smooth and creamy. -
Add Dry Ingredients
Gradually mix in powdered sugar, graham cracker crumbs, and crushed Butterfinger candy. Stir until everything is well incorporated and forms a thick dough. -
Form Balls
Scoop about 1 tablespoon of the mixture and roll it into a ball. Place it on a parchment-lined baking sheet. Repeat until all the dough is used. Chill the balls in the refrigerator for 30–45 minutes or until firm. -
Melt Chocolate Coating
Melt 8 ounces of the almond bark in a microwave-safe bowl, heating in 30-second intervals and stirring between each until fully melted and smooth. -
Dip and Coat
Use a fork or dipping tool to coat each chilled ball in the melted chocolate. Let excess chocolate drip off, then place the coated ball back on the parchment. -
Drizzle and Garnish
Melt the remaining 2 ounces of almond bark. Use a spoon to drizzle over the top of the chocolate-coated balls. Immediately sprinkle with extra crushed Butterfinger, if desired. -
Set and Serve
Allow the chocolate to harden completely before serving. You can refrigerate to speed this up.
Notes
Use a cookie scoop for evenly sized balls.
Let the dough chill well before dipping to avoid crumbling.
Store in the fridge if your kitchen is warm—chocolate can melt at room temperature.
You can swap almond bark for dark chocolate or milk chocolate chips if preferred.
Graham cracker crumbs help bind the dough—don’t skip them!
Keywords: Butterfinger Balls
3. Advanced Techniques
Using Room Temperature Ingredients for Smoother Mixing
To create a smooth and workable dough, ensure both the peanut butter and butter are fully at room temperature before mixing. This makes the ingredients combine more easily and prevents clumping. If you use cold butter, it can make the mixture gritty and harder to roll. Let the butter sit out for 30 minutes before starting.
How to Perfectly Crush Butterfingers
For optimal texture, crush the Butterfinger bars in a zip-top bag using a rolling pin. This gives you a mix of fine crumbs and larger chunks, adding both flavor and crunch to each ball. Be careful not to pulverize them completely—you want some variety for texture.
Best Chocolate for Coating
Almond bark is preferred because it melts evenly and sets quickly. If you want to use chocolate chips or real chocolate, consider tempering it or adding 1 teaspoon of coconut oil to help with consistency and shine. Melt in short bursts to avoid scorching.
Freezing for Firmness Before Dipping
Chilling or briefly freezing the balls before dipping helps them hold their shape and prevents crumbling during the coating process. If you’re working in a warm kitchen, pop them in the freezer for 10 minutes before dipping.
Creating Clean Dips and Drizzles
Use a fork or dipping tool to fully coat each ball in chocolate. Tap the fork gently on the side of the bowl to remove excess chocolate before setting the ball down. For drizzles, use a fork or piping bag for cleaner lines. This gives the final product a professional finish.
See more advanced recipes at cookingwhite.com

4. Storage, Shelf Life, and Maintenance Tips
Refrigeration for Freshness
Store Butterfinger Balls in an airtight container in the fridge for up to 7 days. This keeps the chocolate coating firm and the interior creamy.
Freezing for Long-Term Storage
These freeze beautifully. Place them on a baking sheet to freeze individually, then transfer to a zip-top freezer bag. They’ll last up to 3 months. Thaw overnight in the refrigerator before serving.
Avoid Moisture Exposure
Moisture can cause the chocolate coating to sweat or become soft. Store in a dry, cool place if refrigerating or freezing. Use airtight containers with parchment paper between layers.
Keep Garnish Intact
If garnishing with Butterfinger crumbs, do so while the chocolate is wet so they adhere well. If you wait too long, they won’t stick.
Transporting Tips
If taking them to a party or event, keep them chilled during transport. Use a cooler bag with ice packs if needed to maintain their shape and texture.

5. Dietary Adaptations and Substitutions
Gluten-Free Version
Use gluten-free graham cracker crumbs and double-check the label on Butterfinger bars and almond bark to ensure no hidden gluten.
Dairy-Free Option
Swap the butter for a dairy-free alternative and choose dairy-free chocolate or almond bark. Also, check if Butterfingers are safe for your specific needs.
Nut-Free Adaptation
Substitute sunflower seed butter for the peanut butter. Be sure to use nut-free graham crackers and check candy ingredients thoroughly.
Lower Sugar Option
Use a powdered sugar substitute like Swerve or erythritol. Choose sugar-free chocolate for coating. Note: the Butterfinger candy does contain sugar and can’t be easily substituted.
Vegan Version
Use vegan butter, dairy-free chocolate, and a plant-based peanut butter. Unfortunately, Butterfinger candy contains dairy, so for a fully vegan version, use vegan toffee or crispy peanut candy in its place.

6. FAQs About the Recipe
Can I use natural peanut butter?
It’s not recommended. Natural peanut butter tends to separate and is too oily, which can cause the mixture to be too soft and hard to shape. Use a traditional creamy brand for best results.
How do I prevent chocolate from seizing when melting?
Always use a completely dry bowl and stir between microwave intervals. If water or steam gets into the chocolate, it can seize. Stick to 30-second intervals to avoid overheating.
Can I double this recipe for a crowd?
Yes! This recipe scales well. Double all ingredients and mix in a stand mixer if needed. Be sure to chill longer since the larger quantity may be softer.
Do I need to temper the chocolate?
No. Using almond bark or candy melts eliminates the need for tempering. They melt and harden with a perfect snap, ideal for coating.
What can I use instead of Butterfinger candy?
If Butterfinger bars aren’t available, try using crushed toffee bars like Heath or Skor. They provide a similar crunch and caramel flavor.

7. Conclusion & Final Thoughts
Butterfinger Balls are the ultimate no-bake treat: easy, flavorful, and sure to disappear fast. Whether you’re whipping up a quick dessert for a party, prepping holiday candy trays, or looking for an indulgent snack to stash in the fridge, these candy bites deliver every time. They blend nostalgia with modern simplicity, making them perfect for beginner and experienced bakers alike.
You don’t need special tools or hours of prep—just a bowl, a spoon, and a little creativity. From the creamy peanut butter center to the crunchy Butterfinger bites and the smooth chocolate shell, each element works in harmony. Plus, they’re endlessly customizable for dietary needs or flavor preferences.
Keep a batch on hand in the freezer, and you’ll always have a sweet bite ready to go. With minimal ingredients and maximum flavor, Butterfinger Balls might just become your new favorite no-bake dessert.