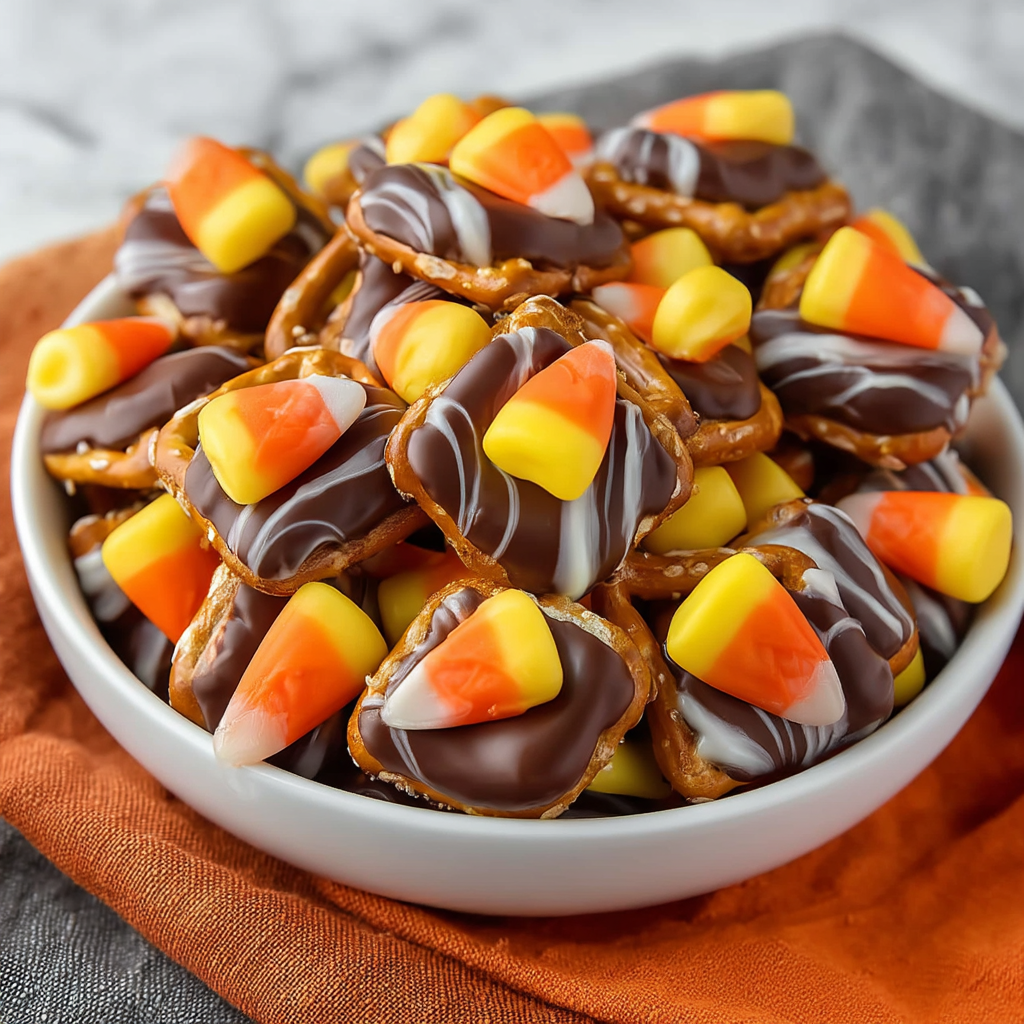
1. Introduction to the Recipe
When Halloween rolls around, everyone’s looking for easy, crowd-pleasing treats that offer maximum festive flair with minimal effort—and that’s exactly what you get with Candy Corn Pretzel Hugs. These delightful little bites bring together the perfect balance of sweet and salty, crunchy and creamy. Made with just three ingredients—pretzels, Hershey’s Kisses (or any variety of chocolate Kisses), and candy corn—this treat is both a visual and flavorful win at any Halloween celebration.
Whether you’re a seasoned home baker or someone who just wants to whip up something quick for a classroom party or spooky movie night, these treats are as foolproof as they come. No baking skills required, no fancy equipment, and no messy cleanup—just melt, press, cool, and enjoy. In fact, this is a great project to make with kids. They’ll love unwrapping the Kisses, placing the candies, and of course, sneaking a few pieces along the way.
You can get creative with the chocolate—use striped Hugs for a fun swirl effect, caramel-filled Kisses for added gooeyness, or dark chocolate for a more grown-up flavor. The salty crunch of the pretzel acts as the perfect base, while the soft, sweet chocolate and chewy candy corn on top bring a satisfying contrast in both texture and taste.
Want to master melting chocolate perfectly for this kind of treat? Read this quick guide on melting chocolate without burning it. And if you’re curious about candy corn varieties, check out this list of the best candy corn brands to pick your favorite.
From Halloween snack boards and party favors to lunchbox surprises and neighbor gifts, Candy Corn Pretzel Hugs are an easy and adorable option. Plus, the recipe is endlessly adaptable—keep reading for ways to elevate, store, customize, and troubleshoot these cute little Halloween treats.
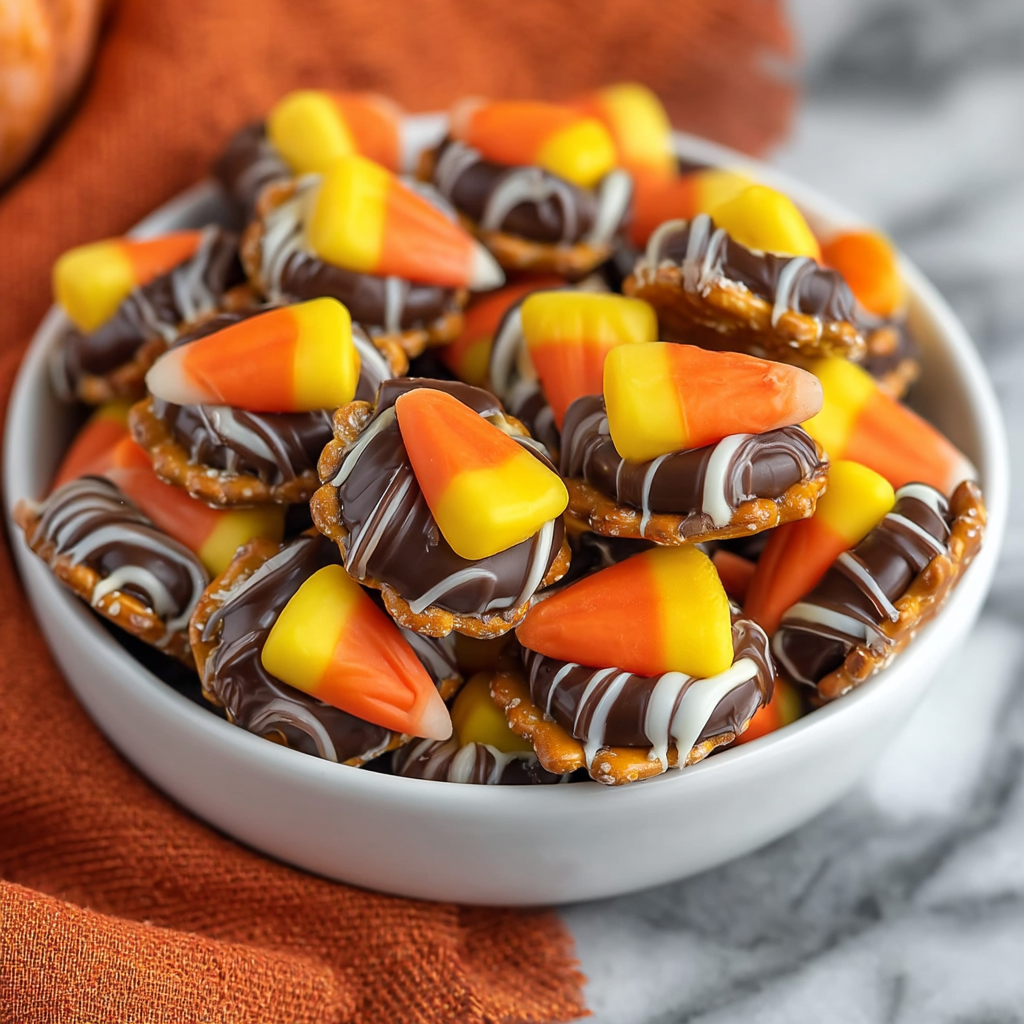
2. Basic Recipe: Ingredients and Instructions
Print
Candy Corn Pretzel Hugs – Easy Halloween Sweet & Salty Snack
Description
Candy Corn Pretzel Hugs are an easy Halloween treat with pretzels, melted Kisses, and candy corn. Sweet, salty, festive fun!
Ingredients
-
24 circle or square-shaped pretzels (like Snaps or Rings)
-
24 Hershey’s Kisses Hugs (or any variety of Kisses—milk, caramel, dark, etc.)
-
24 candy corn candies
Instructions
-
Preheat the oven
Preheat your oven to 200°F (93°C) and line a baking sheet with parchment paper or a silicone baking mat. -
Arrange the pretzels
Lay the pretzels flat in a single layer on the baking sheet, spacing them evenly. -
Place Kisses on each pretzel
Unwrap the Hershey’s Kisses and place one on the center of each pretzel. -
Bake briefly to soften chocolate
Place the baking sheet in the oven for 4–5 minutes—just until the Kisses start to soften and look glossy, but haven’t melted fully. -
Add candy corn
Remove from the oven and immediately press one candy corn gently into the center of each softened Kiss, pushing down slightly to spread the chocolate. -
Let them set
Allow the pretzel hugs to cool completely at room temperature, or speed things up by placing the tray in the fridge for 15–20 minutes until firm. -
Serve or store
Once set, serve immediately or store in an airtight container.
Notes
Don’t overbake: Kisses melt fast. If you bake too long, they’ll lose shape and become too gooey to press the candy into.
Use parchment: It helps with cleanup and prevents sticking.
Substitute candy: Not a fan of candy corn? Try M&Ms, mini Reese’s Pieces, or gummy pumpkins.
Uniform size: Use pretzels of the same shape and size for consistent results—Snaps work best for square alignment.
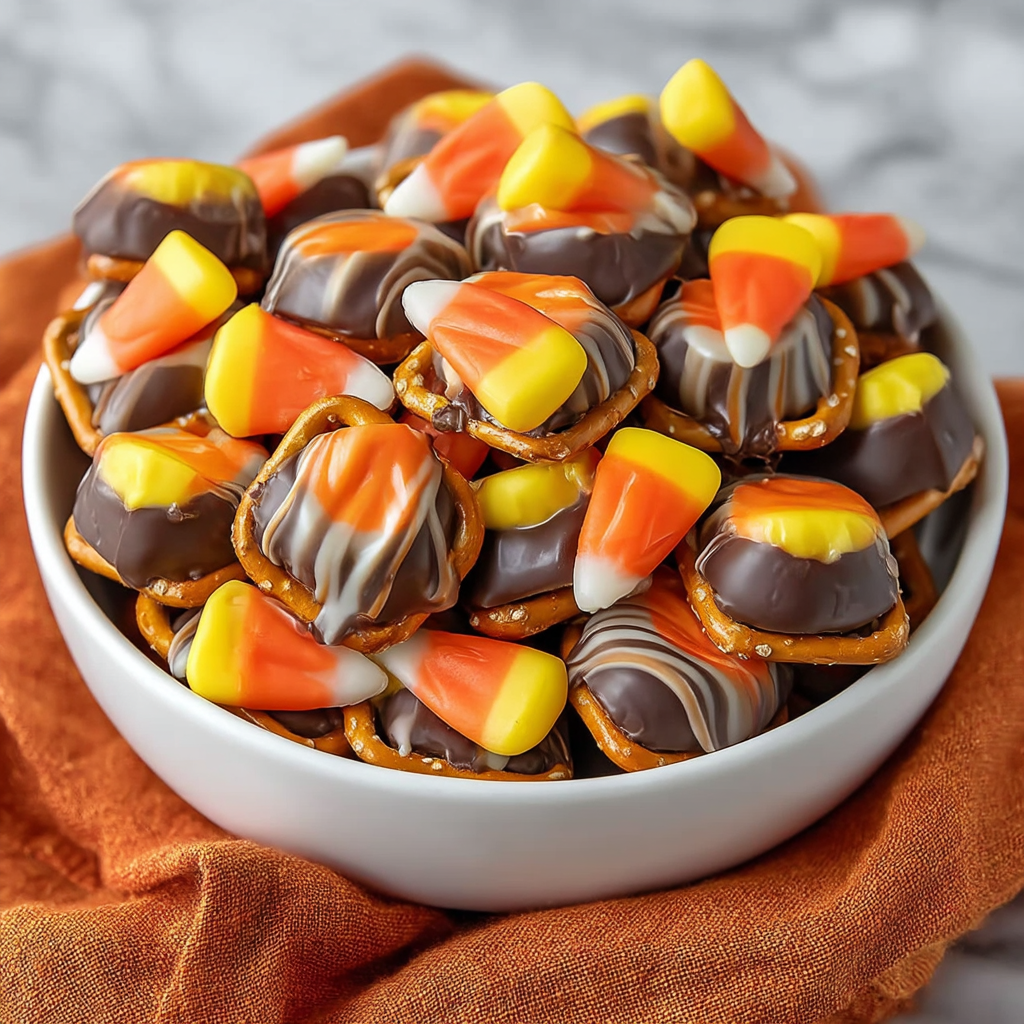
3. Advanced Techniques
1. Melting with Precision: The Key to Perfect Texture
The Kisses should be just soft enough to press a candy corn into without turning to mush. Bake at 200°F for no more than 5 minutes. You’ll know they’re ready when they look shiny and slightly slumped. Overheating will cause them to melt too much, lose shape, and possibly scorch. If you’re unsure, do a test batch with 2–3 first to nail the perfect timing for your oven. Softened chocolate should still hold its shape when touched but yield to gentle pressure.
2. Candy Alternatives for a Visual Twist
Don’t limit yourself to candy corn! Try topping your pretzel hugs with M&Ms, mini Reese’s Pieces, or candy pumpkins for a different color scheme. For adults, try a pinch of flaky sea salt or a roasted almond. These swaps allow you to keep the method the same while adapting the flavors to suit your audience or occasion—think Thanksgiving-themed hugs with chocolate Kisses and leaf-shaped sprinkles.
3. Layering for Flavor Depth
Want a more complex bite? Before placing the Kiss, you can add a hidden layer of peanut butter chips, caramel bits, or mini marshmallows on the pretzel. When the chocolate melts, it adheres everything together, giving each bite an unexpected flavor burst. You can also drizzle with white chocolate or dark chocolate once set to create a more “gourmet” look.
4. Using Specialty Kisses for Unique Flavors
Hershey’s releases seasonal Kisses that can totally change your flavor profile. Options like Pumpkin Spice, Hot Cocoa, or Candy Cane Kisses can create a whole new vibe. Match your topping accordingly—like using a cinnamon candy with Pumpkin Spice Kisses. These fun variants turn a basic snack into a holiday centerpiece.
5. Packaging for Gifting or Sale
Candy Corn Pretzel Hugs make perfect holiday gifts or party favors. Place them in mini cupcake liners for presentation, then box or bag them with Halloween-themed ribbon and labels. A stack of three in a small bag makes a great giveaway. Just be sure they’re fully set before packing, and store in a cool, dry place.
See more advanced recipes at cookingwhite.com
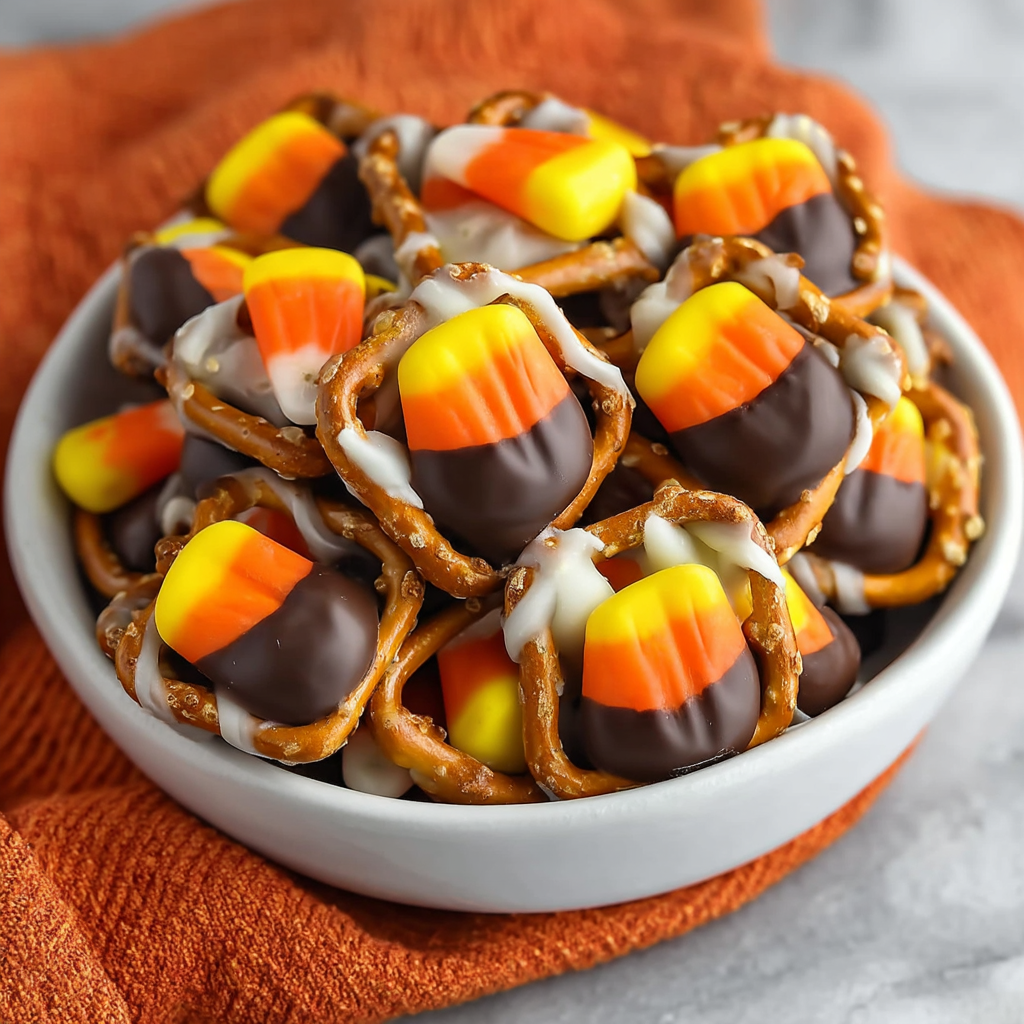
4. Storage, Shelf Life, and Maintenance Tips
1. Room Temperature Storage
Store your pretzel hugs in an airtight container at room temperature for up to 7 days. Use parchment between layers if stacking to prevent sticking or smudging.
2. Refrigeration for Extended Freshness
In warmer environments, refrigerate them to keep the chocolate firm and the pretzels crunchy. They’ll last 2 to 3 weeks in a sealed container in the fridge. Bring to room temp before serving to avoid chocolate condensation.
3. Freezing for Holiday Prep
These treats freeze beautifully. After they’ve set, arrange them in a single layer on a tray and freeze. Once frozen, transfer to a freezer bag. They’ll stay good for up to 2 months. To serve, thaw in the fridge overnight, then bring to room temperature still wrapped.
4. Avoiding Moisture & Chocolate Bloom
Chocolate can develop white streaks (called bloom) when exposed to moisture or temperature swings. Keep treats in a cool, dry place away from sunlight and humidity. If bloom does occur, it’s still safe to eat—just not as pretty.
5. Fixing Soggy Pretzels
If your pretzels go soft after storage, pop them into a 250°F oven for 3–5 minutes to re-crisp them. Let them cool before handling or storing again. Just make sure to watch the chocolate closely to prevent re-melting.
5. Dietary Adaptations and Substitutions
1. Gluten-Free Pretzel Hugs
Use certified gluten-free pretzels (like Snyder’s GF Snaps) and check labels on both the Kisses and candy corn. Many standard brands may contain gluten or cross-contamination, so be vigilant when cooking for someone with celiac or gluten sensitivity.
2. Vegan and Dairy-Free Versions
Use dairy-free chocolate (like Enjoy Life or Hu), and swap candy corn with vegan alternatives (such as YumEarth). Many pretzels are vegan, but always read the label to be sure—some contain butter or dairy derivatives. Coconut oil–based chocolate chips can also work well for melting.
3. Low-Sugar / Keto-Friendly Option
Use sugar-free chocolate Kisses or chips (from brands like Lily’s), low-carb pretzels (from specialty stores), and skip candy corn in favor of keto-friendly toppings like roasted nuts or sugar-free candies. Keep in mind that sugar-free chocolates melt a bit differently and may need gentler handling.
4. Nut-Free for Allergy Safety
To make these nut-free, double-check chocolate and candy labels for nut processing warnings. Avoid caramel-filled or nut-flavored Kisses and stick with plain milk chocolate or white chocolate.
5. Nut-Free for Allergy Safety
To make these nut-free, double-check all packaging—especially for the Kisses, as some varieties are manufactured in facilities that also process nuts. Stick with plain milk or white chocolate Kisses, and avoid caramel, almond, or specialty flavors unless labeled nut-free. For extra peace of mind, use allergen-friendly brands like Enjoy Life or Free2b, which are produced in nut-free facilities. You can also substitute candy corn with nut-free chocolate-covered sunflower seeds or safe gummies.
6. FAQs About the Recipe
1. Can I make these ahead of time for a party?
Absolutely! Candy Corn Pretzel Hugs are perfect for prepping in advance. Make them 1–2 weeks ahead and store in an airtight container in the fridge or freezer. Let them come to room temperature before serving to ensure the chocolate softens slightly and isn’t too firm. If you’re hosting outdoors or somewhere warm, consider keeping them in a cooler to avoid melting.
2. Why did my chocolate Kisses turn grainy or white?
This is likely due to chocolate bloom, which happens when chocolate is exposed to temperature changes or humidity. It’s harmless but doesn’t look great. To avoid this, store the treats in a cool, dry place and avoid moving them between cold and warm environments. Bloomed chocolate is still safe to eat, just less shiny.
3. Can I use different chocolate besides Hershey’s Kisses?
Yes! You can use chocolate disks, melting wafers, or chocolate chips—just make sure they’re large enough to hold a candy corn on top. Chocolate melts like Ghirardelli wafers or Merckens work great and come in a variety of colors and flavors. Adjust the oven time accordingly, as some chocolates melt faster than Kisses.
4. How can I keep the candy corn from sliding off?
This usually happens if the Kisses were overheated and became too melty. Make sure you’re baking just until glossy and soft—about 4–5 minutes. Press the candy corn gently but firmly, and allow the treats to set fully before moving them. If needed, pop the tray into the fridge immediately after assembling to help the chocolate set faster.
5. What’s the best way to package these for gifts or school parties?
Use mini cupcake liners or wrap them individually in wax paper squares. Then place in decorative bags, tins, or boxes. If stacking, insert parchment paper between layers to prevent sticking or smudging. Add a Halloween label or ribbon for extra presentation points. Just make sure they’ve fully set before packaging to avoid a sticky mess.
7. Conclusion & Final Thoughts
When it comes to easy Halloween treats, Candy Corn Pretzel Hugs check every box: they’re festive, flavorful, fast to make, and customizable to suit all kinds of tastes and diets. With just three base ingredients and a few minutes in the oven, you’ll have a tray of sweet and salty goodies that look impressive but couldn’t be easier to whip up.
This recipe is especially ideal for busy parents, classroom treats, last-minute party snacks, or edible gifts. Plus, it’s highly adaptable. Swap out the chocolate, change up the toppings, or even drizzle with melted candy melts to suit your spooky style. Because the base concept is so simple, it becomes a canvas for creativity—seasonal variations, dietary tweaks, and gourmet upgrades are all within reach.
What truly makes Candy Corn Pretzel Hugs special, though, is how they bring people together. Whether you’re letting your kids help with the assembly or handing out homemade treat bags to neighbors, these little bites of Halloween joy spread smiles wherever they go. And let’s face it: in the middle of chaotic fall schedules, having a go-to treat that looks festive, tastes great, and takes less than 30 minutes to make is a total win.
So the next time you’re hunting for the perfect Halloween snack—something easy, fun, and devilishly delicious—give Candy Corn Pretzel Hugs a try. Your taste buds (and your guests) will thank you!