Cauldron Cookie Cups: Spooky, Fun, and Deliciously Magical Halloween Treats
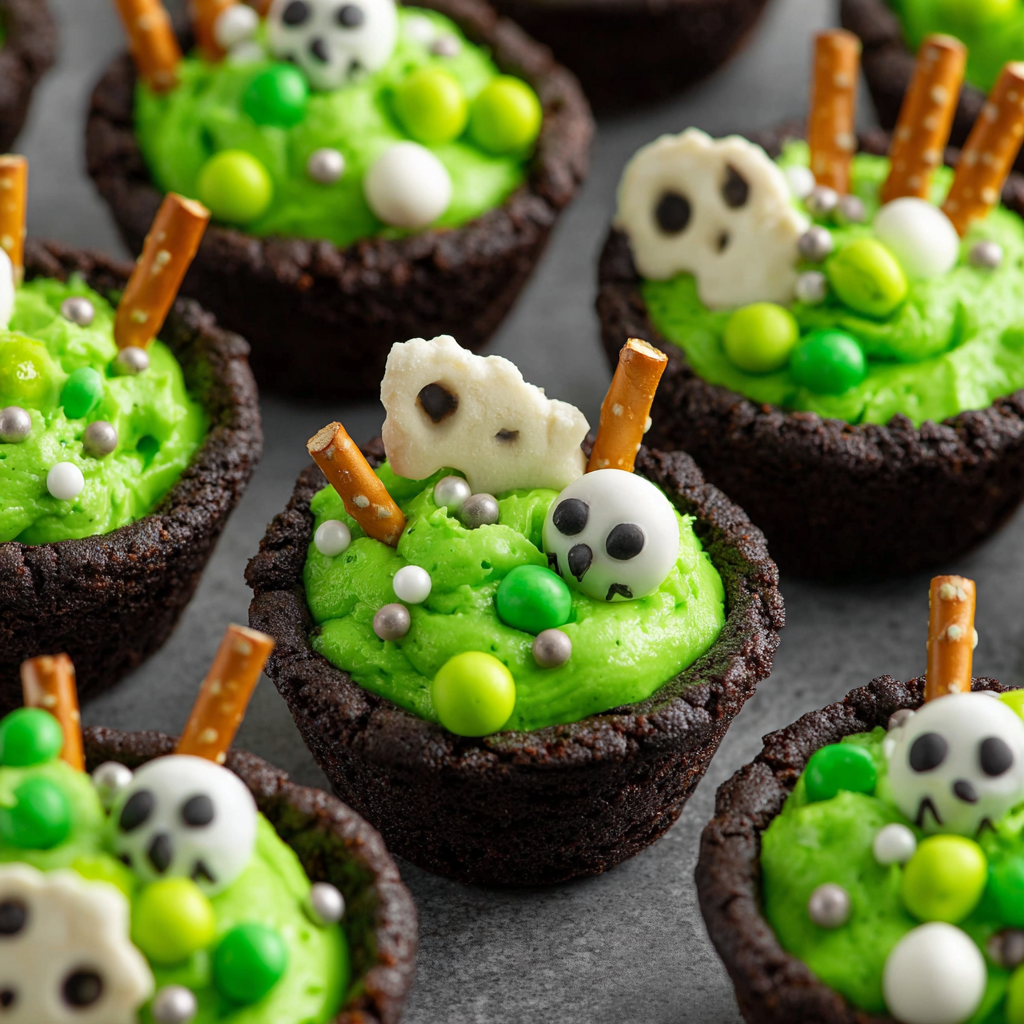
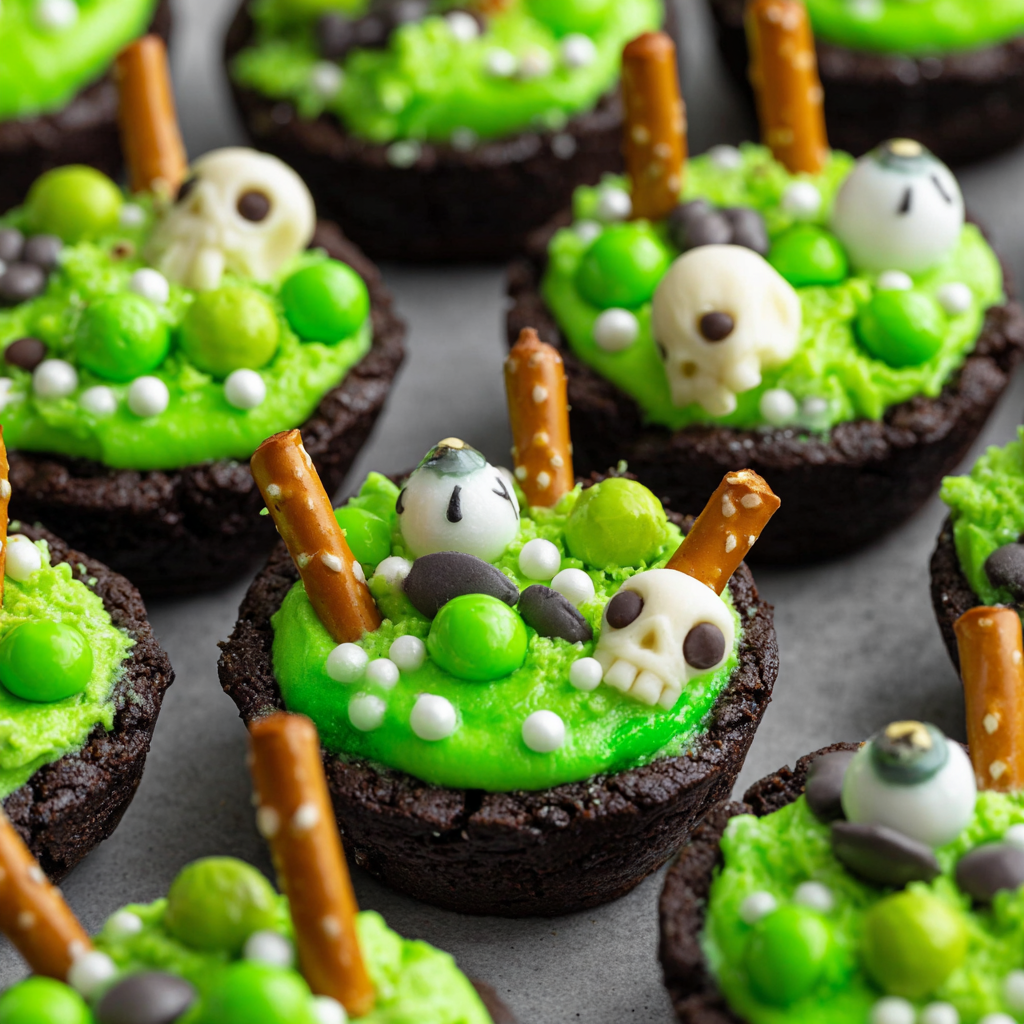
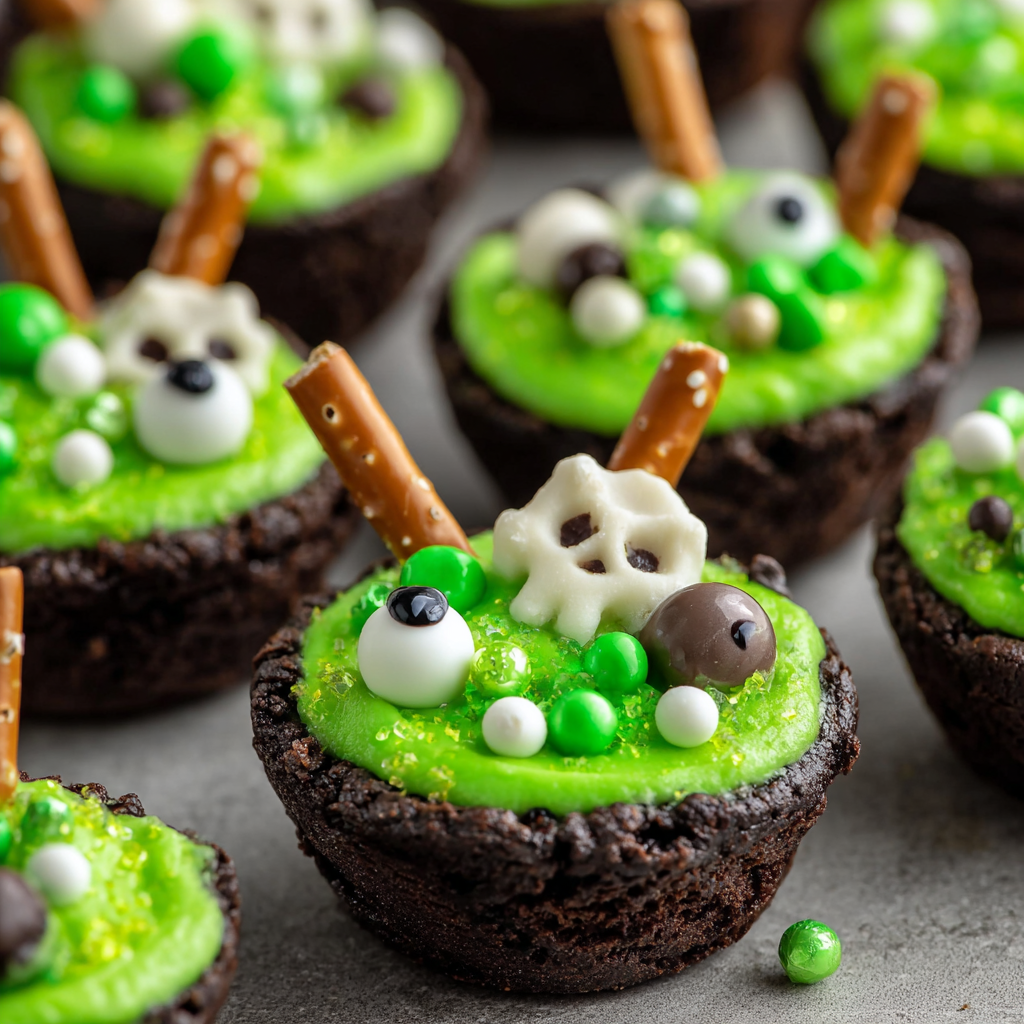
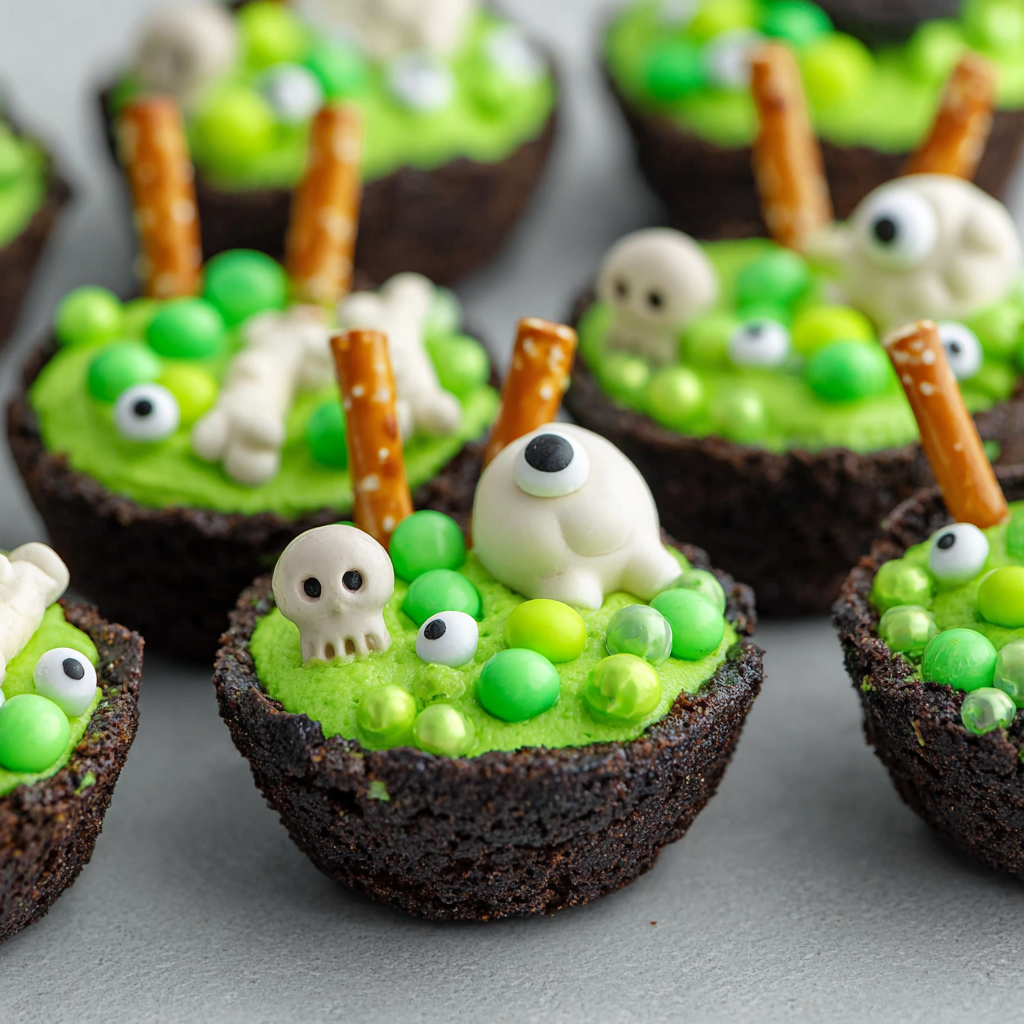
There’s something incredibly nostalgic about Halloween baking — the sweet aroma of chocolate wafting through the house, the hum of excitement as kids eagerly peek over the counter, and the creative chaos of decorating spooky little treats. Cauldron Cookie Cups are one of those recipes that bring all those warm, mischievous vibes together into one unforgettable dessert. Imagine soft, chewy devil’s food cookies transformed into tiny bubbling cauldrons overflowing with “witch’s brew” frosting, candy eyeballs, and Halloween sprinkles. Each bite is rich, chocolatey, and playfully magical — perfect for parties, bake sales, or a cozy night of scary movies.
These cookie cups look delightfully intricate, but they’re surprisingly easy to make. You start with a humble box of Devil’s Food cake mix, which bakes into perfectly dense, fudgy cookie cups. Then you fill them with a vibrant green vanilla frosting that looks like potion slime (thanks to a few drops of green food coloring). Add pretzel stick “handles,” candy eyeballs, and festive sprinkles — and voilà! You’ve conjured up the cutest mini cauldrons that are guaranteed to make everyone smile.
If you’re a fan of Halloween desserts that are as fun to make as they are to eat, you’ll absolutely love these. They’re a hit with both kids and adults, and they make a spooky-cute addition to any dessert table. For even more magical inspiration, check out similar creative treats like Witch Hat Cupcakes or Monster Eye Cookies. Now, let’s brew up some cookie magic!
Recipe Card
Print
Magical Cauldron Cookie Cups for Halloween Treats
Description
These Cauldron Cookie Cups are adorable, chocolatey cookie bases filled with creamy green vanilla frosting and decorated with Halloween candies to look like bubbling witch’s cauldrons. Perfect for spooky parties or classroom celebrations, they’re as fun to make as they are to eat!
Ingredients
For the Cookies:
- 1 (15.25-ounce) box Devil’s Food cake mix
- 2 large eggs
- ½ cup canola or vegetable oil
- Black food coloring (optional, for a darker cauldron look)
For the Frosting:
- 1 cup unsalted butter, softened
- 3 cups powdered sugar
- 1 teaspoon vanilla extract
- ½ teaspoon salt
- 1–3 tablespoons milk
- Green food coloring
For Decoration:
- Round green sprinkles (for “bubbling potion”)
- Halloween sprinkles (bats, ghosts, pumpkins — your choice!)
- Candy eyeballs
- Pretzel sticks (for cauldron handles)
Instructions
- Preheat and Prepare:
Preheat your oven to 350°F (175°C). Lightly grease a 12-cup muffin tin or line with paper liners. - Make the Cookie Dough:
In a large mixing bowl, combine the Devil’s Food cake mix, eggs, and oil. Mix until fully combined and thick. If you want an extra dark “cauldron” effect, mix in a few drops of black food coloring. - Shape and Bake:
Roll the dough into 1½-inch balls and place them into the muffin tin cavities. Use your thumb or the back of a measuring spoon to gently press down the centers to form a small well. Bake for 9–11 minutes, until the edges are set but the centers remain soft. - Create the Cup Shape:
Immediately after baking, use the back of a tablespoon to press down the centers again to form deeper wells — this is where the “potion” will go. Let the cookie cups cool completely in the pan before removing. - Prepare the Frosting:
Beat the softened butter in a large bowl until light and creamy (about 2 minutes). Gradually add powdered sugar, one cup at a time, followed by vanilla, salt, and 1 tablespoon of milk. Beat until fluffy. Adjust the consistency with more milk if needed. Add green food coloring until you reach your desired shade of “witchy slime.” - Assemble the Cauldrons:
Pipe or spoon the green frosting into each cooled cookie cup. Add green round sprinkles on top to mimic bubbling potion. Press a few candy eyeballs and Halloween sprinkles into the frosting for decoration. - Add the Handles:
Break pretzel sticks in half and gently press each end into opposite sides of the cookie cup to form a handle. Repeat for all cups. - Serve and Enjoy:
Arrange your Cauldron Cookie Cups on a platter and serve them at room temperature for the best texture.
Notes
Active time: 20 minutes
Baking time: 10 minutes
Cooling and decorating: 15 minutes
If you plan to make these ahead, bake the cookie cups a day early and frost them before serving for the freshest appearance.
Advanced Techniques
Perfecting the Cauldron Shape Without Cracks
A common issue with cookie cups is cracking around the edges. To avoid this, make sure to press your cookie wells immediately after baking while they’re still warm and pliable. I like using the bottom of a small spice jar to get an even, round shape. If the dough cracks slightly, no worries — a little frosting covers everything! The key is gentle pressure and not overbaking the cookies, so they stay soft and easy to mold.
Boosting the Chocolate Flavor in Your Cauldron Cookie Cups
For a richer flavor, replace two tablespoons of the oil with melted butter and stir in a teaspoon of espresso powder. It enhances the depth of the Devil’s Food cake mix without tasting like coffee. I also love sprinkling a pinch of flaky sea salt on top before baking — it contrasts beautifully with the sweetness of the frosting.
Creating Swirled “Potion” Frosting
If you want to take the decoration up a notch, divide your frosting into two portions. Tint one lime green and the other a deeper emerald. Load both colors side-by-side into a piping bag for a marbled, swirling “potion” effect. When you pipe it, you’ll see both shades intertwine, giving that bubbling cauldron look!
Adding Hidden Candy Surprises Inside
Want to wow your guests? Scoop a tiny bit of cookie from the center after baking and hide mini M&Ms or gummy worms inside before topping with frosting. When someone takes a bite, they’ll find a “hidden spell ingredient” inside their cauldron — it’s a fun, whimsical touch for kids’ parties.
Using Edible Glitter for a Magical Finish
A pinch of edible glitter (in green, purple, or gold) on top of your frosting makes your Cauldron Cookie Cups shimmer like real witch’s brew. I like using fine edible luster dust — it’s subtle but eye-catching, and it looks especially stunning under candlelight or party lighting.
Storage, Shelf Life, and Maintenance Tips
Keeping Cookie Cups Fresh and Chewy
To keep your Cauldron Cookie Cups soft, store them in an airtight container at room temperature for up to three days. Place a small piece of bread or a marshmallow in the container to help retain moisture — an old baker’s trick that really works.
Refrigerating Without Drying Out
If you need to store them longer, refrigerate the cookie cups (without pretzel handles) for up to five days. Wrap them individually in plastic wrap or place them in a sealed container lined with parchment. Bring to room temperature before serving to soften the frosting and cookies.
Freezing Cookie Cups for Later
The baked, unfrosted cookie cups freeze beautifully. Once cooled, place them in a single layer in a freezer bag and freeze for up to two months. When ready to serve, thaw overnight at room temperature and decorate fresh.
Handling Pretzel Handles So They Stay Crisp
Pretzels tend to soften over time due to the frosting’s moisture. Add them right before serving to keep them crunchy. If you’re prepping early, store pretzels separately in an airtight bag and attach them just before your event.
Transporting Without a Mess
If you’re taking these to a party or bake sale, line a shallow baking dish with parchment and arrange the cups snugly so they don’t slide. Chill them for 20 minutes before transport — it helps firm up the frosting and prevents smudging.
Dietary Adaptations and Substitutions
Making Gluten-Free Cauldron Cookie Cups
Simply swap the Devil’s Food cake mix for a gluten-free chocolate cake mix. I’ve had great results with King Arthur’s brand. Make sure your sprinkles and candy decorations are also labeled gluten-free, as some contain wheat starch.
Creating a Dairy-Free Version
For a dairy-free option, use dairy-free margarine or vegan butter in your frosting. You can also try a plant-based milk like almond or oat for thinning the frosting. The result is still silky smooth and perfectly pipeable.
Reducing Sugar Without Losing Sweetness
To cut down on sugar, use a sugar-free cake mix and replace half the powdered sugar in the frosting with a sugar substitute like Swerve Confectioners. You’ll still get great texture and a sweet finish without overpowering sweetness.
Making Vegan Cauldron Cookie Cups
Use a vegan cake mix, replace the eggs with two flax eggs (2 tablespoons flaxseed meal + 5 tablespoons water), and opt for plant-based butter. These versions are wonderfully chewy and taste nearly identical to the original!
Allergy-Friendly Customizations
If you’re serving a group with allergies, skip the pretzels (they often contain gluten) and replace them with gluten-free pretzel twists or licorice laces. You can also substitute almond milk for cow’s milk and sunflower butter for the frosting base if there’s a nut allergy.
FAQs About Cauldron Cookie Cups
Can I Make the Cookie Cups Ahead of Time?
Yes! You can bake the cookie cups up to two days ahead. Store them covered at room temperature, then frost and decorate the day you plan to serve them. The texture stays soft and delicious.
Why Did My Cookie Cups Collapse in the Center?
If your cups collapse too much, they might have been underbaked or you pressed the centers too deeply before baking. No worries — just fill them generously with frosting to balance the shape. They’ll still look and taste amazing!
Can I Use Store-Bought Frosting Instead of Homemade?
Absolutely! A can of store-bought vanilla or buttercream frosting works great. Just tint it green and maybe whip it for a minute to make it fluffier. I personally love making my own for that fresh butter flavor, but shortcuts are totally fine here.
How Do I Make the Black Cookie Color Darker?
Adding black food coloring is the easiest way, but you can also use dark cocoa powder (like Hershey’s Special Dark). Mix 2 tablespoons into the dough before baking for that perfect cauldron shade.
Can Kids Help with This Recipe?
Definitely! Kids love decorating these Cauldron Cookie Cups. I usually let them handle the sprinkles and eyeballs — it turns into a mini decorating party. Just make sure an adult handles the baking and pretzel insertion steps.
Conclusion & Final Thoughts
There’s truly something magical about Cauldron Cookie Cups. They’re the kind of recipe that captures the playful spirit of Halloween — spooky yet charming, easy yet impressive, messy yet joyfully delicious. Whether you’re baking them for a Halloween bash, a classroom treat, or a cozy family night, these little edible cauldrons will instantly become the star of the dessert table.
What I love most is how adaptable they are — you can make them gluten-free, vegan, or even sneak in candy surprises. They also double as a fun creative activity for kids, letting everyone personalize their own bubbling brew with candy eyeballs and sprinkles.
At the end of the day, these treats aren’t just about sweets — they’re about creating memories. The laughter over green frosting smudges, the excitement of adding “witchy” decorations, and the pure delight when someone takes that first bite of rich chocolate cookie and creamy frosting. Cauldron Cookie Cups embody the whimsy and warmth of home baking, one mini cauldron at a time.
So grab your mixing bowl, channel your inner kitchen witch, and conjure up a batch of these enchanting cookies. Your guests (and taste buds) will be spellbound!