Cheeseburger French Fry Casserole
1. Introduction to the Recipe
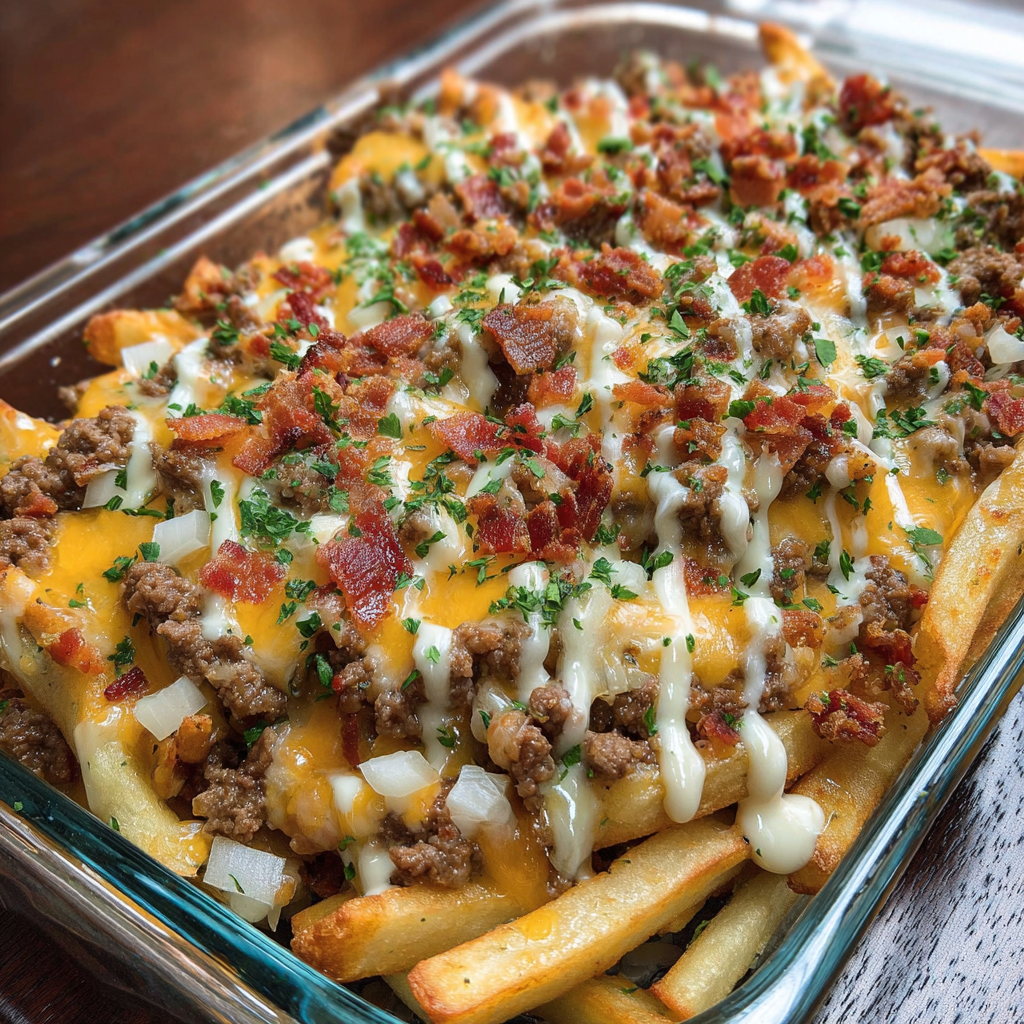
Cheeseburger French Fry Casserole is a delightful mash‑up of all your favorite comfort‑food elements—juicy ground beef, crispy shoestring fries, creamy soups, melty cheddar, and a tangy burger sauce—all baked together into one heavenly, skillet‑to‑table dish. Its appeal lies in how it transforms classic cheeseburger flavors into an ultra‑cozy, shareable meal, perfect for busy weeknights, potlucks, or anyone craving a nostalgic twist on fries and ground beef.
This casserole’s key ingredients—ground beef, French fries, creamy mushroom and cheddar soups, and a special burger sauce—work in harmony to create layers of texture and flavor. The fries bake into golden, crisp‑edged perfection while soaking up juices from the beef and creamy base. On top, a final sprinkle of cheddar melts into gooey bliss. And then there’s the burger sauce: a quick combo of mayo, ketchup, mustard, and pickle juice that drizzles flavor through every bite.
If you love the ease of one‑dish meals, you might enjoy a similarly styled Sloppy Joe Hotdish for its hearty, all‑in‑one comfort, or check out this Ingredient Guide to Casserole Basics for tips on layering flavors and textures in your baking dishes. For a cooking tip that elevates casseroles, see this Techniques for Perfect Baked Toppings to learn how to get that golden, crispy crust just right.
2. Basic Recipe: Ingredients and Instructions
Print
Cheeseburger French Fry Casserole | Comfort‑Food Twist in One Dish
Description
Cheeseburger French Fry Casserole blends fries, beef, soups, and burger sauce in one—easy, cheesy comfort. Cheeseburger French Fry Casserole.
Ingredients
Main Ingredients:
-
2 pounds ground beef
-
28‑ounce bag shoestring French fries
-
10.5‑ounce can cream of mushroom soup
-
10.5‑ounce can cheddar cheese soup
-
½ yellow onion, diced
-
1 tablespoon minced garlic
-
½ cup shredded cheddar cheese
-
1 teaspoon garlic powder
-
1 teaspoon onion powder
-
Salt, to taste
-
Black pepper, to taste
Burger Sauce Ingredients:
-
½ cup mayonnaise
-
¼ cup ketchup
-
1 tablespoon mustard
-
1 teaspoon pickle juice
-
½ teaspoon dehydrated onions
-
Black pepper, to taste
Instructions
-
Preheat and prep
Preheat your oven to 375 °F (190 °C). Lightly grease a 9×13‑inch (or similar) baking dish. -
Cook the beef and aromatics
In a large skillet over medium‑high heat, cook the ground beef with the diced yellow onion and minced garlic until the beef is browned and onions are softened, about 6–8 minutes. Drain any excess fat. -
Season and add soups
Stir in the cream of mushroom soup and cheddar cheese soup, along with garlic powder, onion powder, salt, and black pepper. Mix until well combined and slightly thickened, about 2–3 minutes. -
Layer fries and beef mixture
Spread half the bag of shoestring French fries evenly across the bottom of the greased baking dish. Spoon the beef‑soup mixture over the fries, spreading evenly. Sprinkle half of the shredded cheddar cheese on top. Layer the remaining fries, followed by the rest of the cheddar cheese. -
Bake
Bake uncovered in the preheated oven for 25–30 minutes, or until the fries are golden brown and edges are bubbly. -
Make the burger sauce
While the casserole bakes, whisk together the mayonnaise, ketchup, mustard, pickle juice, dehydrated onions, and black pepper in a small bowl until smooth and tangy. -
Finish and serve
Remove the casserole from the oven and let it rest for 5 minutes. Drizzle the burger sauce across the top—or serve it on the side for dipping. Slice into squares and serve warm.
Notes
For extra crispiness, you can broil for 1–2 minutes at the end, but watch carefully.
If using homemade fries, par‑bake them before layering to ensure crisp texture.
Letting it rest before cutting avoids sauce run‑off and helps slices hold shape.
3. Advanced Techniques
1. Enhancing Fry Texture with Par‑Baking
Par‑baking the fries before assembling ensures crispiness even after soaking in the beef‑soup mixture. Spread the shoestring fries on a baking sheet and bake at 425 °F (220 °C) for 6–8 minutes until lightly golden. Let them cool slightly before layering. This extra step gives you fries that stay crisp on top while still absorbing flavor beneath. The contrast between crunchy and tender is key to an elevated experience. Be careful not to over‑brown them—it’s just enough to get structure, not deep color.
2. Layering Flavors with Caramelized Onions
Instead of just diced raw onion, caramelize them for deeper, sweeter flavor. Cook sliced onions in butter or oil over low‑medium heat until soft and richly golden—about 20 minutes, stirring occasionally. Then mix them into your ground beef and soup base. Caramelized onions bring sweet, umami complexity that melds beautifully with creamy soups and cheese. Your casserole gains richer depth, balancing the saltiness and starch with savory sweetness—and it’s a subtle, sophisticated upgrade that makes all the difference.
3. Custom Cheddar Blend for Flavor Complexity
Use a blend of cheeses: sharp cheddar, mild cheddar, and even a sprinkle of gruyère or Jarlsberg. Roughly ½ cup total, this mix gives melty richness plus nutty undertones. Gruyère adds nuttiness and a luxurious melt, while sharp cheddar brings tang, and mild cheddar smooths things out. Layer half the blend mid‑casserole and the rest on top near the end of baking to get gooey pools below and a golden crust above. The result: mouthwatering hits of flavor and texture in every bite.
4. Boosting Umami with Worcestershire or Soy
For a savory punch, add 1 tablespoon Worcestershire sauce or low‑sodium soy sauce into your beef and soup mixture. This umami booster deepens flavor without making the dish taste overtly “Asian”—it just enriches the meaty base. Stir it into the hot mixture before layering. The explosion of savory nuance gives the casserole that irresistible “just‑made‑at‑diner” appeal. Just adjust salt and pepper after tasting, as the sauces carry sodium.
5. Crispy Topping: Panko and Herb Crunch
Before baking, mix ¼ cup panko breadcrumbs with a teaspoon each of dried parsley, garlic powder, and onion powder, plus a drizzle of melted butter (about 1 tablespoon). Sprinkle this crumb mixture on top of the cheese layer. The panko crisps up to create a buttery, herb‑flavored crust that contrasts the soft fries and creamy base. It adds visual appeal, texture, and an extra layer of flavor. If you like a crunch‑centered casserole, this is a must‑try technique.
See more advanced recipes at cookingwhite.com
4. Storage, Shelf Life, and Maintenance Tips
1. Storing in the Refrigerator
Transfer any cooled leftovers into an airtight container or cover the baking dish tightly with plastic wrap or foil. In the refrigerator, the casserole stays delicious for 3–4 days. When reheating, add a splash of milk or broth to help restore creaminess and prevent drying. Warm gently in the oven at 350 °F (175 °C) for about 15–20 minutes until heated through, or microwave individual portions for 2–3 minutes, stirring halfway. Always check that the center reaches a safe temperature of 165 °F (74 °C). Proper coverage keeps moisture in and flavors fresh.
2. Freezing for Longer Storage
To freeze, let the casserole cool completely. Portion into freezer‑safe containers or freezer bags, or wrap the entire dish tightly in plastic wrap and a layer of foil. It will keep well for 2–3 months. For best results, thaw overnight in the fridge before reheating. Reheat in a 350 °F oven for 25–30 minutes (longer if still partially frozen), covered to retain moisture—remove the cover near the end for crispiness. Proper thawing and reheating help retain texture and avoid a soggy outcome.
3. Room Temperature Holding (Short-Term)
If serving at a potluck or gathering, keep the casserole at room temperature for no more than 2 hours to stay food-safe. Place it on a warming tray or insulated serving dish if available. Refresh the top with a quick broil for 1–2 minutes to revive crispiness before serving. Once the time limit is reached, promptly refrigerate leftovers to avoid bacterial risk. This approach ensures everyone enjoys the casserole warm and crispy without compromising safety.
4. Refreshing Texture When Reheating
If your refrigerated or frozen casserole ends up a bit soggy, revive texture by reheating it uncovered in a 375 °F (190 °C) oven. Add a sprinkle of fresh shredded cheese and let it bake until cheese melts and fries regain crisp edges—usually about 10–12 minutes. This method revives the top while heating evenly, and the extra cheese adds freshness. Alternately, a brief 1–2‑minute broil works well—just keep watch to prevent burning. This trick brings back that “just‑fresh‑from‑the‑oven” magic.
5. Maintaining Sauce Freshness
The burger sauce is at its peak flavor for 2–3 days in the fridge. If storing leftover sauce, keep it in a small airtight jar. Before using again, give it a stir—they may naturally separate. Add a dash of pickle juice or a squeeze of fresh lemon to refresh tang. If stored longer, give a smell‑and‑taste check before serving. Keeping it chilled and properly sealed preserves its creamy, zesty magic to enhance reheated casserole or use as a dip for other leftovers.
5. Dietary Adaptations and Substitutions
1. Vegetarian Version
For a vegetarian twist, substitute the ground beef with plant‑based “beef” crumbles or cooked lentils seasoned with onion, garlic, garlic powder, and onion powder. Use mushroom and cheddar soups that are labeled vegetarian (without meat stock). The combination keeps the hearty texture and creamy base. You can even boost protein with crumbled extra‑firm tofu or cooked beans. Ensure the burger sauce avoids animal‑derived mayo or choose a vegan mayo. The result: a satisfying, savory casserole that maintains cheeseburger flavor without any meat.
2. Gluten‑Free Modification
To make the casserole gluten‑free, select a gluten‑free bag of shoestring fries (many are naturally gluten‑free, but check labeling). Use gluten‑free versions of cream of mushroom and cheddar soups—or make homemade cream sauces thickened with cornstarch instead of flour. For the burger sauce, verify mayonnaise and ketchup are gluten‑free (most are). This adaptation keeps the dish safety-minded and accessible while preserving its cheesy, crunchy character. Labeling awareness ensures it’s safe for anyone with celiac disease or gluten sensitivity.
3. Lower‑Sodium Option
To reduce salt, use low‑sodium or unsalted soups and skip added salt in the beef mixture—rely instead on garlic and onion powders. Choose no‑salt‑added fries or make your own from russet potatoes, thinly sliced and baked. For flavor, add herbs like fresh parsley, thyme, or rosemary and a splash of low‑sodium Worcestershire or tamari. Use plain Greek yogurt instead of mayonnaise in the burger sauce and reduce ketchup. The dish remains flavorful and creamy, but without excess sodium—great for heart‑healthy adaptations.
4. Dairy‑Free or Vegan Swap
To make the casserole dairy‑free or vegan, use plant‑based cheddar soup (or create a cashew‑based “cheese” sauce) and a dairy‑free mushroom soup (made with nondairy milk and umami‑rich broth). Replace shredded cheddar with vegan cheese shreds that melt well. For the burger sauce, use vegan mayo and ensure ketchup is vegan. The fries are usually already dairy‑free. Season the beef alternative (see vegetarian option) or omit entirely and bulk up with roasted veggies. This approach gives everyone a creamy, indulgent casserole sans dairy.
5. Lower‑Carb or Keto Approach
To adapt for low‑carb or keto, swap the fries for thinly sliced parsnips or turnips, or substitute with riced cauliflower spread in a thin layer. Use full‑fat soups without added starch or make a homemade roux with heavy cream and cheese. The ground beef adds protein and fat to keep you in ketosis. For the burger sauce, use sugar‑free ketchup or omit, and use full‑fat mayo with a dash of apple cider vinegar and spices. The result approximates the flavors with minimal carbs, perfect for keto or low‑carb lifestyles.
6. FAQs About the Recipe
1. Can I use frozen fries instead of bagged ones?
Yes, you can use frozen fries—in fact, you can par‑bake them first to boost crispiness. Spread on a baking sheet, bake at 425 °F (220 °C) for 5–8 minutes until lightly golden, then layer as directed. Frozen fries may release more moisture than fresh shoestrings, so consider draining excess liquid from your beef mixture before layering. Keep an eye on bake time—it may require an extra 5 minutes due to the extra moisture. They work fine, but watch texture and crisp to get that ideal edge.
2. My casserole is watery—how do I fix that?
If the casserole seems watery, it may be from excess moisture in the soups or fries. To fix: let it bake longer to allow liquid to absorb or evaporate; you can also thicken the mixture with a tablespoon of cornstarch mixed into a bit of cold water and stirred into the beef‑soup base before baking. Alternatively, remove excess liquid with a spoon just before adding the top layer. Lastly, allow the casserole to rest after baking—it thickens as it cools, reducing watery texture.
3. Can I assemble ahead and bake later?
Absolutely—this casserole is great as a make‑ahead meal. Assemble it in the baking dish, cover tightly, and refrigerate for up to 24 hours before baking. When ready, bake straight from fridge, adding 5–10 minutes to the cooking time if chilled. Let it sit for 5 minutes post‑bake to settle. Avoid freezing in assembled form if you haven’t cooled it fully—otherwise condensation can make fries soggy. This planning option makes dinner prep especially smooth.
4. How do I adjust cooking time if doubling the recipe?
Doubling the casserole in a larger or two baking dishes is doable. Keep the oven at 375 °F (190 °C), but expect the bake time to increase—plan for 35–40 minutes instead of 25–30. Start checking at 30 minutes to monitor browning. Make sure the center is hot and bubbly (165 °F internal temperature if possible). You may also place one dish on a lower rack and one higher, rotating midway to ensure even baking and crispy tops.
5. Can I omit the soups and use homemade sauce?
Yes, for a lighter or less processed version, make a homemade cream sauce by melting 2 tablespoons butter in a saucepan, whisking in 2 tablespoons flour to form a roux, then slowly whisking in 1 cup milk (or half and half) until thickened. Stir in ½ cup shredded cheddar until melted, and season with garlic and onion powder. Use this in place of both cans of soup. It adds fresh flavor, and you can control salt and dairy content—but may be thinner, so consider adding a spoonful of cornstarch slurry if needed.
7. Conclusion & Final Thoughts
Wrapping up: the Cheeseburger French Fry Casserole is a uniquely fun, comfort‑food mashup that hits all the high points—crispy fries, hearty beef, creamy soups, melty cheddar, and a tangy burger sauce—all layered into one irresistibly cozy dish. Whether you’re feeding a family on a busy weeknight, entertaining friends in a low‑effort yet crowd‑pleasing way, or simply craving a nostalgic blend of cheeseburger and fries, this casserole delivers in every sense.
What makes it special is how easily it comes together with accessible ingredients—ground beef, canned soups, fries—and transforms into something more elevated through simple layering and baking. And those extra elements—like the burger sauce, cheese blend, or par‑baked fries—add dimension that keeps each bite fresh and surprising. The versatility in dietary adaptations, make‑ahead potential, and storage options make it a practical favorite, and the advanced techniques let home cooks elevate it to gourmet‑feeling territory without complication.
This dish shines for potlucks, family meals, casual dinner parties, or just when you want cozy, satisfying comfort with minimal fuss. The rich textures, savory‑creamy flavor profile, and the fun mashup of two beloved fast‑food classics make it memorable. Next time you want to impress without stress, turn to this casserole—it’s a proven crowd‑pleaser that feels both indulgent and homey.