Introduction to the Recipe
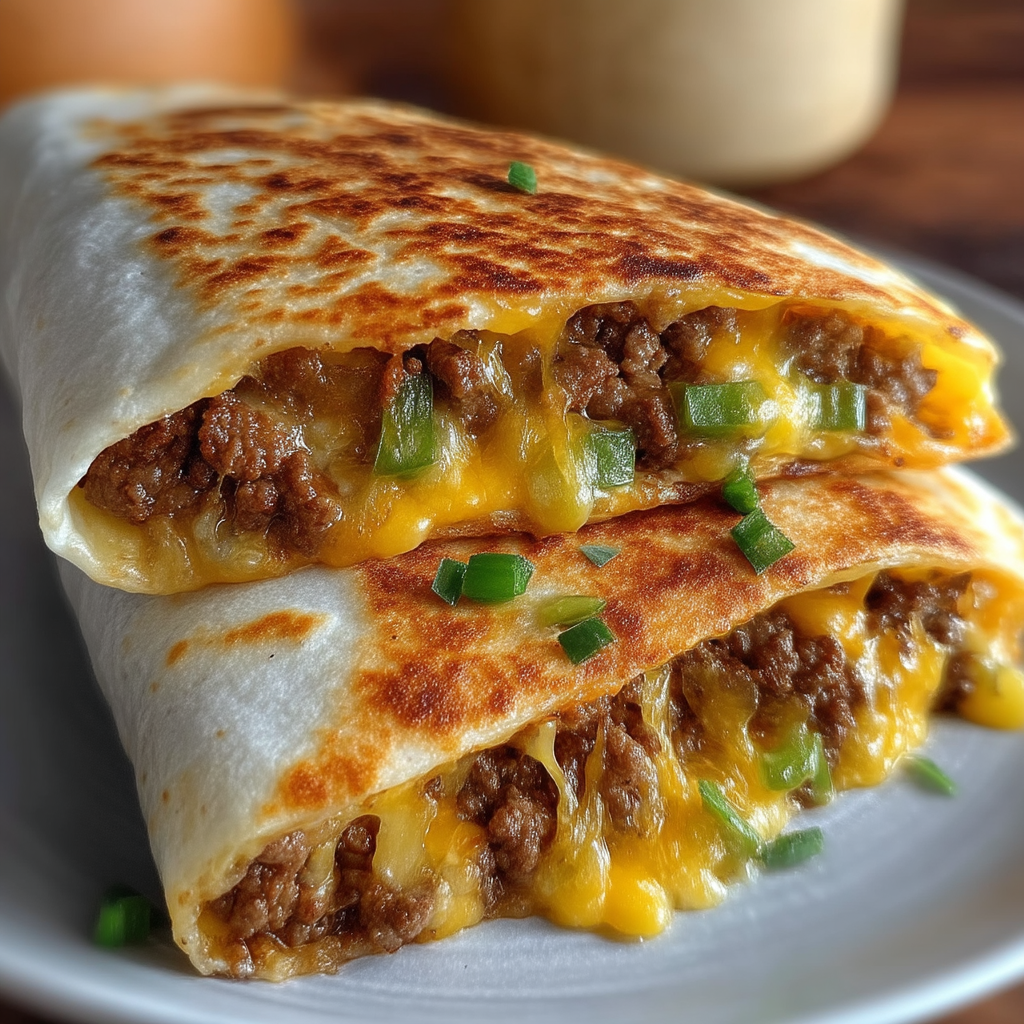
When you’re craving a juicy cheeseburger but want something faster, lighter, or easier to eat on the go, the cheeseburger wrap is your new best friend. It delivers all the classic flavors of a burger—savory beef, melted cheese, fresh veggies, and your favorite condiments—rolled up in a soft tortilla for a no-fuss meal.
What makes this wrap truly irresistible is its combination of seasoned ground beef, gooey American cheese, and crisp romaine lettuce with ripe tomato slices, all encased in a warm tortilla. The addition of ketchup, Worcestershire sauce, parmesan, and spices gives the beef a rich umami flavor, while optional toppings like diced onions, mustard, or relish let everyone customize it just the way they like.
Perfect for busy weeknights, school lunches, or casual dinners, this wrap is a lifesaver when time is short but taste still matters. It’s also a kid-approved hit and a great way to get everyone around the table without firing up the grill.
Need help picking the right wrap for your meal? This tortilla buying guide breaks down the best store-bought options. Or, if you’re interested in learning how to cook ground beef for the best texture and flavor, this ground beef cooking tutorial will give you all the tips you need.
From meal prep to lunchboxes, the cheeseburger wrap is as practical as it is satisfying—bringing you that all-American burger experience in a convenient, handheld format.
Basic Recipe: Ingredients and Instructions
Print
Quick and Easy Cheeseburger Wrap
Description
This cheeseburger wrap is a quick, flavorful twist on a classic cheeseburger—perfect for busy weeknights or casual meals.
Ingredients
- 1 pound lean ground beef
- 1 tablespoon Worcestershire sauce
- 1 tablespoon ketchup
- 1 tablespoon grated parmesan
- 1 teaspoon onion powder
- 1 teaspoon garlic powder
- 1/8 teaspoon salt
- 1/8 teaspoon pepper
- 5 medium tortilla wraps
- 5 slices American cheese
- 2 Roma tomatoes, sliced
- 1 cup romaine lettuce, chopped
- Diced onions (optional)
- Condiments (ketchup, mustard, mayonnaise, relish – optional)
Instructions
- In a skillet over medium-high heat, cook the ground beef until browned and fully cooked (about 6–8 minutes). Drain excess grease if needed.
- Reduce heat to low and stir in Worcestershire sauce, ketchup, parmesan, onion powder, garlic powder, salt, and pepper. Mix well and cook for another 2–3 minutes until heated through and well combined.
- Warm the tortilla wraps slightly in a pan or microwave to make them pliable.
- Place one slice of American cheese on each wrap. Spoon about 1/5 of the beef mixture over the cheese.
- Top each wrap with tomato slices, romaine lettuce, and diced onions if using. Add your favorite condiments like ketchup, mustard, or mayonnaise.
- Fold the bottom of the tortilla up over the filling, then fold in the sides and roll tightly into a wrap.
- Optional: Lightly toast the wrapped burrito in a dry skillet for 1–2 minutes per side to melt the cheese further and give a crisp finish.
- Serve warm with chips, fries, or a side salad.
Notes
For best results, use a nonstick skillet or one with minimal oil.
Swap American cheese for cheddar, pepper jack, or Swiss if desired.
Use flour tortillas that are at least 8 inches in diameter for easy wrapping.
Add pickles or sautéed mushrooms for extra burger flavor.
Make it ahead and wrap in foil for easy reheating on busy days.
Advanced Techniques
Perfectly Seasoning Ground Beef for Depth of Flavor
The secret to getting burger flavor in a skillet is using a combination of condiments and spices that mimic that grilled taste. Worcestershire sauce, ketchup, garlic, and onion powders add depth, while a touch of parmesan enhances the savory profile. Letting the beef simmer in its seasoning for a few minutes ensures every bite is rich and flavorful. You can even add a dash of mustard or paprika to bring it closer to that classic grilled taste.
How to Wrap Like a Pro
A tight wrap ensures everything stays inside when you bite. First, slightly warm your tortillas so they bend easily without tearing. Lay ingredients in a horizontal strip near the center, fold the bottom up over the filling, then fold in both sides, and roll firmly. Wrapping in parchment or foil also helps hold the shape and makes serving cleaner. For presentation, slice the wrap diagonally before serving.
Using a Griddle or Press for a Crispy Finish
Pan-searing or pressing the wraps after assembling adds texture and melts the cheese more thoroughly. Use a sandwich press, griddle, or nonstick skillet over medium heat. Press each wrap gently with a spatula and cook 1–2 minutes per side. This adds a light crust that mimics the seared edges of a real cheeseburger bun.
Customizing for Bold Flavors
Take your cheeseburger wrap up a notch with bold flavor additions: think chipotle mayo, jalapeños, bacon bits, or even a fried egg. Add sautéed mushrooms or caramelized onions for a gourmet feel. Want heat? Add hot sauce to the beef mixture or swap American cheese for pepper jack.
Meal Prep and Freezer-Friendly Tips
These wraps can be made in advance and stored for busy days. After assembly, wrap each tightly in foil or parchment and refrigerate for up to 3 days. To freeze, let the wraps cool completely, wrap tightly, and store in freezer bags. Reheat in a microwave or skillet for a grab-and-go meal anytime.
See more advanced recipes at cookingwhite.com
Storage, Shelf Life, and Maintenance Tips
Refrigerating for Short-Term Storage
Assembled wraps can be stored in the refrigerator for up to 3 days. Wrap them tightly in foil or plastic wrap to prevent drying out. Reheat in the microwave or on a skillet before serving for best results.
Freezing for Future Meals
To freeze, let the cooked beef cool before assembling. Wrap each cheeseburger wrap tightly in foil, then place in a freezer-safe bag. Store for up to 2 months. To reheat, microwave for 2–3 minutes or bake at 350°F for 15 minutes wrapped in foil.
Storing Individual Components
If you want to keep wraps fresh longer, store the components separately. Keep cooked beef in a sealed container in the fridge for up to 4 days. Store veggies separately and assemble just before eating to prevent soggy tortillas.
Packing for Lunch or Travel
Let the wrap cool completely before packing to prevent moisture buildup. Wrap in foil or parchment and store in an insulated container or lunch bag with an ice pack. Include dipping sauces or condiments in small containers on the side to avoid sogginess.
Keeping Tortillas from Getting Soggy
To prevent soggy wraps, allow the beef to cool slightly before assembling, and avoid overloading with sauces. Toasting the tortillas helps create a barrier and gives added structure to hold in moisture.
Dietary Adaptations and Substitutions
Low-Carb/Keto Cheeseburger Wrap
Swap flour tortillas for low-carb versions or use large lettuce leaves for a bunless, keto-friendly option. Stick to sugar-free ketchup and ditch the tomatoes if you’re watching carbs. Use full-fat cheese and mayo for extra richness without the carbs.
Gluten-Free Adaptation
Choose certified gluten-free tortillas and ensure all condiments (especially Worcestershire sauce) are gluten-free. Many brands now offer gluten-free wraps made from rice, cassava, or almond flour that hold up well in this recipe.
Dairy-Free Version
Replace American cheese with a dairy-free cheese slice, and omit parmesan from the beef mix. Ensure condiments are also dairy-free. Some plant-based cheese melts well and adds flavor without sacrificing texture.
Vegetarian Cheeseburger Wrap
Use a plant-based ground beef alternative or a seasoned lentil/walnut mix. Keep the seasonings the same, and use vegetarian Worcestershire sauce. Add grilled mushrooms or veggie bacon for extra umami.
Healthier/Light Option
Use whole wheat tortillas, lean ground turkey, and low-fat cheese. Increase the amount of fresh vegetables and skip the extra condiments to cut down on added fats and sugars. This lighter version still satisfies without weighing you down.
FAQs About the Recipe
Can I make these wraps ahead of time?
Yes! You can assemble and refrigerate them for up to 3 days. For best results, reheat in a skillet or wrap in foil and warm in the oven. Avoid adding too many wet toppings beforehand to keep the wrap from getting soggy.
What type of tortilla works best?
Flour tortillas, about 8–10 inches in diameter, are ideal for cheeseburger wraps. They’re soft, flexible, and easy to roll. If you’re aiming for a lower-carb option, you can use low-carb or whole wheat tortillas. Avoid corn tortillas for this recipe—they tend to be too small and prone to cracking when folded.
Can I use different types of cheese?
Absolutely! While American cheese gives that classic burger flavor and melt, feel free to use cheddar, Swiss, provolone, pepper jack, or any other meltable cheese. You can even mix cheeses if you want to layer in different flavors.
How do I keep the wrap from falling apart?
Don’t overfill the tortilla, and make sure to wrap it tightly. Warming the tortilla beforehand makes it more pliable and less likely to tear. Wrapping the finished product in foil or parchment also helps it hold together, especially if you’re taking it to go.
Can I serve it cold?
You can, but cheeseburger wraps are best enjoyed warm when the cheese is melted and the flavors are more pronounced. If you do serve them cold (like in a lunchbox), leave out high-moisture ingredients like tomatoes until serving to avoid sogginess.
What sides go well with cheeseburger wraps?
Classic sides like fries, chips, coleslaw, or a simple salad pair perfectly. For a healthier twist, serve with roasted sweet potato wedges or sliced veggies with ranch dip. These wraps are also great as part of a lunch platter with pickles and fruit.
Conclusion & Final Thoughts
The cheeseburger wrap is everything you love about a classic burger—wrapped up in a convenient, handheld form. Whether you’re meal prepping for the week, feeding hungry kids, or just looking for a fun alternative to a traditional burger, this recipe checks all the boxes. It’s fast, flavorful, and endlessly customizable.
You’ll love how simple the ingredients are—many of them pantry staples—and how quickly the wraps come together. Plus, the ability to adjust fillings, cheeses, and sauces means you can keep it fresh and exciting each time you make it.
For busy nights, family meals, or even party snacks, these wraps bring serious burger flavor with half the effort. No grill required, no buns needed—just bold, satisfying taste wrapped in a tortilla. It’s comfort food with a twist, and once you make them, they’ll become a go-to favorite in your recipe rotation.