Introduction
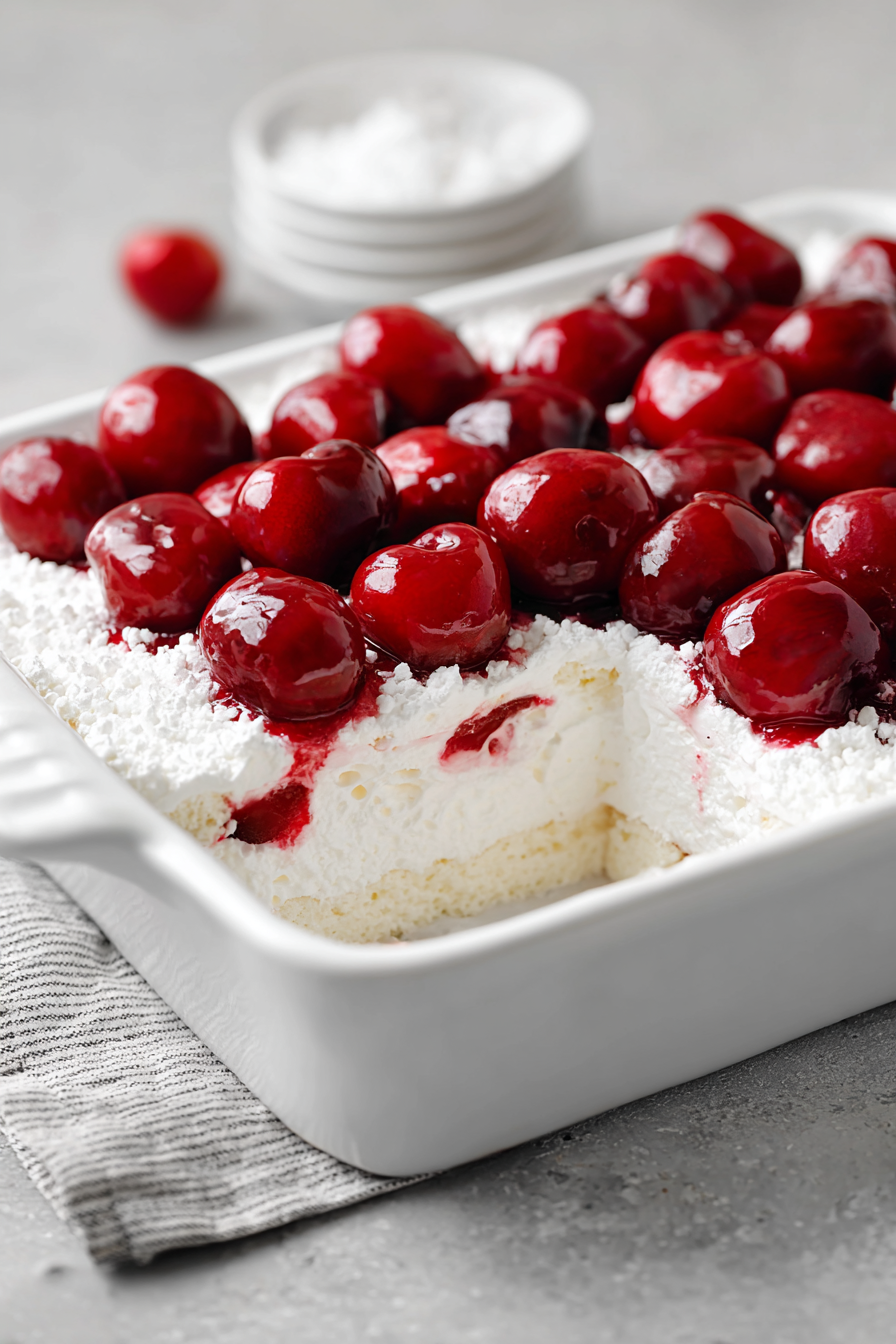
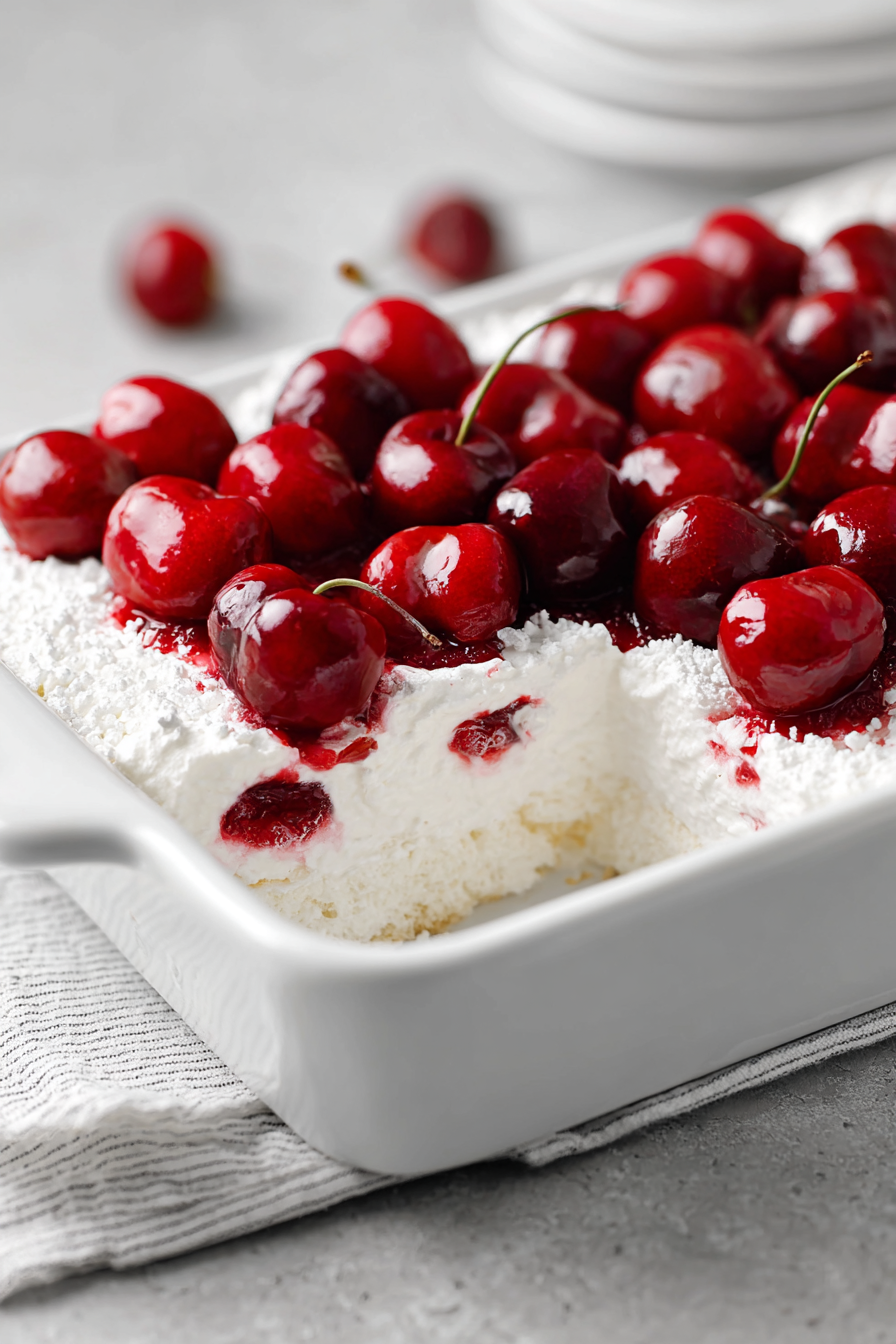
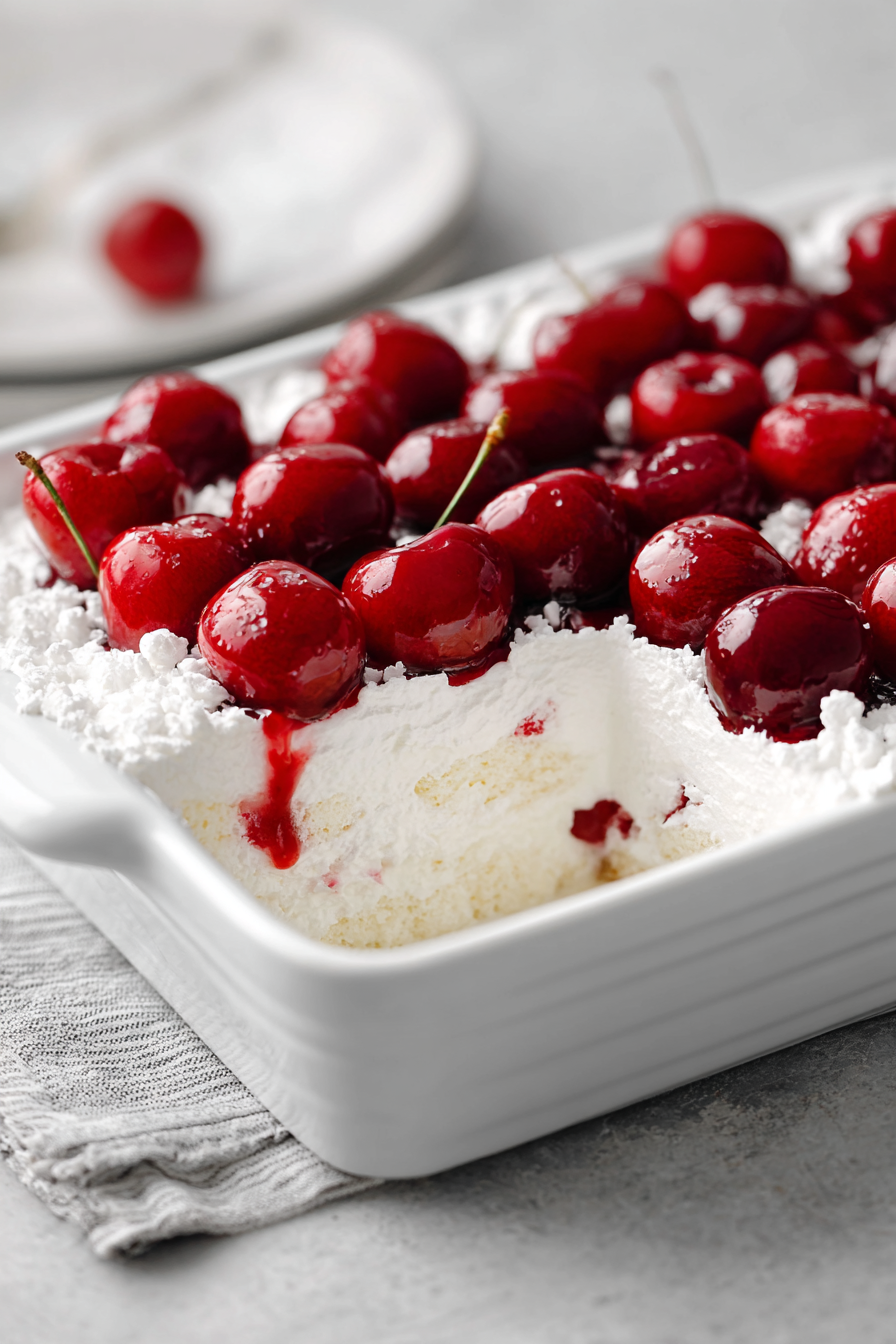
If you’re looking for a dessert that is creamy, sweet, refreshing, and irresistibly nostalgic, Cherries in the Snow is exactly what you need. This timeless recipe combines velvety cream cheese filling with fluffy layers and a bright cherry topping, creating a dish that looks as stunning as it tastes. Perfect for potlucks, family gatherings, or holiday tables, this dessert strikes the perfect balance between rich indulgence and fruity freshness. With its snowy-white filling and ruby-red cherries, it’s also a beautiful dessert to serve when you want to impress with minimal effort.
My recipe story
Cherries in the Snow has always held a special place in my heart because it was one of the first desserts I learned to make with my grandmother. She loved how the cream cheese mixture balanced the sweetness of the cherries, and she often prepared it during the holidays when family filled the house. It was her signature “easy yet elegant” dish that everyone requested year after year. Over time, I made small tweaks to simplify the process and make it even creamier, but the spirit of her recipe remains unchanged. This dessert carries with it not only the flavors of the past but also the warm memories of family traditions, laughter, and holiday cheer.
💡 Why You’ll Love This Recipe
- It’s no-bake, making it perfect for busy days or hot weather when you don’t want to turn on the oven.
- The presentation is stunning, with bright red cherries against a creamy white base.
- Made with simple, affordable ingredients you probably already have in your kitchen.
- Light yet indulgent, making it a great end to heavy meals.
- Easy to customize with different toppings, from blueberries to strawberries.
Ingredient breakdown
What makes Cherries in the Snow so delightful is the simplicity of its ingredients. You only need a handful of staples, yet when combined, they create a dessert that feels sophisticated and comforting at the same time.
The star of the recipe is cream cheese, which provides the luscious, velvety base. Whipped together with powdered sugar, it becomes sweet, smooth, and slightly tangy—an ideal canvas for layering. Adding whole milk helps soften the texture, ensuring the filling is creamy rather than overly dense. A touch of vanilla extract rounds out the flavors, giving the dessert a warm, aromatic depth.
Of course, the crowning jewel is the cherry topping. Whether you use canned cherry pie filling or fresh cherries simmered into a sauce, their bright, fruity flavor complements the richness of the cream cheese beautifully. Finally, this dessert is often layered with angel food cake, sponge cake, or ladyfingers, which soak up the flavors while adding lightness and structure.
Equipment you’ll need
- Large mixing bowl
- Hand mixer or stand mixer
- Spatula
- Measuring cups and spoons
- 9×13-inch baking dish or trifle bowl
- Knife for slicing cake layers (if using sponge cake)
Step-by-step directions
- Prepare the cream cheese filling: In a large mixing bowl, beat the softened cream cheese with a hand mixer until smooth and creamy. Gradually add the powdered sugar, mixing until fully incorporated. Pour in the milk and vanilla extract, continuing to beat until the mixture is fluffy and lump-free. This forms the snowy base that gives the dessert its name.
- Layer the cake or base: Slice angel food cake or sponge cake into bite-sized cubes. Spread half of the cubes evenly across the bottom of your serving dish. This layer helps soak up the creamy filling while giving the dessert structure and texture.
- Add the cream cheese mixture: Spoon half of the cream cheese mixture over the cake layer, spreading it gently with a spatula to cover the surface evenly. Make sure it seeps into the crevices of the cake for that melt-in-your-mouth consistency.
- Add cherries: Spread half of the cherry topping over the cream layer. The vibrant red cherries provide a burst of flavor and visual appeal, contrasting beautifully against the white filling.
- Repeat layers: Add the remaining cake cubes, followed by the rest of the cream cheese mixture, and top with the remaining cherries. Smooth the surface to create a polished, layered effect that looks gorgeous when served.
- Chill and serve: Cover the dish with plastic wrap and refrigerate for at least 4 hours, or overnight if possible. This allows the layers to set and flavors to meld together. Serve chilled in squares or scooped into bowls for a deliciously refreshing treat.
Variations & substitutions
One of the joys of Cherries in the Snow is how customizable it is. Don’t have cherries on hand? Substitute with blueberries, strawberries, or even peaches for a different twist. If you prefer a richer dessert, swap the angel food cake with pound cake for extra indulgence. For a lighter version, you can use low-fat cream cheese and skim milk without compromising too much on flavor. You can also add crushed pineapple between layers for a tropical flair or sprinkle toasted coconut on top for added texture. Each variation brings something new while keeping the heart of the recipe intact.
💡 Expert Tips & Troubleshooting
- Make sure the cream cheese is fully softened before mixing to avoid lumps in the filling.
- If your mixture feels too thick, add a splash more milk until it reaches the desired consistency.
- For extra flavor, fold in a tablespoon of almond extract or a splash of cherry liqueur.
- Chill for at least 4 hours—rushing this step can result in a messy presentation.
- For clean slices, use a sharp knife dipped in hot water before cutting.
Storage, freezing & make-ahead
Cherries in the Snow is best enjoyed fresh, but it can be made ahead for convenience. Store leftovers tightly covered in the refrigerator for up to 3 days. The cake may soften slightly as it absorbs the cream mixture, but that only enhances its texture. Freezing is possible, though the cream cheese mixture may lose some of its smoothness after thawing. If freezing, wrap tightly in plastic wrap and aluminum foil, and consume within one month. For make-ahead preparation, assemble the layers the night before serving and refrigerate until ready to wow your guests.
Serving ideas & pairings
Cherries in the Snow shines on its own, but pairing it with complementary flavors takes it to another level. Serve with a hot cup of coffee or a cappuccino for a satisfying contrast. For a lighter pairing, enjoy it alongside a glass of sparkling water with a slice of lemon. It also makes a fantastic finale to savory meals like roast chicken, beef tenderloin, or a hearty pasta dinner. During the holidays, pair it with mulled wine or hot chocolate for a cozy and festive touch.
FAQ
Can I use canned cherry pie filling?
Yes! Canned cherry pie filling works beautifully and saves time. It also ensures consistency in flavor and texture.
Can I make this dessert sugar-free?
You can substitute powdered sugar with a sugar-free alternative and use sugar-free cherry topping for a lighter version.
Do I need to use cake layers?
While traditional recipes include cake, you can skip it and layer the cream cheese mixture directly with the cherries for a simpler version.
Can I prepare this in individual cups?
Absolutely! Assemble the dessert in small glasses or mason jars for a fun and portable option at parties.
How far in advance can I make this?
Ideally, prepare it the night before serving. It holds well in the fridge for up to 24 hours before serving, allowing flavors to meld perfectly.
Final thoughts
Cherries in the Snow is one of those timeless recipes that never goes out of style. Its striking appearance, deliciously creamy texture, and burst of fruity flavor make it a dessert that appeals to all ages. Whether you’re continuing a family tradition or discovering it for the first time, this recipe is sure to earn a permanent spot in your dessert rotation. Simple yet stunning, it’s the kind of dish that brings people together and sparks joy at every gathering.
Print
CHERRIES IN THE SNOW
- Total Time: 20 minutes plus chilling
- Yield: 12 servings 1x
- Diet: Vegetarian
Description
A creamy, dreamy no-bake dessert with layers of sweetened cream cheese, fluffy cake cubes, and a luscious cherry topping. Perfect for gatherings and holidays.
Ingredients
- 12 oz cream cheese, softened
- ¾ cup powdered sugar
- ⅓ cup whole milk
- ½ tsp vanilla extract
- 1 prepared angel food cake or sponge cake, cut into cubes
- 1 can cherry pie filling (21 oz)
Instructions
- In a large bowl, beat the cream cheese until smooth and creamy.
- Add powdered sugar gradually, mixing until well blended.
- Stir in the milk and vanilla extract until light and fluffy.
- Layer half of the cake cubes in the bottom of a 9×13-inch dish.
- Spread half of the cream cheese mixture over the cake.
- Top with half of the cherry pie filling.
- Repeat layers with remaining cake, cream mixture, and cherries.
- Cover and refrigerate for at least 4 hours before serving.
Notes
For a lighter version, use low-fat cream cheese and skim milk. Try substituting blueberries, strawberries, or peaches for the cherry topping. Store covered in the fridge for up to 3 days.
- Prep Time: 20 minutes
- Cook Time: 0 minutes
- Category: Dessert
- Method: No-Bake
- Cuisine: American