Introduction
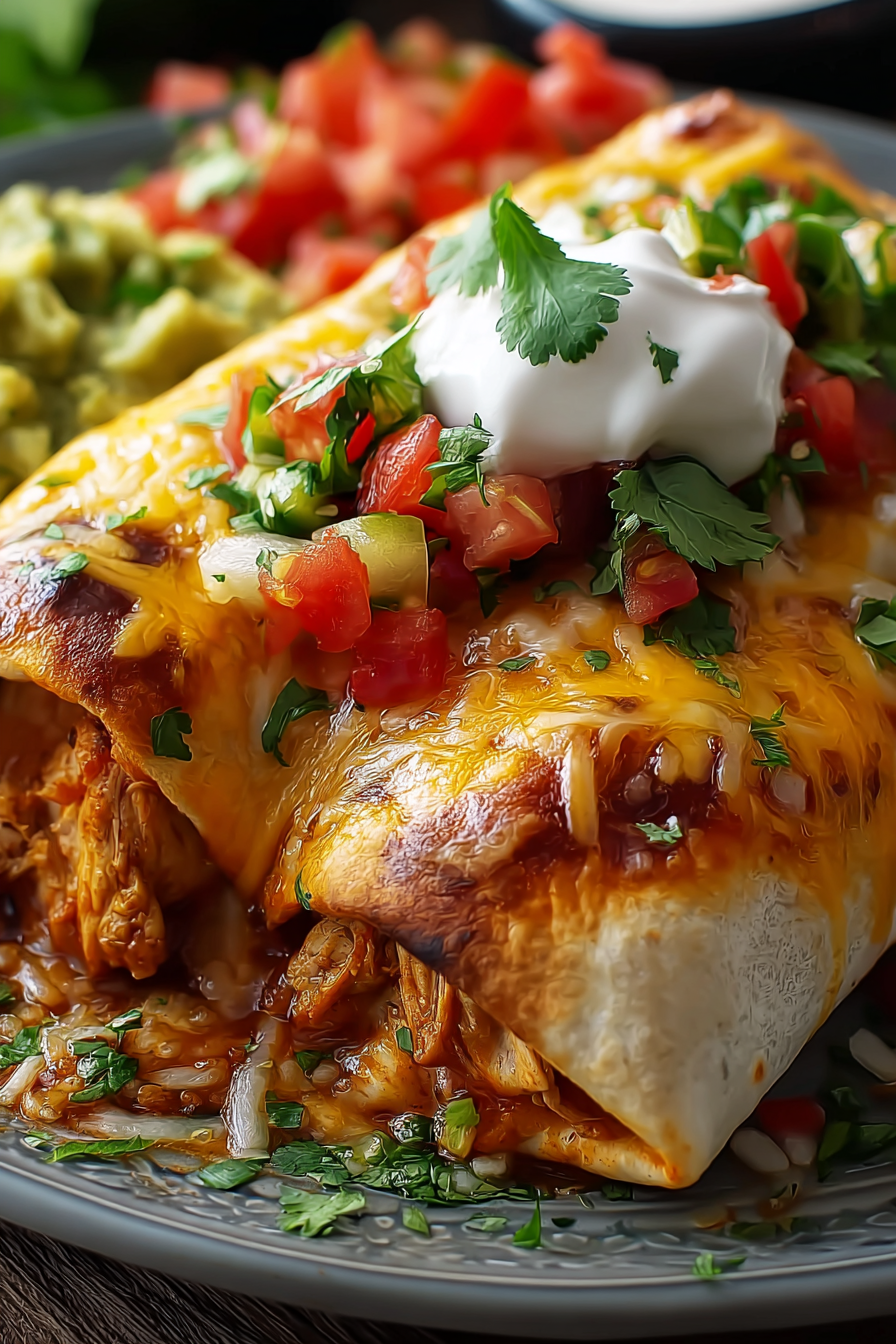
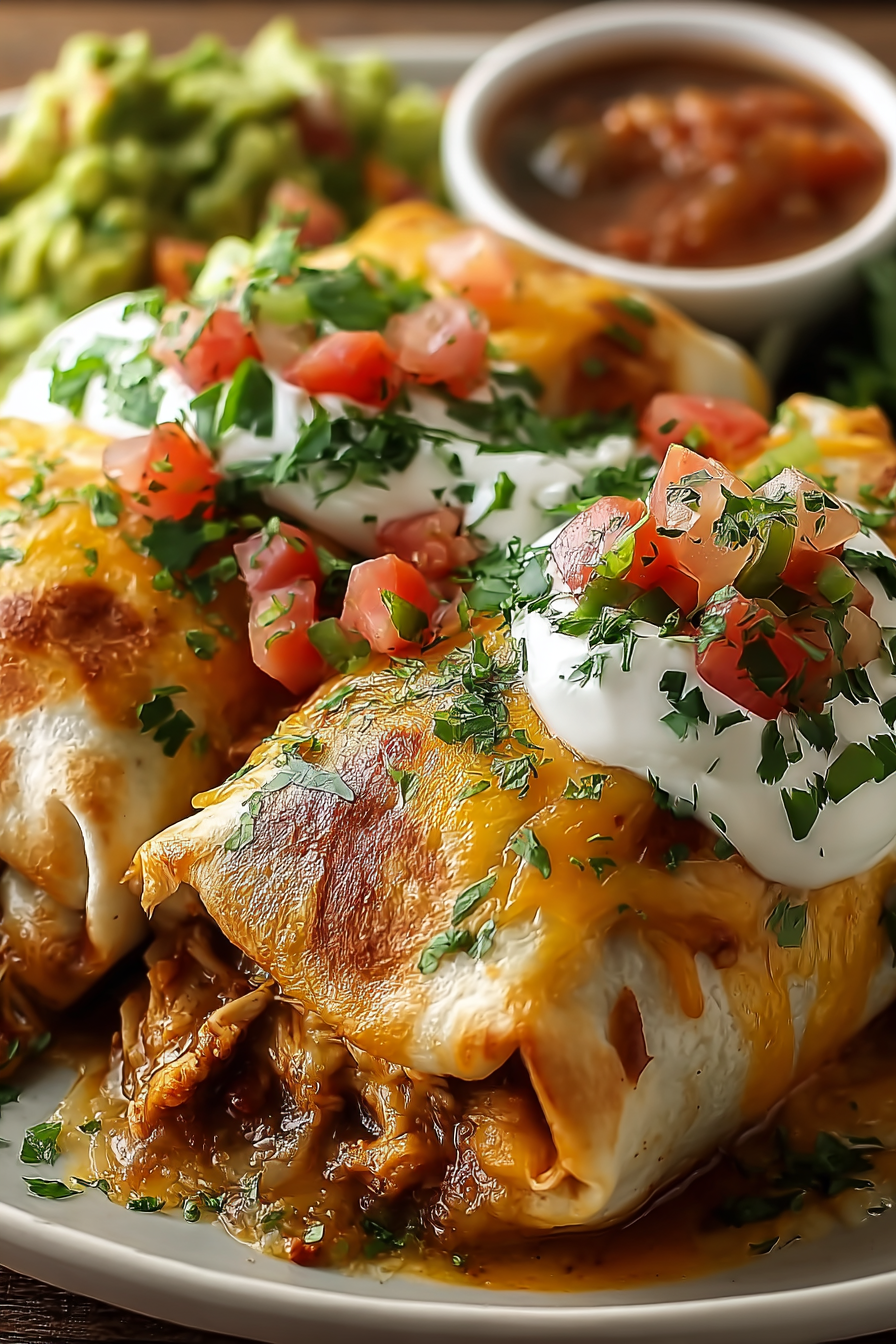
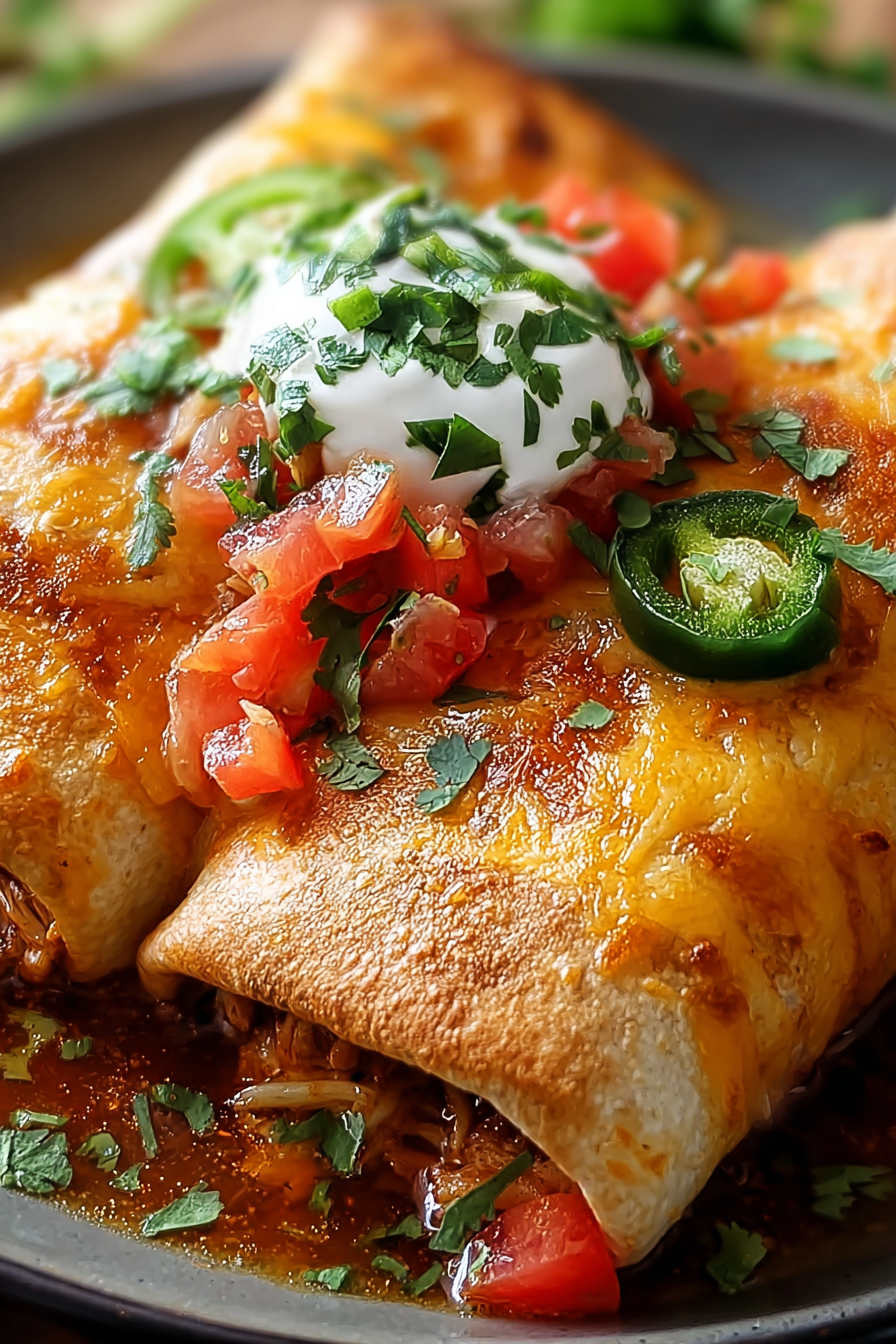
If you’re craving a flavorful, Tex-Mex-inspired dinner that’s both comforting and lighter than the traditional deep-fried version, these Chi-Chi’s Baked Chicken Chimichangas are a must-try. They’re packed with seasoned shredded chicken, gooey melted cheese, and salsa, then wrapped in a tortilla and baked until golden brown. The result is a dish that delivers all the crispy satisfaction of restaurant-style chimichangas—without the extra oil. This recipe is perfect for busy weeknights, family gatherings, or when you just want to bring a little fiesta to your dinner table.
My recipe story
Chimichangas hold a special place in my heart because they remind me of family dinners at Chi-Chi’s, a beloved Mexican restaurant chain that was especially popular in the ‘80s and ‘90s. My family often ordered their chimichangas, crispy on the outside and filled with savory chicken and cheese. When the restaurant closed in many areas, I knew I had to recreate that same flavor at home. Instead of frying, I decided to bake them to make the dish a little lighter and more approachable for everyday cooking. Over the years, this recipe has become one of my most-requested dinners. It’s fun, satisfying, and always brings back a sense of nostalgia with every bite.
💡 Why You’ll Love This Recipe
- Baked instead of fried, making it healthier without sacrificing flavor.
- Easy to customize with different fillings, cheeses, or sauces.
- Perfect for meal prep and freezer-friendly for busy weeks.
- Crispy tortilla shell gives the same crunch as restaurant-style chimichangas.
- Family-friendly meal that kids and adults both enjoy.
Ingredient breakdown
The beauty of this recipe lies in its simplicity. You don’t need a long list of ingredients to create a flavorful and satisfying chimichanga. The star of the show is cooked shredded chicken, which can be from a rotisserie chicken, leftover roasted chicken, or even poached chicken breast. It’s a fantastic way to repurpose leftovers into a completely new meal.
Cheese is another key player here. A mix of Monterey Jack and cheddar cheese creates the ultimate gooey filling. Monterey Jack melts beautifully with a mild creaminess, while cheddar adds a sharper, tangier note. Combined with salsa, which brings freshness and a little zing, the filling becomes rich, flavorful, and slightly saucy. Wrapped in flour tortillas and baked until golden, you get the perfect balance of melty filling and crisp exterior. You can also brush the tortillas lightly with oil or melted butter before baking to ensure maximum crispiness.
What’s great about this recipe is how versatile it is. You can swap in different salsas for varying heat levels or even add beans, corn, or sautéed peppers to stretch the filling. It’s a recipe that encourages creativity while still being easy to follow.
Equipment you’ll need
- Baking sheet
- Parchment paper or nonstick spray
- Mixing bowls
- Measuring cups and spoons
- Basting brush (optional, for oil or butter)
- Sharp knife and cutting board
Step-by-step directions
- Prepare the filling: In a large mixing bowl, combine the shredded chicken, Monterey Jack cheese, cheddar cheese, and salsa. Stir until everything is well incorporated. The salsa not only adds flavor but also helps bind the mixture together, ensuring each bite is juicy and cheesy.
- Preheat your oven: Set your oven to 400°F (200°C) and line a baking sheet with parchment paper or lightly grease it. Preheating ensures the tortillas crisp up beautifully without becoming soggy.
- Assemble the chimichangas: Lay a tortilla flat on a clean surface. Spoon about 1/2 cup of the chicken mixture into the center. Fold in the sides, then roll tightly from the bottom up to create a burrito-style wrap. Place seam-side down on the prepared baking sheet. Repeat with the remaining tortillas and filling.
- Add finishing touches: For extra crispiness, brush each chimichanga lightly with melted butter or oil. This step mimics the golden-brown finish of frying but keeps it light and oven-friendly.
- Bake to perfection: Place the baking sheet in the oven and bake for 20–25 minutes, flipping halfway through. The chimichangas are ready when the tortillas are golden, crispy, and slightly puffed.
- Serve and enjoy: Remove from the oven and let cool slightly before serving. Pair with sour cream, guacamole, or extra salsa for dipping. Garnish with chopped cilantro, green onions, or a sprinkle of extra cheese if desired.
Variations & substitutions
One of the best parts about chimichangas is how adaptable they are. Instead of chicken, you can use ground beef, shredded pork, or even sautéed vegetables for a vegetarian option. Swap Monterey Jack for pepper jack if you like an extra kick of spice, or use mozzarella for a milder taste. If you’re avoiding gluten, simply use gluten-free tortillas. You can also experiment with different sauces—try enchilada sauce, queso, or a drizzle of chipotle crema for a bold twist.
Adding extras like black beans, corn, or rice can make the filling heartier and more budget-friendly. Don’t be afraid to play with flavors and make this recipe your own.
💡 Expert Tips & Troubleshooting
- Brush tortillas with butter or oil to achieve that golden, crispy texture.
- Don’t overfill the tortillas—too much filling can cause them to burst open while baking.
- If the tortillas aren’t pliable, warm them briefly in the microwave to prevent tearing.
- Use parchment paper to avoid sticking and ensure even browning.
- For an extra-crunchy finish, broil the chimichangas for the last 1–2 minutes of baking.
Storage, freezing & make-ahead
These baked chimichangas store beautifully, making them perfect for meal prep. Leftovers can be kept in an airtight container in the refrigerator for up to 4 days. Reheat them in the oven or air fryer to bring back the crispy texture.
If you’d like to freeze them, assemble the chimichangas but don’t bake them. Place them on a baking sheet to freeze individually, then transfer to a freezer bag once solid. They’ll keep for up to 3 months. To serve, bake directly from frozen at 375°F (190°C) for 30–35 minutes, or until heated through and crispy. This makes them an excellent option for busy weeknights or packed lunches.
Serving ideas & pairings
Baked chicken chimichangas are versatile enough to be served with a variety of sides. Pair them with Mexican rice, refried beans, or a simple green salad for a balanced meal. Guacamole, pico de gallo, or a side of queso dip make excellent accompaniments as well. For a festive dinner, serve them with margaritas, horchata, or even a refreshing agua fresca. They’re also perfect for game-day spreads or casual get-togethers with friends.
FAQ
Can I use corn tortillas instead of flour tortillas?
Corn tortillas are less flexible and more prone to cracking, so flour tortillas are highly recommended. If you prefer corn, warm them first and use smaller amounts of filling.
How do I make the chimichangas spicier?
Add diced jalapeños, chipotle peppers, or use a spicy salsa to give the filling an extra kick.
Can I air fry these chimichangas?
Yes! Place them in a preheated air fryer at 375°F (190°C) for about 12–15 minutes, flipping halfway for even crispiness.
What cheese works best for this recipe?
Monterey Jack and cheddar are a perfect combo, but you can also use pepper jack, mozzarella, or a Mexican cheese blend.
How can I prevent my chimichangas from opening while baking?
Be sure to tuck the sides tightly and place the chimichangas seam-side down on the baking sheet. Using a toothpick to secure the fold can also help.
Final thoughts
These Chi-Chi’s Baked Chicken Chimichangas are proof that you don’t need a deep fryer to enjoy a crispy, flavor-packed Tex-Mex classic at home. They’re versatile, easy to make, and perfect for sharing with family and friends. Whether you’re cooking for a weeknight dinner or planning a casual fiesta, this recipe will quickly become a household favorite. With endless variations, freezer-friendly prep, and a healthier baked finish, it’s the kind of dish you’ll turn to again and again.
Print
Chi-Chi’s Baked Chicken Chimichangas
- Total Time: 40 minutes
- Yield: 6 servings
- Diet: Gluten Free
Description
Crispy, cheesy, and packed with flavor, these baked chicken chimichangas are a lighter take on a Tex-Mex favorite the whole family will love.
Ingredients
• 2 cups cooked shredded chicken
• 1 cup shredded Monterey Jack cheese
• 1 cup shredded cheddar cheese
• 1/2 cup salsa
• 6 large flour tortillas
• 2 tbsp melted butter or olive oil (for brushing)
• Optional toppings: sour cream, guacamole, chopped cilantro, extra salsa
Instructions
-
Preheat oven to 400°F (200°C) and line a baking sheet with parchment paper or lightly grease it.
-
In a mixing bowl, combine shredded chicken, Monterey Jack cheese, cheddar cheese, and salsa until evenly mixed.
-
Place a tortilla on a clean surface and spoon about 1/2 cup of the filling into the center. Fold in the sides, then roll tightly to seal.
-
Arrange chimichangas seam-side down on the baking sheet. Brush each one lightly with melted butter or oil for crispiness.
-
Bake for 20–25 minutes, flipping halfway through, until golden brown and crispy.
-
Remove from oven and let cool for a few minutes. Serve warm with your favorite toppings.
Notes
Warm tortillas before filling to prevent cracking. Store leftovers in the refrigerator for up to 4 days and reheat in the oven or air fryer. Freeze unbaked chimichangas for up to 3 months and bake directly from frozen.
- Prep Time: 15 minutes
- Cook Time: 25 minutes
- Category: Main Course
- Method: Baking
- Cuisine: Tex-Mex