Introduction to the Recipe
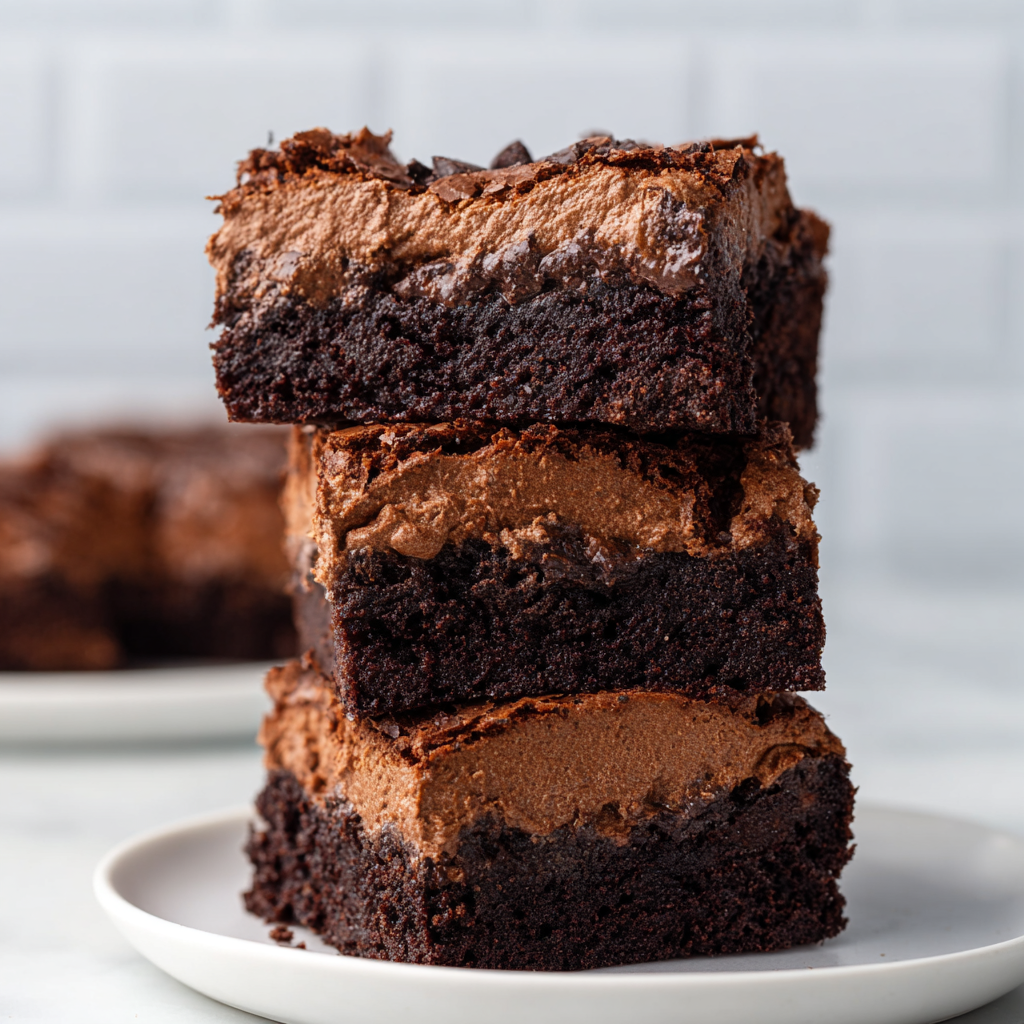
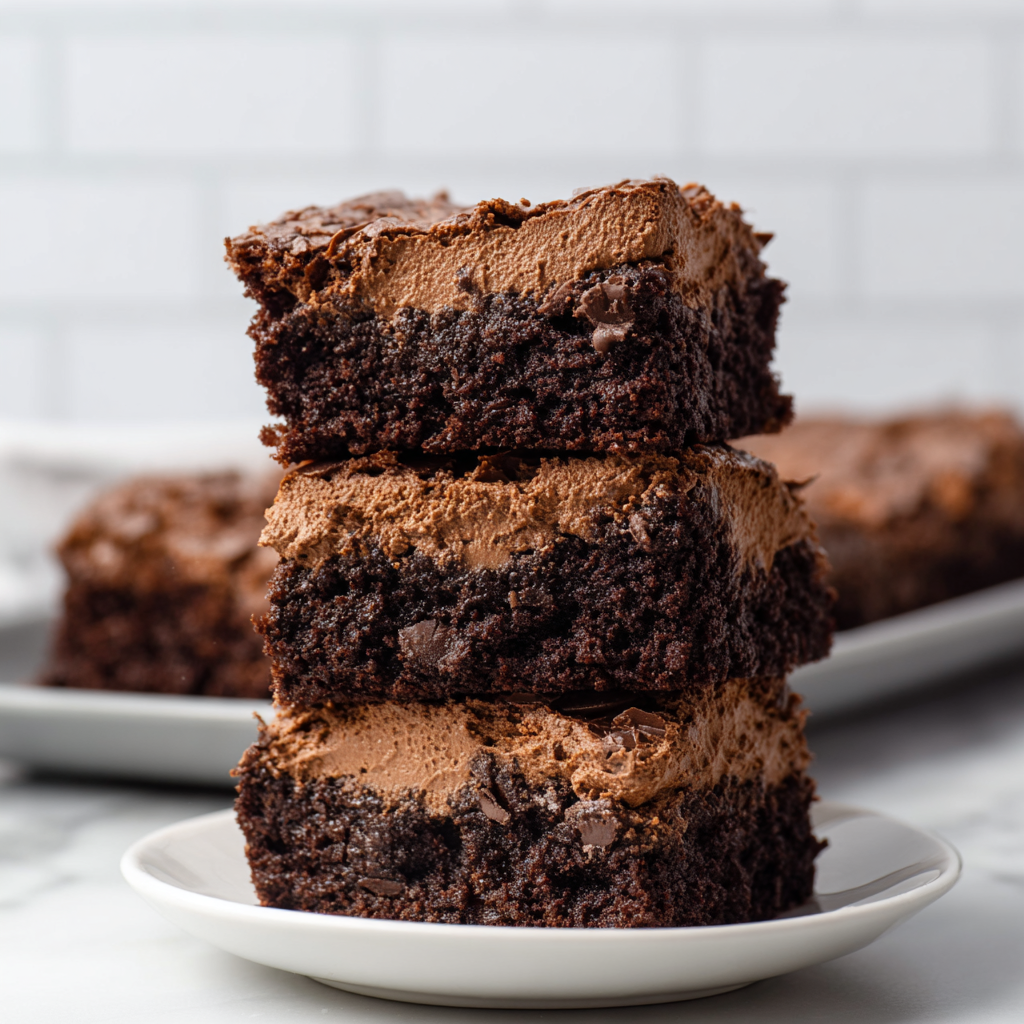
When you need a dessert that screams indulgence, Chocolate Mousse Brownies deliver the ultimate triple hit. This recipe layers a fudgy brownie base, a thick cloud of semisweet chocolate mousse, and a glossy ganache topping for a luxurious bite every time. Whether you’re hosting a dinner party or treating yourself on a weeknight, these brownies are a showstopper.
Each layer adds depth and texture. The brownie is rich, chewy, and perfectly dense. The mousse brings lightness, contrast, and creaminess. And the ganache? It seals the deal with its smooth, shiny finish and melt-in-your-mouth texture. The whole thing tastes like a high-end patisserie creation, but it’s made with simple, real ingredients.
Not sure how to perfect your brownie texture? This guide on fudgy vs cakey brownies breaks it down. Curious about whipping cream into soft peaks? Check out these pro tips from King Arthur Baking to avoid over- or under-whipping.
If you want your dessert to impress without needing a pastry degree, these Chocolate Mousse Brownies are for you. Decadent, balanced, and surprisingly straightforward, they’re bound to become a favorite in your dessert rotation.
Basic Recipe: Ingredients and Instructions
Print
Chocolate Mousse Brownies That Are Pure Decadence
Description
These Chocolate Mousse Brownies feature a rich brownie base, fluffy mousse layer, and silky ganache topping.
Ingredients
For the Brownie Base:
- 1/2 cup (115g) unsalted butter, melted
- 1 cup (200g) granulated sugar
- 2 large eggs
- 1 tsp vanilla extract
- 1/3 cup (40g) unsweetened cocoa powder
- 1/2 cup (65g) all-purpose flour
- 1/4 tsp salt
- 1/4 tsp baking powder
For the Chocolate Mousse:
- 1 1/2 cups (350ml) heavy whipping cream, chilled
- 8 oz (225g) semisweet chocolate, finely chopped
- 3 tbsp (45ml) milk
- 2 tbsp (25g) powdered sugar
For the Ganache Topping:
- 4 oz (115g) semisweet chocolate, finely chopped
- 1/2 cup (120ml) heavy cream
Instructions
Make the Brownie Base:
- Preheat oven to 350°F (175°C). Grease and line an 8×8-inch baking pan with parchment paper.
- In a large bowl, mix melted butter and sugar until combined.
- Beat in eggs and vanilla until smooth.
- Sift in cocoa powder, flour, salt, and baking powder. Stir until just combined.
- Spread batter evenly into the prepared pan.
- Bake for 20–25 minutes or until a toothpick comes out with moist crumbs. Do not overbake.
- Cool completely in the pan before adding mousse.
Make the Chocolate Mousse:
- In a microwave-safe bowl, combine chopped chocolate and milk. Microwave in 20-second bursts, stirring each time, until smooth. Let cool to room temperature.
- In a separate bowl, whip the cold heavy cream and powdered sugar to soft peaks.
- Gently fold the cooled chocolate into the whipped cream until fully incorporated.
- Spread mousse over the cooled brownie layer. Chill in the fridge for 1 hour.
Make the Ganache Topping:
- Heat the heavy cream in a small saucepan until it just begins to simmer.
- Pour over the chopped chocolate. Let sit 2 minutes, then stir until smooth.
- Cool slightly, then pour over the chilled mousse layer.
- Refrigerate for another 1–2 hours until fully set.
To Serve:
- Lift brownies out of the pan using parchment.
- Slice with a sharp knife dipped in hot water for clean cuts.
Notes
Use high-quality chocolate for best flavor.
Let each layer cool/set fully before adding the next.
For easier slicing, chill brownies overnight.
Store covered in the fridge for up to 4 days.
Keywords: Chocolate Mousse Brownies
Advanced Techniques
1. Add Espresso Powder to Intensify Chocolate
A teaspoon of instant espresso powder in the brownie batter deepens the chocolate flavor without making the dessert taste like coffee. It’s a pastry chef’s secret for next-level richness.
2. Use a Water Bath to Even Out Ganache Texture
For ultra-smooth ganache, melt the chocolate and cream in a heatproof bowl over simmering water instead of using a microwave. This prevents scorching and gives you more control.
3. Stabilize the Mousse with Gelatin
For a firmer, more sliceable mousse layer, bloom 1 teaspoon of unflavored gelatin in the milk before heating with the chocolate. It helps the mousse hold its shape beautifully when cut.
4. Brown the Butter for a Nutty Twist
Use browned butter in the brownie base for a nutty, toffee-like undertone. Just melt and cook the butter until golden brown and fragrant before mixing with sugar.
5. Add Texture with a Nut Layer
Sprinkle chopped pecans or walnuts over the brownie layer before baking. They add a crunchy contrast to the soft mousse and ganache layers.

Storage, Shelf Life, and Maintenance Tips
1. Refrigerate in a Covered Container
These brownies should be stored in the refrigerator in an airtight container to keep the mousse and ganache fresh. They’ll stay good for up to 4 days.
2. Freeze Individual Slices
Wrap individual brownie squares tightly in plastic wrap and foil. Freeze for up to 2 months. Thaw in the fridge overnight for best texture.
3. Avoid Stacking Layers
Do not stack brownies on top of each other unless you separate them with parchment or wax paper. The mousse and ganache layers are delicate and can smudge.
4. Serve Slightly Chilled
These brownies taste best when served slightly chilled. Let them sit at room temp for about 10 minutes before serving for the perfect creamy texture.
5. Don’t Freeze Before Fully Set
Make sure all layers are fully set before freezing to preserve their integrity. Premature freezing can cause textural separation.
Dietary Adaptations and Substitutions
1. Make It Gluten-Free
Use a 1:1 gluten-free flour blend in place of all-purpose flour. Ensure your baking powder is certified gluten-free as well.
2. Dairy-Free Version
Use plant-based butter and coconut cream (for mousse and ganache) and choose dairy-free chocolate. The texture will be slightly different but still rich and satisfying.
3. Refined Sugar-Free Adaptation
Swap granulated sugar for coconut sugar in the brownie base and use maple syrup or powdered erythritol in the mousse. Choose sugar-free chocolate options.
4. Nut-Free Option
This recipe is naturally nut-free. Just ensure that your chocolate is produced in a nut-free facility if you’re baking for someone with allergies.
5. Egg-Free Brownies
Replace each egg with a flax egg (1 tbsp ground flaxseed + 2.5 tbsp water). Let it sit 5 minutes before mixing into the batter.
FAQs About the Recipe
1. Why is my ganache separating or oily?
Overheating cream or using very hot cream on cold chocolate can cause the fat to separate. Use gently warmed cream and let it sit before stirring.
2. Can I use milk chocolate instead of semisweet?
You can, but the dessert will be sweeter and slightly softer. Adjust powdered sugar in the mousse if using milk chocolate.
3. My mousse didn’t set—what happened?
The chocolate might have been too warm when folded into the cream, causing it to deflate. Always let the chocolate cool to room temp first.
4. How do I get clean slices?
Use a hot, sharp knife and wipe it clean between cuts. Chilling the brownies overnight also makes slicing easier.
5. Can I double this recipe?
Yes! Double the recipe and bake in a 9×13-inch pan. Add a few extra minutes to the brownie bake time and be sure each layer sets properly before adding the next.
Conclusion & Final Thoughts
Chocolate Mousse Brownies are what dessert dreams are made of. Each bite delivers a balance of textures—dense brownie, airy mousse, and silky ganache—that feel luxurious and perfectly indulgent. Whether you’re making them for a holiday dessert table, a birthday, or a Friday night in, they deliver wow-factor without requiring pastry school credentials.
The beauty of this recipe lies in how easily it can be customized. You can tweak the chocolate intensity, add nuts, go gluten-free, or lighten things up depending on who you’re baking for. And because each component can be made ahead and stored, this dessert is surprisingly make-ahead friendly.
No shortcuts, no fillers—just real chocolate, real cream, and serious satisfaction. If you’ve been looking for a dessert that bridges comfort and elegance, these Chocolate Mousse Brownies check every box. Make them once, and they’ll become your go-to for when only the best will do.