1. Introduction to the Recipe
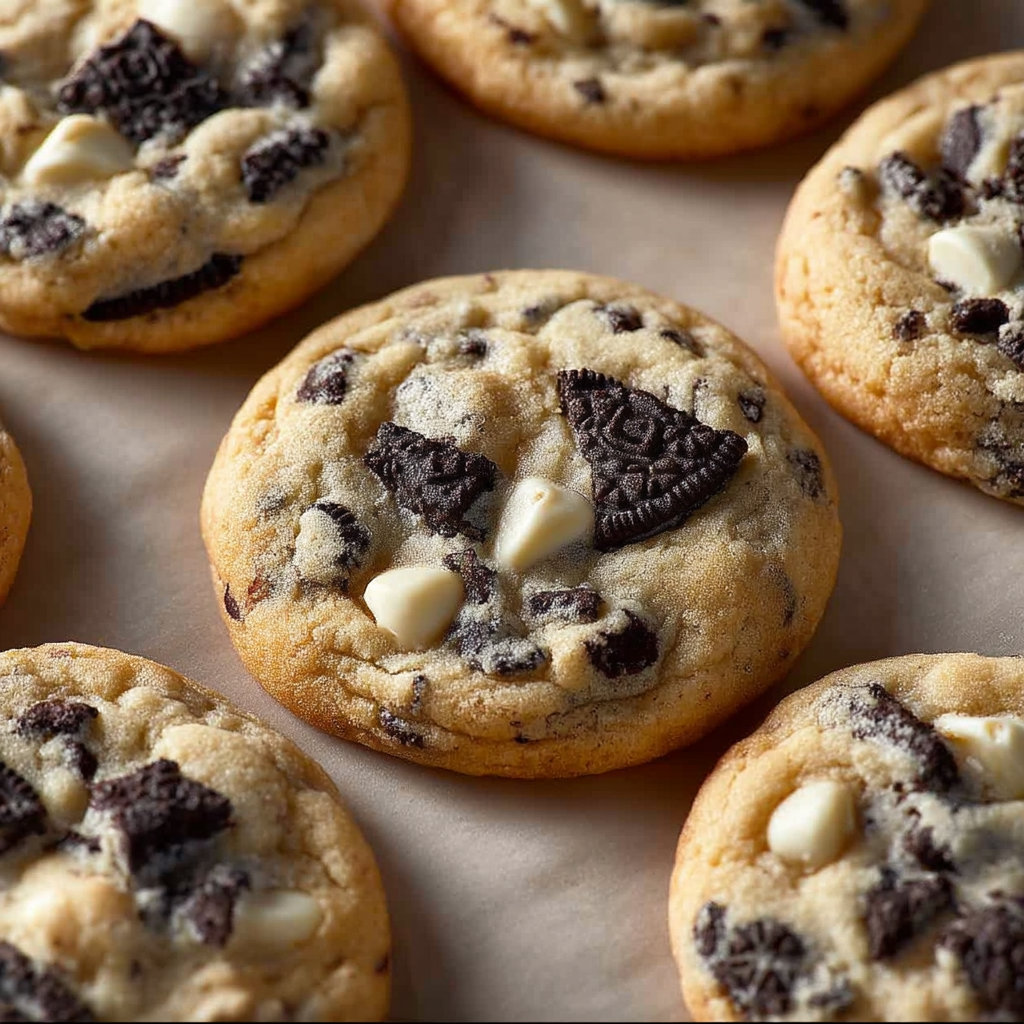
If you have a sweet tooth and a love for classic cookie‑sandwich flavors, Cookies and Cream Cookies will be your new favorite indulgence. These cookies combine the creamy richness of white chocolate with the nostalgic crunch of chopped Oreos, creating a perfect blend of smooth and crispy textures. Whether you’re baking for a party, craving something special with your afternoon tea, or simply want a comforting treat, these cookies deliver big time. The recipe uses simple pantry staples—flour, sugar, butter—enhanced with cornstarch for softness and vanilla for warmth.
The appeal of Cookies and Cream Cookies lies in contrasts: crunchy chocolate wafer bits against soft, buttery dough; sugar caramel notes from brown sugar alongside bright vanilla; and melty white chocolate that complements rather than overpowering. If you enjoy desserts like Oreo cheesecakes or white chocolate chip cookies, you’ll instantly recognize the charm here. These cookies are indulgent without being overly complicated—they strike a balance between decadence and familiarity.
In writing this recipe, the goal is to help you bake cookies with a tender interior, crisp edges, and visible cookie‑bits in every bite. Proper mixing, chilling, and baking are all essential to achieving that ideal texture. Softened butter, fresh brown sugar, vanilla extract—each plays a role in flavor layering. The Oreo chunks offer bursts of chocolate crunch. The white chocolate chips add creamy sweetness to cut through the cookie crunch. Altogether, Cookies and Cream Cookies are perfect for gifting, dunking in milk, or just sneaking an extra one when no‑one’s watching.
2. Basic Recipe: Ingredients and Instructions
Print
Cookies and Cream Cookies Recipe
Description
Soft, crunchy Cookies and Cream Cookies loaded with Oreo bits and white chocolate—indulgent and perfect for dessert lovers.
Ingredients
-
1 ⅔ cups all‑purpose flour, lightly spooned and leveled
-
½ teaspoon baking soda
-
½ teaspoon kosher salt
-
1 tablespoon cornstarch
-
½ cup unsalted butter, softened slightly but still cool
-
⅓ cup packed light brown sugar, fresh and soft
-
½ cup granulated sugar
-
1 large egg
-
1 teaspoon pure vanilla extract
-
½ cup white chocolate chips or chunks, plus extra for topping if desired
-
10 Oreos, chopped
Instructions
-
Preheat & prepare
Preheat your oven to 175 °C (350 °F). Line baking sheets with parchment paper or silicone baking mats. -
Combine dry ingredients
In a bowl, whisk together the flour, baking soda, kosher salt, and cornstarch. Set aside. -
Cream butter and sugars
In a mixing bowl, beat the softened (cool but pliable) unsalted butter with the light brown sugar and granulated sugar until light and fluffy. This takes about 2‑3 minutes on medium speed. -
Add egg and vanilla
Add the large egg and vanilla extract to the butter‑sugar mixture. Beat until fully incorporated, scraping down bowl sides as needed. -
Incorporate dry ingredients
Gradually add the dry flour mixture into the wet ingredients, mixing on low speed until just combined. Do not overmix, to avoid tough cookies. -
Fold in the mix‑ins
Gently fold in the chopped Oreos and white chocolate chips (or chunks). If you want extra chocolate on top, reserve a few chips or chunks to press into the tops just before baking. -
Portion the dough
Use a cookie scoop or spoon to form dough balls of about 1½ tablespoons per cookie. Place them on prepared baking sheets, leaving about 5 cm (2 in) between each to allow for spreading. -
Bake
Bake in the preheated oven for 10‑12 minutes, or until edges are lightly golden but centers still look soft. -
Cool
Let cookies cool on the baking sheet for 5 minutes, then transfer to wire racks to cool completely.
Notes
For best texture, make sure butter is softened but not melted—cool and soft gives structure.
Don’t overbake; pull when edges are set but centers just soft—they firm up while cooling.
Chopping Oreos not too fine preserves crunch; mixing too much or pressing down too much can make texture dense.
Using cornstarch gives tenderness in the crumb—don’t skip it.
If you like gooey white chocolate, press a few extra chips into dough tops just as they come out of oven.
Keywords: Cookies and Cream Cookies Recipe
3. Advanced Techniques
Technique 1: Chilling the Dough for Flavor and Texture
Chilling cookie dough before baking has many benefits: it lets the fats solidify, which helps control spread in the oven, resulting in thicker, chewier cookies. It also gives time for the flour to hydrate and for flavors—from vanilla, brown sugar, Oreo crumbs—to meld. For Cookies and Cream Cookies, scoop the dough into balls, cover with plastic wrap or place in an airtight container, and chill in the refrigerator for at least 1 hour, ideally 2‑4 hours; even overnight if convenient. When ready to bake, allow slightly chilled dough to rest a few minutes at room temperature so that bake times are predictable. The result: edges develop a nice golden brown, centers stay tender, and flavor is more rounded.
Technique 2: Balancing Soft Center vs. Crisp Edge
The holy grail in cookie baking is the contrast of textures: crisp edges, soft, perhaps slightly underdone center. To achieve this: bake at moderate temperature (175‑180 °C / 350‑360 °F) so the edges set first. Make sure oven is fully preheated. Use baking sheets that conduct heat evenly (lighter sheets tend to spread more; dark pans may brown edges too fast). Rotate pans halfway through baking for even browning. Pull cookies out when centers are soft even if they look slightly underbaked—they will continue to firm as they cool. Using melted white chocolate chunks close to the edge can help develop crisp edge zones.
Technique 3: Enhancing Oreo Distribution and Visual Appeal
To get Oreos spread out nicely and visibly (not all sunk or clumped), chop them into uneven pieces—some small crumbs, some chunkier bits. Fold gently so that large chunks don’t break completely, preserving texture. Also reserve a few chunks to press into the surface of each dough ball just before baking to showcase the cookies and cream look, making the top more attractive. For uniform distribution, you can also press each dough ball slightly into the reserved chopped Oreos on the baking sheet. This attention to presentation makes the cookies more tempting visually and gives each bite Oreo‑rich.
Technique 4: Fine‑Tuning Sweetness and Flavor Layers
The recipe is rich and sweet, but you can adjust layers of sweetness without sacrificing balance. Use light brown sugar for its molasses notes; that adds depth. If you prefer less sweetness, reduce granulated sugar by say 10‑15% (but not too much or cookie texture changes). Use high‑quality vanilla extract (pure vanilla) for aroma. White chocolate chips: choose ones that are creamy but not overly sugary; sometimes larger chunks add creamy pockets rather than uniform sweetness. Also consider sprinkling a tiny pinch of sea salt on top just at removal—salt contrast lifts sweetness.
Technique 5: Alternate Baking Methods for Different Results
Beyond standard sheet‑pan baking, try these variations:
- Convection oven: if your oven has convection, reduce temperature by about 10‑15 °C and keep an eye on browning to avoid overcooking edges.
- Skillet or pan bake: press ball of dough into cast iron skillet for a large “cookie cake” version; bake until golden, then slice.
- Drop vs. rolled cookies: this recipe is drop style, but you could roll in sugar or press with a pattern for decorative effect.
- Broil finish: for top browning (especially on white chocolate chips), after baking time ends, switch to broil for 1 minute, watching closely to avoid burning.
See more advanced recipes at cookingwhite.com
4. Storage, Shelf Life, and Maintenance Tips
Tip: Refrigerate Baked Cookies for Short‑Term Freshness
Once cookies are completely cool, place them in an airtight container. Use parchment or wax paper between layers so they don’t stick. Stored at room temperature (in a cool, dry place) in a sealed container, Cookies and Cream Cookies last about 4‑5 days maintaining good texture—edges stay crisp, centers soft. If your kitchen is warm or humid, storing them in the refrigerator will help preserve crispness, though cold can reduce chewiness; you can warm slightly before serving.
Tip: Freeze Dough or Baked Cookies for Longer Storage
You can freeze either the dough or the baked cookies. For dough: portion into dough balls, freeze on a baking sheet until firm, then transfer to freezer‑safe bags; bake from frozen, adding 1‑2 additional minutes. For baked cookies: layer with parchment between, place in airtight containers or freezer bags, freeze up to 3 months. When ready, thaw at room temperature; you may warm for a few seconds in microwave or oven to restore softness or crisp edges.
Tip: Preventing Moisture and Maintaining Texture
Cookies stored improperly can go soggy or lose crisp edges. To avoid this: ensure they are fully cool before sealing. Use airtight containers. Keep a paper towel inside to absorb excess moisture if humidity is high. Avoid stacking too many layers without spacers like parchment paper. If cookies soften, re‑crisp the edges in a warm oven (about 160‑165 °C / 325 °F) for 3–5 minutes.
Tip: Refreshing and Serving After Storage
If your Cookies and Cream Cookies have been stored and seem stale or dry, you can refresh them: warm briefly in oven (as above), or place a tiny piece of bread or a damp (not wet) paper towel in an airtight container with the cookies for a couple hours to reintroduce moisture. For centers that feel hard, microwave for about 10 seconds or reheat in low oven. The white chocolate chunks will soften and bring back creamy pockets.
Tip: Flavor Maintenance Over Time
Flavors like vanilla, Oreo, and white chocolate can dull slightly over storage. To keep flavor vibrant, consider pressing fresh white chocolate chips into the top of cookies just before serving, or sprinkle a very light dusting of vanilla sugar. Also, avoid exposure to light and air—opaque containers are preferable. If possible, serve within first 2‑3 days for best flavor; after that, freshness declines but texture can be revived as above.
5. Dietary Adaptations and Substitutions
Dairy‑Free / Vegan Adaptation
To make Cookies and Cream Cookies vegan or dairy‑free: replace butter with a plant‑based butter substitute or coconut oil (use firm coconut oil so dough holds shape). Substitute white chocolate chips with dairy‑free white chocolate or vegan white chips. Use a flax‑egg (1 Tbsp ground flax + 3 Tbsp water) in place of the large egg, letting it rest to thicken before mixing. Ensure Oreos or cookie‑sandwich pieces used are vegan (many are, but check labels). The texture will differ slightly—maybe less rich—but you can retain sweetness and crunch.
Gluten‑Free Version
To adapt for gluten‑free diets, use a 1‑for‑1 gluten‑free all‑purpose flour blend that includes xanthan gum or add a stabilizer. Also, use gluten‑free cookies in place of Oreos (or certified gluten‑free versions) and ensure the white chocolate chips do not contain gluten‑derived ingredients or cross‑contamination. The dough may be slightly more delicate, so chill well and handle gently.
Sugar‑Reduced / Lower Glycemic Version
For those wanting less sugar: reduce granulated sugar by about 25% and/or reduce white chocolate chips (they contain sugar). You can swap some or all granulated sugar for coconut sugar or a lower glycemic sugar substitute (such as monk fruit or erythritol blends designed for baking). Be cautious: changing sugars alters texture and browning (brown sugar contributes moisture). Using light brown sugar helps retain chewiness. Taste test is important.
Nut‑Free and Allergy‑Sensitive Substitutions
This recipe is inherently nut‑free unless you use white chocolate chips processed in nut facilities. For allergy safety, choose white chocolate chips labeled nut‑free, use allergy‑safe cookie pieces, and avoid cross‑contamination in utensils. You could substitute any mix‑ins (if adding extras) with seeds (pumpkin, sunflower) or allergy‑free candy.
Low‑Carb / Keto Adaptation
For a keto or low‑carb version, much of the challenge is the flour, sugar, and cookie parts (Oreos). Use almond flour or coconut flour blends, erythritol or monk fruit sweeteners, sugar‑free white chocolate, and keto‑friendly cookie bits. Keep in mind: texture will change—cookies will be denser, browning different. Bake shorter or lower temperature to prevent edges over‑crisping. Serve on low‑carb sides or alone.
6. FAQs About the Recipe
Why did my cookies spread too much?
Cookies may spread excessively if butter is too warm or nearly melted, the dough is too soft, the oven temperature is low, or dough hasn’t been chilled. To prevent: use just softened butter (cool to touch), chill the dough balls for at least 30 minutes; use a higher temperature (e.g., ensure oven reaches full 175–180 °C before baking); avoid using a baking sheet that retains too much heat (dark pans spread more). Also, ensure measurements are accurate—too much sugar or too little flour can cause thin dough.
Why are my cookie centers raw while edges are done?
This usually indicates that baking time or temperature wasn’t optimized. Edges set first because they are exposed to more heat; centers remain soft if dough is thick or oven temperature is high, causing outer edges to overcook before centers bake through. Fix this by slightly flattening dough balls, lowering baking temperature by 5‑10 °C, or increasing bake time by a minute or two. Also avoid overcrowding sheets, which can trap heat and delay center cooking.
Can I use dark chocolate or milk chocolate instead of white chocolate?
Absolutely—you can substitute white chocolate chips or chunks with milk chocolate, dark chocolate, or even semi‑sweet. The flavor profile will shift: dark chocolate introduces bitterness and contrast; milk chocolate adds creamy sweetness. Keep in mind that different chocolates have different sugar content and melting properties, so the texture and sweetness of finished cookies will vary. If using dark chocolate, perhaps adjust sweeteners slightly so cookies are well balanced.
How do I get the best Oreo crunch without sogginess?
To preserve Oreo crunch: chop Oreos into medium and small pieces, don’t overmix (which breaks bits too much). Make sure cookies bake fully at edges and cool properly. If dough is too moist (from butter being too soft or egg too large), Oreo crumbs may absorb moisture—chilling dough helps prevent that. Also pressing Oreo bits into top before baking helps them stay visible and crisp. Store baked cookies properly (airtight, dry) to retain crunch.
What’s the best way to store or reheat these cookies to preserve texture?
Store in an airtight container at room temperature for a few days. For longer storage, freeze baked cookies. When reheating, use a low oven (about 160–165 °C / 325 °F) for a few minutes to restore texture—this brings back crispness on edges without drying centers. If microwaving, use very short bursts just to warm; over‑microwaving makes cookies chewy or rubbery. For cookie dough frozen pre‑baking, bake from frozen adding a minute or so to bake time.
7. Conclusion & Final Thoughts
Cookies and Cream Cookies are more than just another sweet treat—they succeed because they capture contrast: creamy white chocolate, crunchy Oreos, tender dough, and just enough crisp on the outside. They satisfy multiple cravings in one bite. Whether for a bake sale, dessert plate, afternoon snack, or cookies‑for‑tea moment, these stand out.
The recipe shines because it uses simple, widely available ingredients, but with technique: the addition of cornstarch, the folding of mix‑ins, chilling or handling dough properly, and watching bake time. These small details elevate the final product. Plus, the visual appeal—bits of Oreo, glistening white chocolate chunks—makes them irresistible.
They are versatile too. You can modify for dietary needs, experiment with chocolate types, or tweak texture. And they store, freeze, and refresh well if you follow the tips. They feel indulgent but not fussy; special but accessible.
When you bake these, expect smiles, sweet crumbs, and maybe a bit of nostalgic joy. The marriage of cookies and cream in a cookie form is a fan favorite—a blend of textures and flavors that appeal broadly. If you want cookies that turn heads, pair well with milk or dessert coffee, and offer comfort in small bites, Cookies and Cream Cookies are the recipe to keep returning to.