Introduction
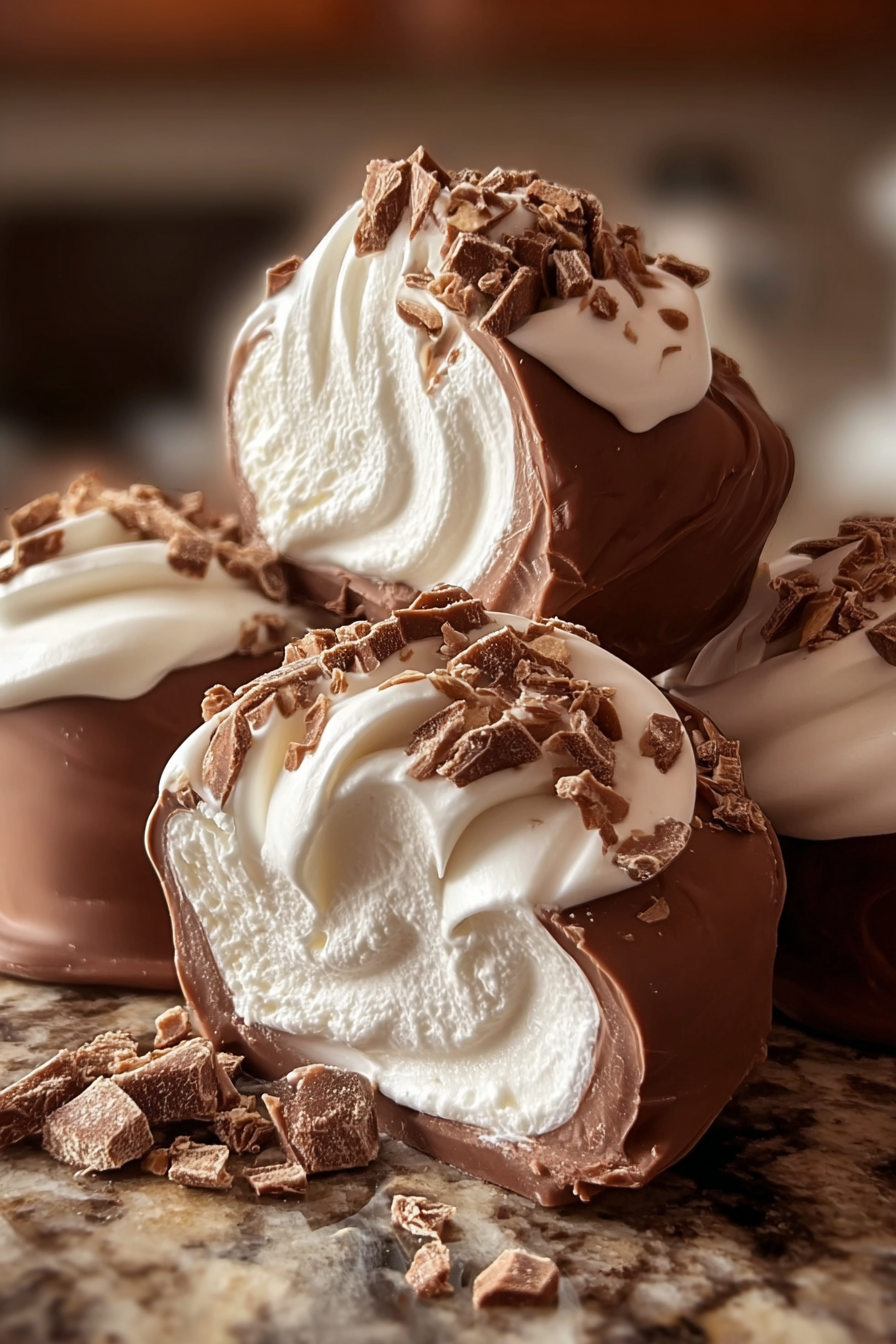
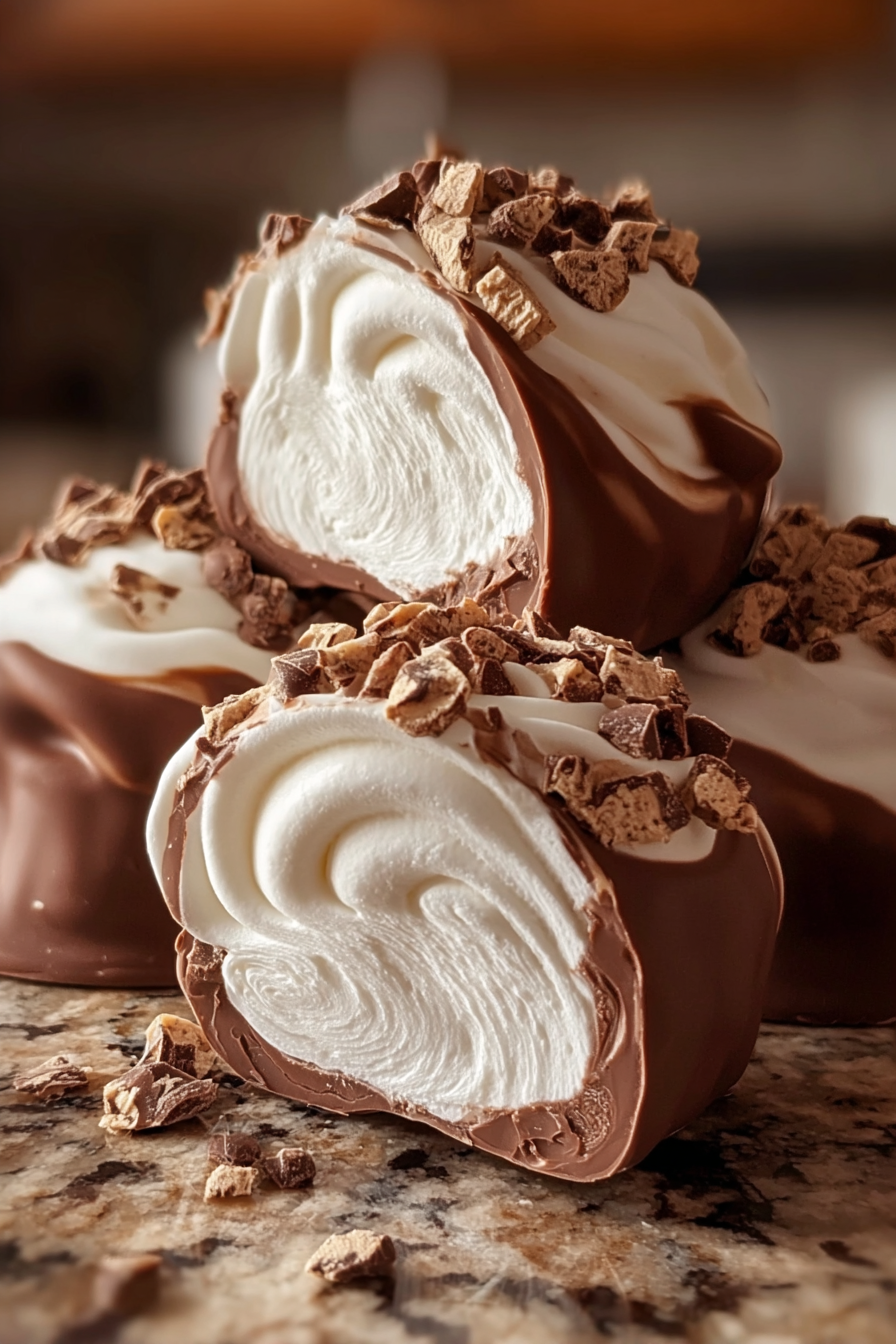
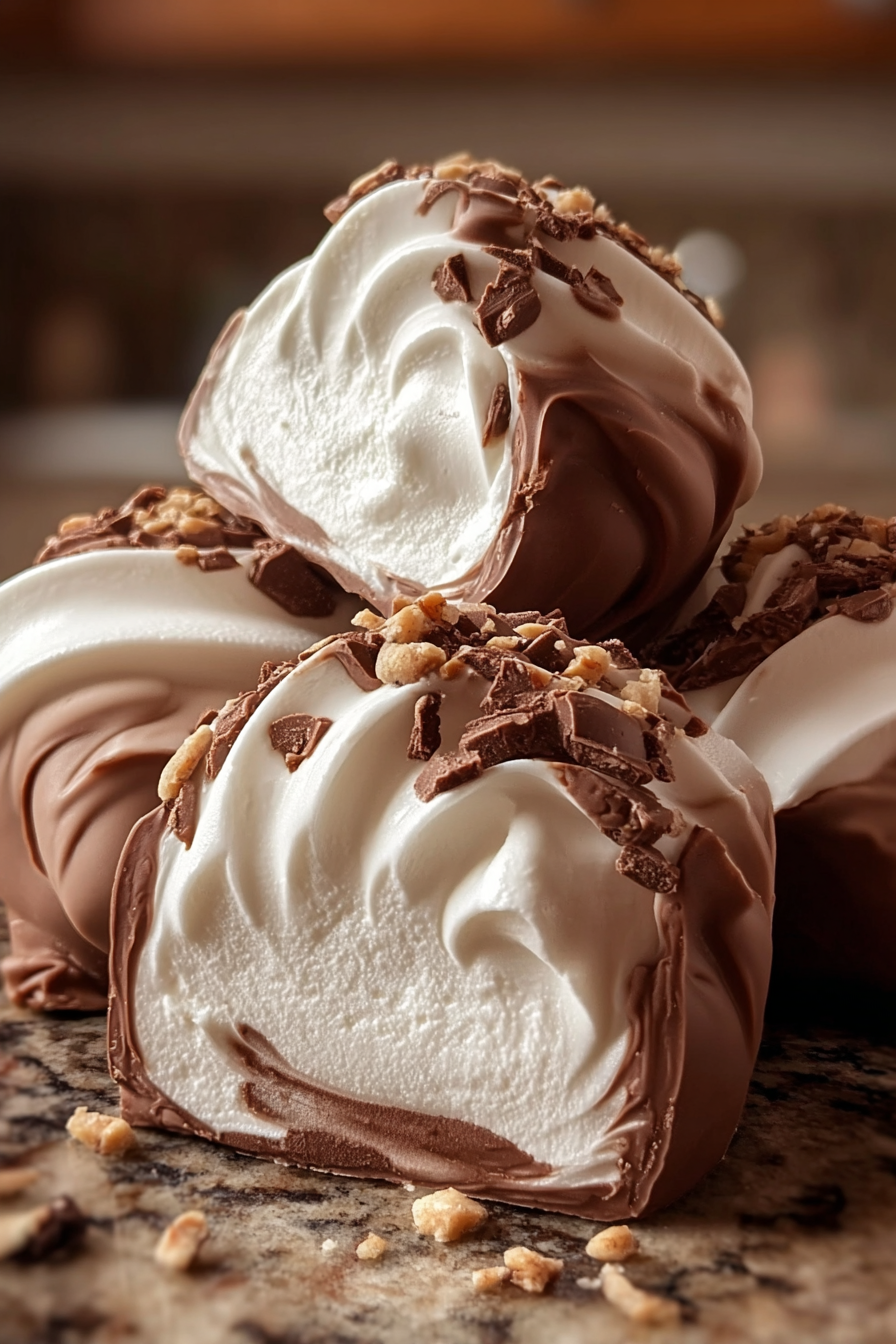
If you’ve ever craved a candy shop-worthy chocolate treat that you can whip up at home with just a few ingredients, you’re in for a delightful surprise. Cool Whip Candy is one of those recipes that feels like magic—it takes creamy whipped topping, a little sweetness, and rich chocolate coating to create a decadent bite-sized confection. It’s smooth, fluffy, and oh-so-chocolatey, perfect for holidays, gifting, or simply satisfying your sweet tooth. Best of all, you don’t need to be a candy-making expert to master this recipe. In fact, it’s beginner-friendly and incredibly versatile, making it a must-try for any home baker.
My recipe story
My first introduction to Cool Whip Candy came during a holiday cookie exchange when a friend brought these delightful little bites. At first glance, they looked like chocolate truffles, but one bite revealed a soft, marshmallow-like center that melted in my mouth. I was hooked instantly! Since then, I’ve experimented with different chocolates, flavors, and shapes, making this recipe my go-to for quick candy gifts and festive platters. It’s especially fun because it feels indulgent while still being incredibly simple to put together—no candy thermometer, no complicated techniques, just pure chocolate bliss.
💡 Why You’ll Love This Recipe
- Only four simple ingredients required, making it budget-friendly and easy to prepare.
- No special candy-making skills or tools are needed.
- The fluffy, creamy center pairs perfectly with a crisp chocolate shell.
- Endlessly customizable with different chocolate types and flavor add-ins.
- Perfect for holidays, parties, gift boxes, or just a cozy night treat.
Ingredient breakdown
This recipe’s charm lies in its simplicity. With just a handful of ingredients, you can create a treat that tastes like it came straight from a candy shop. Each component plays an important role in creating that irresistible texture and flavor balance.
Cool Whip (8 oz tub, fully thawed): The star of the show! Cool Whip gives the candy its signature airy, creamy center. Be sure to use the full-fat version for the best results. Reduced-fat or sugar-free versions don’t hold up as well once frozen and dipped in chocolate.
Powdered Sugar (½ cup): This sweetens the Cool Whip and helps stabilize it. The fine texture of powdered sugar blends seamlessly without creating graininess, giving the filling a silky-smooth consistency.
Vanilla Extract (1 tsp, optional): A dash of vanilla adds depth and warmth to the filling, making the flavor more reminiscent of classic marshmallow candy. You can skip it if you prefer the pure cream-and-chocolate taste.
Chocolate Melting Wafers (16 oz): Choose high-quality milk or dark chocolate wafers, or use almond bark for ease. This chocolate shell provides a satisfying crunch that balances the soft filling. If using chocolate chips, add a teaspoon of coconut oil or shortening for a smoother melt and dip.
Equipment you’ll need
- Mixing bowl
- Hand mixer or stand mixer
- Spatula
- Baking sheet
- Parchment paper or wax paper
- Microwave-safe bowl (or double boiler) for melting chocolate
- Fork or dipping tool for coating
- Freezer-safe container for storing
Step-by-step directions
- Prepare the filling: In a large mixing bowl, add the thawed Cool Whip, powdered sugar, and vanilla extract. Using a hand mixer on low speed, gently whip the ingredients until smooth and well combined. Avoid overmixing to maintain the fluffy texture. The mixture should be creamy yet firm enough to scoop.
- Shape the candies: Line a baking sheet with parchment paper. Using a small cookie scoop or spoon, drop dollops of the Cool Whip mixture onto the sheet. Aim for 1-inch mounds for bite-sized candies. Place the tray in the freezer for at least 2 hours, or until the filling is completely firm.
- Melt the chocolate: In a microwave-safe bowl, melt the chocolate wafers in 30-second increments, stirring between each round until smooth and glossy. If using a double boiler, gently heat the chocolate over simmering water, stirring constantly to prevent scorching.
- Dip the candies: Remove the frozen Cool Whip mounds from the freezer. Working quickly, use a fork or dipping tool to lower each piece into the melted chocolate, turning to coat fully. Lift out and let the excess chocolate drip off before placing it back on the parchment-lined sheet.
- Set and serve: Once all candies are coated, return the tray to the freezer or refrigerator until the chocolate hardens. Once set, transfer to an airtight container. Keep them chilled until ready to enjoy!
Variations & substitutions
This recipe is endlessly customizable! Try swapping vanilla extract for peppermint extract during the holidays for a refreshing twist. You can also roll the frozen centers in crushed cookies, nuts, or sprinkles before dipping them in chocolate for added crunch and decoration. Prefer white chocolate? Swap out the dark or milk chocolate for white melting wafers. You can even swirl two types of chocolate for a marbled effect. For extra indulgence, drizzle caramel over the hardened candies and sprinkle with sea salt for a sweet-salty finish.
💡 Expert Tips & Troubleshooting
- Make sure the Cool Whip is fully thawed before mixing for a smooth filling.
- Always freeze the filling until very firm before dipping—this prevents melting and mess.
- If the chocolate coating cracks, the filling may not have been cold enough; keep the tray chilled between batches.
- Work in small batches when dipping so the filling stays frozen and easy to handle.
- Store candies in the freezer if your kitchen is warm—they hold their shape best when kept cold.
Storage, freezing & make-ahead
Cool Whip Candy stores beautifully, making it a great make-ahead recipe. Keep the finished candies in an airtight container in the refrigerator for up to 1 week. If you’d like to prepare them further in advance, freeze the coated candies for up to 2 months. To enjoy, simply let them sit at room temperature for a few minutes before serving. The filling will stay creamy while the chocolate remains crisp.
Serving ideas & pairings
These candies are versatile and perfect for many occasions. Serve them on a holiday dessert platter alongside cookies, fudge, and peppermint bark. Package them in decorative boxes or tins for thoughtful homemade gifts. For a cozy night in, pair a few with a cup of hot cocoa, coffee, or even a glass of red wine. They also make a sweet addition to birthday parties, baby showers, or any festive gathering. For added flair, top each candy with a drizzle of contrasting chocolate or a sprinkle of sea salt.
FAQ
Can I use homemade whipped cream instead of Cool Whip?
It’s not recommended, as homemade whipped cream doesn’t have the stabilizers that Cool Whip does. The candies may collapse or become watery when frozen and dipped in chocolate.
What’s the best chocolate to use for dipping?
High-quality melting wafers or almond bark are the easiest options since they melt smoothly. If using chocolate chips, add a little coconut oil for easier dipping.
How do I keep the chocolate from seizing?
Avoid any contact with water or steam while melting your chocolate. Use dry utensils and bowls, and stir often to ensure a smooth texture.
Can I make these candies ahead of time?
Yes! They’re perfect for making ahead. Store in the refrigerator for up to a week, or freeze for up to two months.
Can I add flavors to the filling?
Absolutely. Try extracts like peppermint, almond, or coconut for a fun twist. Just use sparingly, as extracts can be potent.
Final thoughts
Cool Whip Candy is proof that homemade treats don’t have to be complicated to be delicious. With its creamy, fluffy center and crisp chocolate shell, it’s the kind of dessert that always gets rave reviews. Whether you’re making them for yourself, gifting to friends, or sharing at a holiday party, this recipe will quickly become a favorite in your kitchen. Keep it simple or dress it up with fun variations—it’s up to you. Either way, you’ll have a tray of irresistible candies that disappear faster than you can make them!
Print
Cool Whip Candy
- Total Time: 2 hours 20 minutes (includes freezing)
- Yield: About 24 candies
- Diet: Vegetarian
Description
Creamy, fluffy Cool Whip centers coated in smooth chocolate make this easy homemade candy irresistible. Perfect for holidays or gifting.
Ingredients
- 1 (8 oz) tub Cool Whip, fully thawed (full-fat recommended)
- ½ cup powdered sugar
- 1 tsp vanilla extract (optional)
- 16 oz milk or dark chocolate melting wafers (or almond bark)
Instructions
- In a mixing bowl, combine Cool Whip, powdered sugar, and vanilla until smooth.
- Drop spoonfuls of the mixture onto a parchment-lined baking sheet. Freeze for at least 2 hours until firm.
- Melt the chocolate wafers in the microwave or over a double boiler until smooth.
- Dip each frozen Cool Whip mound into melted chocolate, coating fully, then place back on the sheet.
- Chill until chocolate is set, then transfer to an airtight container for storage.
Notes
Store in the refrigerator for up to 1 week or freeze for up to 2 months. Try using peppermint extract for a festive twist or drizzle with white chocolate for decoration.
- Prep Time: 15 minutes
- Cook Time: 5 minutes
- Category: Dessert
- Method: No-Bake
- Cuisine: American