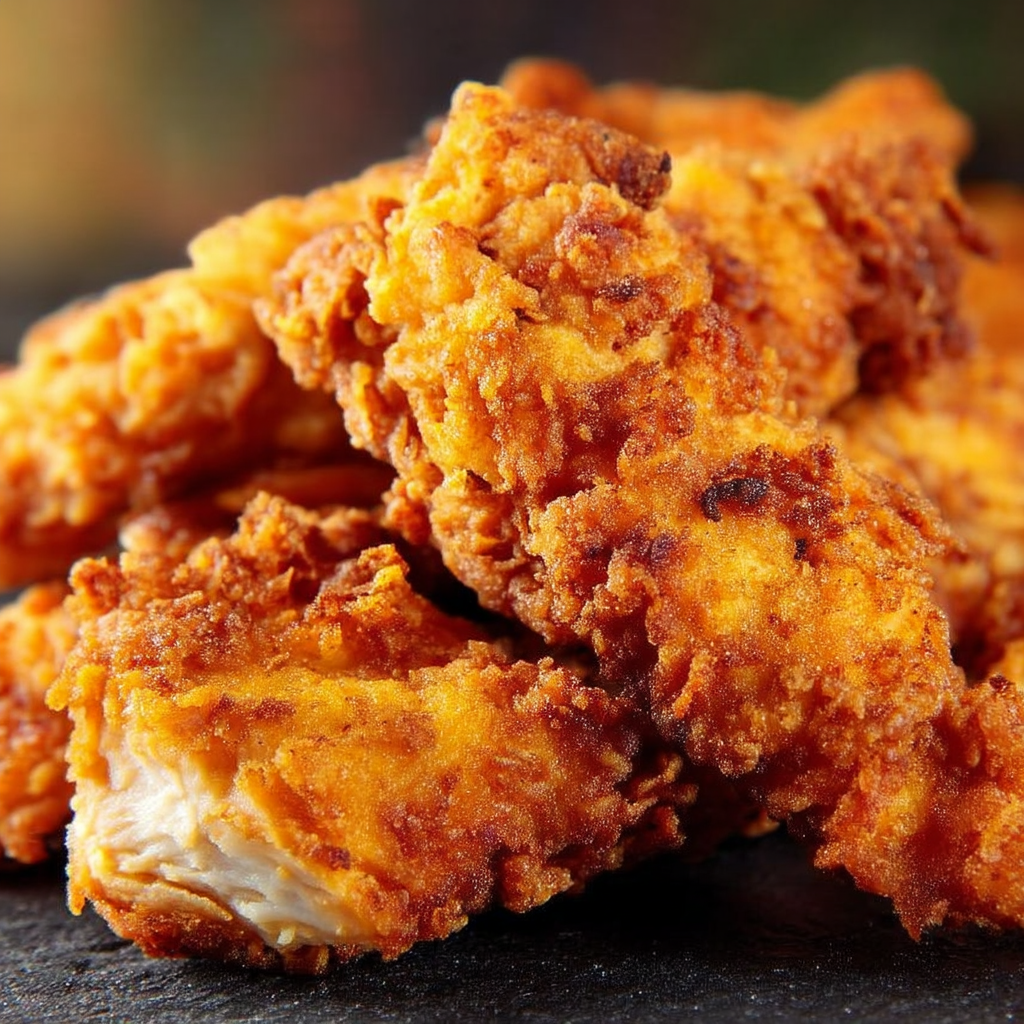
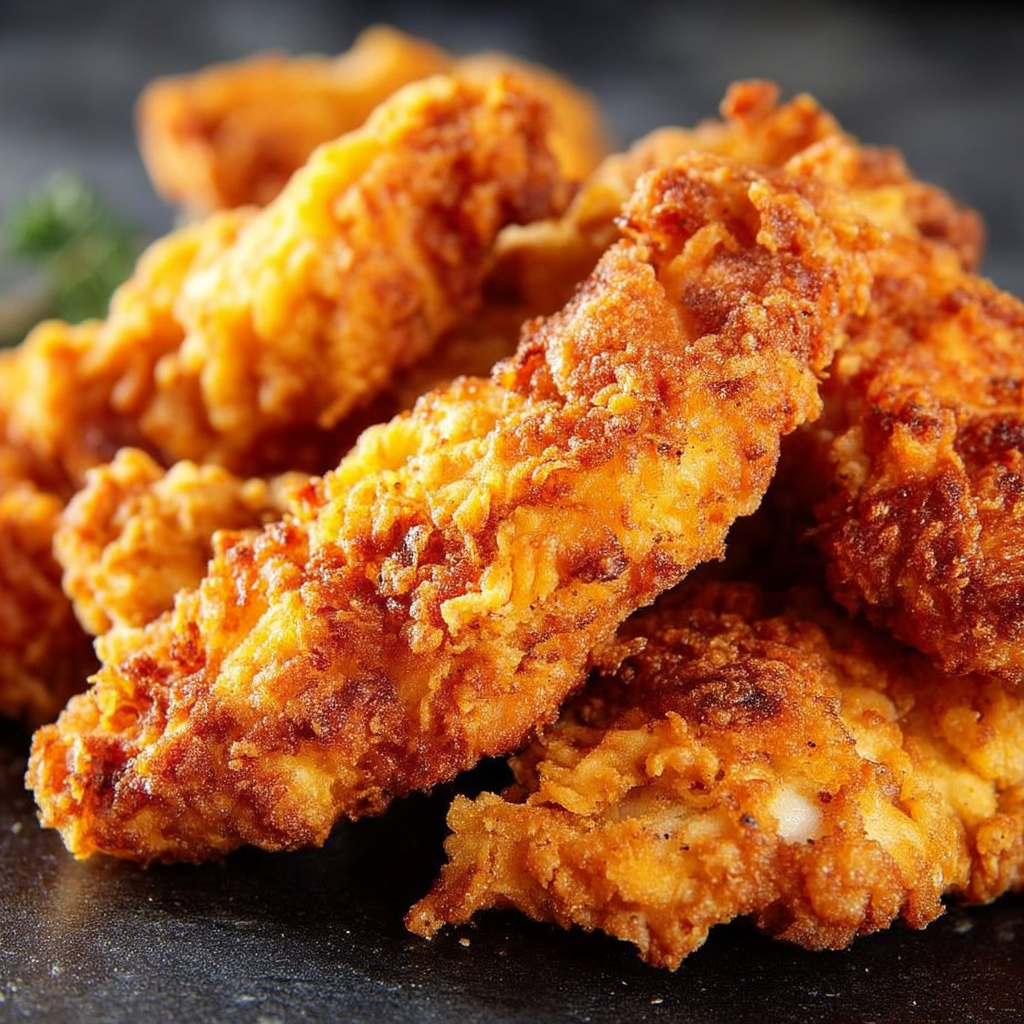
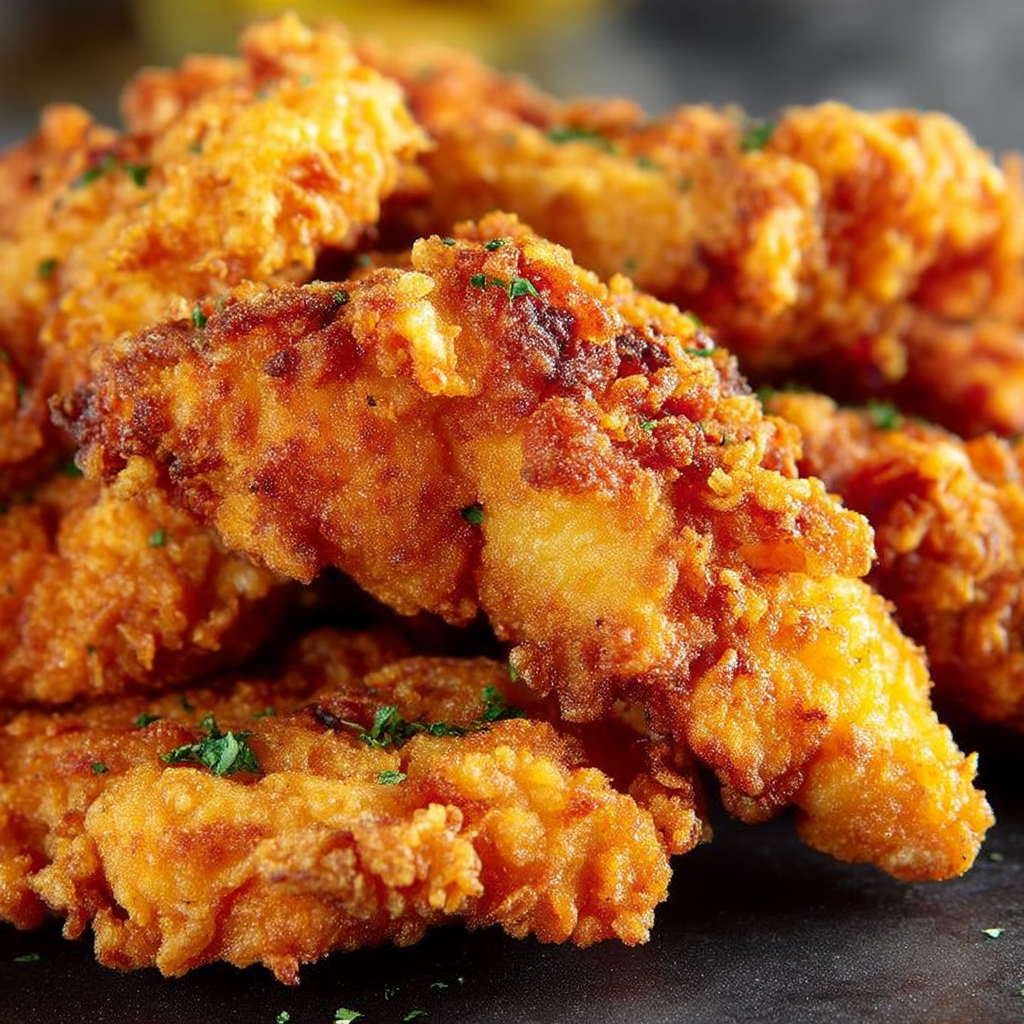
1. Introduction to the Recipe
Crispy fried chicken tenders are a comfort food classic that never goes out of style. Whether served as a snack, a meal, or for a family dinner, these tender, crispy chicken pieces are irresistibly delicious and packed with flavor. The secret to the perfect chicken tenders lies in the marinade and the dry coating. Marinating the chicken in buttermilk and hot sauce ensures a juicy interior, while the dry mix creates a flavorful, crunchy exterior that’s golden and crisp when fried. This recipe takes your chicken tenders to the next level with just the right amount of spice from cayenne pepper, paprika, and a few other pantry staples.
One of the best parts about making homemade chicken tenders is the ability to control the flavor and texture. You can make them as spicy or mild as you prefer, and with just a few ingredients, you can recreate the crispy, golden tenders you love at your favorite restaurant. If you’re looking for more ways to enhance your fried chicken recipes, check out this guide on how to fry chicken to perfection or learn about secret ingredients for crispy fried foods.
2. Basic Recipe: Ingredients and Instructions
Print
Crispy Fried Chicken Tenders Recipe
Description
Discover the secret to perfectly crispy fried chicken tenders with a tangy buttermilk marinade and flavorful dry mix. Easy, delicious, and addictive!
Ingredients
For the Marinade:
-
1 cup / 250ml buttermilk
-
1/4 cup / 60ml hot sauce (I use Frank’s)
-
1/2 tsp salt
-
1/2 tsp white pepper
For the Dry Mix:
-
1 3/4 cups / 250g plain flour
-
1 tbsp cayenne pepper (adjust to taste)
-
2 tsp paprika
-
1 tsp onion powder
-
1 tsp garlic powder
-
1 tsp baking powder
-
1/2 tsp salt
-
1/2 tsp black pepper
For Frying:
-
1.3lb / 600g chicken tenders (about 8–10 pieces)
-
3–4 cups / 750ml – 1 litre vegetable oil (enough to submerge chicken)
Instructions
-
Marinate the Chicken:
In a large bowl, whisk together the buttermilk, hot sauce, salt, and white pepper. Add the chicken tenders and ensure they are completely coated in the marinade. Cover the bowl with plastic wrap and refrigerate for at least 1 hour, or up to overnight for best results. -
Prepare the Dry Mix:
In a separate large bowl, combine the flour, cayenne pepper, paprika, onion powder, garlic powder, baking powder, salt, and black pepper. Whisk the ingredients together until they are evenly distributed. -
Heat the Oil:
In a large frying pan or deep fryer, pour enough vegetable oil to submerge the chicken tenders (about 3-4 cups, depending on the size of your pan). Heat the oil over medium-high heat until it reaches 350°F (175°C). You can test the temperature by dropping a small amount of the dry mix into the oil; it should sizzle immediately. -
Coat the Chicken:
Remove the chicken tenders from the marinade and allow any excess liquid to drip off. Dredge each piece in the dry mix, pressing the flour mixture onto the chicken to ensure a thick coating. Shake off any excess flour. -
Fry the Chicken:
Carefully place the coated chicken tenders into the hot oil. Fry the chicken in batches to avoid overcrowding the pan. Cook for 4-5 minutes per side, or until golden brown and crispy. The internal temperature should reach 165°F (74°C). Use tongs or a slotted spoon to remove the tenders and place them on a wire rack or paper towels to drain excess oil. -
Serve and Enjoy:
Serve your crispy chicken tenders with your favorite dipping sauces, such as ranch, honey mustard, or BBQ sauce. Enjoy!
Notes
Adjust the cayenne pepper to your spice preference. If you prefer a milder flavor, reduce the amount of cayenne.
For extra crispy tenders, you can double-dip the chicken by dredging it in the buttermilk mixture and flour mixture twice.
Ensure the oil stays at 350°F throughout the frying process for best results.
3. Advanced Techniques
1. Double Dipping for Extra Crispiness
If you’re looking for a super-crunchy exterior, double dipping is a game changer. After marinating the chicken, dip it into the dry mix, then return it to the buttermilk and dip it back into the flour mixture. This extra coating creates a thicker, crunchier crust that’s sure to impress.
2. Resting the Coated Chicken Before Frying
After coating the chicken with the dry mix, let it rest for 10-15 minutes before frying. This helps the coating adhere better, resulting in a crispier crust that’s less likely to fall off during frying.
3. Using a Thermometer to Check Oil Temperature
Maintaining the right oil temperature is crucial to perfecting crispy chicken tenders. Use a deep-frying thermometer to ensure the oil stays at a consistent 350°F (175°C). If the oil is too hot, the crust will burn before the chicken cooks through. If it’s too cold, the tenders will absorb too much oil and become greasy.
4. Seasoning After Frying
While the chicken tenders are still hot, sprinkle them with an additional pinch of salt, garlic powder, or paprika to enhance the flavor. This extra layer of seasoning adds more depth to the crispy exterior.
5. Air Fryer Alternative
If you’re looking for a lighter version, you can cook the tenders in an air fryer. Spray the coated tenders with a small amount of oil, then cook at 400°F for about 10-12 minutes, flipping halfway through. The result is still crispy but with less oil.
See more advanced recipes at cookingwhite.com

4. Storage, Shelf Life, and Maintenance Tips
1. Storing Leftover Chicken Tenders
Place leftover fried chicken tenders in an airtight container and store them in the refrigerator for up to 3 days. To preserve their crispiness, you can store them on a wire rack instead of directly in a container, allowing air to circulate around them.
2. Reheating Leftovers
To reheat leftover tenders while keeping them crispy, place them in a preheated oven at 375°F (190°C) for 10-15 minutes. Avoid reheating in the microwave, as this can make the coating soggy.
3. Freezing Chicken Tenders
If you want to make a larger batch in advance, freeze the uncooked, coated chicken tenders. Lay them out on a baking sheet in a single layer and freeze them until solid. Once frozen, transfer them to a freezer-safe bag. When you’re ready to cook, fry them from frozen, adding a few extra minutes to the cooking time.
4. Storing the Dry Mix
If you have leftover dry mix, store it in an airtight container in a cool, dry place. It should keep for up to 3 months. You can use it for future batches of chicken tenders or other fried foods.
5. Maintaining Oil Quality
If you’re frying multiple batches, you can reuse the oil. Strain it through a fine-mesh sieve to remove any food particles, and store it in a clean container. It can be reused 2-3 times before the oil needs to be replaced.
5. Dietary Adaptations and Substitutions
1. Gluten-Free Version
To make the recipe gluten-free, simply substitute the plain flour with a gluten-free flour blend. Ensure that the baking powder and any seasonings you use are also gluten-free.
2. Dairy-Free Option
For a dairy-free version, replace the buttermilk with a non-dairy milk such as almond milk or oat milk. Add 1 tablespoon of lemon juice or vinegar to mimic the tangy flavor of buttermilk.
3. Lower-Carb Version
For a lower-carb option, you can substitute the plain flour with almond flour or a coconut flour blend. This will reduce the carb content while still giving you a crispy exterior.
4. Low-Sodium Adaptation
If you’re watching your sodium intake, reduce the amount of salt in both the marinade and the dry mix. You can also replace the hot sauce with a lower-sodium version or use a salt-free seasoning mix.
5. Vegan Fried “Chicken”
For a vegan version, swap the chicken tenders for plant-based chicken substitutes, such as soy protein or seitan. Use a non-dairy milk for the marinade and an egg replacer if desired.
6. FAQs About the Recipe
1. Can I use boneless chicken breasts instead of tenders?
Yes, you can use boneless, skinless chicken breasts, but they will need to be cut into strips to resemble tenders. Just be sure to adjust the cooking time as thicker pieces of chicken will take longer to cook through.
How can I make the tenders spicier?
If you like your chicken tenders on the spicier side, increase the amount of cayenne pepper or add a bit of chili powder or hot sauce to the dry mix. You can also sprinkle extra cayenne on the tenders after frying for an extra kick.
3. Can I make the tenders ahead of time?
Yes, you can prep the tenders by marinating them and coating them in the dry mix, then refrigerating them until you’re ready to fry. This will allow the flavors to meld and make for a quicker cooking time.
4. What’s the best way to avoid greasy tenders?
To avoid greasy chicken tenders, make sure the oil temperature stays at a consistent 350°F (175°C) and avoid overcrowding the pan. Fry in batches if necessary to maintain the proper temperature.
5. Can I bake these chicken tenders instead of frying them?
Yes, you can bake the chicken tenders in a preheated oven at 400°F (200°C) for about 15-20 minutes, flipping halfway through. Spray them lightly with oil to help them crisp up in the oven.
7. Conclusion & Final Thoughts
These crispy fried chicken tenders are the perfect balance of juicy and crunchy. Whether you’re serving them for a weeknight dinner, a weekend snack, or at a party, they’re guaranteed to be a hit. The buttermilk marinade keeps the chicken tender and flavorful, while the dry mix gives them the right amount of crunch and spice. The best part? You can customize them to your own tastes, adjusting the heat level or even trying different dipping sauces to match your preferences. Crispy on the outside, tender on the inside, these chicken tenders are comfort food at its finest. So, gather your ingredients, heat up the oil, and get ready for some seriously delicious chicken tenders!