Introduction
If you’re looking for the perfect fall dessert that’s quick, easy, and absolutely delicious, this no-bake pumpkin pie is just what you need. With a creamy pumpkin filling, fluffy whipped topping, and a buttery pie crust, this dessert captures all the cozy autumn flavors without ever turning on the oven. Whether you’re making it for Thanksgiving, a Halloween gathering, or just because you love pumpkin, this no-bake pie is guaranteed to impress.
My Recipe Story
Growing up, pumpkin pie was always a staple at our family Thanksgiving table. But the traditional baked version sometimes felt a bit heavy and time-consuming. That’s when I decided to experiment with a no-bake version, and it quickly became a family favorite. The ease of preparation, paired with the light and creamy texture, makes this pie a hit every single time. It’s especially handy when you’re short on oven space during the holidays—just mix, chill, and serve.
Why You’ll Love This Recipe
- No oven required—perfect for busy holiday kitchens.
- Quick to prepare with only a handful of ingredients.
- Creamy, light texture that still captures classic pumpkin pie flavor.
- Great make-ahead dessert for stress-free entertaining.
- Kid-friendly and easily customizable with toppings or crust variations.
Ingredient Breakdown
One of the best parts about this no-bake pumpkin pie is how simple the ingredients are. Most are pantry staples or easy to find at your local grocery store. Let’s take a closer look at what makes this dessert so rich, creamy, and flavorful.
The base starts with cream cheese, which adds a luscious creaminess and helps stabilize the filling. A touch of granulated sugar enhances the sweetness without overpowering the pumpkin flavor. To create that signature light and airy texture, Cool Whip is folded in, giving the pie its dreamy consistency. For the pumpkin element, pure pumpkin puree is used—not pumpkin pie filling—so you get pure pumpkin flavor without added spices or sweeteners.
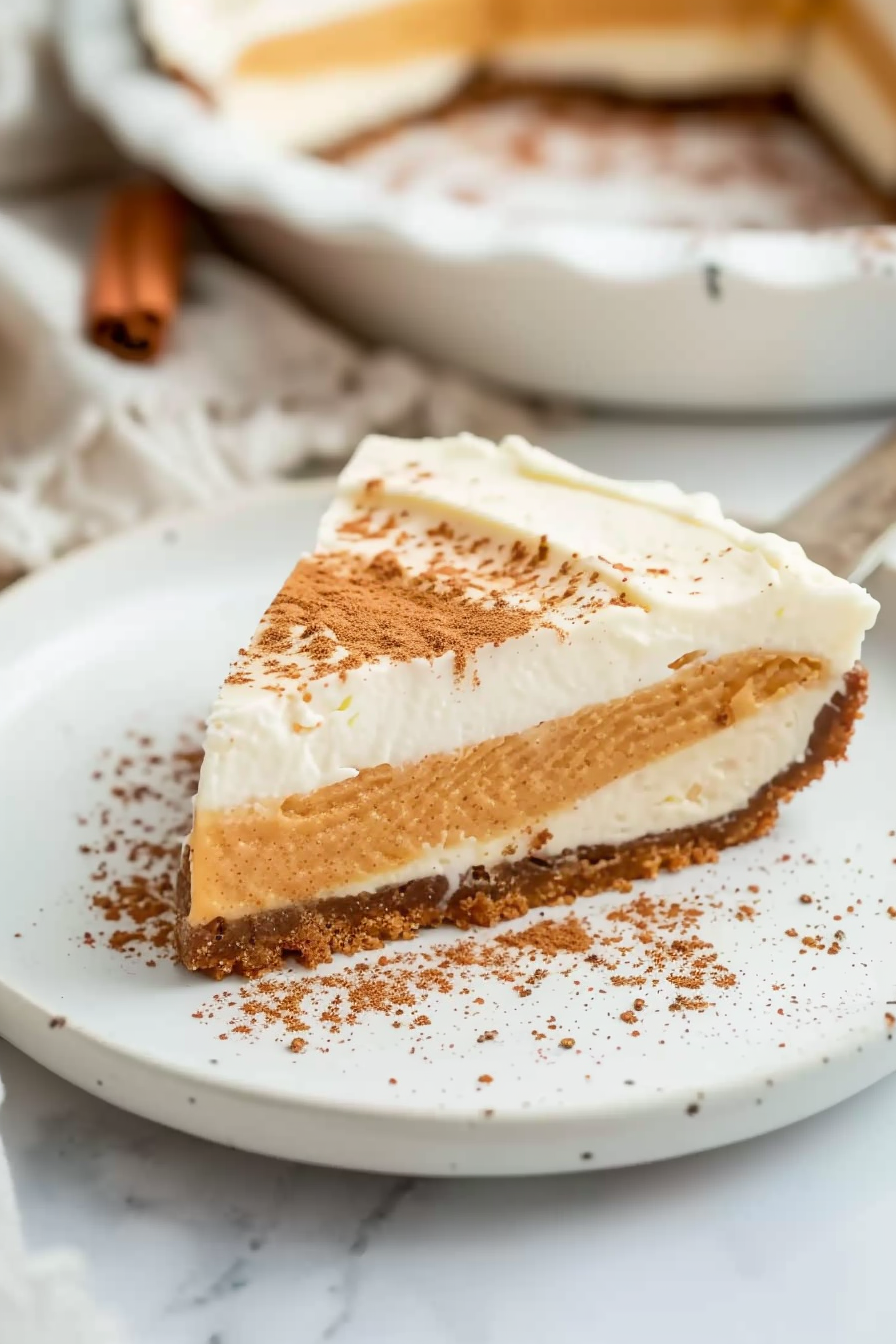
Another secret ingredient is vanilla pudding mix. It thickens the filling while adding a subtle hint of vanilla, ensuring the pie sets beautifully in the fridge. All of this is layered into a pre-made pie crust, which saves time and effort while still delivering that satisfying crunch in every bite.
Equipment You’ll Need
- Mixing bowls
- Hand mixer or stand mixer
- Rubber spatula
- Measuring cups and spoons
- 9-inch pre-made pie crust
- Refrigerator space for chilling
Step-by-Step Directions
- Prepare the cream cheese base: In a large mixing bowl, beat the softened cream cheese with granulated sugar until smooth and creamy. This step ensures that your filling has a silky texture without lumps. Make sure the cream cheese is fully softened before mixing, or you may end up with small clumps.
- Incorporate the Cool Whip: Gently fold in the Cool Whip using a rubber spatula. Folding instead of stirring keeps the mixture airy and light, preventing it from deflating. This step is key to giving your pumpkin pie that fluffy, mousse-like consistency.
- Add pudding mix and pumpkin: Sprinkle the vanilla pudding mix into the bowl and blend until combined. Next, add the pumpkin puree, mixing slowly until the filling is smooth and evenly colored. The pudding helps thicken the filling while the pumpkin adds that signature fall flavor.
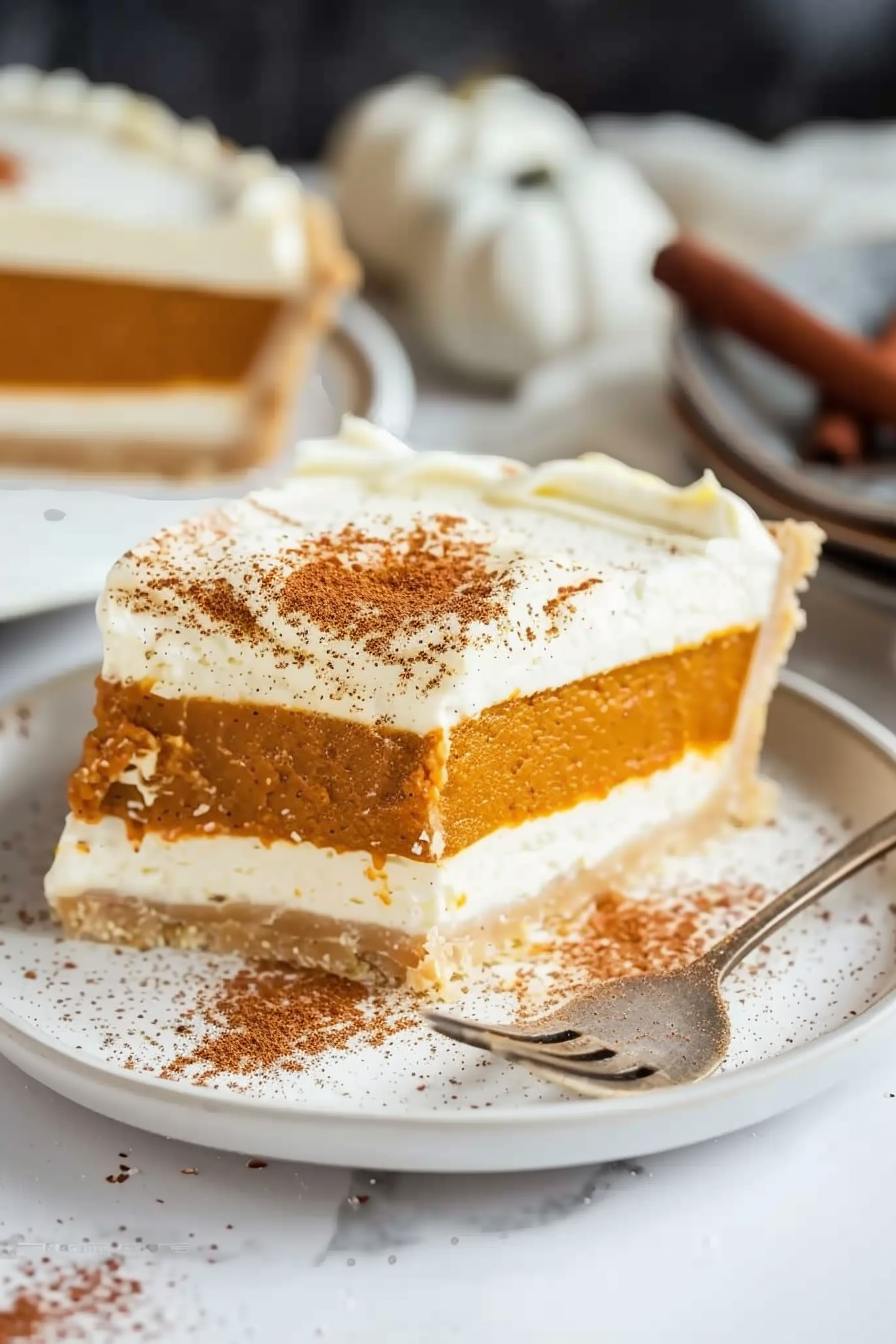
- Assemble the pie: Spoon the filling mixture into the pre-made pie crust, smoothing the top with a spatula for an even finish. You can swirl the top for a rustic look or keep it flat for a polished presentation. At this point, the pie is already looking irresistible!
- Chill and set: Cover the pie with plastic wrap and refrigerate for at least 4 hours, or overnight if possible. Chilling allows the pudding and cream cheese to firm up, ensuring the pie slices beautifully when served.
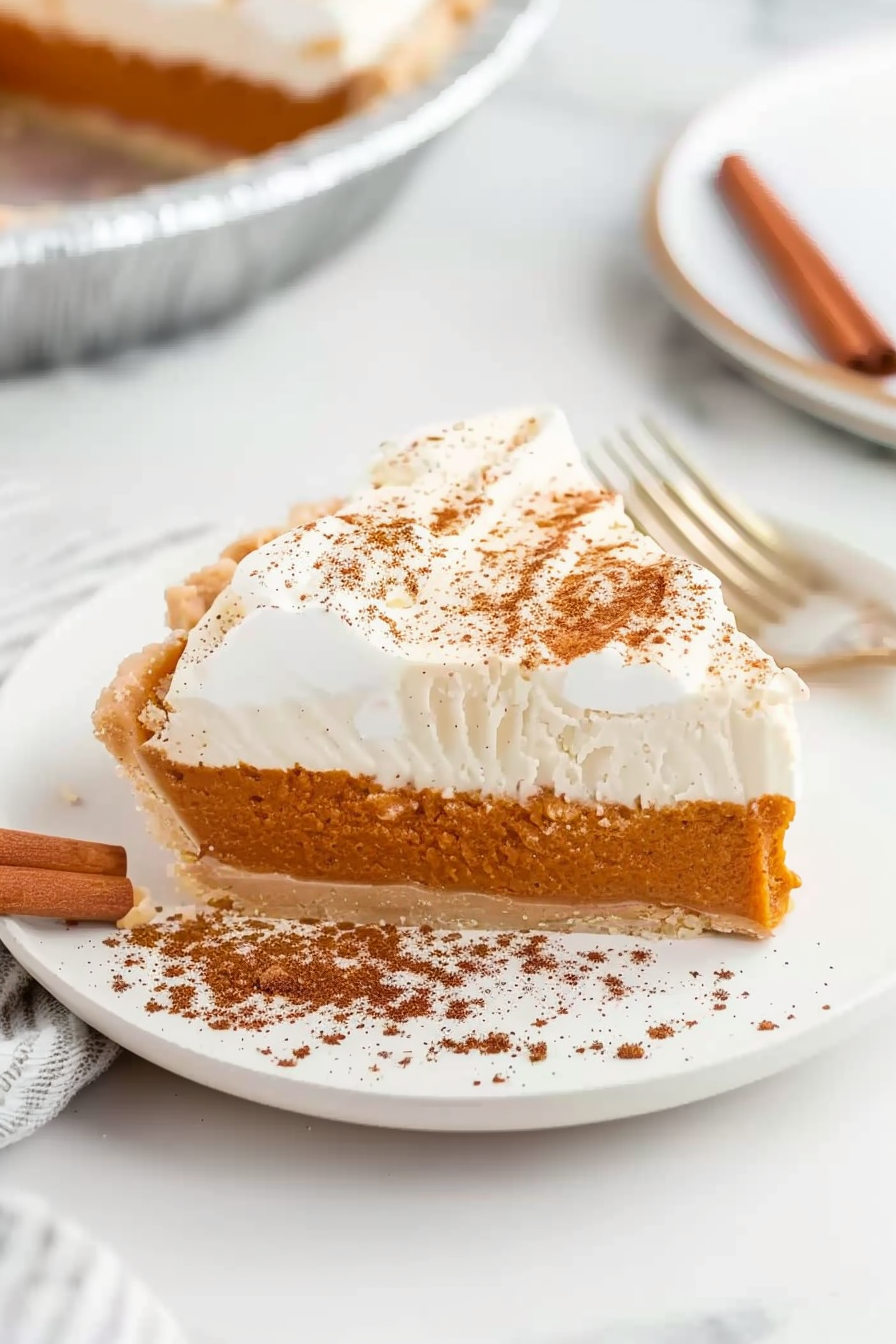
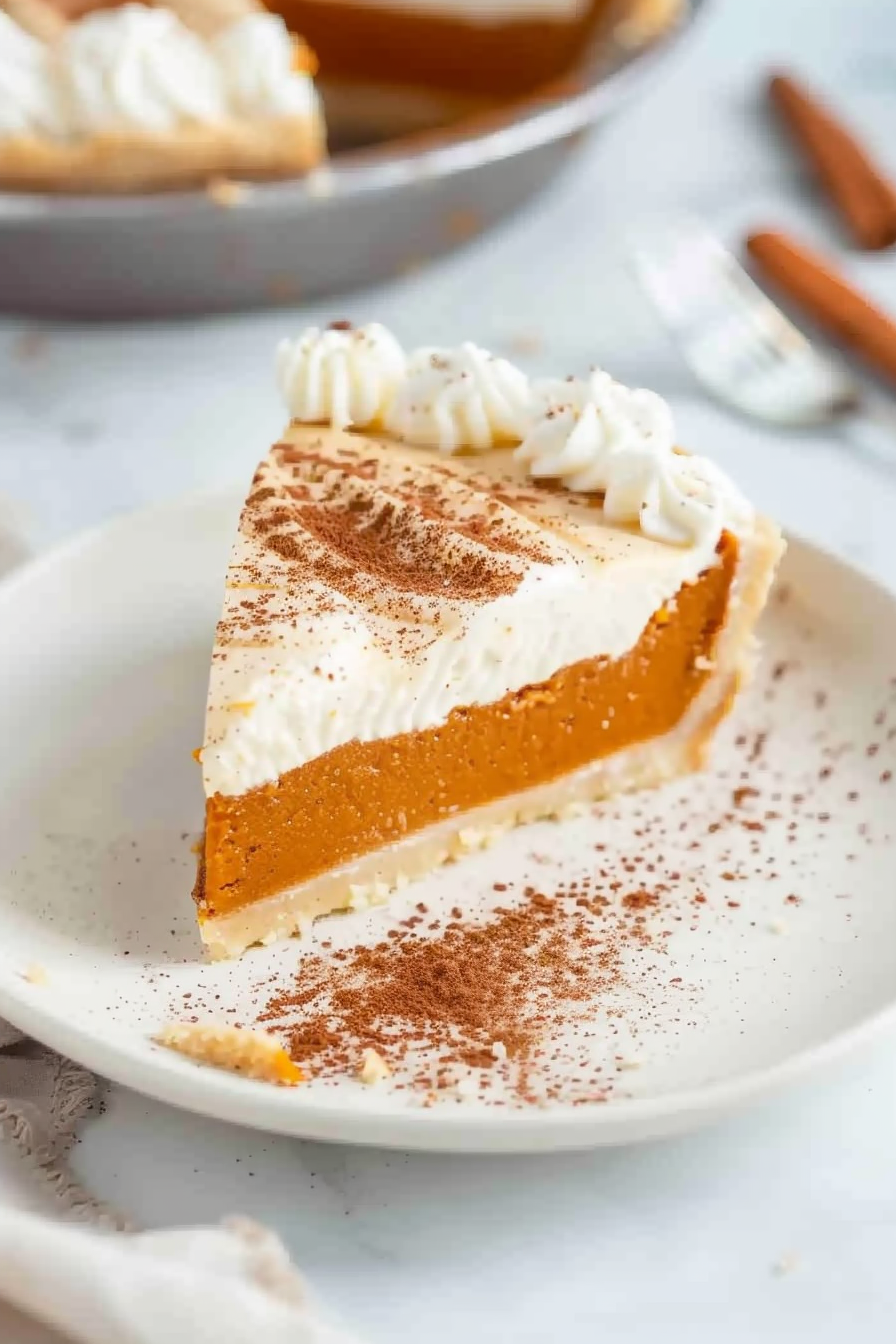
- Serve and enjoy: Once set, remove from the fridge and garnish with extra Cool Whip, a sprinkle of cinnamon, or crushed graham crackers for added flair. Slice, serve, and watch it disappear within minutes!
Variations & Substitutions
This recipe is versatile, and you can easily customize it to suit your taste. Swap out the pre-made crust for a graham cracker crust, gingersnap crust, or even an Oreo crust for a fun twist. If you prefer homemade whipped cream, substitute it for Cool Whip for a richer, less sweet filling. For a dairy-free version, use coconut whipped topping and a plant-based cream cheese. You can also add warm spices like cinnamon, nutmeg, or pumpkin spice blend to the filling for an extra seasonal kick.
Expert Tips & Troubleshooting
- Make sure the cream cheese is softened to room temperature for a smooth filling.
- Chill the pie for the full recommended time so it sets properly before slicing.
- If the filling seems too soft, add a bit more pudding mix to thicken.
- For neat slices, use a sharp knife dipped in warm water, wiping between cuts.
Storage, Freezing & Make-Ahead
This no-bake pumpkin pie is perfect for making ahead of time. Store it in the refrigerator, covered with plastic wrap or foil, for up to 4 days. For longer storage, freeze the pie for up to 2 months. Simply wrap it tightly in plastic wrap and then aluminum foil. To serve, thaw in the refrigerator overnight. The texture remains creamy and delicious, making it a great option for holiday prep.
Serving Ideas & Pairings
Serve this pie chilled, topped with an extra dollop of whipped cream and a sprinkle of cinnamon or nutmeg. It pairs beautifully with hot coffee, apple cider, or even a spiced chai latte. For a festive dessert spread, serve it alongside pecan pie, apple crisp, or chocolate mousse. Add a drizzle of caramel sauce on top for an extra indulgent touch.
FAQ
Can I use fresh pumpkin instead of canned puree?
Yes, just make sure it is well-cooked and pureed until smooth. However, canned puree gives the best consistent texture.
Is this pie gluten-free?
It can be if you use a gluten-free pie crust and verify your pudding mix is gluten-free.
Can I use homemade whipped cream instead of Cool Whip?
Absolutely! Whip 2 cups of heavy cream with a little sugar and vanilla until stiff peaks form, then fold into the filling.
How long does this pie need to chill?
At least 4 hours is recommended, but overnight is best for a firmer set.
What toppings go best with this pie?
Whipped cream, cinnamon, nutmeg, caramel drizzle, or even crushed pecans make wonderful finishing touches.
Final Thoughts
This no-bake pumpkin pie is everything you love about fall desserts wrapped up in a quick, easy, and crowd-pleasing recipe. With minimal ingredients and maximum flavor, it’s a dessert you’ll find yourself making again and again. Perfect for holiday gatherings, potlucks, or weeknight treats, this pie brings the warm flavors of pumpkin to your table without the hassle of baking. Give it a try this season and watch it become a family favorite!
Print
No-Bake Pumpkin Pie
- Total Time: 4 hours 15 minutes
- Yield: 8 servings 1x
- Diet: Vegetarian
Description
Creamy, fluffy, and full of pumpkin flavor, this no-bake pie is the perfect fall dessert that’s quick and easy to make.
Ingredients
- 4 oz cream cheese, softened
- ¼ cup granulated sugar
- 8 oz Cool Whip
- 1 pre-made pie crust
- ¼ cup vanilla pudding mix
- 1 cup pumpkin puree
Instructions
-
In a large bowl, beat the softened cream cheese with granulated sugar until smooth and creamy.
-
Gently fold in the Cool Whip until well combined, keeping the mixture light and airy.
-
Add the vanilla pudding mix and pumpkin puree, stirring until smooth and evenly blended.
-
Spoon the filling into the pre-made pie crust and smooth the top with a spatula.
-
Cover with plastic wrap and refrigerate for at least 4 hours or overnight to set.
- Garnish with extra Cool Whip, cinnamon, or crushed graham crackers before serving.
Notes
Chill pie fully before slicing for clean cuts. Can be made ahead and stored in the refrigerator for up to 4 days. Serve with coffee or cider for a festive treat.
- Prep Time: 15 minutes
- Cook Time: 0 minutes
- Category: Dessert
- Method: No-Bake
- Cuisine: American