1. Introduction to the Recipe
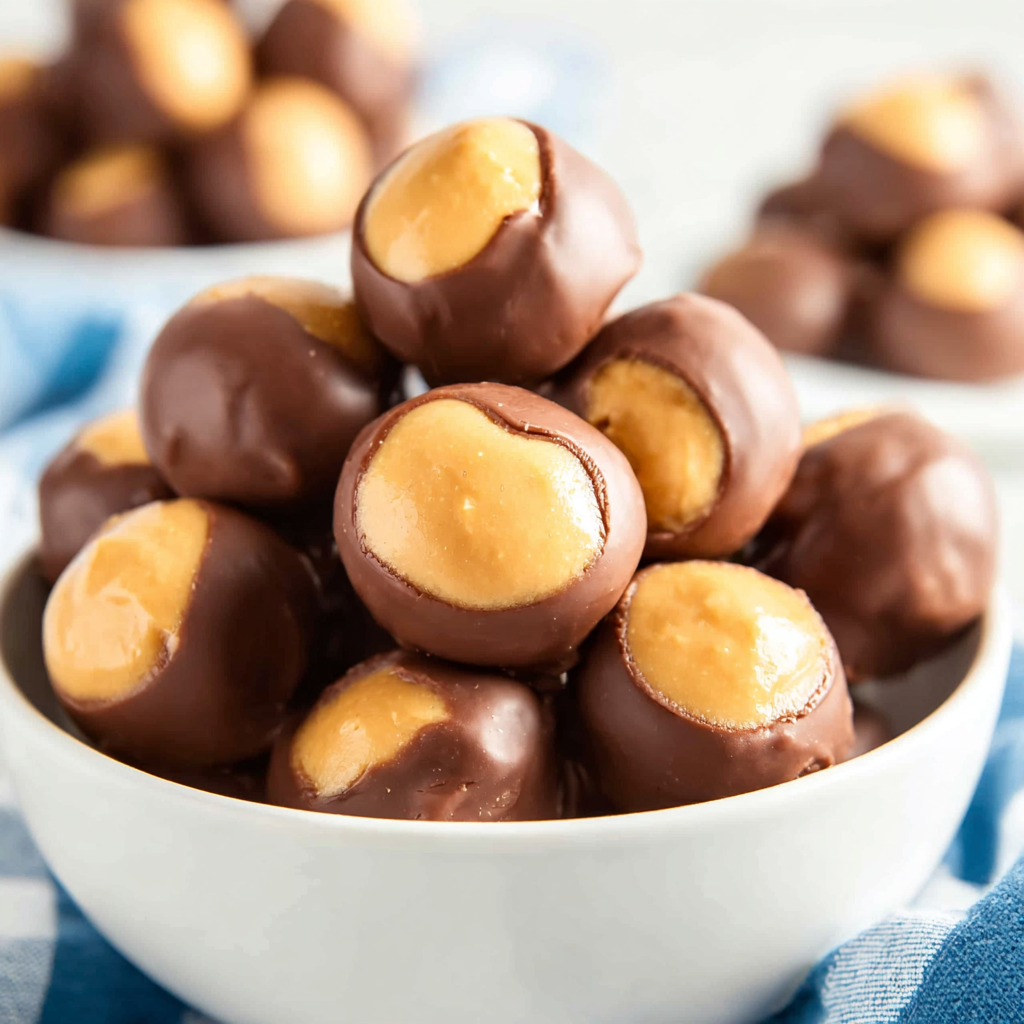
The Peanut Butter Balls recipe is one of those timeless, universally loved treats that manages to strike the perfect balance between indulgence, simplicity, and versatility. Whether you’re craving something sweet, need a quick dessert for a gathering, or want to create a nostalgic bite reminiscent of classic holiday treats, these rich peanut butter centers dipped in smooth chocolate deliver every single time. What makes this recipe especially appealing is how few ingredients it requires—peanut butter, butter, vanilla, powdered sugar, and chocolate—yet it tastes like something far more elaborate and time-consuming. For those who enjoy easy no-bake confections, this recipe offers everything you love about peanut butter cups but in a more playful, poppable form.
If you’re new to making candy-style treats at home, you’ll appreciate that this recipe doesn’t require any special equipment or advanced baking knowledge. It’s also wonderfully customizable—you can adjust the sweetness, change the type of chocolate, or even add fun coatings like sprinkles or drizzles. To dive deeper into working with peanut butter in desserts, you may find it helpful to explore a peanut butter baking guide, which offers tips on how different peanut butter varieties affect texture. For additional inspiration, you can also check a no-bake dessert collection to see how this recipe fits among other simple treats.
One of the best qualities of this Peanut Butter Balls recipe is how easily it adapts to different dietary needs, kitchen setups, and ingredient availability. If you’re short on time or prefer minimal cleanup, these treats are a dream: mix, roll, dip, chill, and enjoy. The perfect blend of creamy peanut butter and chocolate makes them equally suited for everyday snacking or special celebrations. With this guide, you’ll not only learn how to make the basic recipe but also how to elevate it using advanced techniques, proper storage methods, dietary alternatives, and solutions to common troubleshooting issues. By the end, you’ll have a fully comprehensive understanding of how to craft flawless Peanut Butter Balls every time.
2. Basic Recipe: Ingredients and Instructions
Print
Peanut Butter Balls Recipe – Easy No-Bake Treat Anyone Can Make
Description
Make this simple Peanut Butter Balls recipe with creamy peanut butter, chocolate, and pantry staples for a delicious, no-bake treat.
Ingredients
Peanut Butter Mix
- 1 ¾ cups smooth peanut butter (16 ounces)
- ½ cup unsalted butter, softened (4 ounces)
- ¼ teaspoon fine sea salt
- 1 teaspoon vanilla extract
- 4 cups powdered sugar, sifted (1 pound)
For Dipping
- 10 ounces semi-sweet chocolate chips
Instructions
- Cream the Butter and Peanut Butter
In a large mixing bowl, beat together the softened butter and smooth peanut butter until fully combined and fluffy. - Add Vanilla and Salt
Mix in the vanilla extract and sea salt until incorporated. - Incorporate the Powdered Sugar
Add the powdered sugar gradually, about 1 cup at a time, mixing well between additions. The dough should become firm but pliable. - Roll the Peanut Butter Balls
Scoop tablespoon-sized portions and roll them into smooth balls. Place them on a parchment-lined baking sheet. - Chill the Balls
Refrigerate or freeze the peanut butter balls for at least 20–30 minutes to firm up before dipping. - Melt the Chocolate
In a microwave-safe bowl, heat the chocolate chips in 20-second intervals, stirring between each, until fully melted and smooth. - Dip the Balls in Chocolate
Use a fork or dipping tool to submerge each peanut butter ball into the melted chocolate. Tap gently to remove excess chocolate. - Set the Chocolate
Place the dipped balls back onto the parchment and allow the chocolate coating to set at room temperature or in the fridge.
Notes
If the mixture feels too soft, add a little more powdered sugar until the texture is rollable.
Use high-quality chocolate for the best melt and flavor.
Chilling the peanut butter balls before dipping prevents them from falling apart in warm chocolate.
3. Advanced Techniques
1. Bolded Heading: Enhancing Texture with Alternative Mix-Ins
The texture of your Peanut Butter Balls recipe can be customized dramatically by incorporating thoughtful mix-ins. Crushed graham crackers, ground oats, or even finely chopped nuts can lend body and structure to the peanut butter mixture. These additions help hold the shape better, especially in warmer climates or kitchens. For a softer bite, try blending in marshmallow creme, which creates a fluffier, candy-like center. If you prefer a denser interior, increase the powdered sugar slightly or add a tablespoon of coconut flour. Using mix-ins also helps adjust sweetness levels and provides new flavor dimensions without compromising the recipe’s simplicity.
2. Bolded Heading: Mastering Chocolate Tempering for a Glossy Finish
Tempering chocolate is an advanced but rewarding skill that elevates the appearance and texture of your peanut butter balls. Properly tempered chocolate has a smooth, glossy sheen and a crisp snap when bitten into. Although semi-sweet chocolate chips can be used as-is, real couverture chocolate (at least 60% cacao) will yield superior results. The process involves heating the chocolate to a specific temperature, cooling it to seed crystals, then reheating gently. This ensures the cocoa butter stabilizes correctly. While it may sound technical, mastering tempering enhances durability, improves mouthfeel, and prevents unwanted white streaks known as bloom.
3. Bolded Heading: Creating Flavor Variations with Infused Butters
To elevate your Peanut Butter Balls recipe, consider experimenting with flavored butters. Browned butter, for example, adds deep nutty notes that complement peanut butter beautifully. To make it, simply cook butter until the milk solids toast and release a caramel aroma. Chill the browned butter before mixing to maintain proper texture. Another option is cinnamon-infused butter or even maple-infused butter made by simmering butter with a splash of maple syrup. These small changes offer sophisticated flavor layers while keeping preparation straightforward. Such variations allow you to tailor the recipe to different seasons, holidays, or flavor profiles.
4. Bolded Heading: Using Specialty Nut Butters for Gourmet Results
Substituting the peanut butter with higher-end nut butters can instantly transform the flavor. Almond butter produces a milder, slightly sweeter taste, while cashew butter introduces creaminess unmatched by other varieties. Tahini creates a more earthy, sesame-forward twist perfect for those who enjoy bold flavors. When using alternative nut butters, ensure they are not overly runny; stabilizing with extra powdered sugar or a small amount of coconut flour keeps the dough workable. These gourmet variations allow the recipe to move from nostalgic comfort food to a more artisanal confection suitable for gifting or special occasions.
5. Bolded Heading: Professional Dipping and Decorating Techniques
The visual presentation of your Peanut Butter Balls recipe can be significantly elevated with polished dipping techniques. Use a two-prong dipping fork to ensure smooth coverage, gently tapping the fork’s edge on the bowl to remove excess chocolate. For a decorative effect, drizzle contrasting melted chocolate (white, dark, or milk) in thin zigzags. You can also roll the freshly coated balls in chopped nuts, cocoa nibs, or crushed pretzels before the chocolate sets. To achieve perfectly round shapes, rotate chilled balls between your palms quickly. These small touches give your treats a refined, professional look.
See more advanced recipes at cookingwhite.
4. Storage, Shelf Life, and Maintenance Tips
1. Bolded Heading: Refrigeration for Maximum Freshness
Storing your peanut butter balls in the refrigerator helps maintain their shape and extends freshness. The cool environment keeps the chocolate firm and prevents melting, especially during warmer months. Place the balls in an airtight container with parchment separating the layers to avoid sticking. When stored this way, the balls remain fresh for up to two weeks. Refrigeration also helps preserve flavor, as peanut-based treats can absorb odors if left uncovered. If serving to guests, remove them from the fridge 10–15 minutes before eating to enhance the creaminess of the peanut butter center.
2. Bolded Heading: Freezing for Long-Term Storage
Freezing is the best method for keeping your Peanut Butter Balls recipe available for months at a time. Arrange the finished treats in a single layer on a baking tray and freeze until solid. Then transfer them to freezer-safe bags or containers. They can be stored for up to three months without losing quality. When you’re ready to enjoy them, simply thaw in the refrigerator or at room temperature. Freezing prevents chocolate bloom and keeps the peanut butter filling from drying out. It also allows you to prepare large batches ahead for holidays or events.
3. Bolded Heading: Room Temperature Storage for Short-Term Use
If you plan to consume the peanut butter balls quickly, room-temperature storage works well. Keep them in a cool, dry place, away from sunlight or heat sources, which could cause melting. An airtight container is essential to prevent the chocolate from softening and absorbing odors. At room temperature, they stay fresh for approximately five days. This method is ideal for gatherings, bake sales, or lunchbox treats. When stored properly, the peanut butter center remains soft while the chocolate maintains its crisp bite.
4. Bolded Heading: Preventing Moisture and Odor Absorption
Peanut butter-based treats are sensitive to moisture and odors. Store the balls in airtight containers with parchment or wax paper between layers. If freezing or refrigerating, avoid storing them near strong-smelling foods like onions or fish. Moisture can cause the chocolate to develop a dull finish or sticky condensation. To protect against this, ensure the treats are fully cooled and set before sealing the container. For added protection, you may place a small food-safe desiccant packet in long-term storage containers.
5. Bolded Heading: Maintaining Texture and Flavor Over Time
Over time, both the chocolate coating and the peanut butter interior can lose flavor or texture. To maintain quality, always store them at stable temperatures. Avoid moving them from cold to warm environments too quickly; this prevents condensation. If you’re preparing a large batch, consider dipping only half in chocolate and storing the undipped portion separately. Freshly dipped treats will always taste best. Keeping them sealed tightly also prevents dryness and preserves the smooth mouthfeel of the peanut butter filling.
5. Dietary Adaptations and Substitutions
1. Bolded Heading: Creating a Vegan Peanut Butter Balls Version
Adapting the Peanut Butter Balls recipe for a vegan diet is surprisingly simple. Replace the butter with plant-based alternatives such as vegan margarine or coconut oil. Ensure the chocolate chips are dairy-free—many brands now offer vegan-friendly versions that melt beautifully. For the powdered sugar, choose an organic brand to avoid bone-char processing. These small substitutions create a treat that tastes nearly identical to the traditional version. Vegan peanut butter balls also tend to have a slightly softer texture, which many people find appealing. With these adjustments, the recipe becomes accessible to plant-based eaters without sacrificing flavor.
2. Bolded Heading: Making the Recipe Gluten-Free
This recipe is naturally gluten-free since it contains no flour. However, cross-contamination can occur if ingredients are processed in shared facilities. Choose certified gluten-free powdered sugar and chocolate chips to ensure safety for those with celiac disease or gluten sensitivity. For added texture without gluten, you can mix in gluten-free crushed pretzels or gluten-free graham crackers. These small modifications allow individuals with dietary restrictions to enjoy the treat confidently.
3. Bolded Heading: Low-Sugar and Keto-Friendly Modifications
To reduce sugar content or make the recipe keto-friendly, substitute powdered sugar with a powdered erythritol or monk fruit blend. Use sugar-free chocolate chips made with stevia or erythritol. Because sugar alcohols behave differently from traditional powdered sugar, you may need to adjust the amount slightly to achieve the correct texture. These substitutions significantly lower the carbohydrate content and make the peanut butter balls suitable for low-sugar or ketogenic lifestyles while keeping flavor and consistency intact.
4. Bolded Heading: Nut-Free Alternatives for Allergy-Friendly Treats
For nut-free adaptation, replace peanut butter with seed-based spreads such as sunflower seed butter or pumpkin seed butter. These alternatives mimic the creamy texture of peanut butter and blend well with powdered sugar. Ensure the seed butter is not overly oily; if needed, chill it briefly before mixing. Use chocolate labeled nut-free to avoid cross-contamination. This variation allows those with nut allergies to enjoy a safe and delicious version of the classic treat.
5. Bolded Heading: Dairy-Free and Lactose-Free Modifications
To make the peanut butter balls suitable for those avoiding dairy, substitute the butter with dairy-free margarine or coconut oil. Choose lactose-free or dairy-free chocolate chips to melt for dipping. These changes maintain the integrity of the recipe without compromising flavor. Dairy-free versions often have a slightly different melting pattern, but chilling the balls thoroughly before dipping ensures clean, smooth coating.
6. FAQs About the Recipe
1. Bolded Heading: Why Is My Peanut Butter Mixture Too Soft to Roll?
A soft mixture usually results from warm ingredients or a peanut butter brand with higher oil content. To fix this, simply add extra powdered sugar in small increments until the dough firms up. You can also place the mixture in the refrigerator for 10–15 minutes to help it solidify. Using natural peanut butter with separated oil often leads to inconsistent texture, so creamy, stabilized peanut butter works best. Chilling your hands before rolling can also prevent the dough from softening too much.
2. Bolded Heading: How Do I Keep the Chocolate from Cracking?
Chocolate cracks when the temperature between the balls and melted chocolate differs too much. Let the chilled peanut butter balls sit at room temperature for a few minutes before dipping. Do not overheat the chocolate—warm it gently and stir frequently to maintain fluidity. Using good-quality chocolate chips or couverture chocolate reduces the chance of cracking, as they melt more smoothly and set more evenly.
3. Bolded Heading: Why Does My Chocolate Look Dull or Streaky?
Dull chocolate is often a sign of bloom, which occurs when chocolate is overheated or cooled unevenly. Proper tempering helps avoid this, but even without tempering, letting the chocolate cool slightly before dipping improves the finish. Avoid storing the coated balls in extremely cold or humid environments. Always allow the chocolate to set in a cool, dry place for the best appearance.
4. Bolded Heading: Can I Make Peanut Butter Balls Without a Mixer?
Yes! A mixer makes the process easier, but the recipe can be made entirely by hand. Start by softening the butter thoroughly so it blends smoothly with the peanut butter. Mix vigorously with a sturdy spoon or spatula, then gradually fold in the powdered sugar. It may take some arm strength, but the texture will come together beautifully. Chilling the mixture slightly can make hand-mixing more manageable.
5. Bolded Heading: Can I Use White or Dark Chocolate Instead of Semi-Sweet?
Absolutely. White chocolate creates a sweeter, creamier coating, while dark chocolate adds richness and depth. Each type of chocolate melts differently, so be sure to warm them gently and use small intervals to avoid burning. You can even use a combination of chocolates for decorative drizzling or create themed batches for holidays and celebrations.
7. Conclusion & Final Thoughts
The Peanut Butter Balls recipe is one of those rare culinary treasures that strikes the perfect balance between simplicity and indulgence. Whether you’re preparing a festive holiday platter, putting together a homemade gift, or simply craving a comforting treat, these chocolate-dipped bites deliver every single time. Their rich peanut butter interior, paired with a crisp layer of chocolate, satisfies sweet cravings without requiring a long list of ingredients or complicated steps. What makes this recipe so special is how universally appealing it is—children love helping roll the centers, adults appreciate the nostalgic flavor, and everyone enjoys the soft yet substantial texture of each bite.
Beyond the basic recipe, the endless ways to customize these treats make them truly exceptional. You can add mix-ins for crunch, experiment with different types of chocolate, or infuse the peanut butter base with creative flavors like maple or cinnamon. Dietary adjustments are equally simple, allowing you to create vegan, gluten-free, keto, or nut-free versions with minimal effort. With proper storage methods, these treats can be enjoyed fresh for days or frozen for months, making them an ideal make-ahead dessert for busy hosts or planned events.
In many ways, this recipe exemplifies the magic of no-bake desserts: easy to prepare, impossible to resist, customizable for any occasion, and perfect for cooks of all skill levels. Whether you’re making them for a party, sharing them with loved ones, or treating yourself to a well-deserved indulgence, Peanut Butter Balls never fail to bring joy. Their simplicity, adaptability, and nostalgic charm ensure this recipe will remain a beloved staple in your collection for years to come.