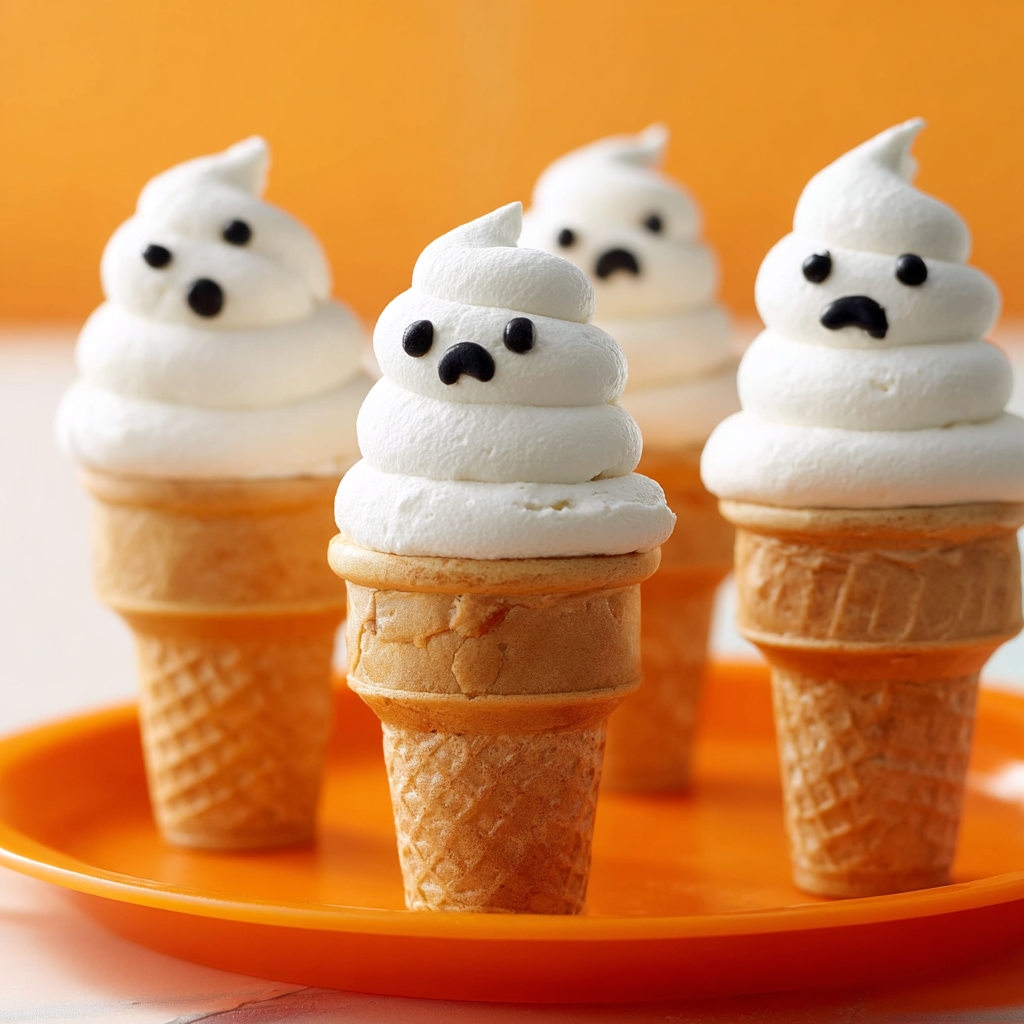
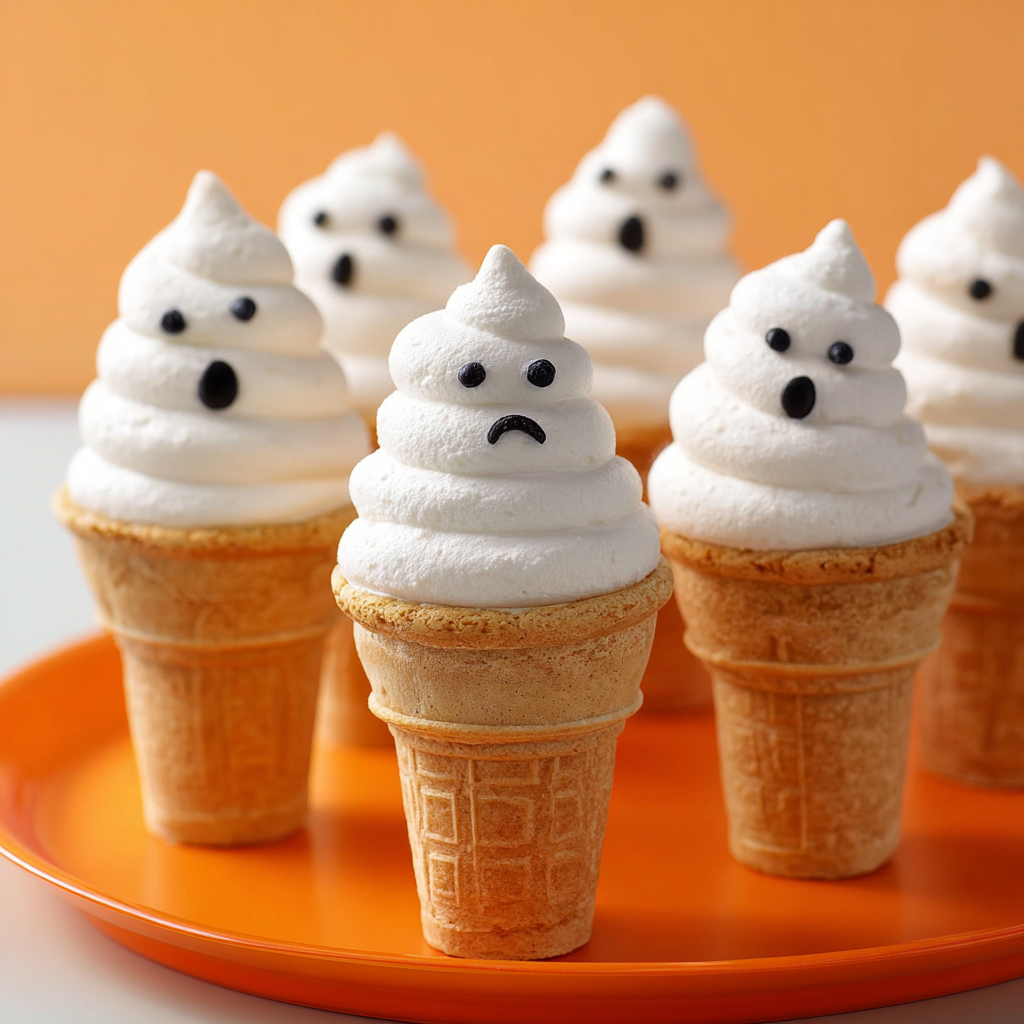
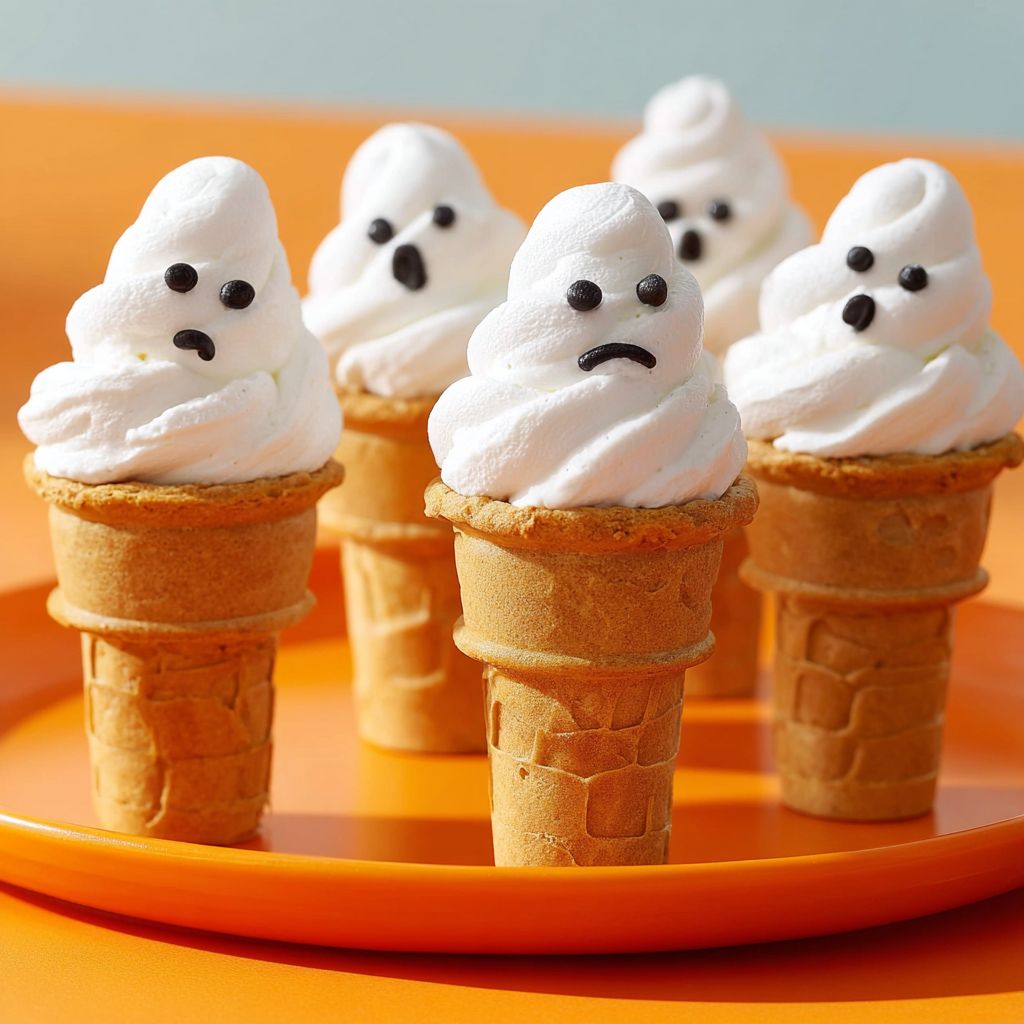
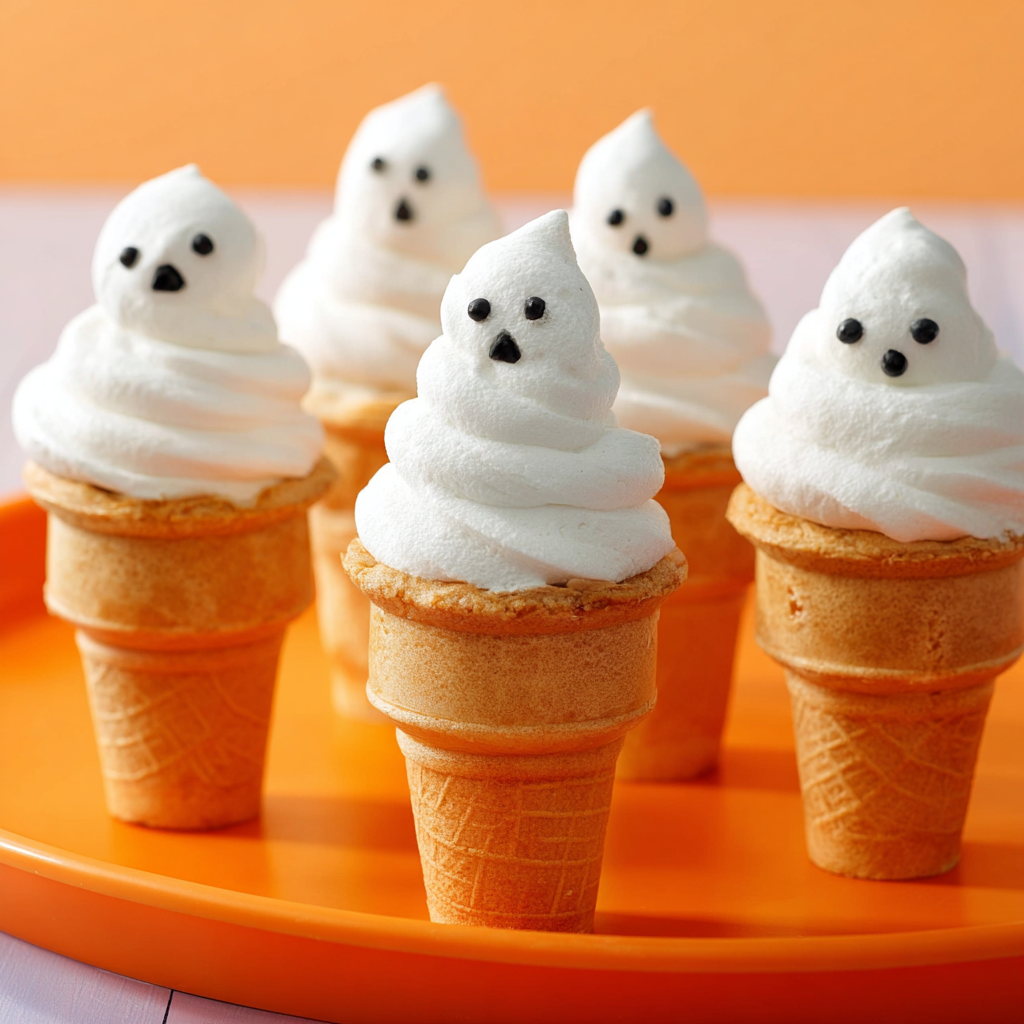
Spooky Ghostly Cupcake Cones with brown sugar batter and frosting ghosts. A festive Halloween dessert kids and adults love.
Introduction to the Recipe
Halloween desserts don’t get more playful—or portable—than Ghostly Cupcake Cones. These cupcake cones bake directly inside cake-style ice cream cones, then get topped with swirls of frosting to resemble spooky little ghosts. They’re handheld, mess-free, and perfect for parties, trick-or-treat events, or school celebrations.
The batter combines butter, creamy peanut butter, and brown sugar for a soft, rich cupcake that pairs beautifully with a light vanilla or marshmallow frosting. Once baked and cooled, you can pipe on tall, white frosting swirls and finish each with candy eyes or black sprinkles to bring the ghosts to life.
Because they’re baked in ice cream cones, these cupcakes are easier to serve than traditional versions—no need for cupcake liners or serving plates. Kids love the fun shape, and adults appreciate the reduced cleanup. You can even wrap them individually for party favors or Halloween bake sales.
Want more festive sweets? Try making a Candy Corn Layer Cake or this DIY Marshmallow Ghost Garland.
With their nostalgic flavor and clever presentation, Ghostly Cupcake Cones are a surefire Halloween hit. Easy to make in batches, customizable with any frosting or sprinkles, and endlessly charming, they’re the kind of seasonal treat people remember—and request again next year.
Basic Recipe: Ingredients and Instructions
Print
Ghostly Cupcake Cones Recipe
Description
Spooky Ghostly Cupcake Cones with brown sugar batter and frosting ghosts. A festive Halloween dessert kids and adults love.
Ingredients
- 1/3 cup butter, softened
- 1/2 cup creamy peanut butter
- 1–1/2 cups packed brown sugar
- 2 large eggs, room temperature
- 1 teaspoon vanilla extract
- 2 cups all-purpose flour
- 2–1/2 teaspoons baking powder
- 1/2 teaspoon salt
- 3/4 cup 2% milk
- 24 ice cream cake cones (about 3 inches tall)
- Frosting of your choice (vanilla, marshmallow, or cream cheese work well)
- Assorted jimmies and sprinkles (black, orange, and candy eyes recommended)
Instructions
- Preheat oven to 350°F (175°C). Set cones upright in muffin tins for stability.
- Cream butter, peanut butter, and brown sugar in a large bowl until light and fluffy.
- Add eggs and vanilla; beat until smooth.
- In a separate bowl, whisk together flour, baking powder, and salt.
- Gradually add dry ingredients to wet mixture, alternating with milk. Mix until fully combined.
- Fill cones two-thirds full with batter (do not overfill to avoid overflow).
- Bake for 20–25 minutes, or until a toothpick inserted into the center comes out clean.
- Cool completely before decorating.
- Frost each cone with a tall swirl to mimic a ghost shape.
- Add candy eyes or sprinkles for ghost faces.
Notes
Keep cones upright by placing them in cupcake pans.
Don’t overbake—the cones can get too crisp and crack.
Store frosted cones upright in a deep container to protect the decorations.
Advanced Techniques
Use a Large Round Tip for Ghost Swirls
Use a piping bag with a large round tip to create the signature ghost swirl. Start at the outer edge of the cone top and spiral upward for height. Finish with a pointed tip at the top for ghostly shape.
Make Your Own Marshmallow Frosting
Skip store-bought and whip up a simple marshmallow frosting using egg whites, sugar, and cream of tartar. This creates a glossy, fluffy finish that holds its shape and adds a subtle toasted flavor.
Add Surprise Centers
Scoop a small hole in the center of the cupcake after baking and add a dollop of jam, melted chocolate, or mini marshmallows before frosting. It’s a fun, unexpected twist when you bite in.
Dip Cone Rims in Chocolate and Sprinkles
Before adding batter, dip the cone rims in melted white or dark chocolate, then in Halloween sprinkles. It adds color and a tasty crunch, and helps seal the edge against moisture from the batter.
Create a Frosting Color Gradient
Use two or three shades of frosting in the piping bag (white, pale gray, and black) for a gradient ghost look. It makes the decorations more striking and gives your cupcakes extra character.
Storage, Shelf Life, and Maintenance Tips
Store Upright in a Deep Container
Use a tall box or plastic container to store the cones standing up so the frosting stays intact. Add tissue or foil around them to stabilize during transport.
Best Eaten Within 2–3 Days
Cones can soften slightly from moisture in the cupcake if stored too long. For best texture, enjoy within 48–72 hours of baking.
Avoid Refrigeration if Possible
Storing in the fridge can cause condensation that makes cones soggy. Keep them in a cool, dry place instead.
Add Eyes and Sprinkles Just Before Serving
If you’re storing the cones overnight, wait to add candy eyes or sprinkles until just before serving so they don’t bleed color or shift.
Freeze Cupcakes Without Frosting
If making ahead, bake cupcakes in cones and freeze (unfrosted) in an airtight container. Thaw before frosting and decorating.
Dietary Adaptations and Substitutions
Gluten-Free Cupcake Mix Option
Swap the all-purpose flour for a gluten-free baking blend and use gluten-free ice cream cones. Check all decorations for gluten content, too.
Nut-Free Version
Replace peanut butter with sunflower seed butter or omit entirely and add 2 extra tablespoons of butter. Ensure your frosting and sprinkles are nut-free.
Dairy-Free Substitutions
Use a dairy-free butter alternative, plant-based milk, and dairy-free frosting to make the entire recipe suitable for those avoiding milk.
Lower Sugar Option
Use a natural sweetener like coconut sugar or a brown sugar substitute, and top with less frosting. Choose unsweetened or lightly sweetened sprinkles.
Egg-Free Version
Use a commercial egg replacer or make flax eggs (1 tbsp ground flax + 3 tbsp water per egg) to bind the batter without sacrificing texture.
FAQs About the Recipe
How do I keep the cones from tipping over while baking?
Place them in a muffin tin cavity or use a special cupcake cone baking rack. You can also nestle them in foil if needed.
Can I make these without peanut butter?
Yes! Simply replace the peanut butter with more softened butter or a nut-free spread like sunflower seed butter.
What frosting works best for the ghost look?
Marshmallow or vanilla buttercream works best. The frosting should be stiff enough to hold a tall swirl but soft enough to pipe easily.
Can I transport these safely?
Yes. Use a deep-sided box and stabilize cones with tissue paper, cupcake inserts, or an empty egg carton flipped upside down with holes cut for cones.
Can I make mini versions of these?
Definitely! Use mini ice cream cones and adjust the baking time to 12–15 minutes. They’re great for bite-sized party treats.
Conclusion & Final Thoughts
Ghostly Cupcake Cones are everything a Halloween dessert should be—fun, eye-catching, and delicious. They look impressive but are easy enough for beginner bakers and customizable for any party theme. From the peanut butter-rich batter to the frosted ghostly peaks, each cone delivers flavor, creativity, and just the right amount of seasonal spookiness.
They’re also practical: easy to serve, minimal cleanup, and a big hit with kids and adults alike. You can make them ahead, swap ingredients for dietary needs, and even dress them up with a few added touches.
Whether you’re baking for a classroom, a costume party, or just want to try something festive at home, Ghostly Cupcake Cones are a must. They capture the Halloween spirit in every bite—and might just become a new seasonal staple on your baking list.
So grab your cones and your frosting bag—it’s time to make your cupcakes boo-tiful!