1. Introduction to the Recipe
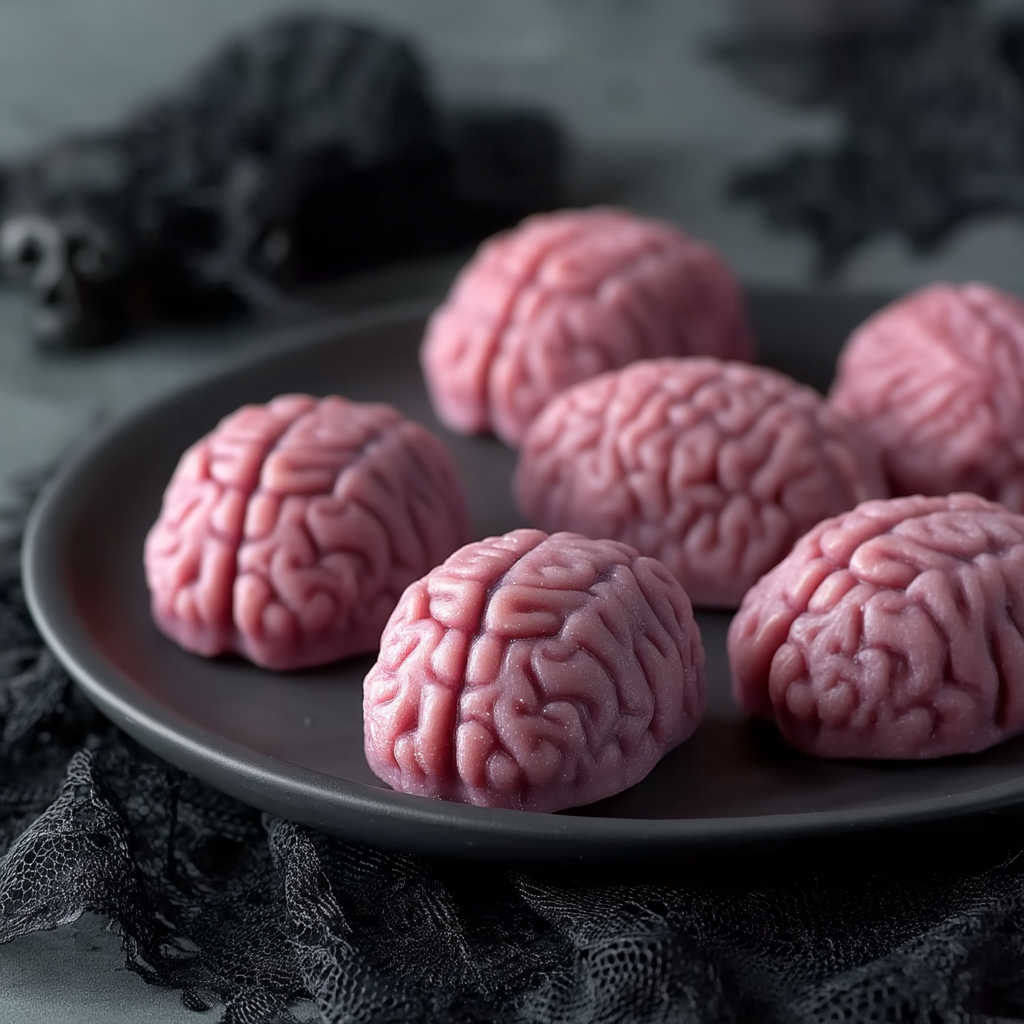
If you’re looking to take your Halloween desserts from cute to creepily delicious, Halloween Cake Pop Brains are exactly what your party table needs. These ghoulish little sweets combine moist red velvet cake crumbs, a butter‑vanilla touch, and a candy shell that cracks open to reveal a “brain” of seedless raspberry jam stained with red food coloring. Not only are they eye‑catching, but the texture contrast—soft cake, creamy coating, and gooey jam—makes every bite something special.
These treats use key ingredients such as crumbled red velvet cake, vanilla frosting, candy melting wafers or ruby chocolate in bright Halloween colors, and raspberry jam. Whether you want eerie lime green brains, spooky purple, or juicy orange, the outer shell captivates before you even bite in. If you’ve crafted cake pops before, you know controlling the moisture, coating consistency, and filling is crucial—tips that are covered in expert guides like Wilton’s candy melts blog for perfect coating control. And if you are new to shaping desserts with silicone molds and whipping up fillings, a good primer like Cake pop brains recipe gives a strong foundation.
The Halloween Cake Pop Brains recipe is fun to make, perfect for parties, and customizable—whether you want them more gooey, more sweet, less sugar, or even vegan. Optimized for visual impact and flavor, these cake pops will be the talk of your Halloween gathering. Whether served to kids, friends, or daringly by candlelight, they balance the spooky look with an irresistible flavor. In this article, you’ll find a full recipe, advanced techniques for better results, storage tips, substitutions for dietary needs, FAQs to troubleshoot common issues, and a final reflection on why this recipe is such a standout.
2. Basic Recipe: Ingredients and Instructions
Print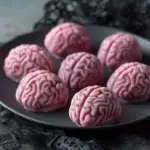
Halloween Cake Pop Brains
Description
Indulge in Halloween Cake Pop Brains—red velvet cake, candy wafer shell, raspberry jam for ghoulishly perfect party treats.
Ingredients
-
4 cups crumbled red velvet cake (homemade or from mix; see Cook’s Note)
-
3 tablespoons vanilla frosting, plus more if needed
-
8 ounces lime green, purple or orange candy melting wafers (or ruby chocolate), finely chopped
-
½ cup seedless raspberry jam
-
Red food coloring, for coloring the jam
Instructions
-
Prepare the Red Velvet Cake Crumbs
Bake or obtain a red velvet cake, allow it to cool completely. Crumble into fine crumbs—use your hands or pulse in a food processor (careful not to over‑process). -
Mix Cake + Frosting
In a large bowl, combine the red velvet cake crumbs and vanilla frosting. Stir thoroughly until the mixture holds together—if the mixture is too dry and doesn’t mold, add a little more frosting, one teaspoon at a time. -
Melt the Candy Shell
In a microwave‑safe bowl or using a double boiler, melt about two‑thirds of the finely chopped candy wafers or ruby chocolate over low heat. Stir until smooth and glossy. Then stir in the rest to ensure uniform melting and temperature. -
Coat the Molds with Candy Shell
Brush or spoon a thin layer of melted candy into silicone brain molds, covering all interior surfaces completely. Chill in refrigerator for a few minutes to set the coating layer firm. -
Color and Prepare the Jam “Brains”
In a small bowl, mix the seedless raspberry jam with a few drops of red food coloring. Add a little water if needed to make the jam fluid enough but not runny—just enough to resemble blood‑like texture. -
Fill Molds & Add Cake Mixture
Once the candy shell inside the mold is set, pour a small amount of colored jam into each cavity. Then press the cake/frosting mixture into the mold on top of the jam layer, packing firmly. Use a sharp paring knife to shave off excess cake so that the top is flush with the mold opening. -
Seal & Finish
Spoon or brush melted candy over the top of each filled mold to seal and cover the cake mixture completely. Let the entire piece set at room temperature for at least 40 minutes. If you’re in a rush, refrigerate for a few minutes—but beware that chilling too much may make the candy shell crack when you unmold. -
Unmold & Serve
Gently pop the brains out of the molds. Inspect for any cracks; if needed, smooth edges with a little melted candy. Arrange on a serving tray and enjoy.
Notes
Cake: Use a 9×13‑inch red velvet cake if making from scratch; let it cool fully or even refrigerate before crumbling—it yields better texture.
Molding: Silicone brain molds work best for easy release.
Jam “blood”: For a more vivid red effect, use gel food coloring instead of liquid because it won’t thin the jam.
Keywords: Halloween Cake Pop Brains
3. Advanced Techniques
Perfect Candy Melt and Shell Finish
To get a crack‑free, glossy candy shell, temperature and consistency are essential. Melt the wafers at 50% power if using a microwave, or over a double boiler with water barely simmering—not boiling. Use dry utensils and bowls, as even a little water can cause seizing. Stir in reserved chopped candy after melting to help temper it slightly. Add vegetable shortening if the candy is too thick. Tap the molds after coating to release air bubbles for a smooth outer shell.
Jam Consistency & “Blood” Effect
The jam should be thick yet spreadable. Gel food coloring is ideal since it gives a vivid red color without thinning the jam. If the jam is too stiff, mix in a tiny bit of warm water. If it’s too runny, reduce slightly on the stove. Let it cool before using. You can also pipe the jam into small veins across the mold before adding the cake mix for a scarier effect—just ensure it doesn’t reach the edges or it may cause leaks.
Cake‑to‑Frosting Ratio Adjustment
The mixture should bind like playdough—moist but not sticky. Use the back of a spoon to test stickiness: if it clings too much, it’s too wet. Add more cake crumbs to balance. If too dry, add a teaspoon of frosting at a time. Over-mixed cake will turn gummy. For a more flavorful base, use a flavored frosting like chocolate or strawberry to complement or contrast the red velvet.
Mold Handling & Unmolding Tips
Always chill the candy-coated mold before adding fillings. A thin but complete layer prevents leakage and gives definition to the shape. After sealing with the top layer of candy, let sit until fully hardened. Silicone molds should be bent gently from the sides to ease the pop out—don’t pull the candy itself. If a pop gets stuck, pop the mold into the freezer for 3 minutes and try again gently.
Flavor Variations & Color Play
Use flavored candy melts (like mint or orange) for an extra twist. Want a chocolatey variation? Add mini chocolate chips to the cake mix. You can also swirl food-safe shimmer or edible glitter into the shell for a magical, ghostly effect. Layer different candy melt colors to create psychedelic or two-tone brains. Use ruby chocolate for a fruit-forward pop or pair with dark chocolate for a dramatic effect.
See more advanced recipes at cookingwhite.com
4. Storage, Shelf Life, and Maintenance Tips
Room Temperature Display & Serving
Once made, cake pop brains can sit out for 4–6 hours if kept in a cool room. Display them on a tray under a glass dome or loosely covered with foil. Avoid placing them near heat sources or windows—sunlight can fade candy colors and soften the coating.
Refrigeration for Short-Term Storage
To store for 1–2 days, place cake pops in an airtight container lined with parchment paper. Stack only if you separate layers with a barrier. Before serving, bring them to room temperature slowly to prevent condensation forming on the shells.
Freezing for Longer Shelf Life
For longer storage (up to 1 month), freeze the pops in a freezer-safe container. Wrap each pop in plastic wrap, then place them in a sealed box. Thaw overnight in the fridge, then bring to room temperature. Avoid microwaving or fast-thawing—they will crack or weep.
Preventing Humidity & Wax Bloom
Humidity causes “sweating” or bloom on candy shells. Always store in a low-humidity environment. Use silica packs in containers for humidity control if necessary. Don’t store near dishwashers, kettles, or fridges with frequent door openings.
Handling Leftovers Without Losing Quality
Leftover pops should be rewrapped and stored in a cool place. If the candy shell becomes soft or tacky, a quick 3-minute chill in the fridge can help restore firmness
. Don’t leave uncovered at room temperature more than 24 hours.
5. Dietary Adaptations and Substitutions
Vegan Version
Use vegan red velvet cake made with flaxseed egg, plant-based milk, and vegan butter. Use a dairy-free frosting and vegan candy melts or ruby chocolate. Ensure your jam is gelatin-free. Vegan versions tend to be slightly softer—chill them well before unmolding.
Gluten-Free Version
Substitute the cake with a gluten-free red velvet mix or homemade recipe using 1:1 GF flour. Use certified GF frosting and candy melts. Gluten-free cakes are crumblier—add an extra tablespoon of frosting if needed to improve texture.
Low-Sugar / Reduced Sugar Version
Use sugar-free or low-sugar cake mix and frosting. Choose candy melts designed for low-carb diets or coat with sugar-free dark chocolate. Use no-sugar-added jam. Flavor intensity might vary—add a pinch of salt or spice to enhance depth.
Nut-Free / Allergen-Free Version
Most ingredients are nut-free, but always double-check packaging for cross-contamination warnings. Use allergy-safe brands for frosting and candy melts. Avoid almond extract—stick with vanilla. Clean all tools and molds thoroughly if cooking for someone with allergies.
Dairy-Free / Lactose-Free Substitutions
Use plant-based butter and dairy-free frosting. Many standard candy melts include dairy—choose certified dairy-free versions or dark chocolate. Raspberry jam is usually dairy-free but double-check labels.
6. FAQs About the Recipe
Why is my candy shell cracking?
This usually happens due to rapid temperature changes or too thick a candy coating. Let candy set at room temp before unmolding. Don’t over-chill. Use a thin, even layer and flex molds gently. Avoid overfilling, which adds pressure to the shell.
Why is jam leaking from the shell?
Either the shell wasn’t fully coated, or the jam was too thin. Use thick, spreadable jam and ensure the initial shell layer covers the entire mold interior. Avoid overfilling. Let candy seal fully set before unmolding.
Why won’t my cake mix hold together?
You may have too little frosting or your cake crumbs are too dry. Add frosting 1 teaspoon at a time until it binds. Don’t overmix—this makes it greasy. Cake should feel like firm dough when pressed.
Why are candy melts seizing or becoming lumpy?
Water contamination or overheating causes seizing. Always use dry tools and avoid boiling water in double boiler. Stir continuously and melt slowly. Add shortening—not water—if it thickens too much.
Can I make these ahead of time?
Yes! Make 1–2 days ahead and store in an airtight container in the fridge. Bring to room temperature before serving. For longer storage, freeze them following best practices outlined above.
7. Conclusion & Final Thoughts
Halloween Cake Pop Brains are the perfect combination of creepy and sweet, making them an ideal addition to your spooky spread. They’re fun to make, especially if you enjoy edible art, and the results are both theatrical and delicious. From the moist red velvet cake interior to the candy shell and jam surprise, each component comes together in a treat that’s equal parts dessert and decoration.
They’re endlessly adaptable, suitable for dietary needs, and great to make ahead. Whether you’re hosting a Halloween bash or want a memorable treat to hand out or share, these little brain bites will leave a lasting impression—and probably some sticky fingers too.
So gather your ingredients, grab your molds, and channel your inner mad scientist. These Halloween Cake Pop Brains might just become your new October tradition.