Description
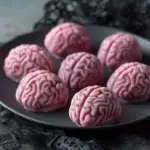
Indulge in Halloween Cake Pop Brains—red velvet cake, candy wafer shell, raspberry jam for ghoulishly perfect party treats.
Ingredients
-
4 cups crumbled red velvet cake (homemade or from mix; see Cook’s Note)
-
3 tablespoons vanilla frosting, plus more if needed
-
8 ounces lime green, purple or orange candy melting wafers (or ruby chocolate), finely chopped
-
½ cup seedless raspberry jam
-
Red food coloring, for coloring the jam
Instructions
-
Prepare the Red Velvet Cake Crumbs
Bake or obtain a red velvet cake, allow it to cool completely. Crumble into fine crumbs—use your hands or pulse in a food processor (careful not to over‑process). -
Mix Cake + Frosting
In a large bowl, combine the red velvet cake crumbs and vanilla frosting. Stir thoroughly until the mixture holds together—if the mixture is too dry and doesn’t mold, add a little more frosting, one teaspoon at a time. -
Melt the Candy Shell
In a microwave‑safe bowl or using a double boiler, melt about two‑thirds of the finely chopped candy wafers or ruby chocolate over low heat. Stir until smooth and glossy. Then stir in the rest to ensure uniform melting and temperature. -
Coat the Molds with Candy Shell
Brush or spoon a thin layer of melted candy into silicone brain molds, covering all interior surfaces completely. Chill in refrigerator for a few minutes to set the coating layer firm. -
Color and Prepare the Jam “Brains”
In a small bowl, mix the seedless raspberry jam with a few drops of red food coloring. Add a little water if needed to make the jam fluid enough but not runny—just enough to resemble blood‑like texture. -
Fill Molds & Add Cake Mixture
Once the candy shell inside the mold is set, pour a small amount of colored jam into each cavity. Then press the cake/frosting mixture into the mold on top of the jam layer, packing firmly. Use a sharp paring knife to shave off excess cake so that the top is flush with the mold opening. -
Seal & Finish
Spoon or brush melted candy over the top of each filled mold to seal and cover the cake mixture completely. Let the entire piece set at room temperature for at least 40 minutes. If you’re in a rush, refrigerate for a few minutes—but beware that chilling too much may make the candy shell crack when you unmold. -
Unmold & Serve
Gently pop the brains out of the molds. Inspect for any cracks; if needed, smooth edges with a little melted candy. Arrange on a serving tray and enjoy.
Notes
Cake: Use a 9×13‑inch red velvet cake if making from scratch; let it cool fully or even refrigerate before crumbling—it yields better texture.
Molding: Silicone brain molds work best for easy release.
Jam “blood”: For a more vivid red effect, use gel food coloring instead of liquid because it won’t thin the jam.
Keywords: Halloween Cake Pop Brains