1. Introduction to the Recipe
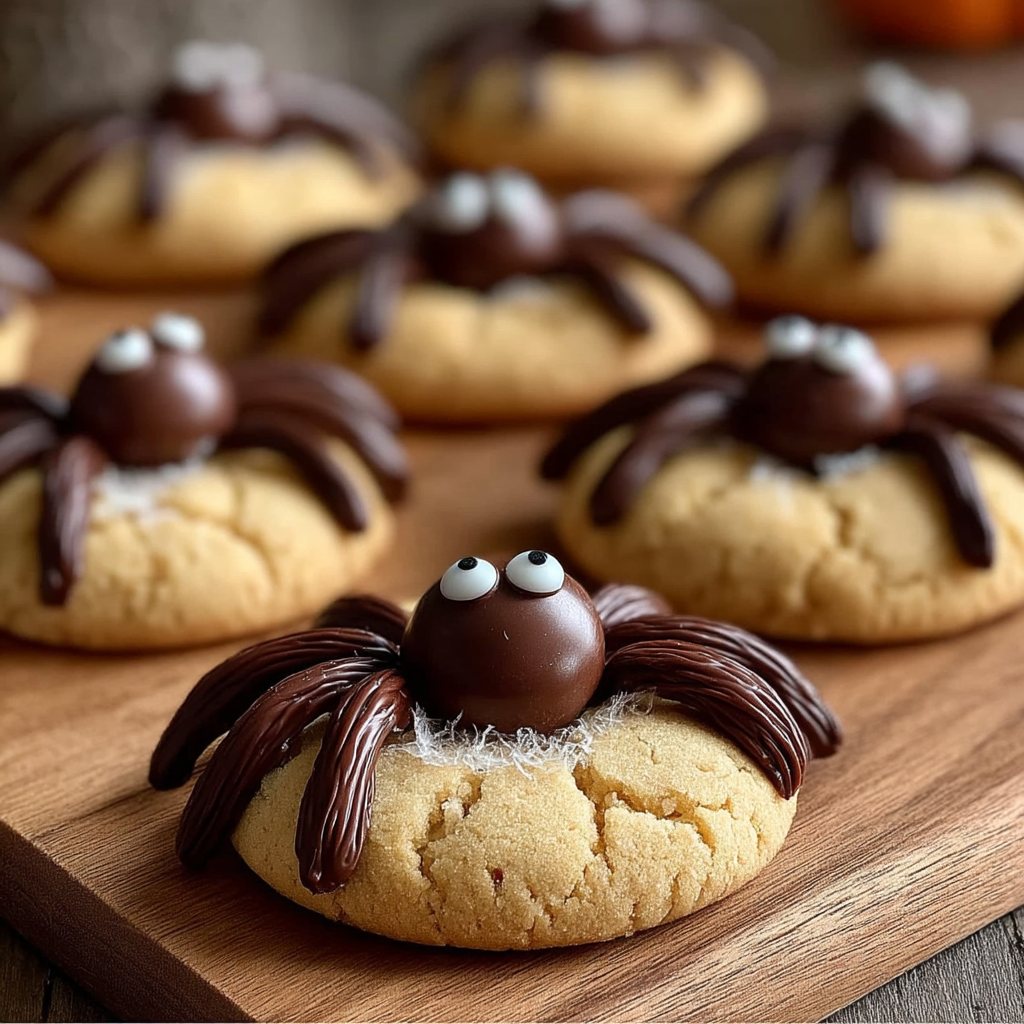
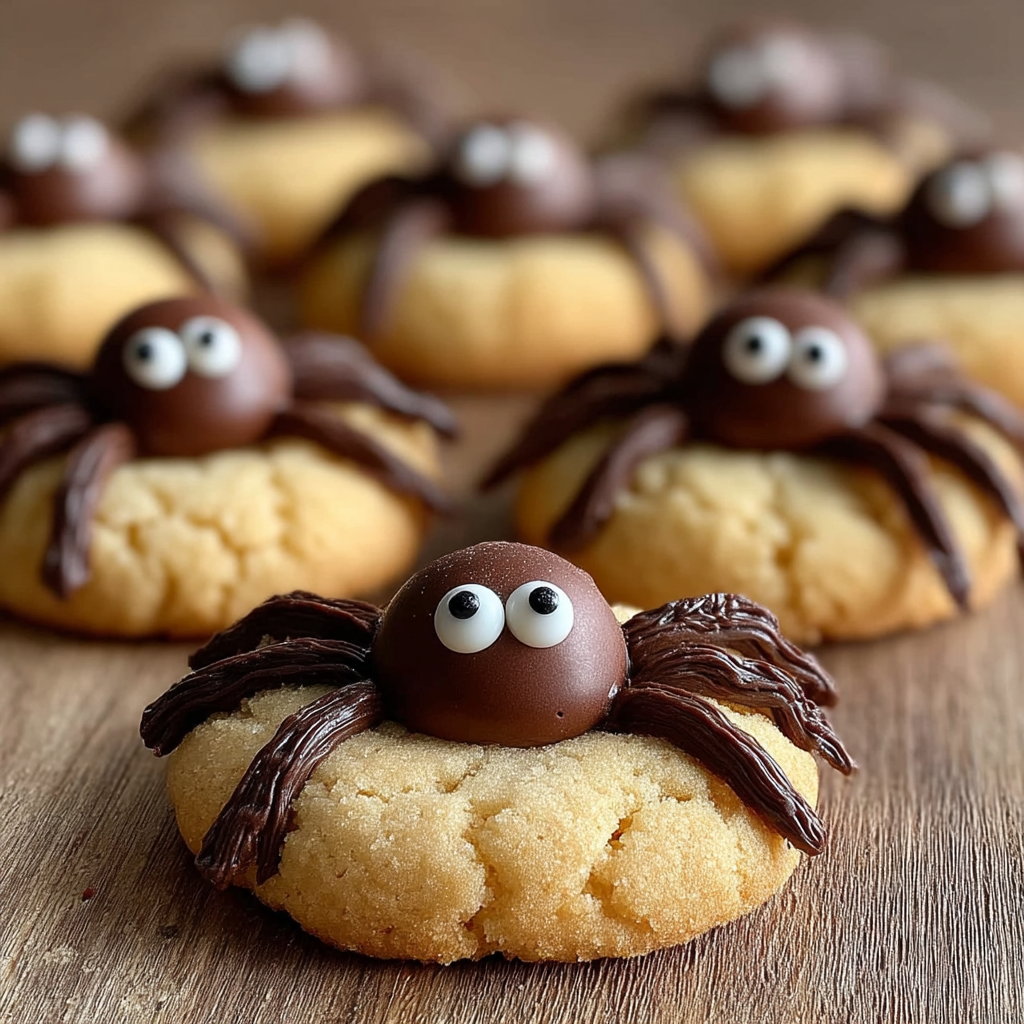
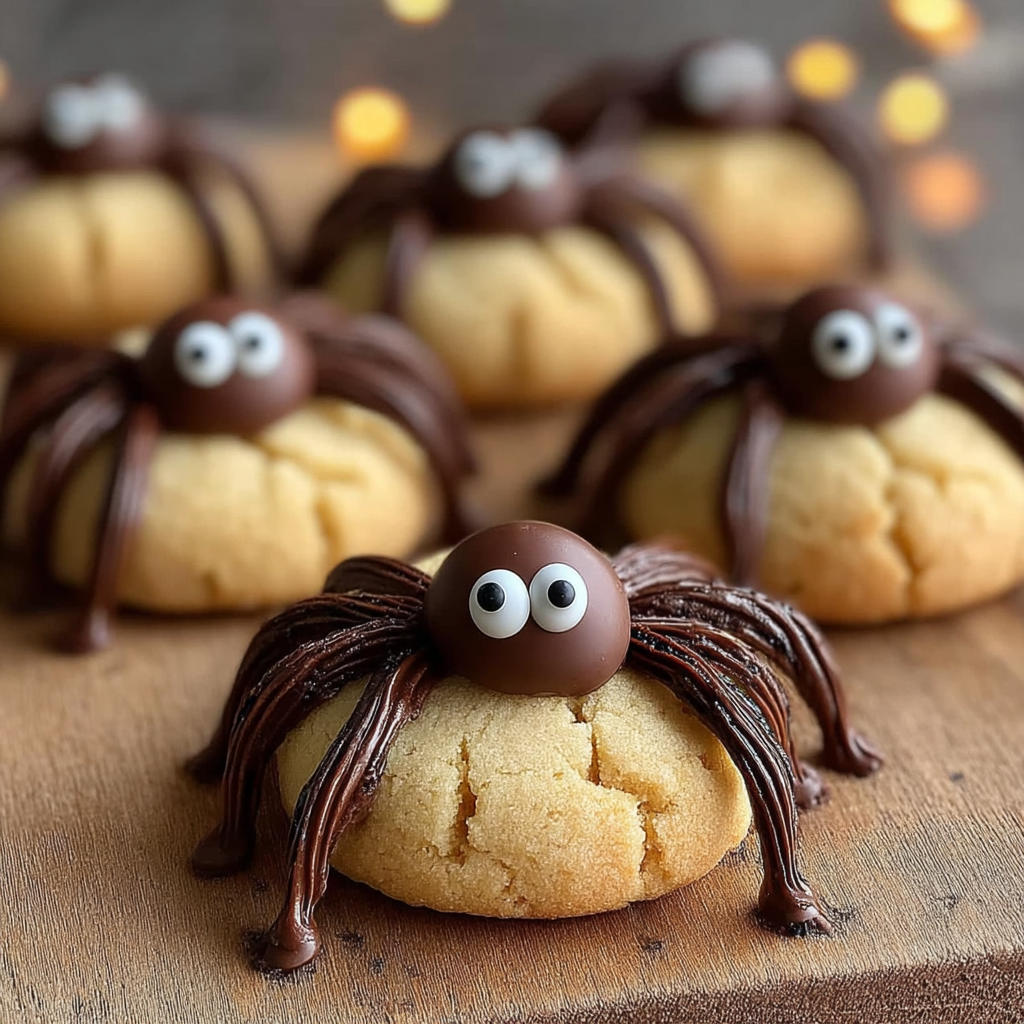
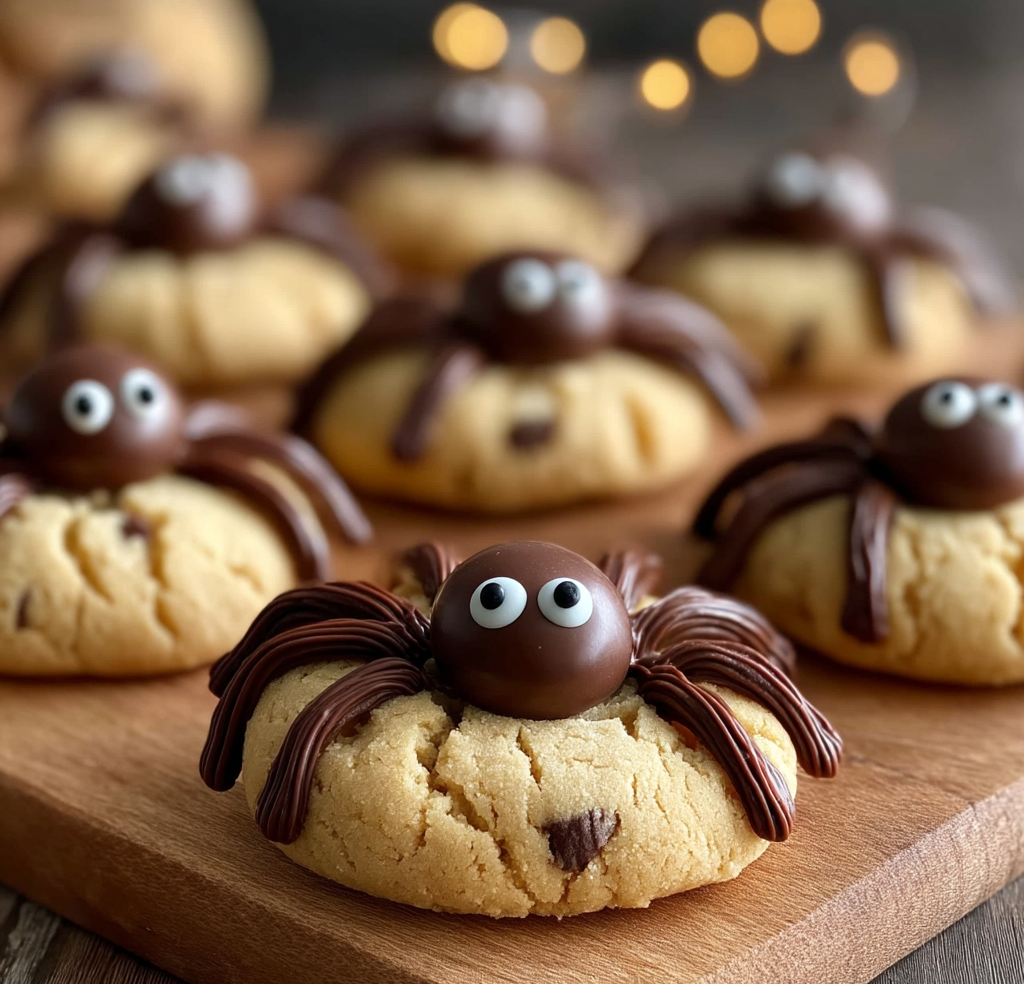
Nothing says Halloween quite like creepy-crawly treats, and Halloween Spider Cookies are a perfect addition to your spooky dessert lineup. These cookies combine a rich buttery dough with the deep caramel flavor of brown sugar, balanced by the crisp texture achieved with cornflour. Each cookie can be decorated to resemble spooky spiders, making them a fun and interactive treat for kids and adults alike.
This recipe uses simple pantry staples and basic baking techniques, making it accessible for bakers of all skill levels. If you’re looking to add some creativity, you can decorate your spider cookies with chocolate legs, candy eyes, or even icing webs. For inspiration on cookie decorating, check out these decorating tips. And if you’re curious about the role of cornflour in baking, this cornstarch baking guide is helpful.
Whether you’re hosting a Halloween party, preparing treats for school, or just craving a festive sweet snack, these Halloween Spider Cookies combine flavor, texture, and spooky fun all in one bite. They’re easy to bake ahead and customize for different tastes or dietary needs.
2. Basic Recipe: Ingredients and Instructions
Print
Halloween Spider Cookies Recipe
Description
Make spooky Halloween Spider Cookies with buttery dough, brown sugar, and festive fun. Perfect for Halloween treats!
Ingredients
-
150g butter, softened
-
½ cup brown sugar (100g)
-
½ cup white sugar (110g)
-
1 egg
-
1 tsp vanilla essence
-
2 cups plain flour (300g)
-
¼ tsp salt
-
1 tsp baking soda
-
2 Tbsp cornflour
Instructions
-
Preheat Oven
Preheat your oven to 350°F (175°C). Line baking sheets with parchment paper. -
Cream Butter and Sugars
In a large bowl, cream together softened butter, brown sugar, and white sugar until light and fluffy. -
Add Egg and Vanilla
Beat in the egg and vanilla essence until fully combined. -
Mix Dry Ingredients
In a separate bowl, whisk together plain flour, salt, baking soda, and cornflour. -
Combine Wet and Dry
Gradually add dry ingredients to the wet mixture, mixing until a soft dough forms. -
Shape Cookies
Roll dough into small balls and place on the prepared baking sheets. Flatten slightly with your palm. -
Bake
Bake for 10-12 minutes or until edges are golden but centers remain soft. -
Cool
Allow cookies to cool on the baking sheet for 5 minutes before transferring to a wire rack. -
Decorate
Once cool, decorate as spiders with chocolate legs, icing, or candy eyes.
Notes
For chewier cookies, reduce baking time slightly.
Dough can be refrigerated for up to 24 hours before baking.
Cornflour helps create a tender texture; don’t skip it.
Keywords: Halloween Spider Cookies
3. Advanced Techniques
Using Cornflour for Tender Cookies
Cornflour (cornstarch) softens the gluten in flour, resulting in a more tender, delicate cookie. Make sure to measure precisely to maintain texture balance.
Decorating Spider Legs with Chocolate
Melt semi-sweet chocolate and pipe thin lines for spider legs. Use a toothpick for fine control and attach candy eyes while chocolate is wet.
Enhancing Flavor with Spices
Add a pinch of cinnamon or nutmeg to the dough for a warm, autumnal twist that complements the brown sugar nicely.
Chilling Dough for Better Shape
Refrigerate cookie dough for 30 minutes before baking to help cookies maintain shape and enhance flavors.
Using Royal Icing for Detailed Decoration
Mix royal icing to pipe intricate spider webs or body details. Let dry completely before stacking or storing.
See more advanced recipes at cookingwhite.com
4. Storage, Shelf Life, and Maintenance Tips
Storing Cookies
Store cookies in an airtight container at room temperature for up to 5 days to keep them soft and flavorful.
Freezing Dough
Cookie dough can be frozen for up to 3 months. Thaw overnight in the fridge before baking.
Keeping Decorations Intact
Avoid stacking decorated cookies until icing or chocolate sets fully to prevent smudging.
Recrisping Cookies
If cookies soften, reheat in a 300°F (150°C) oven for 5 minutes to refresh crispness.
Humidity Control
Store cookies with a slice of bread to absorb moisture and keep cookies from becoming too soft.
5. Dietary Adaptations and Substitutions
Gluten-Free Version
Substitute plain flour with a gluten-free flour blend, ensuring it contains xanthan gum for structure.
Vegan Adaptation
Use vegan butter and replace the egg with a flax egg (1 tbsp ground flax + 3 tbsp water).
Low Sugar Option
Reduce sugar amounts by ¼ and substitute brown sugar with coconut sugar for a lower glycemic index.
Nut-Free Safe
This recipe is naturally nut-free but check all ingredients for cross-contamination if needed.
Dairy-Free Alternative
Use dairy-free margarine or coconut oil in place of butter for a dairy-free treat.
6. FAQs About the Recipe
Can I use regular cocoa powder for a darker cookie?
Yes, adding unsweetened cocoa powder can make a chocolate spider cookie variation.
How do I prevent cookies from spreading too much?
Chill dough before baking and avoid overmixing to control spread.
Can I make these cookies gluten-free?
Absolutely, using gluten-free flour blends works well.
What’s the best way to store decorated cookies?
Store in airtight containers layered with parchment paper after decorations fully dry.
Can I freeze baked cookies?
Yes, freeze cooled cookies in airtight containers for up to 3 months.
7. Conclusion & Final Thoughts
Halloween Spider Cookies are a fun, festive, and delicious way to celebrate the spooky season. Their buttery, soft texture combined with sweet brown sugar and tender crumb makes them irresistible. Plus, the ability to decorate them as creepy crawlers adds an interactive and creative element that’s perfect for kids and adults alike.
With simple ingredients and straightforward steps, this recipe is a great choice for bakers of any skill level. Whether you want to whip up a batch for a party, classroom treat, or just to satisfy your Halloween sweet tooth, these cookies bring spooky fun to your kitchen.
The best part is their versatility—easy to customize with flavors, decorations, and dietary adjustments to suit your needs. So grab your mixing bowl, get creative with decorating, and enjoy these spooky, scrumptious Halloween Spider Cookies that are sure to be a highlight of your Halloween celebrations!