Introduction
Halloween is the perfect time to unleash your creativity in the kitchen, and what better way than with a batch of hauntingly delicious Vampire Fudge? This simple yet decadent recipe combines creamy white chocolate, velvety sweetened condensed milk, and a touch of vanilla extract to create a spooky treat that’s as festive as it is tasty. Whether you’re hosting a Halloween party, preparing treats for trick-or-treaters, or simply craving something sweet, this recipe will cast a spell on anyone who takes a bite.
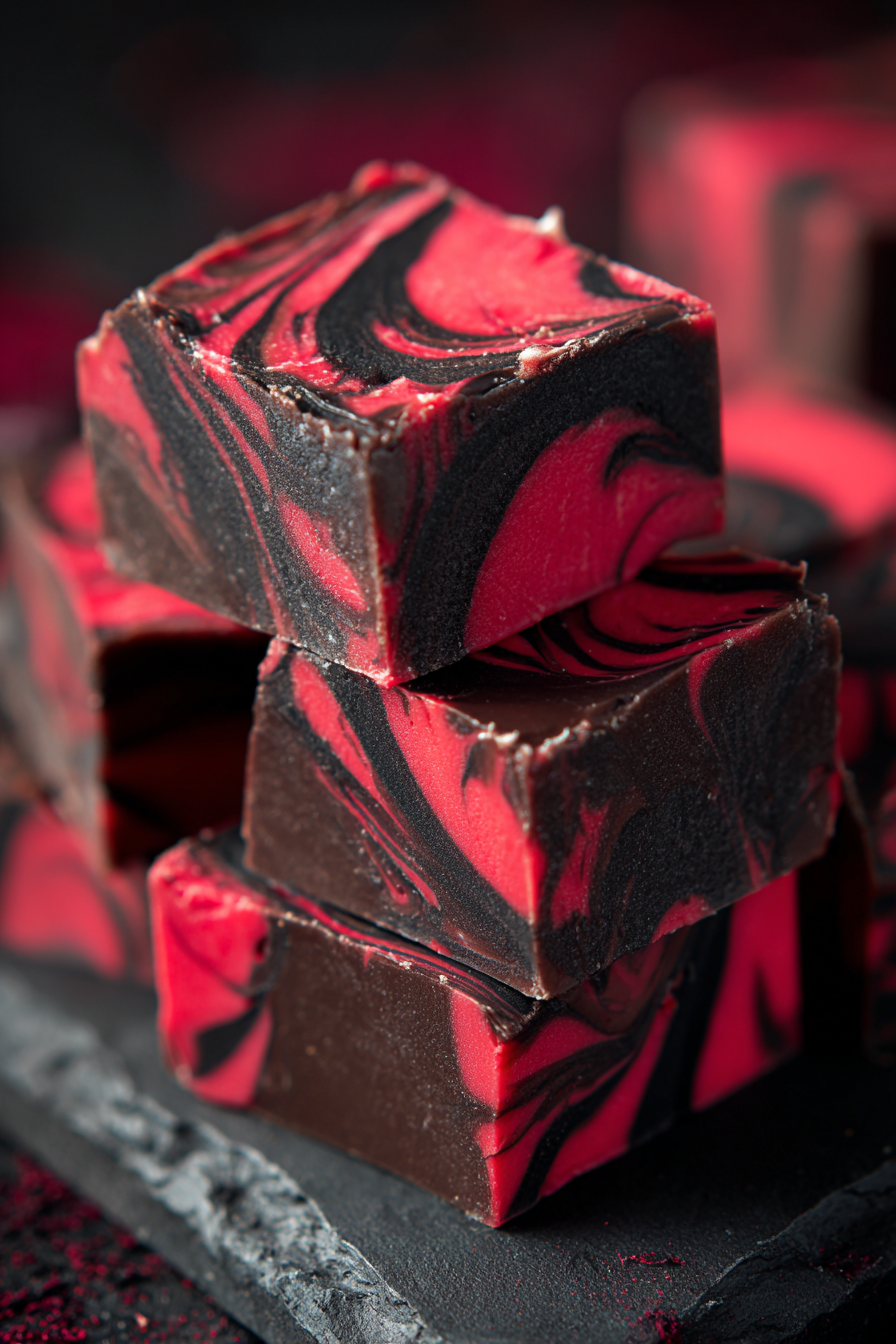
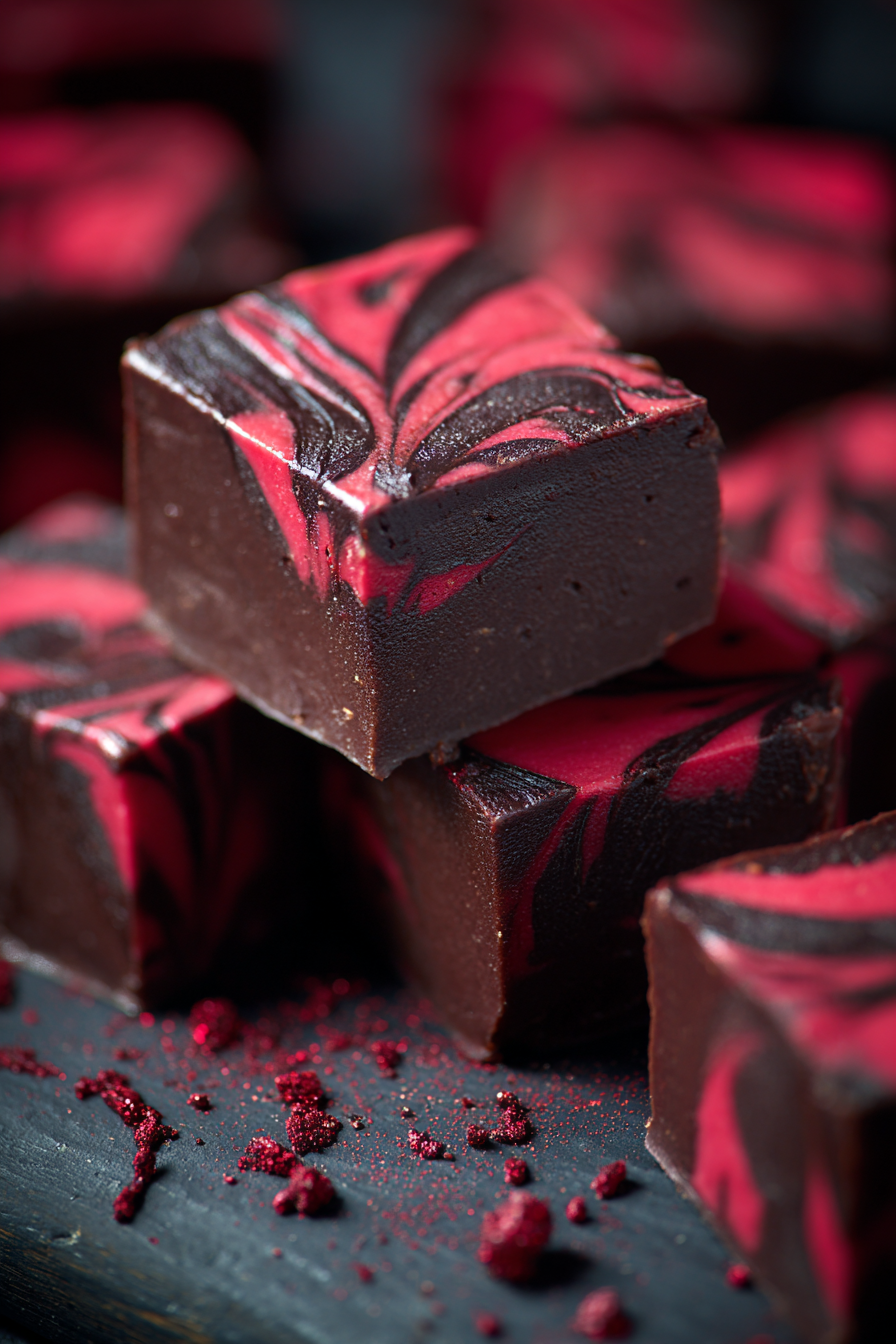
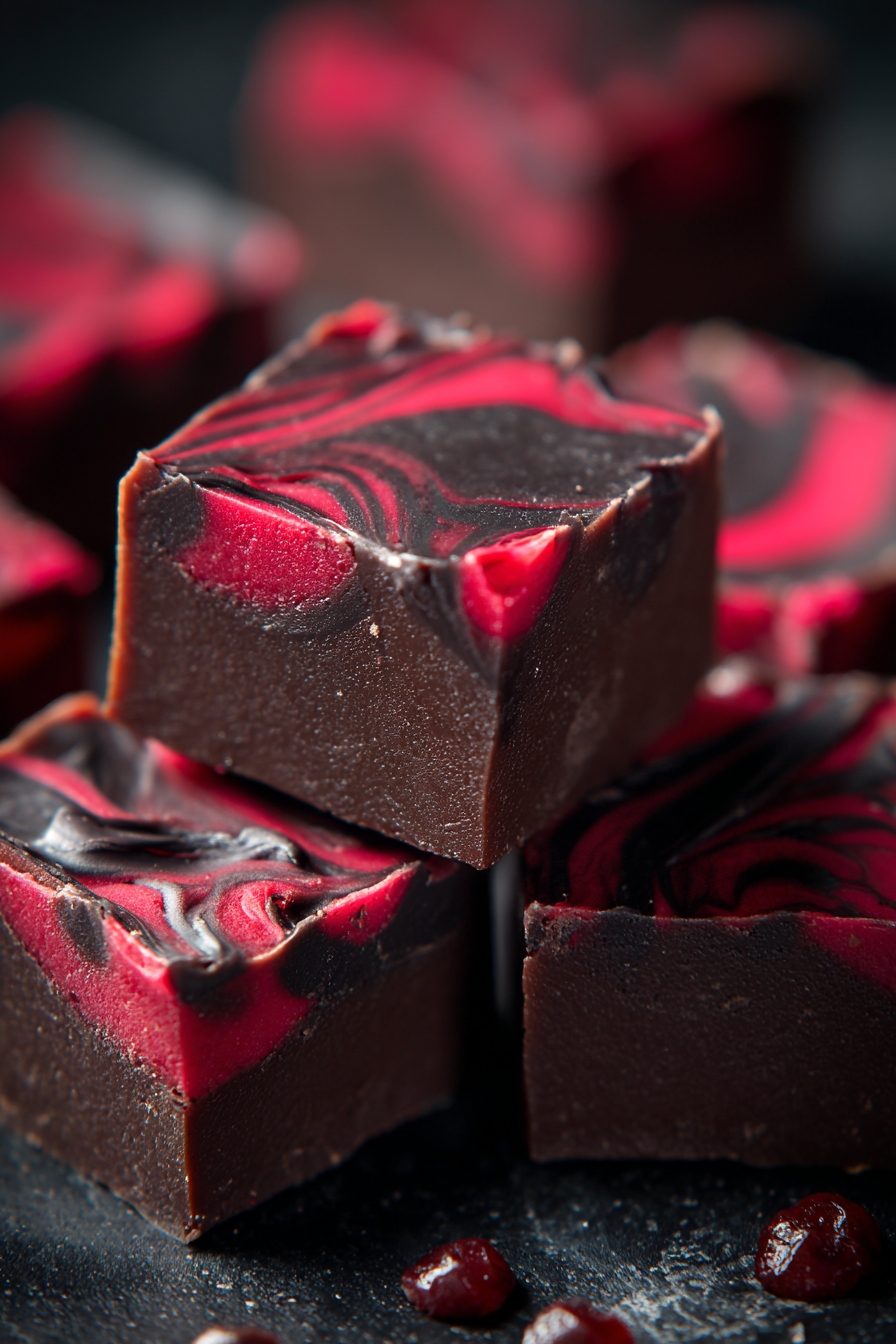
What sets this fudge apart is not just its creamy texture and irresistible sweetness, but its spooky flair. With a little imagination, you can decorate or swirl in “bloody” red coloring for a vampire-inspired effect. The result? A dessert that looks like it came straight from Dracula’s castle but tastes like a dream. If you’re looking for a quick, no-fuss recipe that delivers maximum impact, you’re going to love this Halloween Vampire Fudge.
My recipe story
I first stumbled upon the idea of Vampire Fudge during a Halloween potluck. I wanted something festive but didn’t have the time to bake elaborate cakes or cookies. Fudge seemed like the perfect solution—rich, indulgent, and easy to prepare. I remembered how quickly fudge can be made with just a few pantry staples, so I decided to put a spooky spin on it. By adding a swirl of red “blood” coloring and cutting it into bite-sized pieces, I had created a Halloween masterpiece with minimal effort. My friends and family couldn’t stop talking about it, and it has since become a yearly tradition in my kitchen.
Now, every October, I whip up a batch of this fudge to share with neighbors, coworkers, and trick-or-treaters. It’s always a hit because it strikes the perfect balance between fun presentation and classic sweet flavor. This recipe also gave me the confidence to experiment with other Halloween treats, but Vampire Fudge remains the crowd favorite. It’s proof that sometimes the simplest recipes create the most magical memories.
💡 Why You’ll Love This Recipe
- Quick and easy—ready in under 15 minutes of prep.
- Uses only three simple ingredients you probably already have.
- Perfect for Halloween parties, bake sales, or spooky movie nights.
- Customizable with colors, flavors, or spooky decorations.
- Kid-friendly and fun to make with the whole family.
Ingredient breakdown
The beauty of this Vampire Fudge recipe is its simplicity. With just three main ingredients, you can create a creamy and indulgent dessert that feels festive and luxurious. Let’s take a closer look at what makes this recipe so special.
White Chocolate Chips: The star of this recipe, white chocolate chips provide the smooth, creamy base for the fudge. They melt beautifully and blend seamlessly with the condensed milk to create a rich and velvety texture. Using high-quality white chocolate chips will ensure the best flavor and consistency.
Sweetened Condensed Milk: This ingredient is the secret weapon in many fudge recipes. It adds sweetness, creaminess, and stability to the fudge. Unlike evaporated milk, sweetened condensed milk has sugar already added, which eliminates the need for extra sugar in the recipe. It’s what helps the fudge set perfectly.
Vanilla Extract: A small amount of vanilla extract enhances the overall flavor, adding warmth and depth. Even though it’s a minor ingredient, it makes a noticeable difference by rounding out the sweetness of the chocolate and milk. Opt for pure vanilla extract for the best results.
Equipment you’ll need
- Medium saucepan
- Heatproof spatula or wooden spoon
- 8×8-inch square baking pan
- Parchment paper
- Sharp knife for slicing
- Optional: food coloring and toothpick for swirling
Step-by-step directions
Step 1: Prepare your pan
Line an 8×8-inch square baking pan with parchment paper, leaving a slight overhang on the sides for easy removal later. This step ensures the fudge won’t stick and makes cleanup a breeze. If you want a more festive presentation, lightly spray the parchment with nonstick cooking spray before pouring in the mixture.
Step 2: Melt the chocolate and milk
In a medium saucepan over low heat, combine the white chocolate chips and sweetened condensed milk. Stir constantly with a heatproof spatula to prevent burning or sticking. Continue stirring until the chocolate is completely melted and the mixture is smooth and glossy.
Step 3: Add vanilla extract
Once the chocolate has melted, remove the saucepan from the heat and stir in the vanilla extract. This small addition enhances the flavor and balances the sweetness of the fudge. Make sure it’s fully incorporated before moving on to the next step.
Step 4: Add spooky flair
If desired, add a few drops of red food coloring to the mixture or drizzle it on top once the fudge is in the pan. Use a toothpick or knife to swirl the color around, creating a “bloody” vampire-inspired design. This is where you can let your creativity shine.
Step 5: Chill and set
Pour the fudge mixture into the prepared baking pan, spreading it evenly with the spatula. Place the pan in the refrigerator for at least 2 hours, or until the fudge is firm to the touch. For best results, let it set overnight.
Step 6: Slice and serve
Once set, lift the fudge out of the pan using the parchment paper overhang. Transfer it to a cutting board and slice it into bite-sized squares with a sharp knife. Wipe the knife between cuts for clean edges. Serve immediately or store for later enjoyment.
Variations & substitutions
While this recipe is delicious as written, there are countless ways to put your own spin on it. Try adding crushed Oreos for a cookies-and-cream twist, or stir in candy eyeballs for a fun Halloween effect. You could also drizzle melted dark chocolate over the top for added contrast and flavor. If you don’t have white chocolate chips, white baking bars chopped into pieces work just as well. For a unique flavor, consider adding peppermint or almond extract instead of vanilla. The possibilities are endless, making this recipe a versatile Halloween staple.
💡 Expert Tips & Troubleshooting
- Use low heat when melting the chocolate to prevent scorching or grainy texture.
- If the mixture seems too thick, add 1–2 teaspoons of milk to loosen it up.
- For neat slices, dip your knife in hot water, dry it, then cut the fudge.
- Don’t rush the chilling process—allow the fudge to fully set for the best texture.
- Store fudge in an airtight container to keep it from drying out or absorbing fridge odors.
Storage, freezing & make-ahead
This fudge is excellent for making ahead of time. Store it in an airtight container in the refrigerator for up to 2 weeks. To freeze, wrap the fudge tightly in parchment paper and then in plastic wrap before placing it in a freezer-safe bag. It will keep well for up to 3 months. When ready to enjoy, thaw it in the refrigerator overnight. This make-ahead convenience makes Vampire Fudge ideal for party prep or gift-giving during the Halloween season.
Serving ideas & pairings
Vampire Fudge is a versatile treat that pairs well with other Halloween snacks. Serve it alongside caramel apples, popcorn balls, or candy corn for a festive dessert table. It’s also great with a cup of hot cocoa or spiced apple cider. For a grown-up twist, pair it with a glass of red wine, which complements the creamy sweetness perfectly. If you’re hosting a party, consider presenting the fudge in themed cupcake liners or adding edible glitter for extra sparkle.
FAQ
Can I use dark or milk chocolate instead of white chocolate?
Yes! The recipe works with any type of chocolate, though the flavor and appearance will be different. Dark chocolate creates a richer fudge, while milk chocolate gives a creamier, sweeter taste.
Do I need a candy thermometer?
No, this is a foolproof fudge recipe that doesn’t require precise temperature control. As long as you melt the ingredients slowly over low heat, it will turn out perfectly.
How can I make this recipe dairy-free?
Use dairy-free white chocolate chips and sweetened condensed coconut milk. The texture and flavor will still be delicious, with a slight coconut undertone.
Can I add mix-ins like nuts or candy?
Absolutely. Walnuts, almonds, sprinkles, or Halloween-themed candies make great additions. Just fold them in before pouring the mixture into the pan.
How do I prevent my fudge from being too soft?
Be sure to let the fudge chill completely before slicing. If it’s still too soft, it may need more time in the fridge or freezer to firm up properly.
Final thoughts
Halloween Vampire Fudge is a spooky, sweet, and satisfying treat that’s as fun to make as it is to eat. With only three ingredients and minimal prep, this recipe is approachable for beginner cooks yet impressive enough for seasoned bakers looking for a festive addition to their holiday spread. Whether you’re making it for a Halloween party, gifting it to friends, or simply indulging in a seasonal sweet, this fudge is sure to become a favorite tradition in your home. So grab your ingredients, get creative with your spooky designs, and enjoy every bite of this fang-tastic fudge.
Print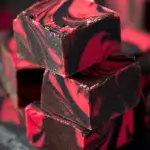
Halloween Vampire Fudge
- Total Time: 2 hours 15 minutes (includes chilling)
- Yield: 16 squares 1x
- Diet: Vegetarian
Description
Creamy white chocolate fudge with a spooky vampire twist, swirled with red for a festive Halloween treat. Perfect for parties and gifting.
Ingredients
- 3 cups white chocolate chips
- 1 can (14 oz) sweetened condensed milk
- 1 teaspoon vanilla extract
- Red food coloring (optional, for vampire “blood” effect)
Instructions
- Line an 8×8-inch pan with parchment paper, leaving an overhang for easy removal.
- In a saucepan over low heat, melt the white chocolate chips and sweetened condensed milk, stirring constantly until smooth.
- Remove from heat and stir in vanilla extract until well combined.
- Pour the mixture into the prepared pan, spreading evenly. Add drops of red food coloring and swirl with a toothpick for a bloody effect.
- Chill in the refrigerator for at least 2 hours, or until firm.
- Lift fudge from the pan, slice into squares, and serve.
Notes
Store in an airtight container in the refrigerator for up to 2 weeks. Freeze for longer storage, up to 3 months. Great for Halloween dessert tables or gift bags.
- Prep Time: 10 minutes
- Cook Time: 5 minutes
- Category: Dessert
- Method: Stovetop
- Cuisine: American