Introduction
Few desserts capture the essence of comfort food quite like a homemade apple crumble. With tender spiced apples tucked beneath a buttery, golden topping, it’s the kind of dessert that makes a house smell heavenly as it bakes. This classic dish has been loved for generations, celebrated for its simplicity, versatility, and ability to warm both the heart and the stomach. Whether served with a scoop of vanilla ice cream or a dollop of whipped cream, apple crumble is a timeless treat that brings joy to gatherings, holidays, or even just a quiet night at home.
My recipe story
My love for apple crumble began in my grandmother’s kitchen, where she would use freshly picked apples from her garden to create the most heavenly dessert. I remember the crisp autumn afternoons when we would peel apples together, her teaching me how to balance sweetness and tartness with just the right blend of spices. Over the years, I’ve adapted her recipe to make it a bit simpler while still preserving all the nostalgic flavors. Today, this recipe has become a staple in my own kitchen—a dessert that I turn to when I want something quick yet comforting. It’s a recipe that feels both familiar and adaptable, perfect for weeknights or holidays alike.
💡 Why You’ll Love This Recipe
- Simple ingredients you likely already have in your pantry.
- Perfect balance of sweet, tart, and spiced flavors.
- Versatile enough to adapt with different fruits or nuts.
- Quick to prepare—no fancy equipment required.
- Comforting dessert that’s ideal for family gatherings or cozy nights.
Ingredient breakdown
One of the reasons apple crumble is so beloved is because it uses simple, everyday ingredients. At its core, the recipe requires apples, sugar, flour, butter, and a few warm spices. The magic happens when these modest ingredients come together, creating a dessert that’s both rustic and refined.
For the filling, apples are the star. Using a mix of tart and sweet apples, such as Granny Smith and Honeycrisp, ensures balance and depth of flavor. A touch of lemon juice brightens the apples, while cinnamon, nutmeg, and sometimes cloves add warmth. Sugar enhances the natural sweetness, while a bit of flour helps thicken the juices as the crumble bakes.
The topping is all about texture. Flour, oats, and brown sugar create a crumbly mixture, while cold butter worked into the dry ingredients ensures a golden, crunchy finish. Some variations include nuts like pecans or almonds, which add an extra layer of flavor and crunch. Together, the topping and filling strike the perfect balance between tender and crisp, sweet and spiced.
Equipment you’ll need
- Large mixing bowls
- Apple peeler and corer (optional but helpful)
- Sharp knife and cutting board
- 9×13-inch baking dish (or similar size)
- Pastry cutter or fork for blending butter into crumble topping
- Measuring cups and spoons
Step-by-step directions
Step 1: Prepare the apples. Begin by peeling, coring, and slicing the apples into even wedges, about 1/4-inch thick. This ensures they cook evenly and soften without turning mushy. Place the apple slices in a large mixing bowl, then toss them with lemon juice, granulated sugar, cinnamon, nutmeg, and a touch of flour. The lemon juice helps prevent browning, while the flour absorbs excess juices during baking. Set the prepared apples aside while you make the topping.
Step 2: Make the crumble topping. In another bowl, combine flour, oats, brown sugar, and a pinch of salt. Add cold, cubed butter and use a pastry cutter, fork, or your fingertips to work the butter into the mixture until it resembles coarse crumbs. The key here is to keep the butter cold, as this helps create that signature crisp topping. You want small pea-sized pieces of butter distributed throughout the mixture.
Step 3: Assemble the crumble. Grease your baking dish lightly with butter or nonstick spray. Spread the spiced apple mixture evenly into the dish, making sure the fruit is distributed in a single layer. Sprinkle the crumble topping generously over the apples, covering them completely. Press gently to help the topping adhere without compacting it too much, as this ensures a balance of crunch and softness.
Step 4: Bake to perfection. Preheat your oven to 350°F (175°C). Place the assembled crumble on the center rack and bake for 40–45 minutes, or until the topping is golden brown and the apples are bubbling beneath. If the topping browns too quickly, you can loosely cover it with aluminum foil halfway through baking. The aroma of spiced apples and buttery crumble will fill your kitchen as it bakes.
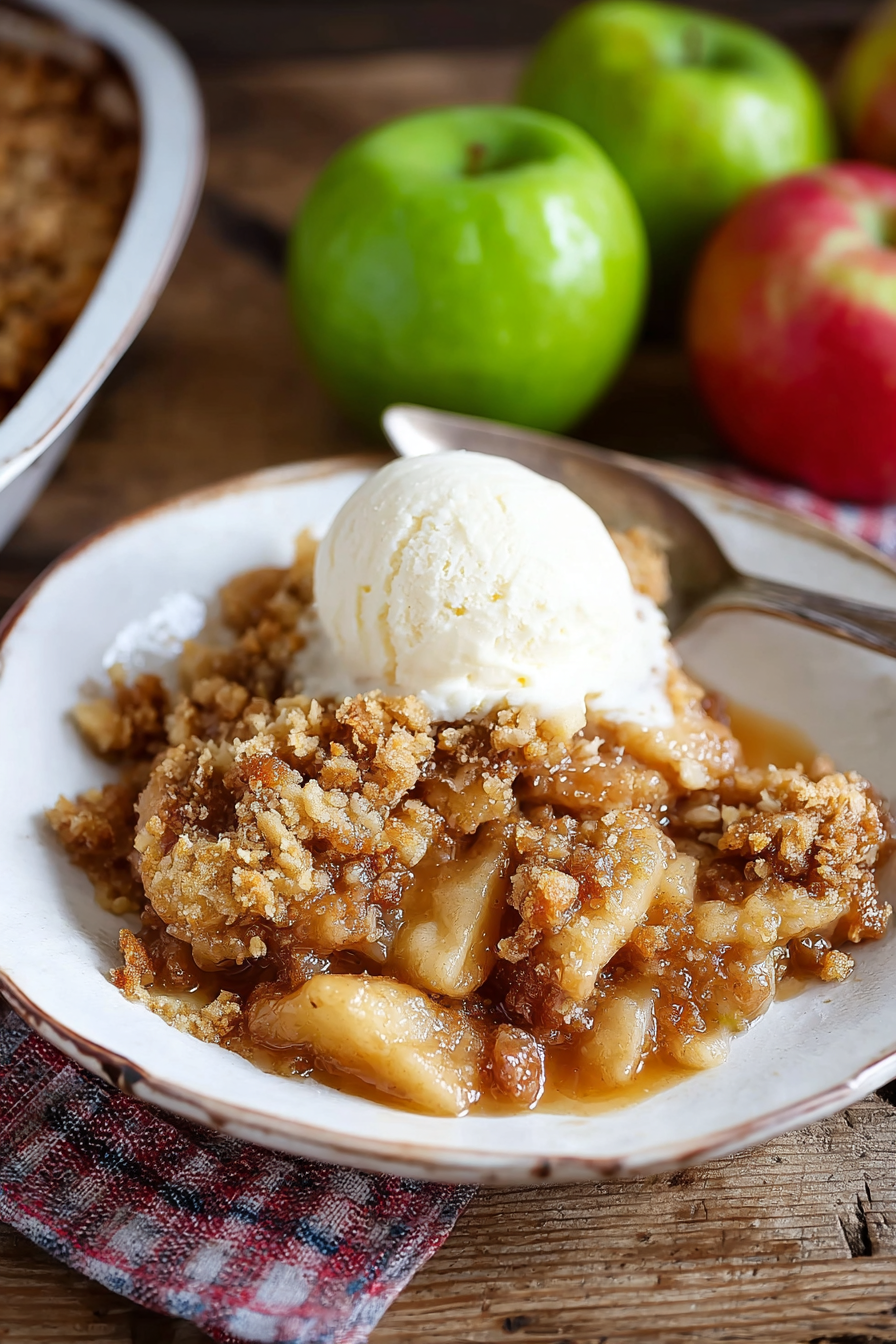
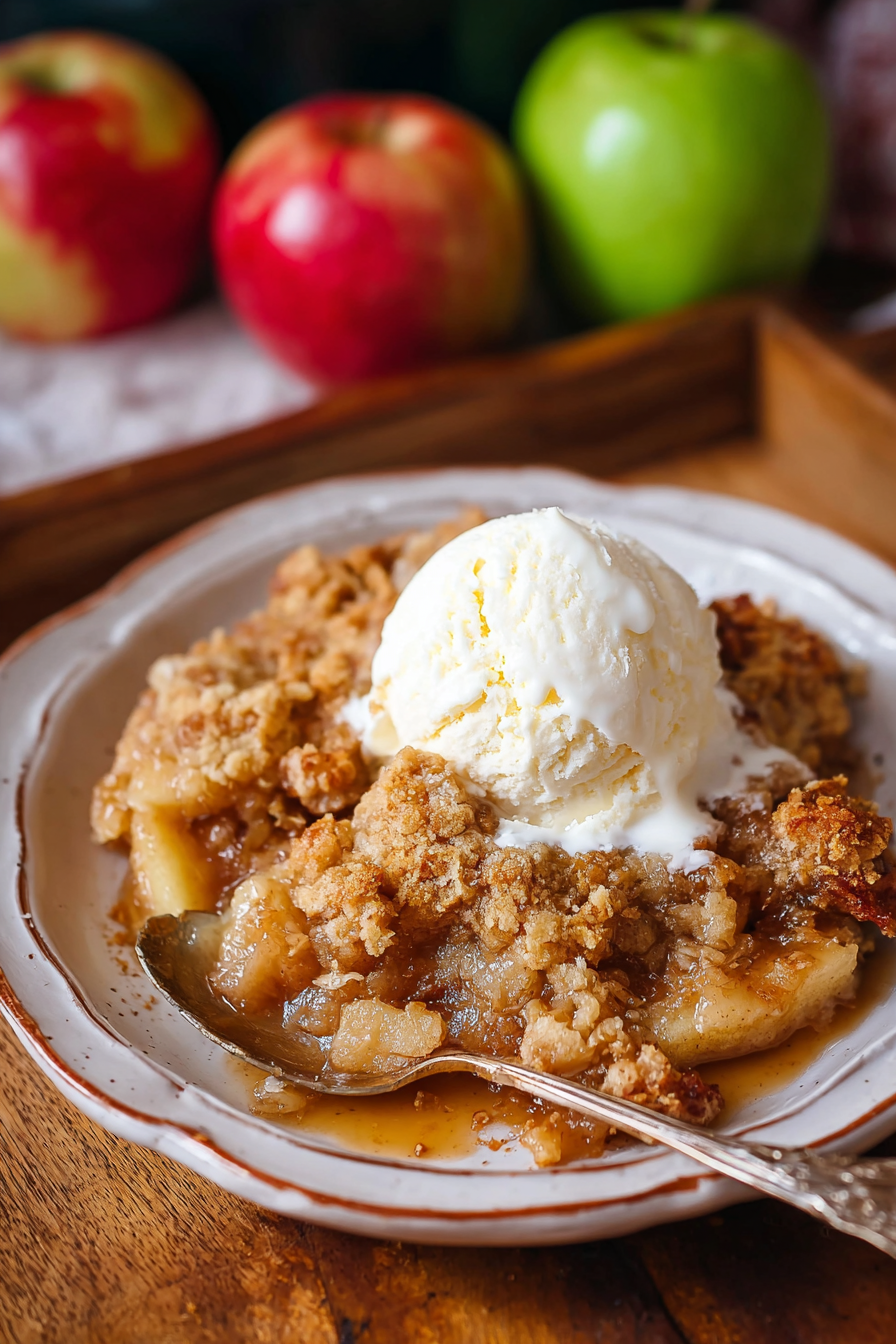
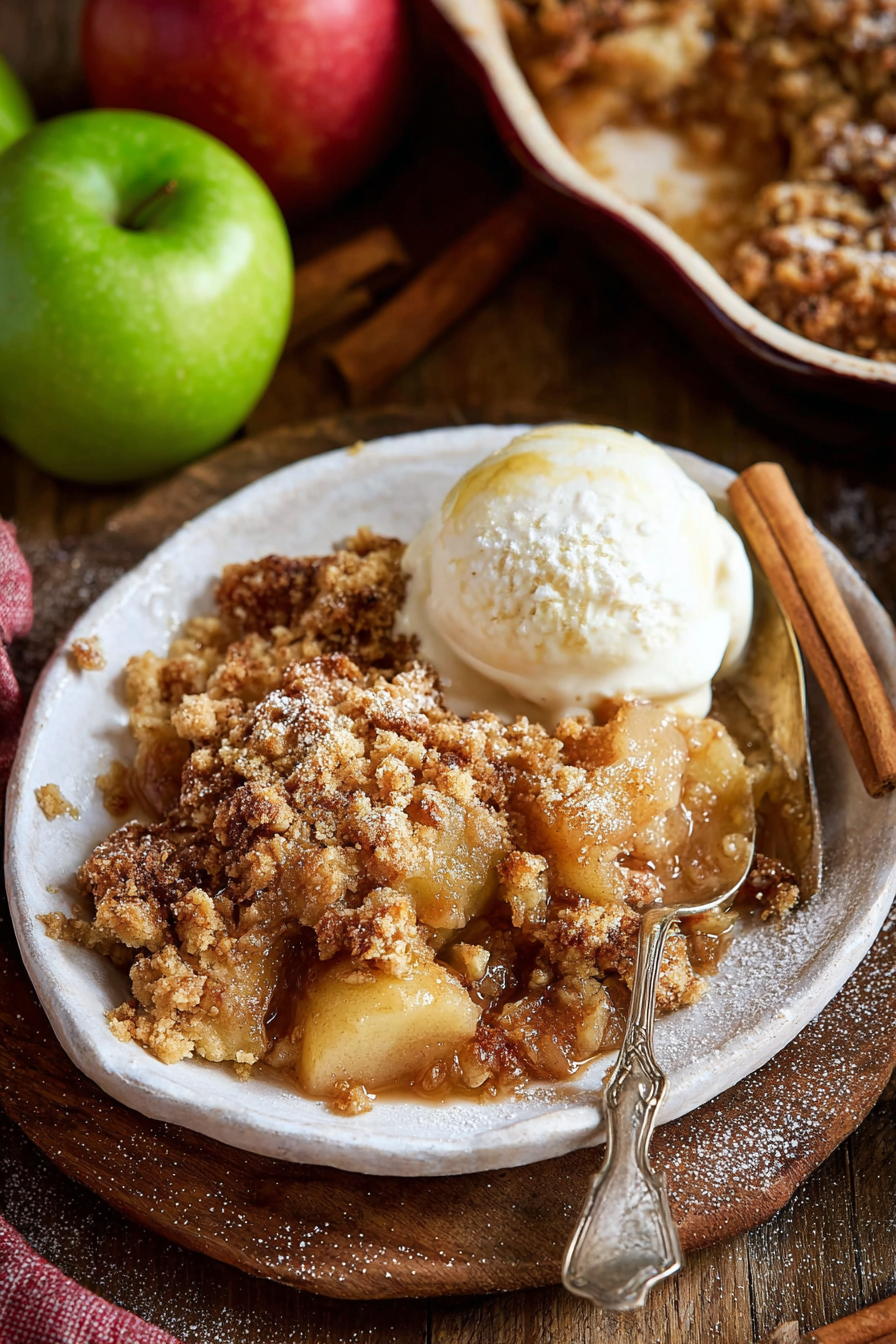
Step 5: Cool and serve. Once baked, remove the crumble from the oven and allow it to cool for at least 15 minutes before serving. This resting period allows the juices to thicken and makes it easier to scoop. Serve warm with a scoop of vanilla ice cream, whipped cream, or even a drizzle of caramel sauce for an extra indulgent touch.
Variations & substitutions
This recipe is endlessly adaptable, making it a go-to dessert no matter the season. Try substituting part of the apples with pears or peaches for a fruity twist. Add a handful of berries, such as blueberries or raspberries, for bursts of color and tartness. If you prefer a nutty topping, mix in chopped pecans, almonds, or walnuts for extra crunch. Gluten-free flour and oats can easily be swapped for regular ones to make this recipe suitable for gluten-sensitive eaters. You can also experiment with spices—cardamom or ginger adds an exciting depth of flavor beyond the traditional cinnamon and nutmeg.
💡 Expert Tips & Troubleshooting
- Use a mix of tart and sweet apples for balanced flavor and texture.
- Keep the butter cold when making the topping for the best crumble.
- If your topping looks too dry, add a tablespoon of melted butter.
- Cover with foil if the topping browns too quickly before apples are tender.
- Let the crumble rest before serving to allow juices to thicken.
Storage, freezing & make-ahead
Homemade apple crumble stores beautifully, making it an excellent make-ahead dessert. Once cooled, cover the baking dish tightly with plastic wrap or foil and refrigerate for up to 4 days. To reheat, simply warm individual portions in the microwave or reheat the entire dish in the oven at 300°F (150°C) until warmed through. For longer storage, apple crumble can be frozen either before or after baking. To freeze before baking, assemble the dish, cover tightly, and freeze for up to 3 months. When ready, bake straight from frozen, adding 10–15 extra minutes to the baking time. If freezing after baking, allow it to cool completely before wrapping and freezing. Thaw overnight in the fridge before reheating.
Serving ideas & pairings
Apple crumble is delicious on its own, but it truly shines with a few accompaniments. A scoop of vanilla ice cream is the most classic pairing, the cold creaminess perfectly complementing the warm, spiced apples. Freshly whipped cream with a hint of vanilla adds lightness, while custard sauce offers a rich, silky touch. For a gourmet twist, drizzle salted caramel sauce or sprinkle toasted nuts on top. If serving as part of a larger meal, pair it with a hot beverage like spiced chai tea, mulled cider, or strong coffee for a cozy and satisfying finish.
FAQ
Can I use any type of apple? Yes, but a mix of tart and sweet apples like Granny Smith and Honeycrisp works best for balance.
Do I need to peel the apples? Peeling is recommended for a smoother texture, but leaving the skins on adds extra fiber and a rustic feel.
Can I make this crumble ahead of time? Absolutely—assemble and refrigerate overnight, then bake when ready. You can also freeze for up to 3 months.
Why is my topping soggy? This usually happens if too much liquid is released by the apples. Be sure to add flour to the filling and allow the crumble to rest after baking.
What’s the difference between apple crisp and apple crumble? They are very similar, but crisps traditionally include oats and sometimes nuts in the topping, while crumbles may be more cake-like. This recipe leans toward a crisp-style crumble.
Final thoughts
Homemade apple crumble is a timeless dessert that requires minimal effort but delivers maximum comfort. With its balance of spiced apples and golden, buttery topping, it’s a dish that feels both nostalgic and endlessly customizable. Whether you’re making it for a weeknight treat, a holiday feast, or to share with loved ones, this apple crumble recipe is sure to become a staple in your kitchen just as it has in mine. So grab some apples, preheat your oven, and prepare to enjoy one of the most satisfying desserts you’ll ever bake.
Print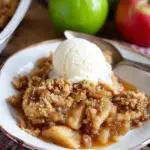
homemade Apple Crumble
- Total Time: 1 hour 5 minutes
- Yield: 8 servings
- Diet: Vegetarian
Description
A warm and cozy dessert with tender spiced apples topped with a buttery, golden crumble. Perfect with ice cream or whipped cream.
Ingredients
- 6 medium apples, peeled, cored, and sliced
- 2 tablespoons lemon juice
- 1/2 cup granulated sugar
- 1 teaspoon ground cinnamon
- 1/4 teaspoon ground nutmeg
- 2 tablespoons all-purpose flour
- 1 cup all-purpose flour (for topping)
- 1 cup rolled oats
- 1/2 cup brown sugar, packed
- 1/2 teaspoon salt
- 1/2 cup cold unsalted butter, cubed
Instructions
- Preheat oven to 350°F (175°C) and lightly grease a 9×13-inch baking dish.
- In a large bowl, toss apple slices with lemon juice, sugar, cinnamon, nutmeg, and flour until coated. Spread evenly in the baking dish.
- In another bowl, combine flour, oats, brown sugar, and salt. Cut in cold butter with a fork or pastry cutter until mixture resembles coarse crumbs.
- Sprinkle crumble topping evenly over the apples.
- Bake for 40–45 minutes, or until the topping is golden and apples are bubbling. Let rest 10–15 minutes before serving.
Notes
Best served warm with vanilla ice cream, whipped cream, or custard. Store leftovers covered in the refrigerator for up to 4 days. Reheat in the oven or microwave before serving.
- Prep Time: 20 minutes
- Cook Time: 45 minutes
- Category: Dessert
- Method: Baking
- Cuisine: American