1. Introduction to the Recipe
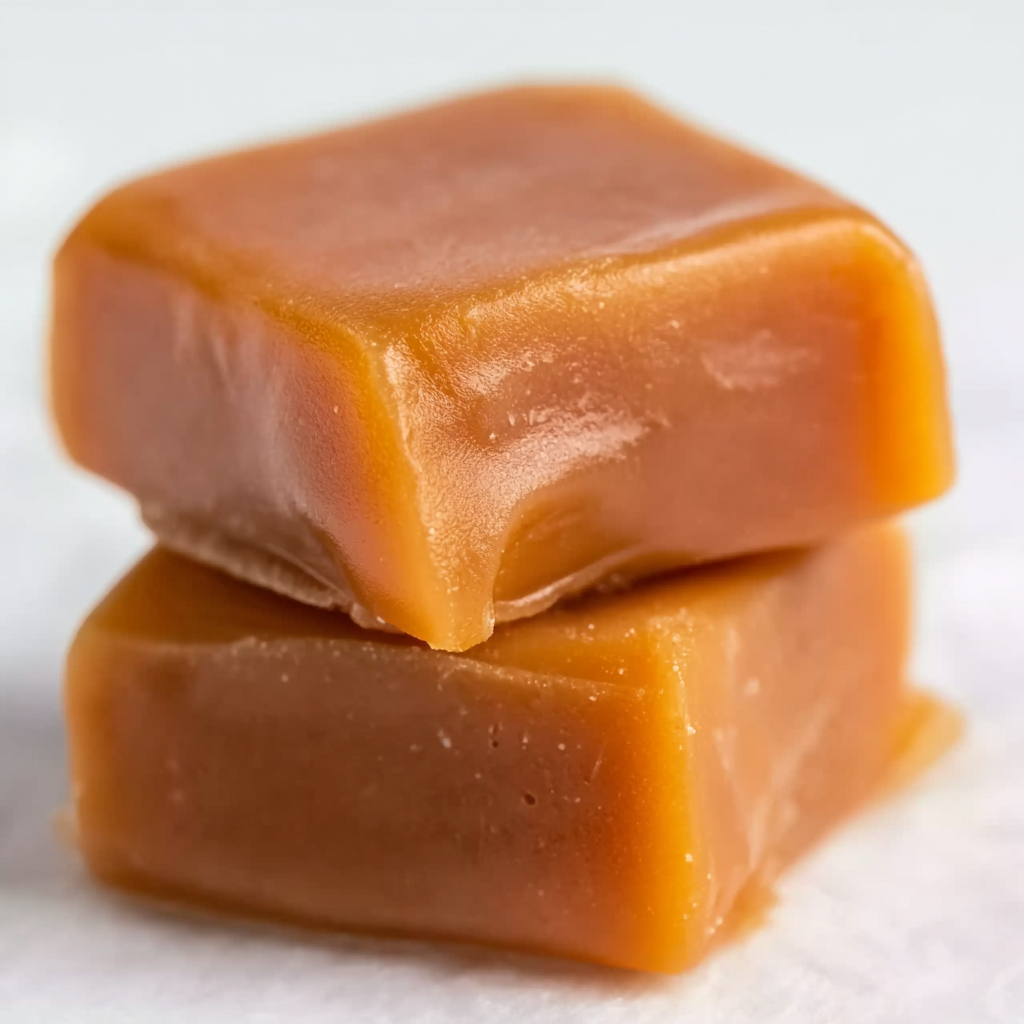
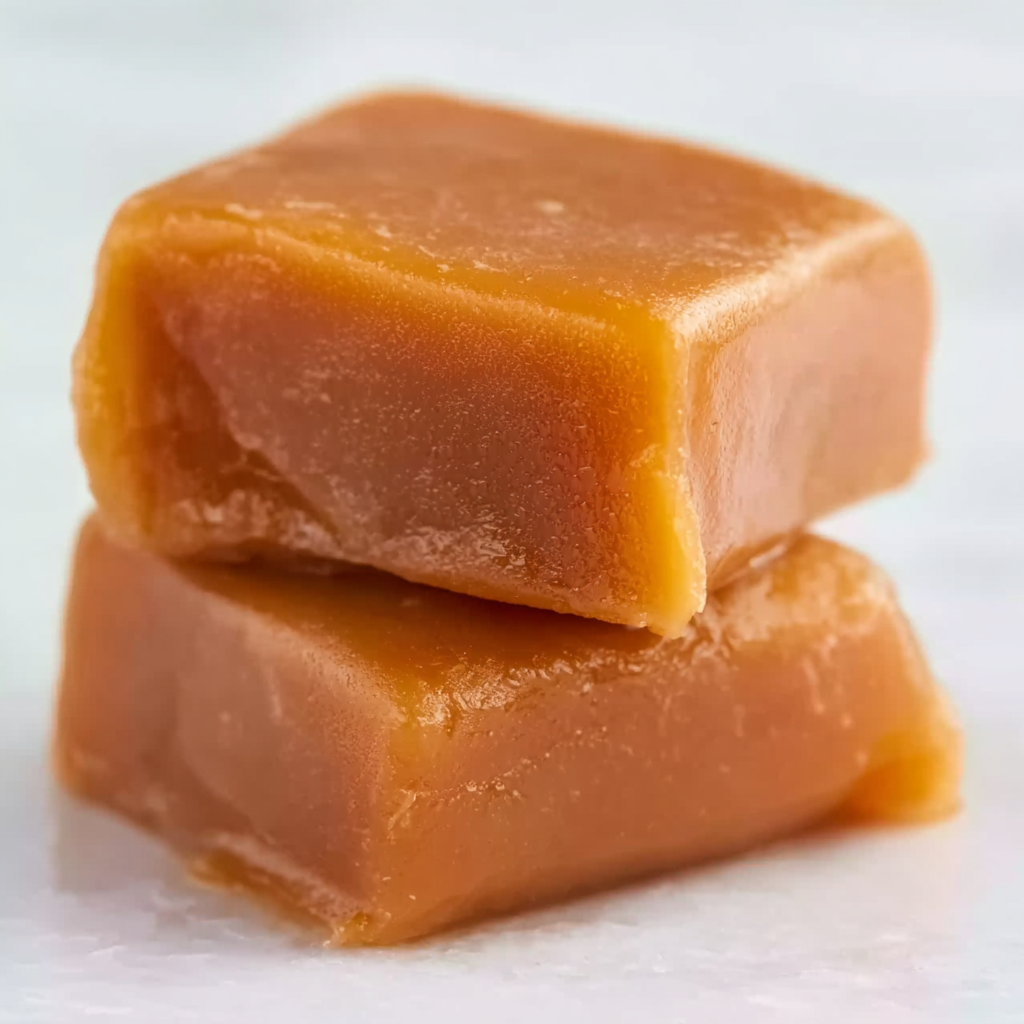
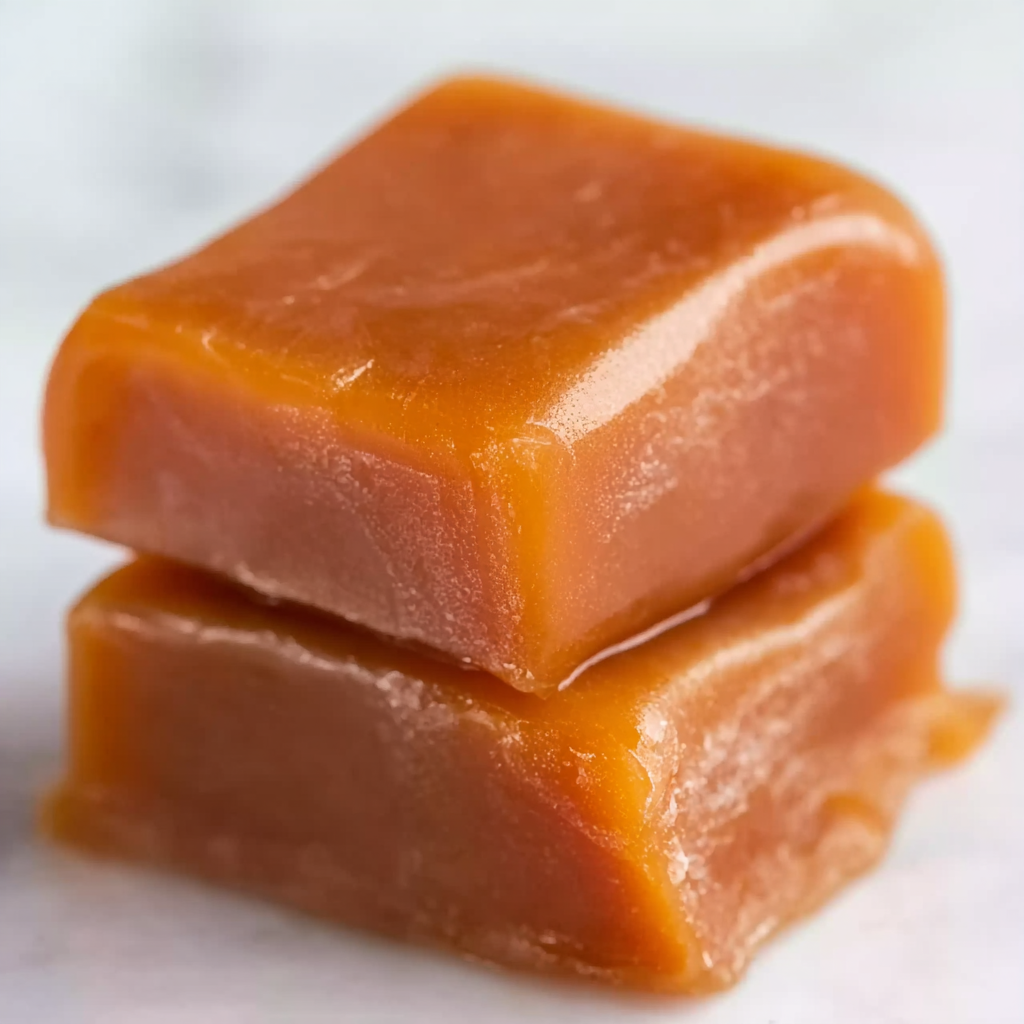
There’s nothing quite like the irresistible taste of soft, buttery Homemade Caramels Recipe prepared right in your own kitchen. These chewy, melt-in-your-mouth treats deliver a nostalgic experience reminiscent of old-fashioned candy shops, holiday gatherings, and the simple joy of homemade sweets. Made with a handful of classic ingredients — including granulated sugar, brown sugar, butter, and evaporated milk — this recipe becomes a delightful blend of rich caramel flavors balanced by a gentle touch of sea salt. Whether you’re crafting caramels as gifts, sharing them at celebrations, or simply satisfying a craving, this recipe brings professional results with surprisingly little effort.
Caramel-making can feel intimidating to many home cooks, but with the right technique and guidance, it’s a deeply rewarding process. Learning how sugar transforms into a golden, glossy syrup is almost magical, and the aroma that fills the kitchen is enough to make anyone fall in love with candy-making. If you’re new to the craft, you may find it helpful to explore additional resources such as guides on proper sugar temperatures from reputable culinary websites like King Arthur Baking or classic candy-making tips from Taste of Home. These external resources provide excellent foundational knowledge as well as step-by-step temperature guidelines that support your caramel-making journey.
What makes this Homemade Caramels Recipe truly special is its adaptability and reliability. You can adjust the saltiness, change its firmness, or add flavors like vanilla, espresso, or chocolate. This flexibility makes it ideal for beginners and experts alike. As you dive into this article, you’ll discover basic instructions, advanced techniques, troubleshooting guidance, storage tips, dietary adaptations, and more — everything needed to master this timeless confection. Whether making caramel for the holidays or as a luxurious everyday treat, this recipe is your new go-to guide.
2. Basic Recipe: Ingredients and Instructions
Print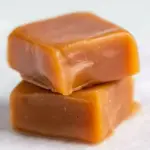
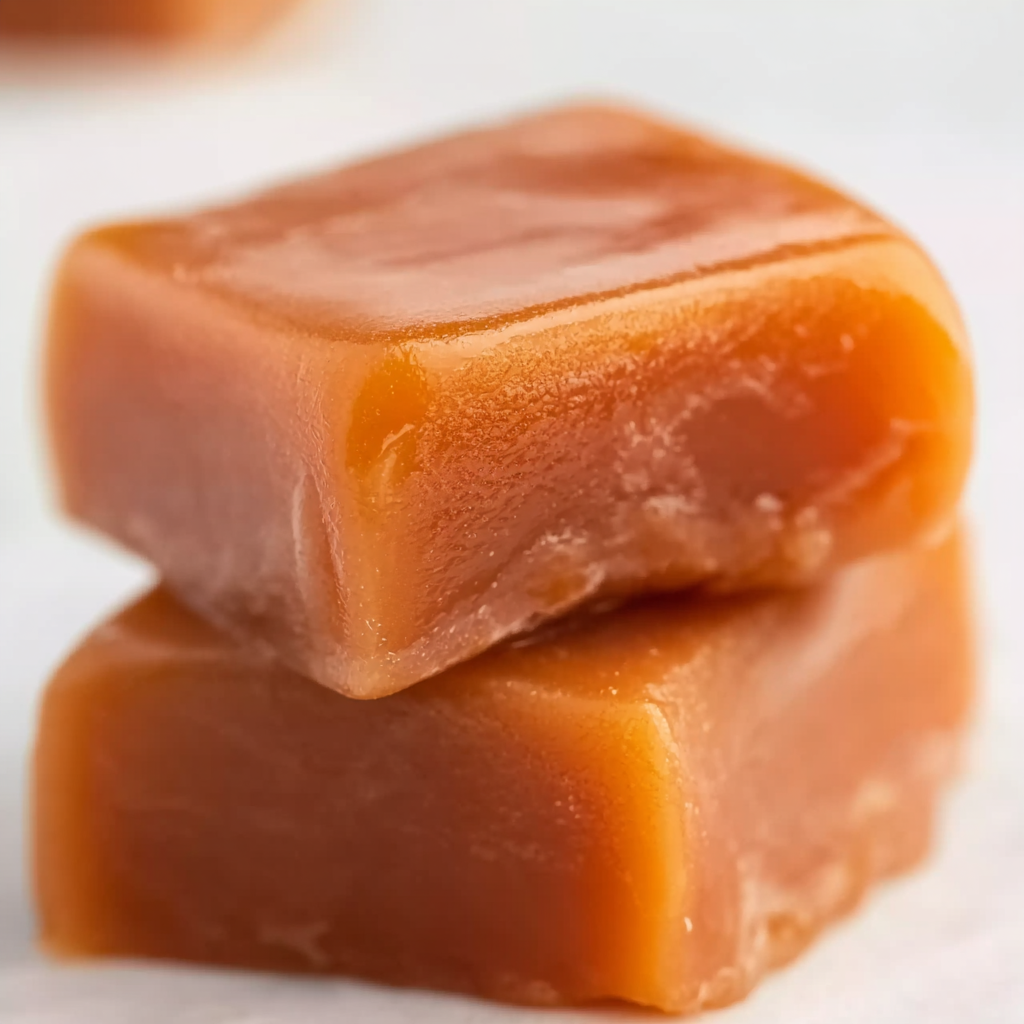
Homemade Caramels Recipe: Soft, Chewy, and Buttery Treats
Description
Soft, buttery Homemade Caramels Recipe with rich flavor, simple steps, and perfect texture for gifting, parties, or everyday sweetness.
Ingredients
- 3 cups granulated sugar
- 1 cup brown sugar
- 1 cup unsalted butter, softened
- 2 cups light corn syrup
- 1 teaspoon sea salt
- 24 ounces evaporated milk
Instructions
- Prepare the pan. Line a 9×13 inch baking pan with parchment paper and lightly butter the sides.
- Heat sugars and syrup. In a large heavy-bottomed pot, combine granulated sugar, brown sugar, butter, and corn syrup. Cook over medium heat, stirring until sugar dissolves.
- Add evaporated milk. Slowly pour in evaporated milk while stirring constantly to prevent the temperature from dropping too quickly.
- Cook to 245°F–250°F. Continue cooking, stirring frequently, until the mixture reaches firm-ball stage on a candy thermometer.
- Add sea salt. Remove from heat and stir in sea salt or any additional flavorings you prefer.
- Pour and cool. Transfer the hot caramel into your prepared pan and allow it to cool fully at room temperature.
- Cut and wrap. Once firm, cut into desired shapes and wrap individually in wax paper.
Notes
Stir constantly toward the end to avoid scorching.
Humidity can affect caramel texture — avoid making it on very humid days.
A heavy pot helps prevent hot spots and burning.
3. Advanced Techniques
1. Bolded Heading: Enhancing Depth of Flavor with Browning Techniques
To elevate your Homemade Caramels Recipe, consider browning the butter before adding it to the sugar mixture. Browned butter adds nutty undertones that complement caramel’s natural richness. Let the butter cook until small brown bits form at the bottom of the pan, and its aroma becomes toasted and fragrant. When incorporated, it creates a deeper, more complex flavor profile that tastes gourmet without adding extra steps. You can also experiment with lightly toasting the brown sugar to intensify its molasses notes. These browning methods allow the caramel to develop more dimension, making each bite richer and more memorable.
2. Bolded Heading: Using Temperature Control for Texture Precision
Mastery of temperature is key to perfecting any caramel recipe. The firm-ball stage (245°F–250°F) determines the chewiness, so using a reliable candy thermometer is essential. For softer caramels, aim for temperatures closer to 245°F; for firmer ones, closer to 250°F. Stirring consistency also affects crystallization — too much stirring early on can cause sugar crystals to form, resulting in grainy texture. When advanced cooks learn the subtle cues such as color shifts, bubble size changes, and aroma intensification, they gain greater control over texture and finish.
3. Bolded Heading: Infusing Flavors with Spices, Coffee, or Extracts
Advanced caramel makers often enhance their creations with infusions. Vanilla extract is classic, but using real vanilla bean seeds gives exceptional depth. Coffee or espresso powder creates a bold caramel macchiato flavor. Spices like cinnamon, nutmeg, or cardamom introduce warmth. For herbal notes, consider infusing the evaporated milk with lavender or rosemary by heating and steeping before adding it. The key is to balance bold flavors without overpowering caramel’s natural sweetness. These infusions help you create signature variations ideal for gifting or seasonal menus.
4. Bolded Heading: Achieving Ultra-Smooth Caramels Through Straining
Straining is an often-overlooked technique that separates professionals from beginners. Once your caramel reaches desired temperature, pour it through a fine-mesh strainer to eliminate any crystallized sugar or burnt flecks. This method ensures a silky, uniform texture. Even tiny impurities can cause graininess, so advanced candy makers rely on straining to guarantee pristine results. It’s especially useful when using add-ins like spices or browning butter, ensuring a smooth finish while retaining the enhanced flavors.
5. Bolded Heading: Adjusting the Recipe for Altitude or Humidity
Environmental factors dramatically influence caramel-making. At high altitudes, water boils at a lower temperature, meaning your caramel will reach its final stage more quickly. To compensate, reduce the final cooking temperature by 2°F for every 1,000 feet above sea level. Conversely, humid environments can add extra moisture to the mixture, causing softer caramels. Experts compensate by cooking the caramel slightly longer or storing finished caramels in airtight containers with anti-humidity packets. Mastering environmental adjustments ensures consistent results year-round.
4. Storage, Shelf Life, and Maintenance Tips
1. Bolded Heading: Proper Room Temperature Storage for Freshness
Storing caramels at room temperature keeps them soft and chewy. Wrap each piece tightly in wax or parchment paper to prevent sticking. Place them in an airtight container and store them in a cool, dry area. Avoid direct sunlight or overly warm rooms, as heat can soften or melt them. Properly stored, homemade caramels remain fresh for up to two weeks. This method is ideal for gifting during holidays or events where refrigeration may not be available.
2. Bolded Heading: Refrigeration Tips for Longer Shelf Life
Refrigeration extends your Homemade Caramels Recipe to three months or more. Make sure each caramel is individually wrapped, as refrigeration can introduce moisture. Store them in a sealed container or vacuum-seal for optimal freshness. When ready to enjoy, allow them to reach room temperature for the best texture. Refrigeration also helps preserve infused flavors like coffee or spices, ensuring they remain vibrant without degradation.
3. Bolded Heading: Freezing Caramels for Extended Storage
Freezing is the best strategy for long-term storage — up to six months or more. Wrap caramels individually, then place them in freezer-safe bags or containers. Double-bagging helps prevent freezer burn. To serve, thaw at room temperature without unwrapping to avoid moisture condensation. Freezing maintains texture surprisingly well and is an excellent solution for bulk candy-making during holiday seasons.
4. Bolded Heading: Preventing Stickiness with Proper Wrapping
Caramels can become sticky if exposed to moisture or warm air. Using wax paper, cellophane, or candy wrappers provides a protective barrier. Avoid plastic wrap, as it tends to stick to the candy. Wrapping also helps retain shape and prevents the pieces from melding into one another. Choose thicker candy-grade papers for shipping or long-term storage to avoid deformation.
5. Bolded Heading: Storing Flavored or Topped Caramels
If your caramels include toppings like sea salt, nuts, or chocolate drizzle, store them in single layers separated by parchment. This prevents toppings from smudging or sticking. Temperature control becomes even more important since flavored caramels can be more sensitive to heat. Store chocolate-covered variations in cooler environments and consider refrigeration for stability.
5. Dietary Adaptations and Substitutions
1. Bolded Heading: Vegan Caramel Adaptation
Making vegan caramel is entirely possible with simple ingredient swaps. Replace butter with vegan butter or coconut oil, and use coconut cream instead of evaporated milk. The texture remains rich and creamy with a slightly tropical undertone. Use organic sugar to ensure it’s vegan-friendly. Cooking times and temperatures remain almost identical, though coconut-based alternatives may caramelize slightly faster.
2. Bolded Heading: Low-Sugar or Reduced-Glycemic Version
For those reducing sugar intake, you can replace part of the granulated sugar with erythritol or allulose. Keep in mind that sugar alternatives caramelize differently, so achieving the same deep color may require experimentation. A combination of sugar and sweeteners often yields the most balanced results. Lower-sugar caramels tend to be softer, so cooking slightly longer can improve firmness.
3. Bolded Heading: Dairy-Free Substitutions
Dairy-free options include coconut milk, oat milk, or almond cream. Coconut milk gives the richest consistency, closest to evaporated milk. Dairy-free butters melt seamlessly and still create a chewy texture when paired with corn syrup. Monitor the mixture closely, as plant-based milks may scorch faster.
4. Bolded Heading: Nut-Free Flavor Variations
This recipe is naturally nut-free, but some add-ins (like extracts processed in nut facilities) may raise concerns. Opt for pure extracts and avoid topping variations that include nuts. You can still create bold flavors with cinnamon, apple cider, coffee, or citrus zest without compromising dietary restrictions.
5. Bolded Heading: Gluten-Free Adaptations
Caramels are naturally gluten-free, but cross-contamination can occur with certain ingredients. Use certified gluten-free evaporated milk and butter alternatives if needed. Packaging materials, like wax wrappers, can also sometimes contain gluten traces, so it’s best to choose certified safe varieties.
6. FAQs About the Recipe
1. Bolded Heading: Why Are My Caramels Too Soft?
Soft caramels typically result from not cooking the mixture long enough or not reaching the firm-ball temperature. Check thermometer accuracy by testing it in boiling water (should read 212°F). Environmental humidity may also cause softness. To correct soft batches, you can reheat the caramel and cook to a higher temperature.
2. Bolded Heading: Why Did My Caramels Become Grainy?
Graininess occurs when sugar crystals form in the mixture. Avoid scraping the sides of the pot while cooking. Using a wet pastry brush to wash down sugar crystals can help. Stirring too vigorously early in the process can also cause crystallization. Straining the mixture before pouring helps achieve a smoother texture.
3. Bolded Heading: How Do I Prevent Caramel from Burning?
Use a heavy-bottomed pot and maintain medium heat. Stir often toward the end of the cooking process. Burnt caramel tastes bitter and can affect the entire batch. Consistent stirring and controlled heat prevent hot spots that quickly burn sugar.
4. Bolded Heading: Can I Add Chocolate to This Recipe?
Yes, adding chocolate creates a richer, fudge-like caramel. You can stir in chocolate chips after removing from heat or drizzle melted chocolate on top once cooled. Milk chocolate results in a sweeter finish, while dark chocolate adds sophisticated depth.
5. Bolded Heading: How Do I Make Salted Caramels?
To make salted caramels, increase the sea salt to 2 teaspoons or top each cut piece with flaky sea salt. Add salt immediately after pouring to ensure it sticks. Salt enhances caramel’s natural sweetness and creates a balanced flavor experience.
7. Conclusion & Final Thoughts
Crafting your own Homemade Caramels Recipe is a truly rewarding experience that combines nostalgic flavors with satisfying kitchen artistry. These soft, buttery candies embody everything delightful about homemade treats — rich flavor, smooth texture, and the flexibility to customize for any occasion or preference. Whether you’re preparing them for holiday gifting, adding them to party favor bags, or enjoying them as an indulgent snack, homemade caramels always make an impression.
One of the greatest advantages of making caramels at home is the level of control you have over every element — from texture firmness to flavor intensity, add-ins, and dietary adjustments. With just a few key ingredients and the right techniques, anyone can create caramels that rival those of professional confectioners. This recipe provides not only the foundational steps but also advanced insights, troubleshooting solutions, dietary alternatives, and storage methods, ensuring your candy-making journey is seamless and enjoyable.
In a world full of quick snacks and packaged sweets, homemade caramels stand out as a thoughtful, handcrafted treat. They elevate simple ingredients into something luxurious and memorable. Whether you’re infusing creative flavors, mastering precision cooking, or simply reveling in the joy of stirring a bubbling caramel pot, this recipe invites you to savor the entire process. With each chewy bite, you’ll taste the effort, passion, and warmth that only a homemade recipe can deliver. Enjoy sharing these delightful candies — or keeping them all to yourself!