Introduction to the Recipe
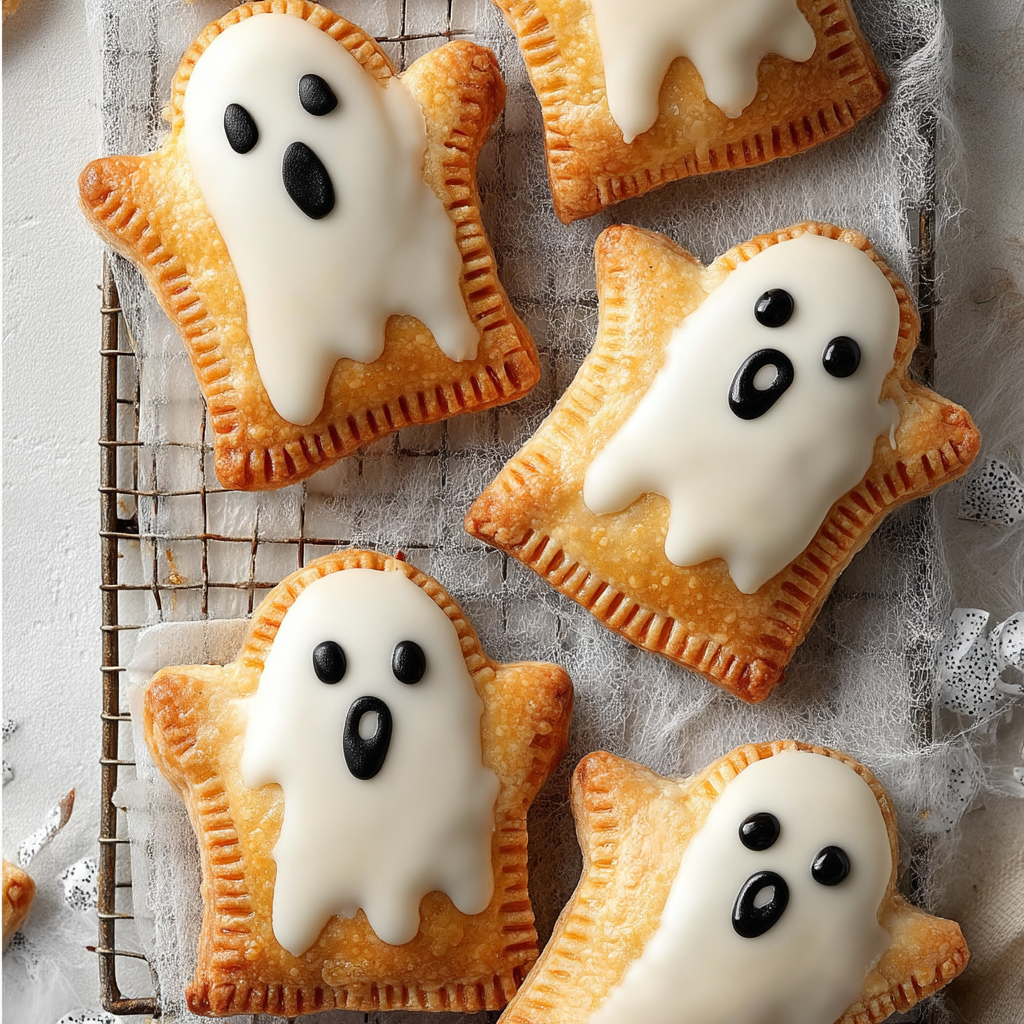
Looking for a Halloween treat that’s spooky, sweet, and totally homemade? These Pop Tart Ghosts check all the boxes. Flaky pastry, a gooey filling like Nutella, and a smooth glaze make them taste as good as they look. Whether you’re baking with kids or preparing snacks for a party, these ghost-shaped hand pies are easy to customize and guaranteed to impress.
What makes these treats extra special is the combination of buttery homemade pastry with a rich filling and a playful ghostly shape. They’re soft, slightly crispy on the edges, and totally melt-in-your-mouth once glazed. The decorating is part of the fun too—use pink food coloring to blush their little cheeks and black nonpareils to dot their spooky eyes.
You don’t need any fancy ingredients or baking degrees—just a ghost-shaped cookie cutter, some basic pantry staples, and a bit of time. And if you’re short on time, you can even swap in store-bought pie dough or puff pastry. These Pop Tart Ghosts are just as flexible as they are festive.
For more fun baking ideas, check out these Halloween cookie recipes and this guide to Halloween baking with kids. But first, let’s get into how to bring these edible ghosts to life.
Basic Recipe: Ingredients and Instructions
Print
Homemade Pop Tart Ghosts for Halloween
Description
Bake spooky-sweet Pop Tart Ghosts filled with Nutella and topped with icing. A fun and festive Halloween treat for all ages!
Ingredients
For the dough:
- 2 cups all-purpose flour
- 2 tbsp granulated sugar
- ½ tsp salt
- 1 cup cold salted butter, cubed
- 3–4 tbsp ice water
For the filling and icing:
- ¼ cup Nutella (or jam, cookie butter, etc.)
- 3 cups powdered sugar
- 5 tbsp milk
- ½ tsp vanilla extract
- Black nonpareils (for eyes)
- Pink powdered food coloring (for cheeks)
Instructions
- Make the dough: In a large bowl, whisk together flour, sugar, and salt. Add cold butter cubes and cut in with a pastry blender or fingers until the mix resembles coarse crumbs.
- Add ice water: Slowly add water 1 tablespoon at a time, mixing until the dough comes together. Form into a disc, wrap in plastic, and chill for 30 minutes.
- Roll and cut: On a floured surface, roll out dough to about 1/8-inch thick. Use a ghost-shaped cookie cutter to cut an even number of shapes.
- Fill and seal: Place half the ghosts on a baking sheet. Add 1 tsp of Nutella to the center of each. Top with remaining dough cutouts and press edges with a fork to seal.
- Bake: Preheat oven to 375°F (190°C). Bake for 12–15 minutes or until golden. Cool completely before icing.
- Make icing: Whisk together powdered sugar, milk, and vanilla until smooth. Dip or spoon icing over cooled tarts.
- Decorate: Add black nonpareils for eyes and brush on pink cheeks using pink powdered food coloring.
Notes
Make ahead and freeze the unbaked tarts—bake straight from frozen, adding a few minutes.
Swap Nutella for jam, peanut butter, or marshmallow fluff for fun variations.
Use a toothpick to fix icing drips and keep the ghost face clean.
Advanced Techniques
Use Gelatin-Free Marshmallow Filling
Want that classic s’mores texture? Use a gelatin-free marshmallow fluff to fill your Pop Tart Ghosts for a gooey center. It bakes slightly caramelized and oozes like ectoplasm when you bite in—ideal for the Halloween theme. Just don’t overfill or it will leak during baking.
Layering Flavors with Spices
Enhance the pastry with warm spices like cinnamon, nutmeg, or even a pinch of cardamom added directly to the dough. These subtle notes boost the overall flavor and pair well with fillings like Nutella or jam.
Icing Piping for Extra Personality
If you’re feeling crafty, use a piping bag with a fine tip to add tiny mouths, eyebrows, or even ghostly arms. Royal icing works best here since it hardens well and holds shape. You can even add little vampire fangs or stitched smiles.
Brushed Butter Finish
Before baking, lightly brush the tops of your ghost cutouts with melted butter for a richer golden finish. This also adds a light crisp texture to the outer shell that contrasts beautifully with the icing.
Infuse the Milk Glaze
Steep a tea bag (like chai or vanilla rooibos) in the milk before mixing it with powdered sugar. This subtle flavor upgrade gives your glaze depth and makes the ghost topping smell amazing.
Storage, Shelf Life, and Maintenance Tips
Room Temperature Storage
Once iced, your Pop Tart Ghosts can be stored in an airtight container at room temperature for up to 2 days. Keep layers separated with parchment paper to prevent sticking.
Refrigerating for Longer Life
For longer storage (up to 5 days), refrigerate the ghosts. Let them come to room temp before serving, or warm slightly in the microwave to refresh the texture without melting the glaze.
Freezing the Dough
You can make the dough in advance and freeze it for up to a month. Thaw overnight in the fridge before rolling and cutting. This lets you prep parts of the recipe ahead of a big event.
Freezing Baked Ghosts
Freeze fully baked, un-iced Pop Tart Ghosts for up to 2 months. Wrap each individually, then store in a zip-top freezer bag. Ice after thawing for best results.
Avoiding Icing Bleed
If using colored icing details, let the base layer fully dry before adding eyes and cheeks. This prevents the colors from running or blending together.
Dietary Adaptations and Substitutions
Gluten-Free Pop Tart Ghosts
Use a 1:1 gluten-free baking flour blend in place of all-purpose flour. Add ½ tsp of xanthan gum if your mix doesn’t already include it. Keep the dough cold to maintain structure.
Vegan-Friendly Adjustments
Substitute the butter with plant-based butter sticks and use a plant-based milk (like oat or almond) in the glaze. Nutella can be replaced with vegan chocolate spread or fruit jam.
Low-Sugar Version
Use a no-added-sugar jam as the filling and reduce the powdered sugar in the glaze. Add a splash of lemon juice to the glaze to enhance sweetness naturally without extra sugar.
Nut-Free Option
Choose a nut-free filling like marshmallow fluff, fruit preserves, or cookie butter. Be cautious with icing ingredients and toppings to avoid cross-contamination.
Natural Food Coloring Alternatives
Use beetroot powder or crushed freeze-dried strawberries in place of artificial pink food coloring. They create a subtle blush with zero synthetic dyes.
FAQs About the Recipe
Can I use store-bought pie dough?
Yes! Store-bought pie dough or even puff pastry works great in a pinch. The texture will be a bit different—flakier and crispier—but still delicious and ghostly.
Why is my dough cracking or too dry?
You may need a bit more water—add it slowly, just until the dough holds together. Always chill it well before rolling to prevent cracks.
Can I make them ahead of time?
Definitely. You can make and assemble the ghosts, then freeze them unbaked. Bake straight from the freezer, adding 3–5 extra minutes of baking time.
How do I keep the icing from melting or smearing?
Make sure the Pop Tarts are completely cool before adding icing. Let the glaze set at room temperature for at least 30 minutes before stacking or storing.
What other shapes can I use?
Any Halloween shape will work—pumpkins, bats, or skulls! Just adjust the filling and sealing based on the size and intricacy of the cutter.
Conclusion & Final Thoughts
These Pop Tart Ghosts are more than just a Halloween treat—they’re a hands-on, creative way to celebrate spooky season with baked-from-scratch flair. From their flaky, golden crust to their playful, ghostly glaze, these hand pies are a guaranteed crowd-pleaser.
The best part? You can make them your own. Change up the filling, tweak the icing, or go wild with spooky decorations. Whether you’re baking for a classroom party, a haunted house dessert table, or just a cozy fall afternoon, these ghost tarts deliver big Halloween energy without complicated steps.
They also freeze well, store easily, and come together with common ingredients, so there’s no excuse not to try them. Plus, decorating each ghost is half the fun—give them different faces, blush tones, or even little icing fangs.
So if you’re looking for something equal parts delicious, cute, and a little creepy, get out your rolling pin and ghost cutter. These Pop Tart Ghosts are waiting to haunt your oven.