Introduction
Homemade Saltwater Taffy Rolls are a timeless treat that bring joy with every chewy bite. With just a handful of pantry staples, you can recreate the colorful, nostalgic candy that has delighted generations. This recipe walks you through making your own soft, stretchy, and flavorful taffy right at home, complete with tips for pulling, wrapping, and storing. Whether you want to impress guests, make thoughtful edible gifts, or enjoy a fun family project, this recipe delivers both flavor and fun.
My recipe story
Saltwater taffy has always been a nostalgic candy for me. Growing up, I remember stopping by beachside shops that displayed rows of brightly colored taffy rolls in every flavor imaginable. The fun wasn’t just in eating them but also in choosing which flavor to try first. Years later, I realized that this classic candy could be recreated at home with simple ingredients and some patience. I first attempted this recipe during a family holiday, and to my surprise, it became a fun group activity. Everyone enjoyed the candy-pulling process, and the laughter made it a memory as sweet as the taffy itself. Now, it’s a go-to treat I love making for special occasions, birthday parties, and even as homemade gifts tied with colorful wrappers.
💡 Why You’ll Love This Recipe
- Classic nostalgic flavor that reminds you of beach vacations and candy shops.
- Fun hands-on activity for families, especially with kids who love pulling candy.
- Customizable with endless flavor extracts and food coloring options.
- Perfect as edible gifts or party favors when wrapped individually.
- Made with simple, budget-friendly pantry ingredients.
Ingredient breakdown
The beauty of homemade saltwater taffy lies in its simplicity. Most of the ingredients are probably already sitting in your pantry. Sugar, corn syrup, butter, and salt form the base of this chewy confection, while flavor extracts and food coloring let you add a creative touch.
Granulated sugar is the backbone of the candy, giving it structure and sweetness. The light corn syrup helps prevent crystallization, ensuring the taffy turns out smooth and pliable instead of grainy. A touch of unsalted butter lends richness, while salt balances the sweetness, enhancing every bite.
Finally, the fun part comes with the flavor extract and food coloring. Whether you love classic vanilla, fruity flavors like strawberry or orange, or even minty variations, extracts let you personalize the candy to your liking. Food coloring isn’t necessary but adds that festive, eye-catching element that makes saltwater taffy so iconic.
Equipment you’ll need
- Heavy-bottom saucepan
- Candy thermometer
- Wooden spoon or heatproof spatula
- Heatproof gloves or buttered hands for pulling
- Marble slab or greased baking sheet
- Sharp kitchen scissors or oiled knife
- Wax paper squares for wrapping
Step-by-step directions
Step 1: Prepare your work area. Before you begin, grease a large baking sheet or marble slab with butter. Cut wax paper squares for wrapping the taffy later. Having everything ready ahead of time makes the process smooth and stress-free, since once the candy is ready, you’ll need to work quickly.
Step 2: Combine ingredients. In a heavy-bottom saucepan, combine sugar, light corn syrup, water, butter, and salt. Stir over medium heat until the sugar dissolves and the mixture comes to a gentle boil. Stir occasionally to ensure the mixture heats evenly without scorching.
Step 3: Cook to the right temperature. Attach a candy thermometer to the pan without touching the bottom. Continue cooking the mixture, without stirring, until it reaches the firm-ball stage (around 250°F / 121°C). This stage ensures the perfect chewy texture that makes taffy so delightful.
Step 4: Add flavor and color. Once the mixture reaches the right temperature, remove it from heat immediately. Stir in your chosen flavor extract and a few drops of food coloring. Mix gently but quickly, as the candy will begin to firm up as it cools.
Step 5: Pour and cool slightly. Carefully pour the hot candy onto your prepared greased surface. Allow it to cool until it’s comfortable to handle—warm but not hot. This usually takes about 10 minutes. Use heatproof gloves or buttered hands to avoid sticking.
Step 6: Pull the taffy. This is the fun part! Stretch the candy by pulling it out into a long rope, folding it back onto itself, and pulling again. Repeat for about 10–15 minutes, or until the taffy becomes lighter in color and has a smooth, glossy finish.
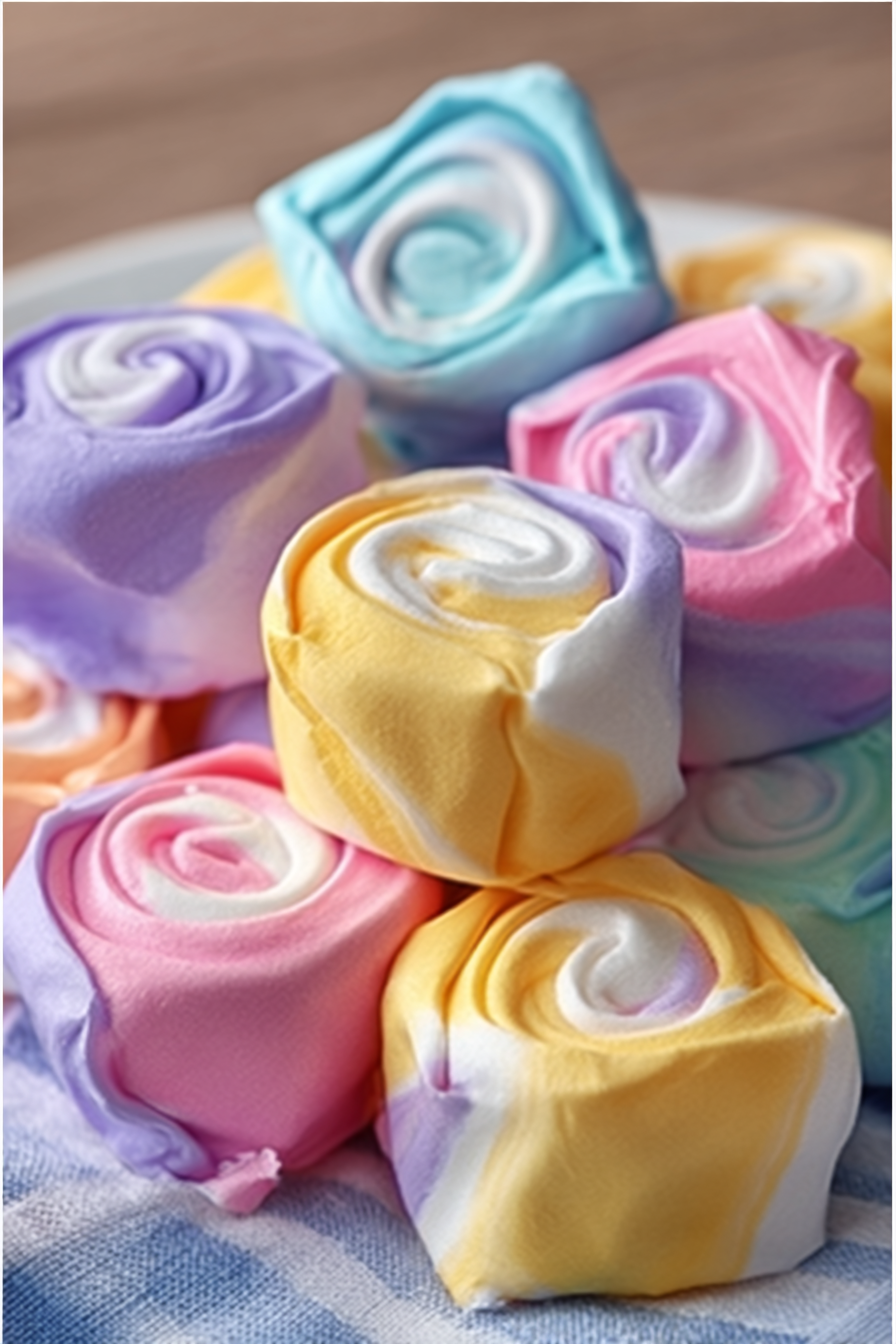
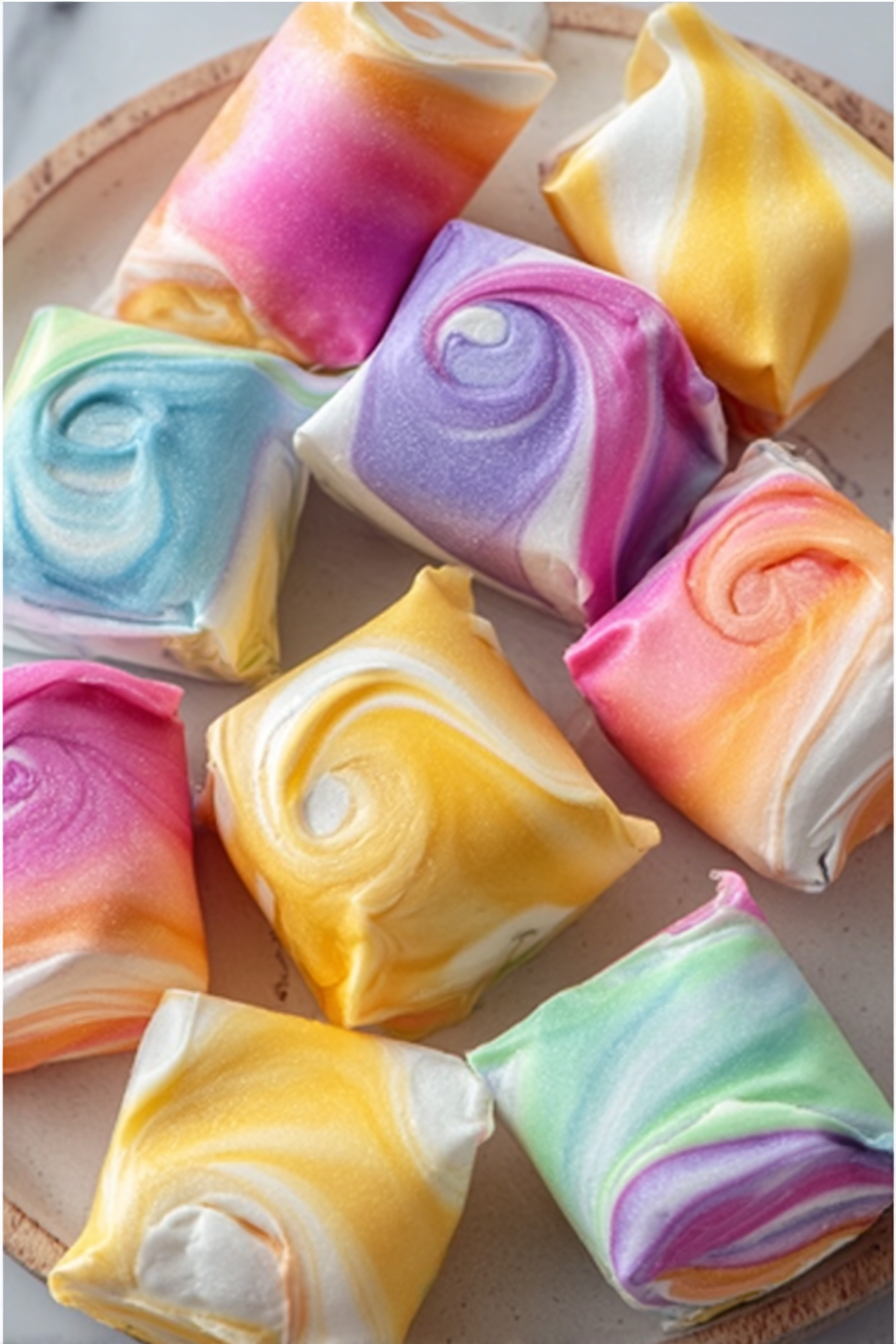
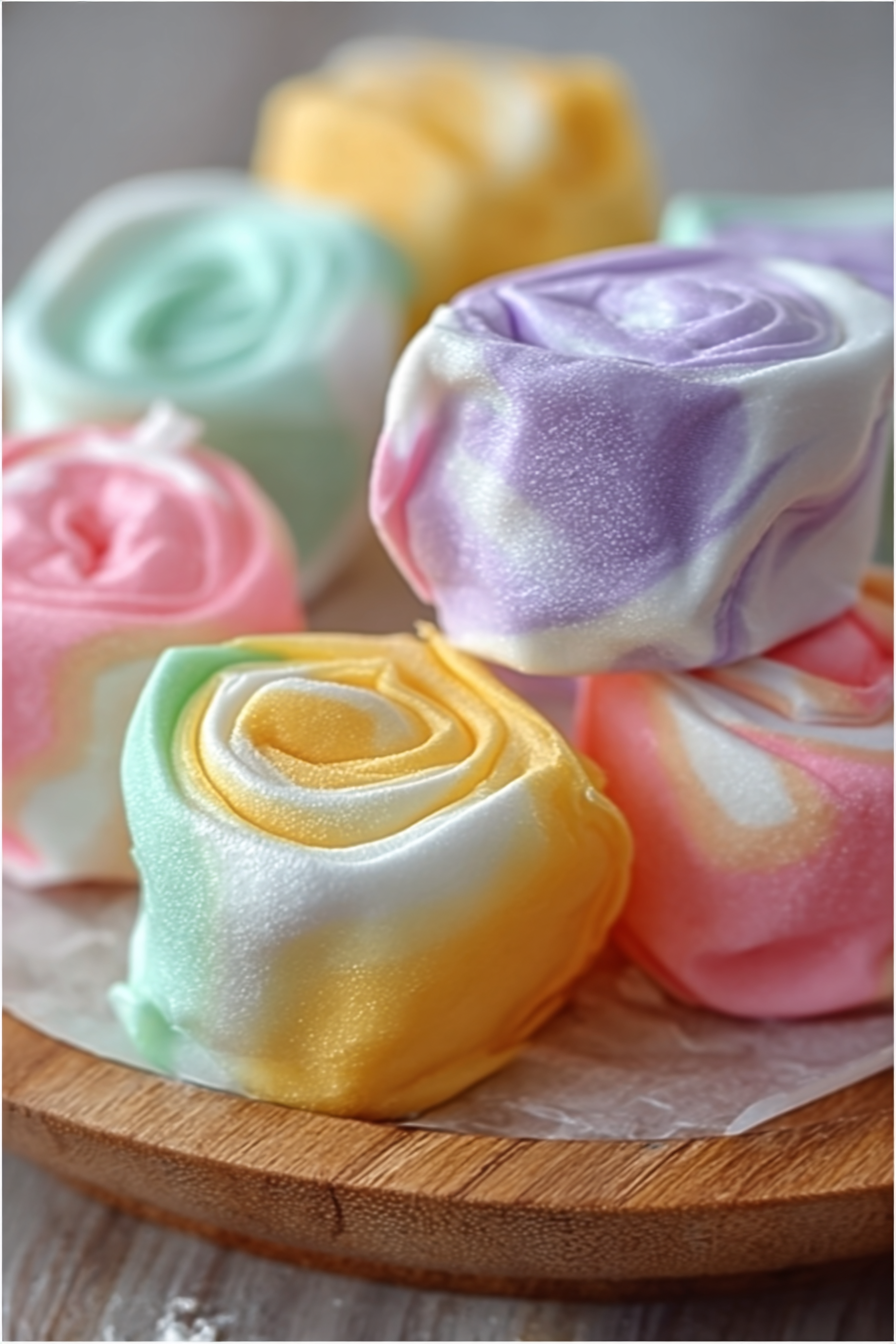
Step 7: Shape and cut. Roll the pulled taffy into long ropes about ½ inch thick. Use buttered scissors or a sharp oiled knife to cut the rope into bite-sized pieces. Immediately wrap each piece in wax paper squares to prevent sticking.
Step 8: Enjoy and share. Your homemade saltwater taffy rolls are ready to enjoy! Store them in an airtight container or gift them in decorative bags for a sweet homemade treat.
Variations & substitutions
One of the joys of making taffy at home is how customizable it is. You can experiment with a wide variety of flavor extracts, from fruity options like cherry, lemon, or pineapple, to more unique picks such as maple, root beer, or even coffee. Food coloring can be matched to the flavor or the occasion—think red and green for holidays, pastel shades for spring, or bold rainbow colors for birthday parties. If you don’t have corn syrup, you can substitute with glucose syrup, though the texture may differ slightly. For a dairy-free version, replace butter with coconut oil, which adds a subtle tropical note to the candy.
💡 Expert Tips & Troubleshooting
- Always use a reliable candy thermometer—temperature control is key to achieving the right chewy texture.
- If the taffy feels too sticky while pulling, butter your hands or wear lightly greased food-safe gloves.
- Don’t skip the pulling stage—it incorporates air, giving the candy its signature light, chewy consistency.
- If the taffy hardens too quickly, you may have overcooked it. Aim for 250°F and remove from heat immediately.
- Work in small batches if making multiple flavors to avoid candy cooling before you can shape it.
Storage, freezing & make-ahead
Once wrapped, saltwater taffy can be stored in an airtight container at room temperature for up to two weeks. Keep the container in a cool, dry spot to prevent the candy from becoming sticky or overly soft. For longer storage, refrigerate the wrapped taffy for up to a month. Freezing is also possible—just ensure the pieces are individually wrapped and stored in a freezer-safe bag. When ready to enjoy, allow the taffy to come back to room temperature before unwrapping for the best texture.
Serving ideas & pairings
Saltwater taffy is delightful on its own, but it can also be part of a creative spread. Serve it alongside cookies and fudge on a candy platter for holidays or parties. Pack colorful assortments in jars or cellophane bags tied with ribbons for thoughtful homemade gifts. For a fun twist, use wrapped taffy as edible décor in party centerpieces or candy buffets. You can even pair fruity taffy flavors with lemonade or iced tea for a refreshing sweet treat, while richer flavors like chocolate or maple taffy go perfectly with coffee or hot cocoa.
FAQ
Can I make saltwater taffy without a candy thermometer?
While possible, it’s not recommended. A thermometer ensures precise cooking. Without it, you risk ending up with candy that’s too soft or too hard.
Why is it called “saltwater” taffy if there’s no seawater?
The name originated in Atlantic City in the late 1800s, likely as a clever marketing gimmick. The recipe doesn’t actually use seawater—just regular salt and water.
How long does the pulling stage take?
Usually about 10–15 minutes. The candy should become lighter in color and glossy when enough air has been incorporated.
Can I make different flavors in one batch?
It’s best to make smaller batches if you want multiple flavors. Once the candy cools, it becomes harder to divide and flavor evenly.
What should I do if my taffy turns out too hard?
This usually means it was cooked beyond the firm-ball stage. Next time, remove it from heat as soon as it reaches 250°F. Slight variations in thermometer calibration can also play a role.
Final thoughts
Homemade Saltwater Taffy Rolls bring together nostalgia, fun, and flavor in one irresistible candy. Though it may take some patience and practice, the results are well worth the effort. From the joy of pulling candy with family to the satisfaction of enjoying a chewy, colorful treat you made yourself, this recipe offers an experience as sweet as the taffy itself. Once you try it, you’ll find yourself making it again for special occasions, gifting, or simply indulging in a little homemade magic whenever the craving strikes.
Print
Homemade Saltwater Taffy Rolls
- Total Time: 40 minutes
- Yield: About 60 pieces
- Diet: Vegetarian
Description
Soft, chewy, and nostalgic, these homemade saltwater taffy rolls are fun to make and perfect for gifting or sharing with family and friends.
Ingredients
- 2 1/2 cups granulated sugar
- 3 tablespoons cornstarch
- 1 cup light corn syrup
- 3/4 cup water
- 2 tablespoons unsalted butter
- 1 teaspoon salt
- 1 teaspoon vanilla extract (or flavor extract of choice)
- 3–4 drops food coloring (optional)
Instructions
- Grease a large baking sheet and cut wax paper squares for wrapping later.
- In a heavy saucepan, combine sugar, cornstarch, corn syrup, water, butter, and salt. Stir over medium heat until dissolved and boiling.
- Attach a candy thermometer and cook without stirring until the mixture reaches 250°F (firm-ball stage).
- Remove from heat and quickly stir in extract and food coloring. Pour onto the prepared sheet and let cool until warm but manageable.
- With buttered hands, pull the candy by stretching and folding repeatedly for 10–15 minutes until light and glossy.
- Roll into ropes, cut into bite-sized pieces, and wrap individually in wax paper.
Notes
Wrap tightly to keep fresh and store in an airtight container at room temperature for up to 2 weeks. Great for party favors or holiday gifts.
- Prep Time: 15 minutes
- Cook Time: 25 minutes
- Category: Candy, Dessert
- Method: Stovetop
- Cuisine: American