1. Introduction to the Recipe
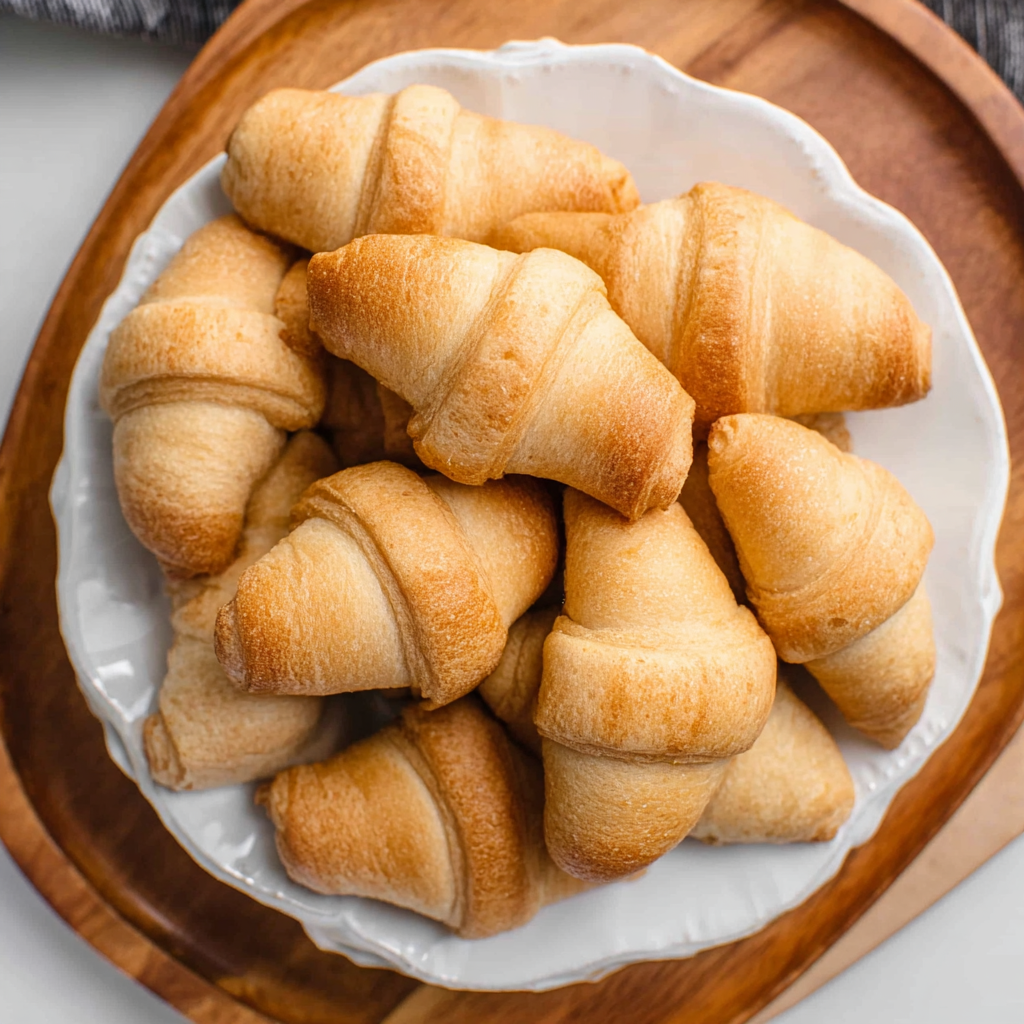
Homemade Honey Wheat Dinner Rolls are one of those timeless kitchen treasures that manage to bring warmth, comfort, and irresistible aroma to any mealtime gathering. Whether served at a holiday table, a weekend dinner, or as a special treat next to a hearty soup or stew, these rolls strike the perfect balance between wholesome wheat flavor and the natural sweetness that comes from honey. Their soft, pillowy texture makes them incredibly satisfying, while their deep golden color gives them a classic, home-baked appeal that reminds us why making bread from scratch is always worth the effort. These rolls aren’t just bread—they’re a delightful fusion of nostalgia, flavor, and craftsmanship.
What makes Honey Wheat Dinner Rolls particularly special is their use of two complementary flours: whole wheat and all-purpose. The whole wheat flour provides earthy richness and nuttiness, contributing structure and depth, while the all-purpose flour keeps the rolls fluffy and light. Combined with honey, melted butter, and eggs, the dough becomes rich and tender, creating a bakery-quality roll that tastes far more indulgent than its simple ingredients would suggest. Honey not only adds sweetness but also helps keep the rolls moist, while butter enhances flavor and ensures a beautiful golden-brown crust.
If you’ve ever been intimidated by yeast breads, these Honey Wheat Dinner Rolls are an excellent place to start. The dough is forgiving, easy to work with, and yields reliably soft rolls even for beginners. With a little patience, a warm kitchen, and the step-by-step instructions below, you’ll create rolls that rival anything found in a bakery. Whether brushed with melted butter, paired with a drizzle of extra honey, or used as the base for small sandwiches, these rolls elevate any meal and are sure to become a regular favorite in your kitchen.
2. Basic Recipe: Ingredients and Instructions
Print
Honey Wheat Dinner Rolls – Soft, Fluffy, and Perfectly Sweet
Description
Soft, fluffy Honey Wheat Dinner Rolls with the perfect sweetness. Easy recipe, expert tips, and storage guides for amazing homemade bread.
Ingredients
- 2 ¼ teaspoons active dry yeast (1 packet)
- 1 cup warm water (105–110°F)
- ⅓ cup honey, divided
- ½ cup butter, melted and cooled slightly
- 3 large eggs, beaten
- 1 teaspoon salt
- 2 cups whole wheat flour
- 2 ¼ cups all-purpose flour (preferably unbleached)
- 4 tablespoons butter, melted (for brushing, divided)
Instructions
1. Activate the Yeast
In a large mixing bowl, combine the warm water and 2 tablespoons of the honey. Sprinkle the yeast over the mixture and allow it to sit for about 5–10 minutes until it becomes foamy. This step ensures that your yeast is active and ready to help your dough rise properly.
2. Add Wet Ingredients
Stir in the remaining honey, melted butter, beaten eggs, and salt. Mix until the ingredients are well incorporated. The mixture will be slightly creamy and fragrant.
3. Add the Flours
Begin adding the whole wheat flour first, mixing thoroughly. Then add the all-purpose flour gradually, one cup at a time, until a soft dough forms. You may not need the full amount or may require slightly more depending on humidity and flour density.
4. Knead the Dough
Turn the dough out onto a lightly floured surface and knead for 8–10 minutes until smooth, elastic, and slightly tacky but not sticky. Alternatively, knead using a stand mixer with a dough hook for 5–7 minutes.
5. First Rise
Place the dough in a greased bowl, cover with a clean towel or plastic wrap, and let rise in a warm place for about 1–1½ hours or until doubled in size.
6. Shape the Rolls
Punch down the risen dough and divide it into 16–20 evenly sized portions. Roll each portion into a tight ball and place them in a greased 9×13-inch baking dish or on a parchment-lined baking sheet.
7. Second Rise
Cover and allow the rolls to rise for another 30–45 minutes until puffy and nearly doubled.
8. Bake
Preheat the oven to 350°F (175°C). Brush the tops of the rolls with half of the melted butter. Bake for 18–22 minutes or until golden brown.
9. Finish
Remove from the oven and brush immediately with the remaining melted butter. Allow to cool slightly before serving.
Notes
Warm water is key—too hot and it can kill the yeast.
If your dough feels too sticky, add flour one tablespoon at a time.
For extra flavor, you can swap half the melted butter with olive oil.
Rolls freeze beautifully—see storage section below.
3. Advanced Techniques
1. Mastering Dough Hydration for Fluffier Rolls
Achieving the perfect hydration level in your Honey Wheat Dinner Rolls dough is essential for producing soft, bakery-style rolls. Wheat flour absorbs more liquid than all-purpose flour, so balancing the moisture content is important. If the dough feels too stiff, add warm water in one-tablespoon increments until it becomes soft and pliable. When kneading, look for elasticity and smoothness rather than dryness. Proper hydration helps gluten develop fully, trapping air bubbles that make your rolls airy and tender. Once mastered, this technique elevates your rolls from homemade to artisan-quality.
2. Enhancing Flavor Through Slow Fermentation
If time allows, consider using an overnight rise to deepen the flavor of the rolls. Slow fermentation in the refrigerator gives the yeast more time to work, allowing the dough to develop more complex, slightly tangy notes while maintaining the signature sweetness of honey. To use this technique, place your kneaded dough in the refrigerator for 8–12 hours. The next day, allow it to warm at room temperature before shaping. This approach improves both texture and flavor, giving your Honey Wheat Dinner Rolls a gourmet touch.
3. Perfecting the Crust with Steam Baking
Adding steam to your oven during the first 10 minutes of baking can create a delicate, tender crust while keeping the interior soft. This professional bakery method is simple: place a small tray of hot water on the lower rack and preheat the oven with it inside. The steam helps the rolls rise higher before the crust forms, leading to a more rounded, attractive shape. This method is especially helpful for whole-wheat recipes, which can sometimes produce denser rolls. The result: glossy, beautifully risen dinner rolls.
4. Using a Preferment for Stronger Structure
A preferment—such as a sponge or poolish—can significantly improve the structure of your Honey Wheat Dinner Rolls. Mixing a portion of the flour, water, yeast, and honey several hours before making the dough boosts yeast activity and improves gluten formation. This technique results in rolls that rise more easily and have a more open crumb. Preferments also enhance flavor without adding extra ingredients. This step is optional but worth incorporating if you enjoy experimenting with bread craft.
5. Shaping Techniques for Uniform, Professional Rolls
Uniform shaping leads to even baking and attractive presentation. To achieve this, weigh each dough portion using a kitchen scale to ensure consistency. Roll each piece firmly into a smooth ball by cupping your hand over it and making small circular motions against the counter. This creates surface tension that helps the rolls rise upward instead of outward. Paying attention to shaping might seem like a small detail, but it makes a big difference in both texture and appearance.

4. Storage, Shelf Life, and Maintenance Tips
1. Room-Temperature Storage for Daily Freshness
Freshly baked Honey Wheat Dinner Rolls store well at room temperature for up to three days when stored in an airtight container or tightly wrapped in aluminum foil. Because the rolls contain honey and butter, they retain moisture exceptionally well, but exposure to air can cause them to dry out more quickly. Keep them in a cool, dark place, away from direct sunlight or heat sources. To refresh them, warm in the microwave for 10 seconds or in a low oven for 3–5 minutes.
2. Freezing Baked Rolls for Long-Term Storage
These rolls freeze beautifully and can be preserved for up to three months without losing their soft texture. Allow the baked rolls to cool completely before wrapping them tightly in plastic wrap and placing them inside a freezer-safe bag. For best results, label the bag with the date. To reheat, thaw them at room temperature and warm in the oven at 300°F for 10 minutes. Freezing is a great way to prepare ahead for holidays or gatherings.
3. Freezing the Dough for Future Baking
Instead of freezing the baked rolls, you can freeze the dough after shaping. Simply form the dough balls, freeze them on a baking sheet until firm, then transfer to a freezer bag. When ready to bake, thaw the dough in a greased dish, allow it to rise fully, and bake as directed. This method preserves freshness and gives you the luxury of baking fresh rolls anytime.
4. Refrigerator Storage for Short-Term Dough Maintenance
If you need to delay baking, refrigerate the dough after its first rise. Cover tightly and store for up to 24 hours. Cold dough may take longer to rise during the shaping stage, so plan accordingly. This method enhances flavor while giving you flexibility in preparing rolls ahead of time.
5. Keeping Rolls Soft with Proper Moisture Control
To keep rolls ultra-soft, avoid storing them in paper bags, which allow moisture to escape. Plastic or reusable silicone bags work best. You can also add a small piece of bread or a marshmallow inside the storage container to help retain moisture naturally. These simple moisture-control tricks keep your Honey Wheat Dinner Rolls tender and fresh.
5. Dietary Adaptations and Substitutions
1. Making the Rolls Vegan-Friendly
To create vegan Honey Wheat Dinner Rolls, replace honey with maple syrup or agave nectar, use plant-based butter, and substitute the eggs with unsweetened applesauce or a flaxseed mixture (1 tablespoon flaxseed meal + 3 tablespoons water per egg). Choose plant-based milk or water in place of dairy if desired. These changes maintain the soft texture while keeping the recipe fully vegan.
2. Gluten-Free Adaptation
Replacing wheat flour with gluten-free flour is challenging but possible with the right blend. Use a high-quality gluten-free baking mix that includes xanthan gum. Increase hydration slightly—gluten-free flours absorb more liquid—and avoid kneading, as gluten-free dough behaves more like batter. Let the dough rise in the baking dish to maintain shape.
3. Low-Sugar or No-Sugar Variations
For a lower-sugar version, reduce the honey to 2 tablespoons. Vanilla extract or cinnamon can help enhance perceived sweetness without adding sugar. You may also use sugar-free honey substitutes, though textures may vary slightly. These adaptations lighten the recipe while keeping the rolls flavorful.
4. Dairy-Free Modifications
To make the recipe dairy-free, swap butter with coconut oil or plant-based butter. Use warm water or plant milk, such as almond or oat milk, instead of dairy milk if needed. These swaps maintain structure while offering a familiar flavor profile.
5. Higher-Protein Adaptation
For added protein, replace half the whole wheat flour with white whole wheat flour and add two tablespoons of whey or plant-based protein powder. Increase water slightly if the dough becomes dry. This creates a hearty roll ideal for active lifestyles.
6. FAQs About the Recipe
1. Why didn’t my rolls rise properly?
Poor rising is often caused by expired yeast, water that is too hot, or a cold environment. Make sure your water temperature is between 105–110°F and your yeast is still active. If the room is cool, place the dough in a warm oven (off) with the light on or in a warm corner of your kitchen. Using fresh flour also improves rising.
2. Why is my dough too sticky?
Dough with honey can feel stickier than standard dough. Add flour gradually, one tablespoon at a time, until the dough becomes workable. Avoid adding too much flour or your rolls may turn dense.
3. Can I mix the dough by hand?
Absolutely. Kneading by hand gives you excellent control over texture and helps you learn the feel of properly developed gluten. Just allow extra time for kneading, about 8–10 minutes.
4. How can I make the rolls lighter?
Use fresh flour, avoid adding too much flour, and knead thoroughly for elasticity. A longer first rise also results in fluffier rolls. Using unbleached all-purpose flour helps maintain a soft structure.
5. Can I add flavors or mix-ins?
Yes! Add garlic powder, herbs, cinnamon, raisins, or seeds. Mix-ins should be added after the first rise to prevent interfering with gluten development.
7. Conclusion & Final Thoughts
Honey Wheat Dinner Rolls offer the perfect combination of hearty flavor and soft texture, making them ideal for everything from family dinners to holiday gatherings. Their slight sweetness from honey pairs beautifully with the wholesome nuttiness of whole wheat flour, while the addition of butter and eggs creates a tender, luxurious crumb that elevates even the simplest meal. These rolls are a joy to bake—simple enough for beginners yet rewarding enough for seasoned bakers who love crafting homemade bread that warms the kitchen with its comforting aroma.
One of the greatest strengths of this recipe is its versatility. You can shape the rolls into sandwich buns, twist them into knots, bake them in muffin tins, or form them into cloverleaf rolls for a more traditional presentation. The dough is sturdy enough to handle adjustments yet soft enough to remain tender and inviting. With the advanced techniques outlined above—such as using steam, slow fermentation, or dough shaping methods—you can turn these already delightful rolls into something truly exceptional, worthy of any festive table.
Beyond flavor and texture, these rolls offer a sense of tradition. Breadmaking has always been a way to gather, celebrate, and nourish, and Honey Wheat Dinner Rolls capture that spirit beautifully. They store well, freeze effortlessly, and adapt to a wide range of dietary needs, making them one of those recipes you’ll return to again and again. Whether you’re serving them with soup, slicing them for sliders, or enjoying them warm with butter and honey, these rolls remind us why homemade bread is such a gift—comforting, delicious, and always worth sharing.