Introduction to the Recipe
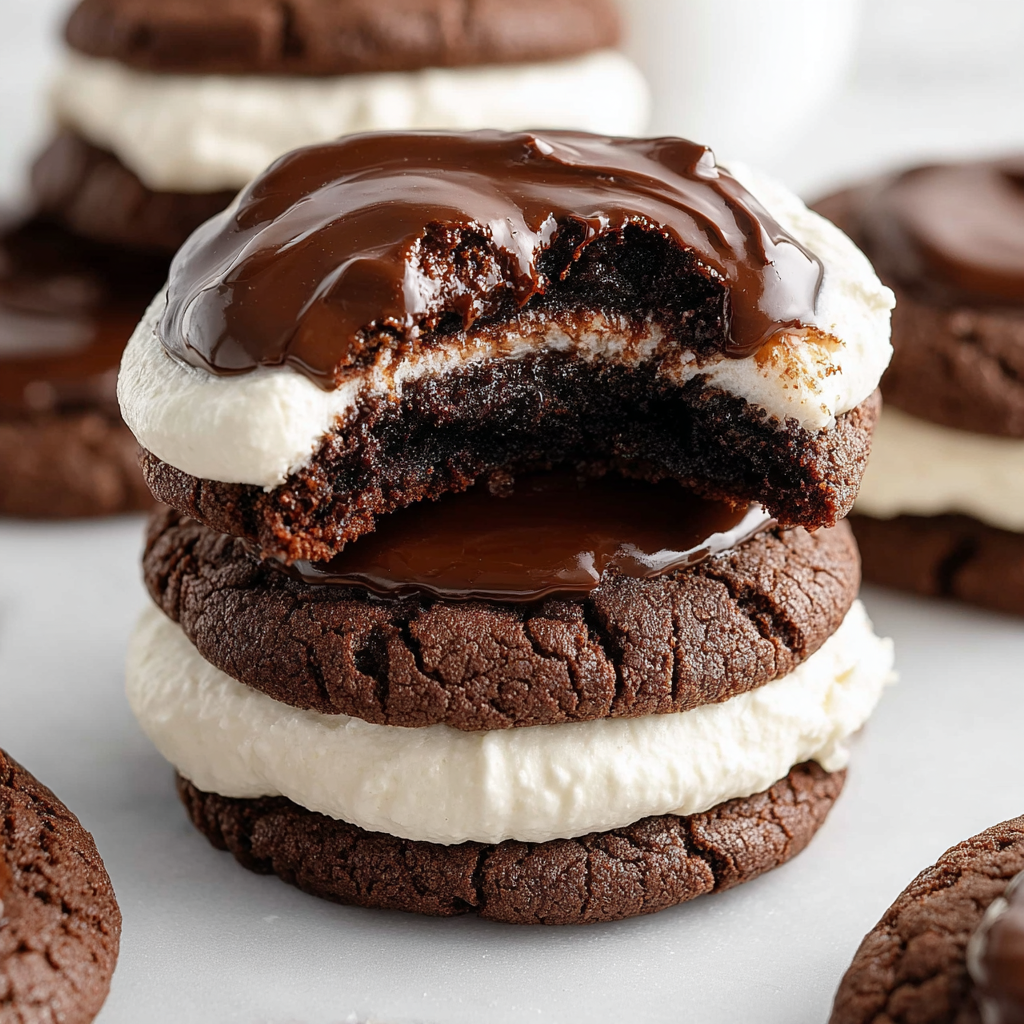
If you grew up on Hostess cupcakes, you’re in for a nostalgic and indulgent treat with these Hostess Cupcake Cookies. These cookies take all the iconic elements of the classic snack cake—rich chocolate, fluffy marshmallow filling, and that signature white swirl—and turn them into a soft, chewy cookie that’s both playful and decadent.
What makes this recipe truly special is how it balances texture and flavor. The cookie dough is deep, rich, and chocolatey, thanks to a generous dose of Dutch-processed cocoa. Inside, a smooth marshmallow frosting adds a creamy contrast, and the ganache topping gives it that luxurious, glossy finish. A piped swirl of icing adds the final decorative (and delicious) nod to the original snack.
Not only are these cookies a hit with kids, they also impress adults who remember the boxed classic from lunchboxes past. They’re perfect for birthday parties, nostalgic dessert tables, or just as a weekend baking project to satisfy your sweet tooth.
For a deep dive into how to work with ganache and ensure it sets just right, this guide is invaluable. And if you’re curious about the science of cocoa powders, make sure to check out this comparison to learn why Dutch-processed cocoa makes all the difference in this recipe.
Whether you’re baking for a crowd or just to indulge your inner child, these Hostess Cupcake Cookies offer a homemade twist that’s sure to impress.
Basic Recipe: Ingredients and Instructions
Print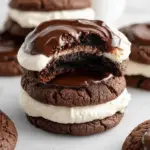
Hostess Cupcake Cookies
Description
These Hostess Cupcake Cookies combine nostalgic flavor with marshmallow and ganache for the ultimate soft, chocolatey treat.
Ingredients
Cookie Dough
- ¾ cup unsalted butter, softened to room temperature
- 1 ¼ cups light brown sugar, packed
- ¼ cup granulated sugar
- 2 large eggs, room temperature
- 2 teaspoons vanilla extract
- 2 ⅓ cups all-purpose flour
- ⅔ cup Dutch-processed unsweetened cocoa powder
- 1 tablespoon cornstarch
- 1 teaspoon baking soda
- ½ teaspoon salt
Marshmallow Frosting
- 1 cup unsalted butter, softened to room temperature
- 3 cups powdered sugar, sifted
- ½ teaspoon vanilla extract
- ⅛ teaspoon salt
- 7 oz marshmallow creme (marshmallow fluff)
- 1–2 tablespoons heavy whipping cream
Chocolate Ganache
- 4 oz semi-sweet chocolate baking bar, chopped
- ⅓ cup heavy whipping cream
- 2 teaspoons light corn syrup
Pipeable Icing (for swirl)
- ¾ cup powdered sugar, sifted
- 3 tablespoons unsalted butter, softened
- ¼ teaspoon vanilla extract
- 2 teaspoons heavy cream
Instructions
1. Make the Cookie Dough
- Preheat your oven to 350°F (175°C). Line two baking sheets with parchment paper.
- Cream the butter, brown sugar, and granulated sugar together until light and fluffy.
- Add eggs one at a time, beating well after each addition. Mix in vanilla extract.
- In a separate bowl, whisk together the flour, cocoa powder, cornstarch, baking soda, and salt.
- Gradually add the dry ingredients to the wet, mixing until fully combined.
- Scoop cookie dough onto baking sheets using a medium cookie scoop (about 2 tablespoons). Leave 2 inches between each.
- Bake for 9–11 minutes. Let cool on the sheet for 5 minutes before transferring to a wire rack.
2. Make the Marshmallow Frosting
- Beat the butter until creamy.
- Add powdered sugar, vanilla, and salt. Mix on low until mostly incorporated, then beat on high until fluffy.
- Add marshmallow fluff and 1 tablespoon cream; beat until smooth. Add extra cream if needed for piping.
3. Make the Chocolate Ganache
- Place chopped chocolate in a heat-safe bowl.
- Heat cream and corn syrup in a small saucepan until just boiling. Pour over chocolate.
- Let sit 2 minutes, then stir until smooth. Let cool until slightly thickened.
4. Make the Pipeable Icing
- Beat together butter and powdered sugar. Add vanilla and cream.
- Beat until smooth. Transfer to a piping bag with a small round tip.
5. Assemble the Cookies
- Once cookies are cool, pipe or spoon a mound of marshmallow frosting on each.
- Spoon or drizzle ganache over the top. Let set slightly.
- Pipe a swirl of icing across the top of each cookie to mimic the Hostess design.
Notes
Use room temperature ingredients for best consistency.
Don’t overbake—the cookies should be soft in the center.
Chill dough if it seems too sticky or if you want thicker cookies.
Advanced Techniques
1. Tempering Chocolate for a Glossier Finish
Want bakery-level shine on your ganache? Try tempering the chocolate. Instead of simply melting, you heat and cool chocolate to precise temperatures to stabilize it. This keeps it glossy and snappy. Use a thermometer: melt chocolate to 115°F, cool to 82°F, then reheat to 88-90°F. Though it takes a little more effort, the visual payoff is huge, especially if you want to gift these cookies.
2. Toasting the Marshmallow Layer
If you’re feeling fancy, pipe the marshmallow layer using a dome tip, then use a kitchen torch to lightly toast the frosting. It adds a toasted flavor and visual flair, creating a campfire-marshmallow vibe. Just make sure to torch before adding the ganache so you don’t melt the chocolate.
3. Infusing the Ganache with Espresso or Liqueur
Add depth to the ganache by stirring in a teaspoon of espresso powder or a flavored liqueur like Bailey’s or Kahlúa. The added complexity enhances the overall taste without overpowering the nostalgic chocolate-mallow combo.
4. Using a Cookie Stamp or Mold
For a uniform, bakery-style shape, press each dough ball with a cookie stamp before baking. You’ll get a nice even surface, perfect for holding the frosting and ganache. Just don’t flatten them too much or you’ll lose the soft center.
5. Make-Ahead Components
Each component—cookies, frosting, ganache, icing—can be made a day ahead and stored separately. This helps streamline the process if baking for an event. Store cookies in an airtight container, and keep frostings refrigerated until ready to use.
Storage, Shelf Life, and Maintenance Tips
1. Storing at Room Temperature
Store assembled cookies in an airtight container at room temp for up to 3 days. Keep them in a single layer or use parchment between layers to avoid smudging the ganache and swirl.
2. Refrigeration for Longer Freshness
If you need longer storage, refrigerate them. Place them in a sealed container lined with wax paper. Bring to room temp before serving so the ganache softens properly.
3. Freezing the Dough
Cookie dough can be scooped and frozen on a sheet tray, then transferred to a freezer bag for up to 2 months. Bake from frozen by adding 2–3 minutes to the baking time.
4. Freezing Assembled Cookies
You can also freeze fully assembled cookies. Place on a tray to freeze solid, then wrap individually and store in an airtight container. Thaw overnight in the fridge and bring to room temp before serving.
5. Restoring Texture After Storage
Cookies can lose softness in the fridge or freezer. To revive, microwave a cookie for 8–10 seconds or warm in a low oven for a few minutes. This brings back the fresh-baked softness.

Dietary Adaptations and Substitutions
1. Gluten-Free Version
Substitute the all-purpose flour with a 1:1 gluten-free flour blend. Make sure the blend contains xanthan gum for structure. Check all other ingredients (especially marshmallow fluff and chocolate) for gluten-free labels.
2. Vegan Adaptation
Use plant-based butter, a flax egg (1 tbsp flaxseed + 3 tbsp water), and vegan marshmallow fluff (some brands like Dandies offer it). Swap heavy cream for canned coconut cream and make a dark chocolate ganache without dairy.
3. Lower-Sugar Option
Use a sugar substitute like Swerve or Monkfruit for the dough and frosting. Opt for a low-sugar chocolate bar for ganache. Keep in mind, consistency may vary slightly.
4. Nut-Free Safety
This recipe is naturally nut-free, but double-check all product labels to avoid cross-contamination, especially for kids with allergies.
5. Dairy-Free Swap
Use dairy-free butter and coconut or oat-based cream in place of heavy whipping cream. Use dairy-free chocolate bars to complete the recipe.

FAQs About the Recipe
1. Why did my cookies spread too much?
Cookies that spread too much often have too-warm dough or too little flour. Make sure the butter is just soft, not melted, and chill the dough for 30 minutes if needed. Always measure flour accurately using the spoon-and-level method.
2. Can I use regular cocoa powder instead of Dutch-processed?
You can, but the flavor and color will be different. Dutch-processed cocoa is less acidic and creates a richer, darker chocolate taste. If you use natural cocoa, you may want to add an extra pinch of baking soda.
3. Can I make these without a piping bag?
Absolutely. Use a zip-top bag with the corner snipped off, or simply spread the layers with a spoon. The swirl might not be as precise, but the flavor stays the same.
4. How do I get the perfect swirl on top?
Use a small round piping tip and steady pressure as you pipe a continuous loop across the ganache. Practicing on parchment first helps build muscle memory.
5. Can I double the recipe?
Yes, this recipe doubles well. If your mixer isn’t large enough, prepare each batch separately to ensure proper mixing. You can also bake in stages and freeze extra dough.

Conclusion & Final Thoughts
Hostess Cupcake Cookies are a perfect mash-up of nostalgia and indulgence. With their rich chocolate base, creamy marshmallow center, silky ganache, and signature swirl, these cookies bring the childhood treat back to life in a fun, homemade format.
They’re easy enough for casual bakers but customizable and detailed enough to delight serious dessert lovers. You can make them all in one go or split the work across a few days by prepping each layer ahead of time. With options for gluten-free, dairy-free, and vegan variations, nearly everyone can enjoy a batch.
They make a playful yet impressive addition to holiday cookie trays, birthday parties, bake sales, or just as a creative weekend bake. Whether you’re baking with kids or whipping up a sophisticated dessert platter, these cookies offer both flavor and flair.
The next time you’re craving a rich chocolate treat with a nostalgic twist, give Hostess Cupcake Cookies a try. They look as good as they taste, and every bite is a flashback to lunchbox glory—only better, because you made them yourself.