
Mini Zombie Cookies: A Spooky Halloween Delight
Why Mini Zombie Cookies Are a Must-Try Halloween Treat
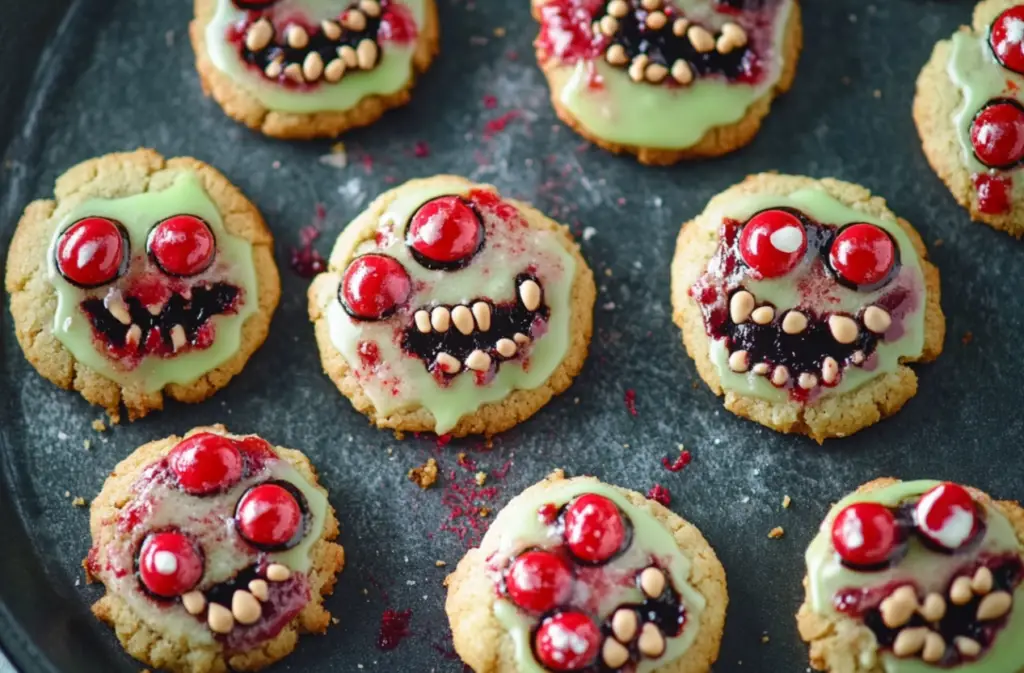
If you’re searching for a unique Halloween treat, mini zombie cookies are the perfect choice. These spooky yet fun cookies bring a delightful twist to the usual Halloween desserts, captivating both kids and adults alike. The bright green icing and haunting candy eyes make these cookies an Instagram-worthy snack that’s sure to stand out at any party. Want to see more Halloween cookie ideas? Check out these Creative Halloween Cookies for Kids.
The Rise of Mini Zombie Cookies in Halloween Baking
As Halloween approaches, many bakers look for innovative ways to celebrate the season. Mini zombie cookies have become a trendy choice because they’re easy to customize and fun to decorate. They offer a perfect blend of creativity and taste, making them ideal for anyone who enjoys combining art with baking. Plus, if you’re just starting with royal icing, these cookies are a great beginner project. You can get some Royal Icing Tips for Beginners to get started.
Fun for the Whole Family
One of the best things about mini zombie cookies is that they can be a family-friendly activity. Decorating them allows everyone to participate, making Halloween baking more than just about the finished product. With endless options for colors and designs, these cookies are sure to be a hit with your kids. Whether you’re hosting a party or just looking for a fun afternoon activity, mini zombie cookies are a fantastic addition to your Halloween celebrations. Need the perfect cookie dough to get started? Try this Best Cookie Dough Recipe for Decorating.
Basic Recipe for Mini Zombie Cookies
Print
Mini Zombie Cookies
- Total Time: 40 minutes
- Yield: 24 mini zombie cookies
- Diet: Vegetarian
Description
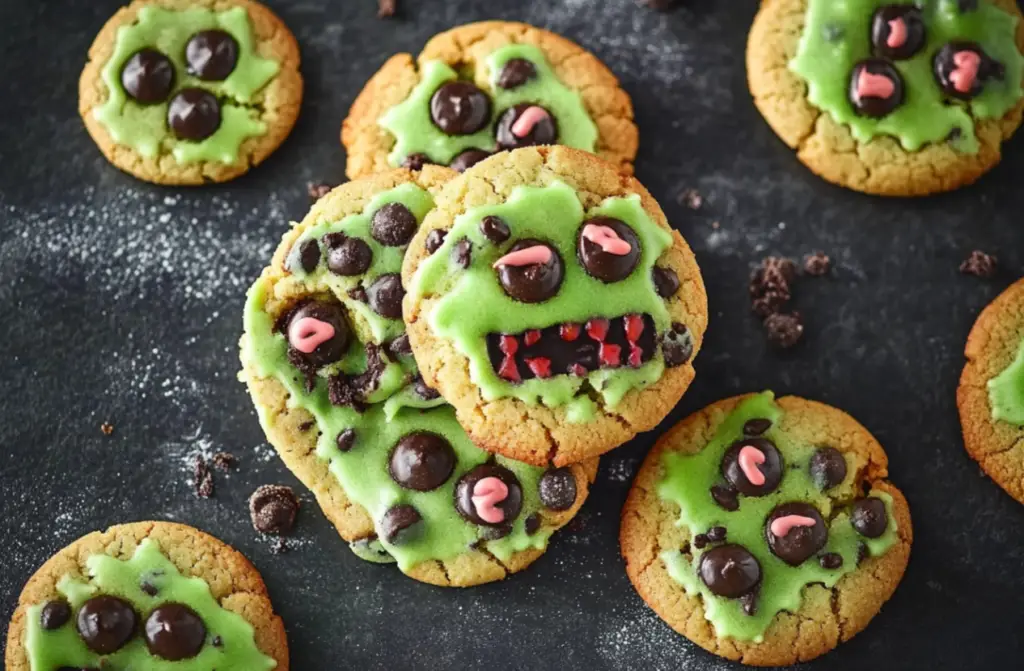
These spooky yet fun mini zombie cookies are perfect for Halloween. Made with cookie dough and decorated with colorful royal icing, these treats are sure to be a hit at any Halloween gathering.
Ingredients
- Cookie dough
- Royal icing
- Circle cookie cutter (2-inches)
- Food coloring (Electric Green, Electric Pink, Red Red, Super Black)
- Jumbo candy eyes
- Red food coloring pen (optional if using Halloween candy eyes)
- Disposable decorating bags
- Couplers
- Decorating tips (sizes 2, 3, and 4)
Instructions
- Prepare your cookie dough according to your favorite recipe or use store-bought dough. Roll it out to ¼ inch thickness and cut out 2-inch circle shapes using a cookie cutter.
- Bake the cookies according to your recipe’s instructions and allow them to cool completely.
- Prepare royal icing by separating it into different bowls. Use food coloring to create Electric Green, Electric Pink, Red Red, and Super Black icing.
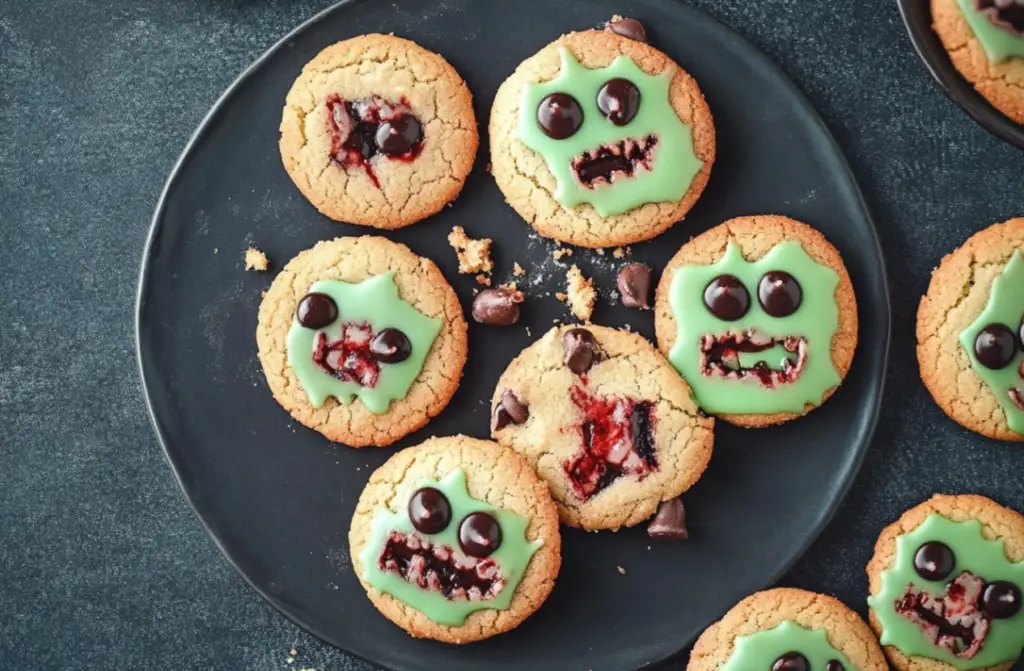
- Pipe the outlines of the zombie face using black icing (tip size 2), then fill in the face with green icing (tip size 4). Allow it to dry.
- Use pink icing to create scars and details.
- Attach jumbo candy eyes using a dab of icing.
- Optional: Add additional detail with a red food coloring pen to make the zombie look extra spooky.
Notes
- Make sure cookies are fully cooled before icing.
- Royal icing consistency is key for the best results.
- Prep Time: 30 minutes
- Cook Time: 10 minutes
- Category: Dessert, Halloween Treat
- Method: Baking
- Cuisine: American
Nutrition
- Serving Size: 1 cookie
- Calories: 150 per cookie
- Sugar: 10g
- Sodium: 50mg
- Fat: 6g
- Saturated Fat: 3g
- Unsaturated Fat: 2g
- Trans Fat: 0g
- Carbohydrates: 22g
- Fiber: 1g
- Protein: 2g
- Cholesterol: 15mg
Keywords: Mini Zombie Cookies
STEPS
Step 1
Prepare the cookie dough according to the recipe. Roll out the cookies 1/4-inch, cut out circles, and bake as directed by the recipe. Let cool completely.
Step 2
Prepare the royal icing and divide. I usually work with 1/2 cup to 1 cup of icing at a time.
Step 3
Tint some of the icing light pink (you’ll only need a drop or two). This icing should be thick enough to keep its shape when piped.
Step 4
Tint some icing green. Add drops of water to the green icing so you can pipe an outline, but when you pipe to fill, the icing loses its lines.
Step 5
Tint some icing black and some red (no need to thin the black and red icing). Prepare decorating bags. Fill two bags with size 2 tips with the black icing and red icing, a bag with size 3 tip with the green icing, and a bag with size 4 tip with the pink icing. Close tightly with rubber bands.
Step 6
To decorate zombie cookies, outline the circle (all but the very top) with green icing. Let set a few minutes.
Step 7
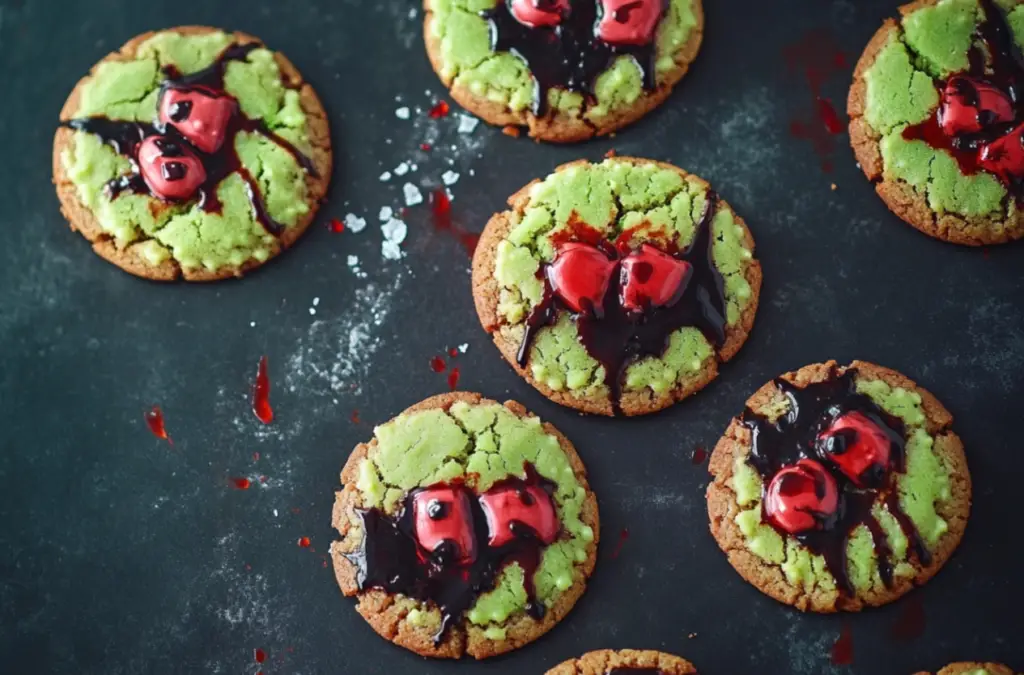
Pipe brains at the top of the cookie.
Step 8
Pipe to fill the cookie with green icing. Let set a few minutes (you may pipe the other cookies while you wait). Rest a candy eye on the cookie and gently press to adhere. With the black icing, pipe an “X” for an eye and a squiggle for the mouth. Add red icing “blood.”
Mini Zombie Cookies: Advanced Decorating Techniques
Mastering Royal Icing for Mini Zombie Cookies
When decorating mini zombie cookies, the key to professional results lies in mastering royal icing. Ensure your icing is at the right consistency—thick enough to outline, but thin enough to fill without flooding. Use a size 2 tip for fine details like scars and outlines, while larger tips are perfect for filling. Start with a thin outline of the zombie face in black, then fill in with Electric Green icing. This contrast brings out the spooky zombie look, and using different piping tips creates depth and dimension.
Creating Lifelike Zombie Cookies
To take your mini zombie cookies to the next level, focus on adding lifelike details. Layering shades of green icing can create a textured effect that mimics decaying skin, giving your cookies a more realistic, eerie look. Add small imperfections with a pink icing to resemble wounds or stitches, which enhances the overall zombie vibe. Don’t forget to use your red food coloring pen for extra details like blood splatters on the edges of the cookie—just enough to make them pop!
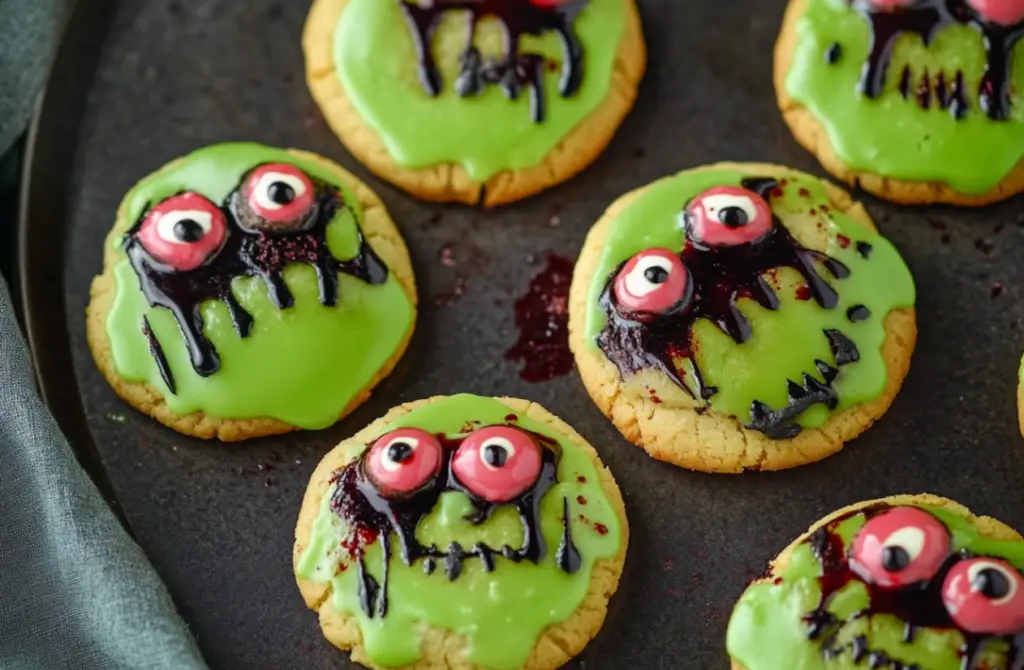
Tips for Achieving Perfect Candy Eyes
The candy eyes are one of the most important features of mini zombie cookies. To make sure they stand out, use a dab of royal icing to attach each jumbo candy eye securely. If you want to add even more personality, draw small lines around the eyes with black icing to give them a sunken, hollow look. Always wait for the icing to dry fully before adding final details, ensuring that your cookies stay neat and clean during the decorating process.
Mini Zombie Cookies: Storage and Maintenance Tips
How to Properly Store Mini Zombie Cookies
To maintain the freshness and look of your mini zombie cookies, it’s important to store them correctly. Once decorated, allow the royal icing to dry completely before attempting to store the cookies. This prevents the icing from smudging or sticking. Place the cookies in a single layer in an airtight container, adding parchment paper between layers if stacking is necessary. Proper storage keeps your cookies fresh for up to a week.
Freezing Mini Zombie Cookies
Freezing mini zombie cookies is an excellent way to prepare ahead for events. For undecorated cookies, simply wrap each one individually in plastic wrap, and store them in an airtight container in the freezer. When you’re ready to decorate, allow them to thaw at room temperature for a few hours. Decorated cookies can also be frozen, but make sure they are completely dry before freezing. Place them in a single layer on a baking sheet, freeze them until solid, then transfer them to a container with parchment paper between layers.
Prolonging Freshness After Baking
If you’re planning to serve mini zombie cookies over multiple days, keeping them in optimal condition is key. Store them at room temperature in an airtight container away from direct sunlight, as heat and moisture can affect the icing. For an extra tip, place a piece of bread in the container to help retain moisture, ensuring your cookies stay soft longer. With these simple steps, you can enjoy your spooky treats for days without losing their freshness or vibrant decorations.
Mini Zombie Cookies: Dietary Adaptations and Customizations
Gluten-Free Mini Zombie Cookies
For those following a gluten-free diet, mini zombie cookies can easily be adapted by using gluten-free cookie dough. Many store-bought or homemade gluten-free doughs work perfectly, offering the same delicious texture and flavor as traditional dough. Just ensure that your baking space and tools are free from gluten contamination to avoid cross-contact.
Dairy-Free Royal Icing for Mini Zombie Cookies
Creating dairy-free mini zombie cookies is simple by making adjustments to the royal icing. Instead of traditional icing that uses egg whites, you can substitute aquafaba (the liquid from canned chickpeas) as a vegan alternative. This allows you to maintain the icing’s glossy finish while making it suitable for those with dairy or egg allergies.
Low-Sugar Option for Mini Zombie Cookies
If you’re aiming to reduce the sugar content, swap out regular royal icing for a sugar-free version made with sugar substitutes like erythritol. This way, you can enjoy spooky mini zombie cookies with less guilt, while still keeping the fun decorations intact. Additionally, choosing a lower-sugar cookie dough will help further reduce the overall sugar content of your cookies.
Customizing the Zombie Look
Personalizing mini zombie cookies is part of the fun. Experiment with different colors or change the size of the candy eyes for various zombie expressions. You can even mix up the icing colors to make your zombies appear more vibrant or decayed, depending on the Halloween theme you’re going for. The possibilities are endless, making these cookies a versatile treat for all dietary needs.
Mini Zombie Cookies: Tips for Making with Kids
Simplifying the Mini Zombie Cookies Process for Kids
Making mini zombie cookies is a fun and engaging activity for kids. To simplify the process, prepare the cookie dough and bake the cookies ahead of time. This allows children to focus on the most enjoyable part—decorating! Set up a decorating station with pre-mixed royal icing in various colors, disposable decorating bags, and jumbo candy eyes. Keeping the icing in smaller, manageable bags helps prevent messes and makes it easier for little hands to control.
Letting Kids Be Creative with Mini Zombie Cookies
Children love to express their creativity, and mini zombie cookies are the perfect canvas. Encourage kids to personalize their zombies with unique icing colors or even change the face designs for a fun variety. You can also provide different sizes of candy eyes to give each zombie its own quirky personality. Letting kids explore their artistic side will make the activity even more exciting.
Safety Considerations for Baking Mini Zombie Cookies
Safety is always a priority when working in the kitchen with kids. Make sure to cool the cookies completely before decorating, as hot cookies can melt the royal icing and pose a burn risk. Additionally, use plastic or silicone decorating tools, which are safer for children compared to metal ones. Always supervise younger children, especially when using sharp objects like cookie cutters or scissors to cut disposable decorating bags. With these precautions, mini zombie cookies become a safe and memorable experience for the whole family.
Mini Zombie Cookies: Frequently Asked Questions
Why is my royal icing too runny for Mini Zombie Cookies?
If your royal icing is too runny, it’s likely due to too much water. For mini zombie cookies, you need a thick consistency for outlining and a slightly thinner one for filling. Add more powdered sugar, a little at a time, until you achieve the right texture. Make sure to mix thoroughly to avoid clumps, which can interfere with smooth decorating.
How can I prevent the icing from bleeding on Mini Zombie Cookies?
Icing can bleed if it’s applied too wet or if the colors are not separated properly. For mini zombie cookies, allow each layer of icing to dry completely before adding the next color. This layering technique ensures that the colors stay crisp and won’t bleed into one another. Additionally, avoid working in humid environments, as moisture can also cause bleeding.
What’s the best way to keep Mini Zombie Cookies from spreading while baking?
To keep mini zombie cookies from spreading, make sure your cookie dough is well-chilled before baking. Roll out the dough evenly, and don’t overwork it. If you’re using store-bought dough, refrigerate it for 15–20 minutes before cutting out shapes. This will help the cookies maintain their round shape, ensuring your zombie faces stay intact after baking.
Can I customize the decorations for Mini Zombie Cookies?
Absolutely! Mini zombie cookies are perfect for customization. Feel free to experiment with different colors, add extra details like stitches, or even create other Halloween-themed characters like ghosts or mummies.