1. Introduction to the Recipe
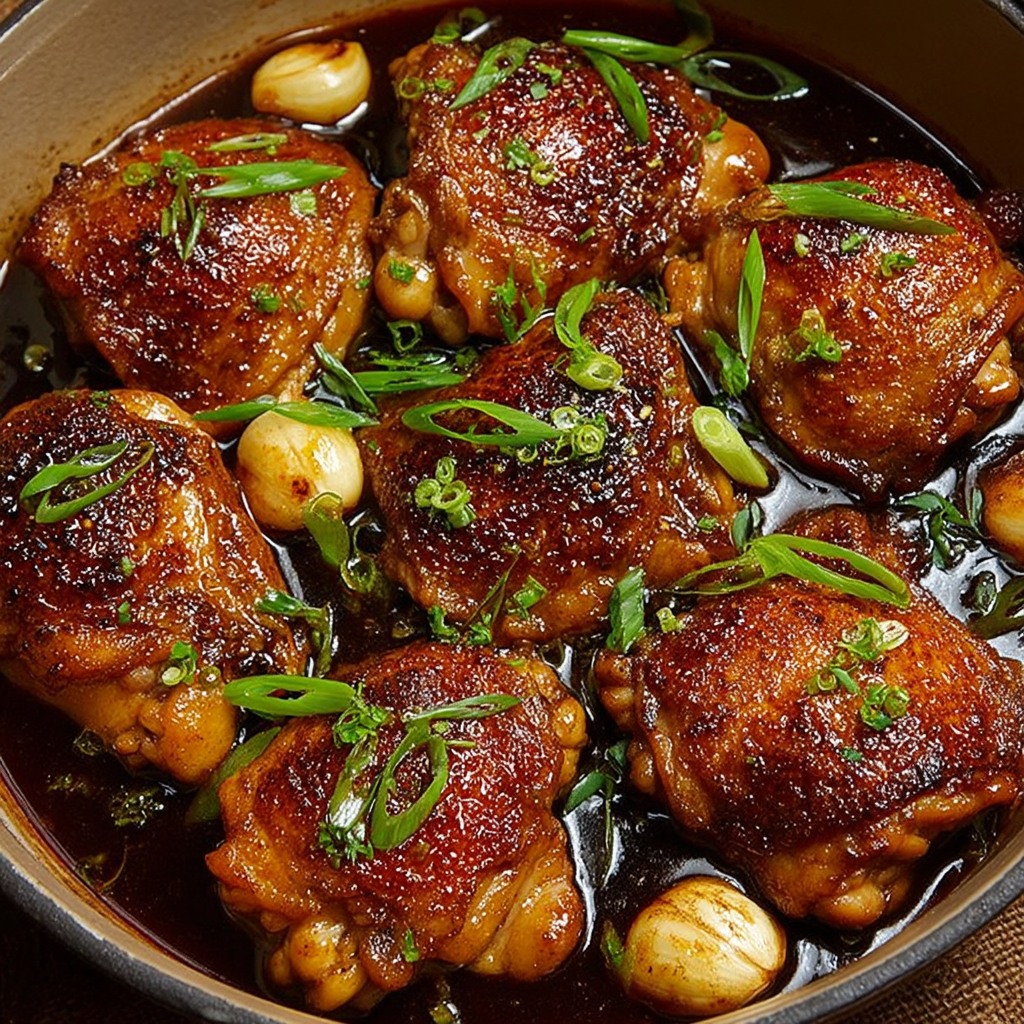
If you’ve ever wondered how to elevate dinner with a dish that balances sweetness, savoriness, and that satisfyingly sticky sauce—Caramel Chicken is your answer. This recipe features juicy, skin-on bone-in chicken thighs—rich in flavor—marinated and cooked in a luscious caramel glaze made with light brown sugar, soy sauce, garlic, ginger, rice vinegar, and chicken broth. The combination of sweet caramel, sharp vinegar, pungent garlic, and warm ginger gives every bite depth and complexity unlike typical glazed chicken dishes.
What makes this Caramel Chicken unique is not just the interplay of flavors but the technique: starting with a good sear on the chicken to crisp and brown the skin, then building layers of flavor through aromatics like ginger and garlic, and finishing in a caramel sauce that both coats and permeates the meat. It’s far more than just sweet chicken—it’s a dish where the glaze becomes part of the texture, giving both sticky sauce and tender meat in every bite.
If you enjoy learning new flavor profiles, the balance in this recipe is similar to what you find in a classic Vietnamese caramel chicken (“gà kho”) or in Filipino adobo variants. You might also find useful this guide to using fresh ginger and garlic in savory cooking to maximize these aromatics, or this article on mastering glaze caramelization without burning sugar which will help you get the sauce just right.
By following this recipe, you’ll master a Caramel Chicken dish that’s perfect for weeknight dinners, special family meals, or anytime you want something comforting but elevated. Expect crispy edges, tender meat, and a sauce that’s not just on top—but integral to every forkful.
2. Basic Recipe: Ingredients and Instructions
Print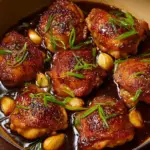
Irresistible Caramel Chicken Recipe
Description
This Caramel Chicken recipe delivers succulent thighs in sweet-savory caramelized glaze—easy steps, kitchen tips, dietary swaps for everyone.
Ingredients
-
2 tablespoons vegetable oil
-
2–3 pounds skin‑on, bone‑in chicken thighs (about 6–8 thighs)
-
Kosher salt and freshly ground black pepper
-
8 garlic cloves, peeled
-
1/3 cup (packed) light brown sugar
-
1/4 cup unseasoned rice vinegar
-
2 slices fresh ginger, about 1/4‑inch thick, peeled
-
1 cup low‑sodium chicken broth
-
1/4 cup reduced sodium soy sauce
-
2 scallions, thinly sliced on the bias (for garnish)
-
Cooked rice, for serving
Instructions
-
Prepare the Chicken:
Pat the chicken thighs dry with paper towels. Season both sides generously with kosher salt and freshly ground black pepper. Dry skin helps achieve better browning and crispiness. -
Sear the Chicken:
In a large skillet (preferably heavy-bottomed or cast iron), heat the 2 tablespoons vegetable oil over medium-high heat. When the oil shimmers, add the chicken thighs skin-side down. Don’t overcrowd the pan—do in batches if needed. Sear until the skin is golden brown and crisp, about 6–8 minutes without moving them. Flip and sear the other side for about 4 minutes. Remove chicken and set aside. -
Cook Aromatics:
Reduce heat to medium. Add the peeled garlic cloves and ginger slices to the same skillet. Sauté for 1–2 minutes, stirring frequently, until fragrant but not burnt. -
Make the Caramel Glaze Base:
Add the packed light brown sugar to the skillet. Stir for about 1 minute, letting the sugar begin to dissolve and caramelize lightly, mixing with the garlic and ginger. Then carefully pour in the rice vinegar—it may sputter. Stir to combine and deglaze the bottom of the pan. -
Add Liquids:
Pour in the chicken broth and reduced-sodium soy sauce, stirring until the sugar is mostly dissolved and the sauce is smooth. -
Simmer with Chicken:
Return the seared chicken thighs to the skillet, skin-side up. Lower the heat to medium-low. Cover and simmer for about 20–25 minutes, or until the chicken is cooked through and the sauce has thickened. Remove cover halfway through if needed to reduce the sauce more. -
Finish & Garnish:
Once the chicken is cooked and sauce has reached desired thickness, turn off the heat. Garnish with sliced scallions. Serve immediately over cooked rice.
Notes
For extra crisp skin, after the simmer you can broil the chicken for 2‑3 minutes skin‑side up.
If the sauce isn’t thick enough, remove the chicken and reduce sauce on high heat.
Taste the sauce before serving—adjust for sweetness, salt, or tanginess to your liking.
Keywords: Caramel Chicken Recipe
3. Advanced Techniques
Here are advanced techniques to elevate your Caramel Chicken, bringing out deeper flavors, textures, and presentation.
Technique 1: Marinating Ahead for Deeper Flavor
Allow the chicken thighs to marinate several hours or overnight in a simple marinade of soy sauce, minced garlic, grated ginger, and a touch of brown sugar. By letting the marinade penetrate overnight (about 8–12 hours in the fridge), you infuse the meat with flavor down to the bone. This pre‑seasoning ensures that even during the sear and caramel steps, the flavors are integrated rather than surface deep. When ready to cook, remove chicken from marinade, pat dry to get that crisp skin, and proceed with searing—taking care not to burn sugar in the glaze (since sugar will be on the surface). The extra moisture from marinade should be patted off so it doesn’t steam the chicken and hinder crispness.
Technique 2: Controlling Caramelization Without Burnt Flavor
Caramelization is critical for this dish, but it’s easy to cross into burnt bitterness. To avoid that, use light brown sugar rather than dark, and dissolve sugar slowly over medium heat after aromatics rather than adding high heat from the start. When you add vinegar or broth, do so with care (the liquid will deglaze; that is, lift up cooked bits without instantly cooling everything). Use a heavy‑bottomed skillet that distributes heat evenly. Also, monitor the sauce color: aim for rich amber caramel. If it smells overly burnt, reduce heat or remove pan from heat briefly. Finally, have all liquid ingredients measured and ready to go before starting caramelizing, so you can move swiftly and avoid overcooking the sugar.
Technique 3: Skin‑Crisping and Texture Contrast
Maximize texture contrast between crispy skin and tender meat. First, dry the chicken skin well (pat with paper towels) before seasoning. Use moderate-high heat for searing—get the skin side down first, press gently so the skin contacts the pan entirely (especially on warped chicken thighs). After searing skin‑side down until deeply golden, flip and sear briefly. During simmering, keep lid slightly ajar or remove it when sauce is thickening to let steam escape; excess steam can soften the skin. If desired, as mentioned, finish under the broiler for a minute or two for extra crispness. This contrast in texture (crisp skin, juicy interior, sticky sauce) elevates the eating experience.
Technique 4: Balancing Sweet, Savory, and Acidity
The key to a memorable Caramel Chicken is the balance between sweet (brown sugar), savory (soy sauce and chicken), and acidity/tang (rice vinegar, aromatics). Taste as you go: after adding sugar, taste when you’ve added the soy sauce and vinegar. If it’s too sweet, add a bit more vinegar or a squeeze of fresh lemon or lime. If it’s too tangy, a touch more sugar or even a small drizzle of honey can soften. Adjust salt only after the sauce has reduced, since soy sauce is salty. If you adjust too early, the reduction intensifies saltiness. For extra umami, a dash of fish sauce or a tiny bit of mushroom powder could be stirred in at the end, depending on your preference.
Technique 5: Presentation & Garnishes for Serving
While flavor and texture are fundamental, presentation adds to satisfaction. Once chicken is cooked and plated over rice, spoon some of the caramel sauce over the top and let it glisten. Garnish with thinly sliced scallions, possibly a few thin rounds of fresh red chili for heat and color contrast. A sprinkle of toasted sesame seeds or a few cilantro leaves elevates visual appeal. Consider slicing the chicken thighs just before serving (cut between bone and meat) so guests see the moist interior. Serve in a shallow bowl so sauce pools attractively. Lighting, plating—little touches make the difference.
See more advanced recipes at cookingwhite.com
4. Storage, Shelf Life, and Maintenance Tips
Keeping your Caramel Chicken fresh and safe, and retaining texture and flavor, requires attention. Here are storage and maintenance strategies.
Tip 1: Refrigeration and Best‑Use Window
Once Caramel Chicken is completely cooled to near room temperature, store it in an airtight container in the fridge. It should be used within 3‑4 days. The sauce helps maintain moisture, but the skin may lose crispness over time. To partially restore texture, reheat skin‑side up in an oven (about 375°F / 190°C) or under a broiler for a few minutes. Always taste and check for off‑smells or appearance before consuming leftovers.
Tip 2: Freezing for Longer Storage
If you want to preserve the dish longer, freeze it. Remove chicken from bone if preferred (for easier storage). Use freezer‑safe containers or heavy-duty freezer bags. Spoon some sauce over chicken to help protect against drying out. Label with date. Caramel Chicken can be frozen for up to 2‑3 months. Thaw in the refrigerator overnight. When ready, reheat gently in an oven or covered pan, then uncover and finish under broiler if you want to crisp skin.
Tip 3: Reheating Without Drying Out
To reheat Caramel Chicken and keep it juicy, use low heat. Preheat oven to ~325°F (160°C). Place chicken and sauce in an oven‑safe dish, cover with foil to trap moisture. Warm for 15‑20 minutes or until heated through (internal temp ~165°F). Remove foil, increase heat or broil very briefly to crisp skin. Alternatively, you can reheat on stovetop: simmer gently in skillet, skin‑side down, adding a splash of water or broth if sauce seems too thick or sticking.
Tip 4: Refreshing Sauce and Flavor After Storage
Leftover sauce gets thick or may separate. To refresh: strain out ginger slices and garlic cloves if they’ve disintegrated or overcooked; whisk sauce (on stove) with a small splash of chicken broth or hot water to loosen consistency; adjust seasoning with a little more vinegar or sugar as needed. If sauce lost its sheen, adding a small knob of butter at the end (swirl in off‑heat) can give gloss. Be sparing with fat, but this trick improves mouthfeel.
Tip 5: Texture Retention in Skin and Sauce
Over time, skin softens and sauce loses vibrancy. To retain better texture, store chicken and sauce separately when possible: keep sauce in its own container or jar; keep chicken skin‑side up when stored so steam doesn’t condense and soften skin. When ready to serve, reheat chicken skin‑side up in oven or broiler, then pour heated sauce over. Also, avoid stacking pieces in storage as stacking compresses and squashes skin. Use shallow containers.
5. Dietary Adaptations and Substitutions
Here are ways to adapt Caramel Chicken to accommodate different diets or preferences.
Adaptation 1: Gluten‑Free Version
To make Caramel Chicken gluten‑free, substitute the reduced‑sodium soy sauce with tamari or a certified gluten‑free soy sauce alternative. Ensure that the broth is also gluten‑free (some commercial broths have hidden gluten in flavorings). All other ingredients (garlic, ginger, brown sugar, rice vinegar) are naturally gluten‑free. Taste carefully—the saltiness and flavor profile may change slightly, so you might need to adjust the amount of sweet or acid to balance.
Adaptation 2: Lower Sugar / Low‑Carb Option
Reduce sugar by using half the brown sugar (use about 2½ tablespoons instead of ⅓ cup), or substitute with a natural low‑glycemic sweetener like coconut sugar, allulose, or erythritol blend (if compatible with cooking temperature). Note that caramelization may differ—some substitutes don’t brown exactly like sugar, so monitor closely. Serve over cauliflower rice or steamed vegetables instead of white rice to reduce carbohydrates.
Adaptation 3: Poultry Alternative or Vegan / Plant‑Based Substitute
If you’d rather skip chicken or follow a vegan diet: use firm tofu, seitan, or tempeh. Press tofu well to remove excess moisture. For seitan or tempeh, slice into appropriate size. Sear similarly to get browning. Use vegetable broth instead of chicken broth. Use vegan‑friendly soy sauce and ensure sugar used (some sugars are filtered; look for vegan certified). For the vegan version, reduce simmer time so plant protein doesn’t become too soft. Garnish similarly.
Adaptation 4: Nut‑Free, Allergy‑Sensitive Adjustments
Original recipe is already nut‑free, but be careful with cross‑contamination if using broths or soy sauce processed in facilities with nuts. Use soy sauce alternative if needed. Ensure any additional garnish (e.g. sesame seeds) is omitted or replaced. Use coconut aminos if soy is an issue (though that changes flavor somewhat). Use high‑quality, clean‑label ingredients.
Adaptation 5: Adjusting for Spiciness / Heat Preferences
For those who love heat, add red pepper flakes, sliced fresh chili (bird’s eye, jalapeño), or a dash of Sriracha into the sauce. Add it alongside garlic and ginger or when simmering. For mild preferences, omit spicy elements and perhaps balance with a tiny extra vinegar to brighten the sauce. Alternatively, serve hot sauce or chili paste at the table for individual control. Heat also builds flavor contrast with the sweetness of caramel.
6. FAQs About the Recipe
Here are frequently asked questions and troubleshooting tips for making Caramel Chicken.
FAQ 1: Why is my sauce grainy or crude after caramelizing sugar?
If sugar is not fully dissolved before adding liquids, or if heat is too high, the sugar may crystallize or become grainy. To avoid this, stir sugar gently after adding brown sugar, giving time to melt and dissolve in the oil and aromatics before introducing vinegar or broth. If crystals form along the pan’s edges, use a wet pastry brush to wash them back into the mixture. Also, avoid stirring sugar aggressively while melting—gentle swirling is better. If it’s already grainy, you can strain or whisk it over medium heat with a bit more liquid to smooth it out.
FAQ 2: How do I ensure chicken is cooked through without overcooking?
Using bone‑in thighs helps because they stay moister than breast meat, but you still need to monitor. Use a meat thermometer—the internal temperature should reach at least 165°F (74°C) near the bone, in the thickest part of the meat. After searing and during simmer, cover to cook through gently rather than high heat that overcooks outside while interior remains raw. Also let it rest a few minutes before serving; carryover heat finishes cooking slightly and helps juices redistribute.
FAQ 3: Why did my chicken skin get soggy during simmering?
Soggy skin results from excess moisture or steam trapping. Possible causes include: not drying skin before searing; adding too much liquid; covering fully and letting steam condensate back onto skin. To avoid this, always pat skin dry; after searing, maintain skin side up when simmering; leave lid ajar or remove lid for final minutes so steam escapes. If desired, after simmer, broil skin briefly to restore crispness.
FAQ 4: Can I use boneless chicken thighs or chicken breasts instead? How would that change cooking?
Yes, you can use boneless chicken thighs or chicken breasts—but expect differences. Boneless thighs cook quicker (maybe 10‑15 minutes simmering) and retain more uniformity, but skin presence or coating may differ. Chicken breasts are leaner and may dry out; sear carefully and avoid overcooking; reduce simmer time. Also, bone adds flavor and helps maintain juiciness. If substituting boneless, check doneness a few minutes earlier, use slightly lower heat, and perhaps add an extra 2‑3 tablespoons of broth or sauce to prevent dryness.
FAQ 5: My sauce is too salty / too sweet / too sour—how do I fix it?
Taste the sauce after it has reduced partially. If it’s too salty—add a bit more sugar or a sweetener, or dilute with unsalted chicken broth. If too sweet—add more acid: a splash more rice vinegar, or a squeeze of citrus (lime or lemon). If too sour—balance with a tiny bit of sugar, or even a pat of butter to round out sharpness. Use small increments, tasting as you go. Remember that reduction intensifies all flavors, so adjust earlier rather than later.
7. Conclusion & Final Thoughts
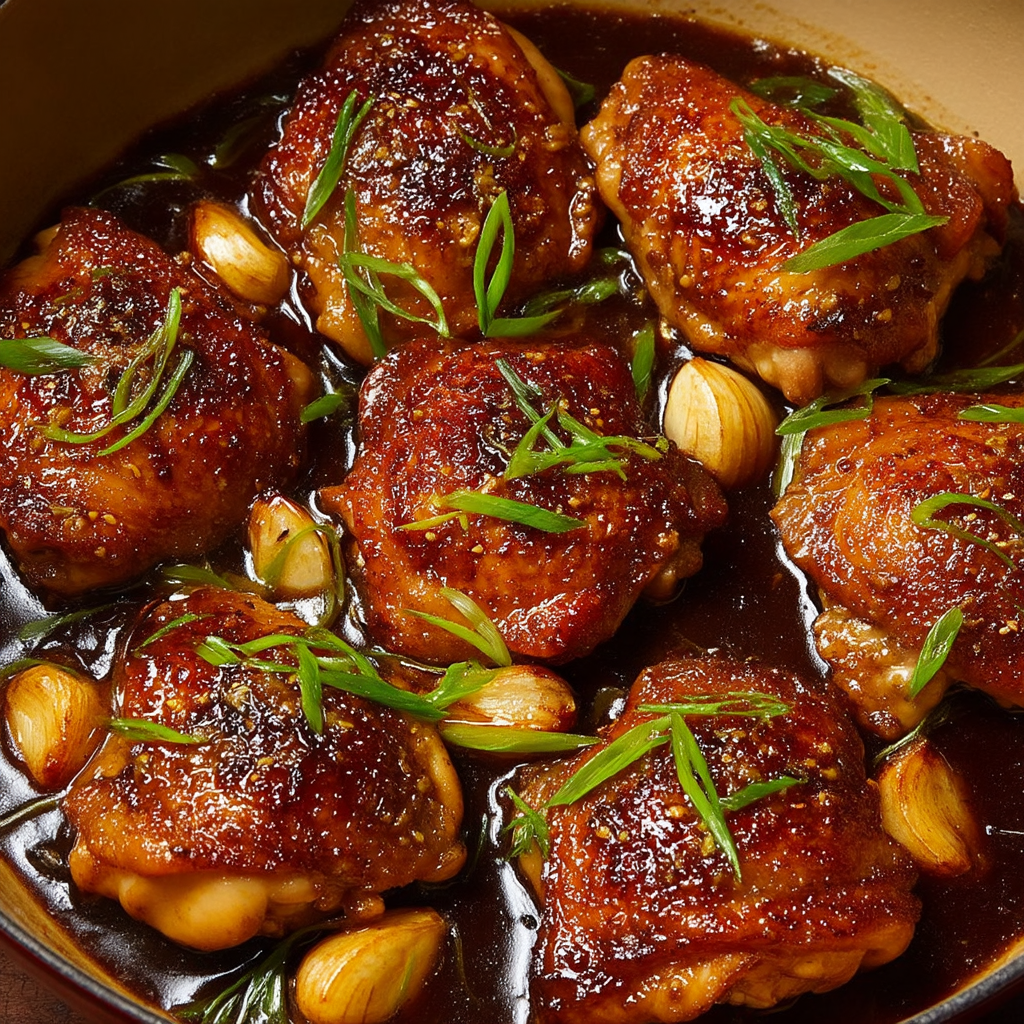
Caramel Chicken stands out because it bridges comfort and elegance—sticky, sweet, tangy, savory—all in one skillet. Whether you’re cooking for a busy weeknight or entertaining guests, this recipe delivers flavor depth with relatively little fuss. The golden brown, crisped skin provides texture; aromatics like garlic and ginger bring warmth and fragrance; the sauce glazes the chicken while also soaking into it during simmering. Serving it over plain cooked rice lets the sauce shine, and the garnish of scallions adds freshness and contrast.
This recipe is special because it gives you control: you can adjust sweetness, acidity, heat; you can make it gluten‑free, vegan, or lower sugar; you can cook in under an hour, or give it more time (marinating, finish with broiler) if you want elevated texture. It’s dependable and forgiving. And importantly, it’s versatile—pairs well with rice, steamed greens, roasted vegetables, or even noodles.
For gatherings, its beauty is that the sauce can be prepared ahead and gently reheated; flavors often mature overnight. For home cooks seeking both comfort and flavor sophistication, Caramel Chicken is a recipe that rewards attention to technique but doesn’t require professional skill. It’s perfect for family dinners, weekend meals, or special occasions when you want something memorable yet approachable.
In conclusion, Caramel Chicken is more than just a sweet glaze on chicken—it’s a harmony of flavors and textures. Crisp skin, tender meat, sticky sweet‑savory sauce—with optional tweaks for diverse diets. Whether you keep it classic or make it your own, this recipe is bound to become one of your go‑to favorites. Enjoy every luscious, caramelized bite.