Introduction
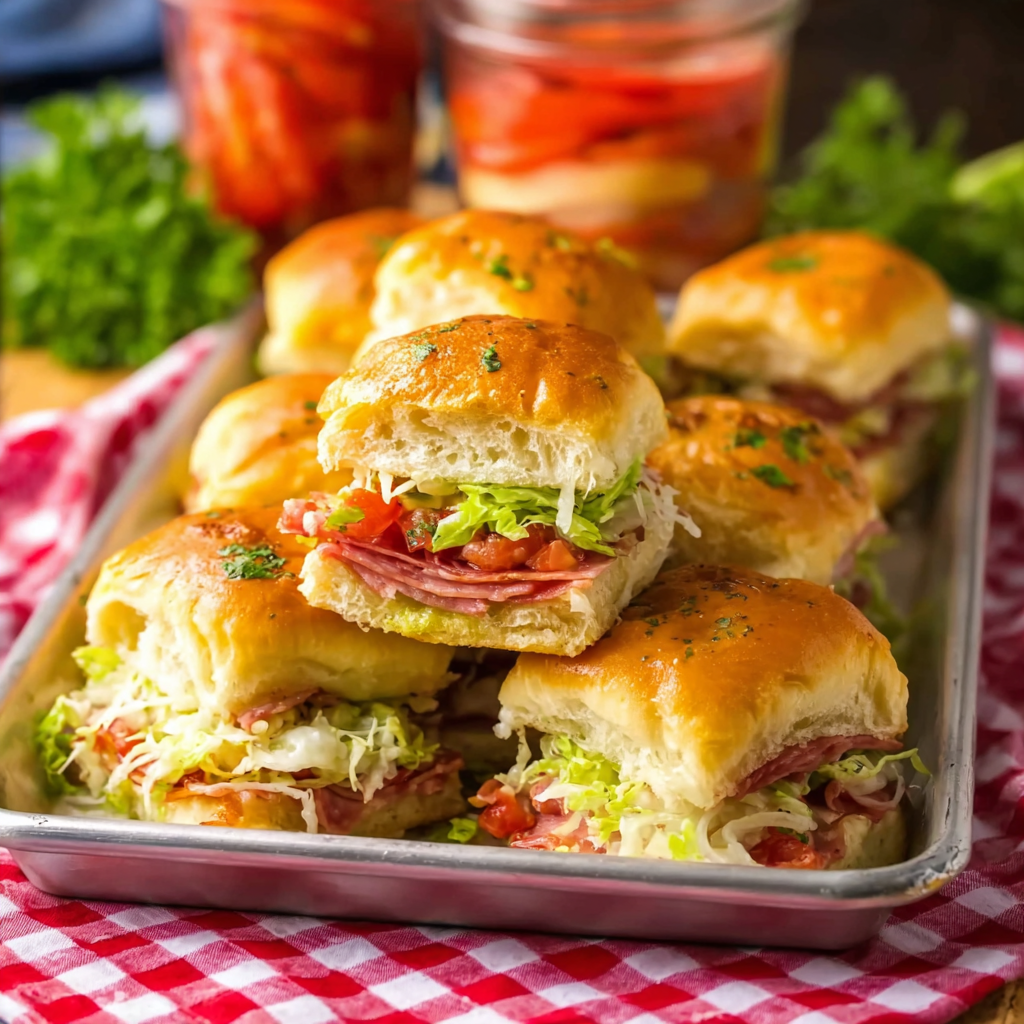
If you love the bold, zesty flavors of a classic Italian sub but want something easier to serve for parties, game nights, or family dinners, these Italian Sub Sliders will absolutely steal the show. They capture everything irresistible about that iconic deli-style sandwich—the layers of savory meats, melty cheese, tangy veggies, and herby dressing—but package it into warm, cheesy, pull-apart sliders that feed a crowd with almost no effort. I’ve been making variations of this recipe for years, especially during busy seasons or gatherings where I want something guaranteed to be devoured quickly.
One of the things that makes these sliders so special is how beautifully the layers come together once baked. The provolone melts into the ham, salami, and pepperoni, the rolls turn perfectly soft inside with a buttery toasted top, and the dressing and mayo add that signature “Italian sub” zing without making the rolls soggy. The fresh toppings—shredded lettuce, red onion, banana peppers, and roasted red peppers—get added after baking so they stay crisp and bright. The contrast of warm, melty meat-and-cheese layers with cool, crunchy vegetables gives every bite that deli-shop authenticity.
I also love how customizable this recipe is. You can swap meats depending on what you have on hand, choose sharper or milder cheeses, add extra veggies, or even turn up the heat with spicy giardiniera. These sliders are easy to assemble, fun to serve, and consistently crowd-pleasing. They’re also one of my favorite weeknight tricks when I want something family-friendly that comes together quickly but doesn’t feel ordinary.
Let’s dive into the full recipe and then explore techniques, storage tips, adaptations, and helpful FAQs so you can personalize your Italian Sub Sliders to perfection.
Basic Italian Sub Sliders Recipe
Print
Italian Sub Sliders – Cheesy, Meaty Party Sandwiches
Description
These warm, cheesy Italian Sub Sliders are loaded with deli meats, provolone, Italian dressing, crisp veggies, and buttery seasoned tops. They’re perfect for parties, game days, potlucks, or quick weeknight meals.
Ingredients
- 12 count Hawaiian rolls
- ¼ pound deli ham
- ¼ pound deli salami
- ¼ pound deli pepperoni
- 12 slices provolone
- 3 tablespoons butter
- ½ teaspoon Italian seasoning
- 2 cups shredded lettuce
- Half of a small red onion, thinly sliced
- ¼ cup banana peppers
- ¼ cup roasted red peppers, sliced
- 1 tablespoon mayo
- ¼ cup Italian dressing
Instructions
- Prep the rolls. Preheat the oven to 350°F. Slice the entire sheet of Hawaiian rolls horizontally to create a top and bottom layer. Place the bottom layer in a baking dish.
- Add the mayo and dressing. Spread the mayo evenly across the cut side of the bottom rolls. Drizzle 2–3 tablespoons of Italian dressing over the mayo.
- Layer the meats. Add ham first, then salami, then pepperoni. Make sure the meats reach the edges so every slider has a full bite.
- Add the provolone. Layer the cheese evenly over the meats.
- Top with the roll lids. Place the top half of the rolls back on.
- Make the butter topping. Melt butter in a small bowl and stir in Italian seasoning. Brush evenly over the tops of the rolls.
- Bake. Cover the dish loosely with foil and bake 12 minutes. Remove foil and bake an additional 3–6 minutes until the cheese melts and tops turn lightly golden.
- Finish with fresh toppings. Once removed from the oven, lift the top section or gently separate sliders enough to tuck in shredded lettuce, red onion, banana peppers, and roasted red peppers. Drizzle remaining Italian dressing if desired.
- Serve immediately. Cut into individual sliders and enjoy warm.
Notes
Active time: 15 minutes
Passive time: 15 minutes baking
Add veggies after baking to keep them crisp and vibrant.
If you prefer a saucier slider, increase dressing by 1–2 tablespoons.
Advanced Techniques for Perfect Italian Sub Sliders
Creating a Melted Cheese “Barrier” to Prevent Sogginess
One of my favorite tricks for perfect sliders is placing a layer of provolone both under and over the meats. Cheese acts as a moisture barrier, helping the rolls stay soft but never soggy. This is especially helpful when using juicy toppings like banana peppers or roasted red peppers. Melting the bottom cheese briefly before adding meats is another optional step that strengthens the barrier.
Toasting the Bottom Layer for Extra Structure
If you like your sliders a bit sturdier, toast the bottom half of the rolls in the oven for 3–4 minutes before assembling. This creates a slightly firmer base that holds up beautifully to dressing and mayo. I use this technique when making sliders ahead of time or when serving outdoors where humidity might soften bread faster.
Building the Perfect Layered Meat Stack
The key to achieving deli-style layering is alternating textures and saltiness. Start with ham for moisture and softness, follow with salami for savory punch, and finish with pepperoni for spice. Press gently with your palms to compact the layers—this ensures clean slices and prevents the sliders from toppling when pulled apart.
Upgrading Flavor with a Garlic-Butter Parmesan Topping
Instead of simple Italian seasoning, mix the melted butter with 1 tablespoon grated Parmesan and 1 clove grated garlic. Brush this mixture over the rolls before baking. It adds a savory, aromatic crust that tastes almost like garlic bread meets Italian sub. It’s a crowd-favorite upgrade for parties.
Using Steam to Get Perfect Melted Cheese
Covering the dish loosely with foil during the first half of baking traps steam, helping the provolone melt evenly and preventing the tops from browning too quickly. Removing the foil for the final minutes restores crispness. It’s a simple method but produces beautifully gooey sliders every time.
Storage, Shelf Life, and Maintenance Tips
Storing Leftover Sliders Properly
Store leftovers in an airtight container in the refrigerator for up to 3–4 days. Since fresh veggies soften over time, consider removing them before reheating and adding new ones afterward for best texture.
Reheating Sliders Without Drying Them Out
Reheat sliders in a 325°F oven for about 10–12 minutes, covered with foil to keep the bread soft. Remove the foil in the last 2–3 minutes if you want to crisp the tops. Avoid microwaving if you want to keep the bread from getting tough or rubbery.
Freezing Sliders for Convenient Meal Prep
You can freeze the assembled-but-not-baked sliders (without veggies) for up to 2 months. Wrap tightly in foil, place in a freezer bag, and bake straight from frozen at 350°F for 25–30 minutes. Add lettuce and veggies after baking.
Keeping the Lettuce Fresh and Crisp
If serving sliders buffet-style or outdoors, keep the shredded lettuce chilling separately on the side and allow guests to add it to their individual sliders. This ensures the lettuce stays crunchy and prevents moisture buildup.
Refreshing Sliders for Next-Day Serving
If sliders lose moisture overnight, brush lightly with warm butter before reheating. Add a touch of dressing afterward to revive brightness and flavor.
Dietary Adaptations and Substitutions
Making a Lighter Version with Leaner Meats
Swap ham for turkey, use turkey pepperoni, or substitute chicken salami. The sliders still taste savory and satisfying but reduce overall calories and sodium. Light provolone also works well without sacrificing meltiness.
Turning These Sliders into a Spicy Italian Version
Use spicy salami or hot capicola, and replace banana peppers with spicy giardiniera. Add crushed red pepper flakes to the butter topping for an extra kick. This variation is a huge hit for game days.
Gluten-Free Adaptation
Simply use gluten-free slider buns. Many brands offer soft rolls comparable to Hawaiian rolls. Ensure your deli meats are gluten-free as well—most are, but check labels to be safe. Everything else in the recipe is naturally gluten-free.
Low-Carb or Keto Variation
Use low-carb dinner rolls or bake a batch of keto slider buns. You can also create “unwich sliders” by stacking the meats, cheese, and toppings inside crisp lettuce cups instead of bread. The flavor profile stays just as bold and delicious.
Dairy-Free Substitutions
Replace provolone with dairy-free mozzarella slices and brush the rolls with olive oil instead of butter. Choose a thicker vegan cheese so it melts well without turning watery.
FAQs About Italian Sub Sliders
Can I Make These Sliders Ahead of Time?
Absolutely! Assemble everything except the lettuce and veggies, then cover and refrigerate up to 24 hours before baking. Bake when ready, then add fresh toppings. This makes party prep incredibly easy.
How Do I Keep the Bottom Rolls from Getting Soggy?
Use just enough dressing to coat—not drench—the rolls, and add cheese directly against the bread to create a moisture barrier. Toasting the bottom rolls for a few minutes before assembly also helps.
Can I Use a Different Cheese Instead of Provolone?
Yes! Mozzarella, Monterey Jack, white cheddar, or even Swiss can substitute. Provolone is classic because it melts smoothly without overpowering the meats, but the recipe is flexible.
Do the Sliders Taste Good at Room Temperature?
Yes—they hold up well for parties. The bread stays soft, and the meats keep their texture. Add lettuce right before serving for best results and avoid leaving out longer than 2 hours.
What’s the Best Way to Slice These Cleanly?
Use a long, sharp serrated knife and press straight down in a single motion. Don’t saw back and forth—this squishes the rolls. Some people even chill the sliders for 10 minutes before slicing for extra neatness.
Conclusion & Final Thoughts
These Italian Sub Sliders are the kind of recipe that feels fun to assemble and even more fun to eat. They combine everything great about a deli sandwich—melty cheese, layered meats, tangy dressing, bright veggies—and transform it into a warm, shareable, pull-apart meal that always gets rave reviews. Whether you’re prepping for a party, looking for a no-fuss weeknight dinner, or simply craving something hearty and comforting, sliders like these deliver big flavor with minimal effort.
What I love most is how adaptable they are. Make them mild or spicy, cheesy or extra veggie-forward, classic or gourmet. You can double the recipe for larger gatherings or make a half batch for a family dinner. They also reheat well, pack nicely, and come together quickly enough that they’re ideal for last-minute hosting.
I hope these Italian Sub Sliders become a go-to favorite in your kitchen just as they have in mine. Whether you serve them during football season, at backyard gatherings, or for a cozy evening at home, they’re sure to bring people together—and disappear fast. Enjoy every warm, melty, savory bite!