Introduction
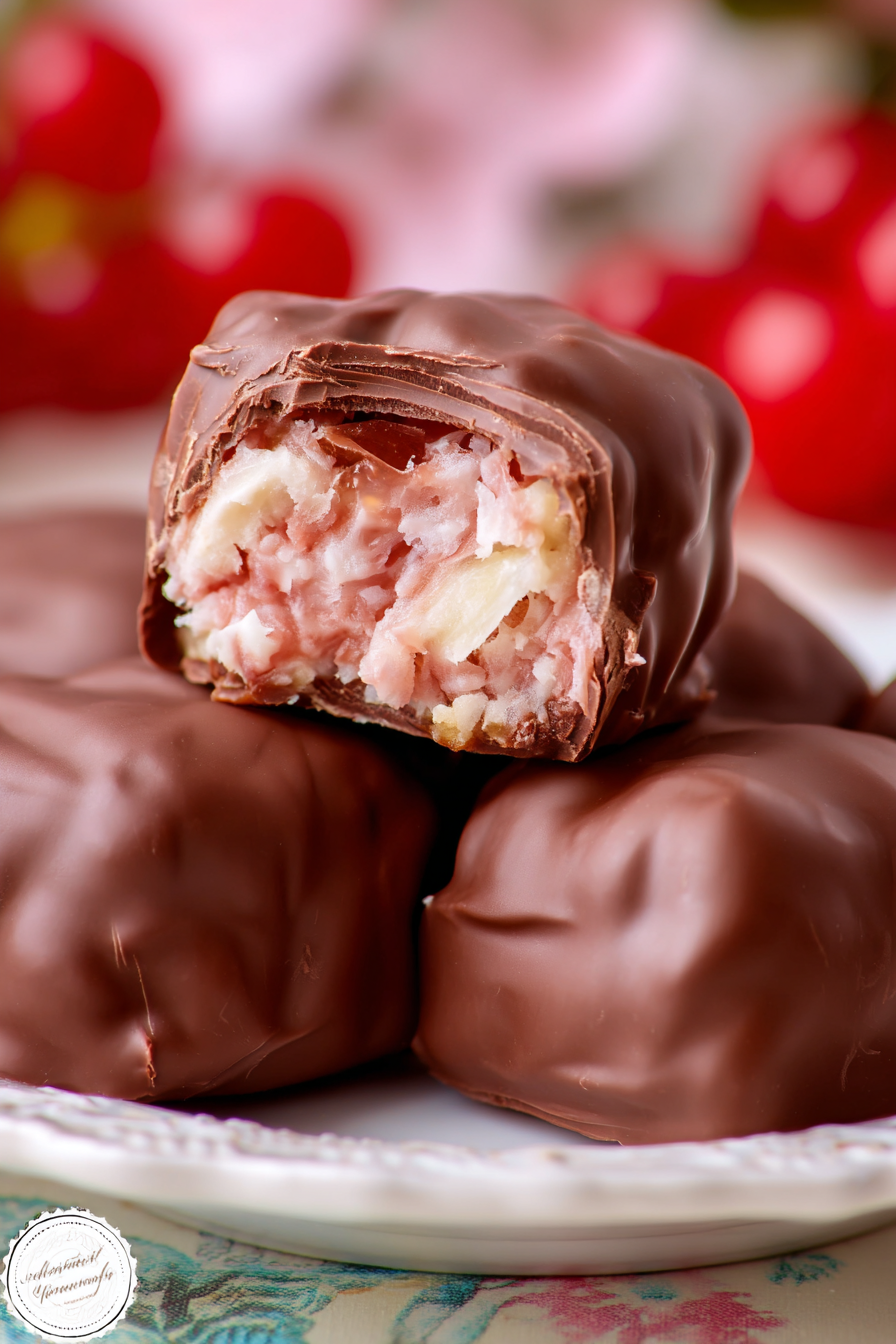
Martha Washington Candies are an old-fashioned confection that has stood the test of time. Featuring a sweet coconut and vanilla filling encased in rich chocolate, they make the perfect bite-sized treat for holidays, parties, or gift-giving. These candies are beloved because they’re rich, decadent, and easy to make in large batches. Whether you’re preparing them for Christmas cookie trays or just craving something sweet, these candies deliver on flavor and tradition.
My recipe story
This recipe has been passed down through generations in many families, and for good reason. My first encounter with Martha Washington Candies was during a family Christmas when my grandmother surprised us with tins filled with them. The creamy, sweet filling paired with the snap of chocolate instantly became one of my favorites. Over the years, I’ve experimented with small tweaks, but the core ingredients remain the same. These candies have become a staple in my holiday baking routine, and now I’m excited to share my version with you.
💡 Why You’ll Love This Recipe
- Classic, nostalgic candy with timeless flavor.
- Simple ingredients you likely already have in your pantry.
- Perfect for holidays, parties, and homemade gifts.
- No special candy-making skills or tools required.
- Rich, sweet, and chocolatey—ideal for any sweet tooth.
Ingredient breakdown
The beauty of Martha Washington Candies lies in their simplicity. The filling starts with butter, which gives a creamy base that balances the sweetness. Using melted butter ensures the filling has a smooth consistency and blends well with the powdered sugar.
Powdered sugar acts as the backbone of the filling, providing sweetness while also binding everything together. It creates a soft but firm dough that’s easy to shape into bite-sized balls.
Vanilla extract is essential for depth of flavor. It enhances the sweetness without being overpowering, giving these candies their signature aroma. Finally, shredded sweetened coconut adds texture and tropical richness, making the filling both chewy and satisfying. Once coated in chocolate, the combination is simply irresistible.
Equipment you’ll need
- Mixing bowls
- Electric mixer or sturdy spoon
- Baking sheet
- Parchment paper or wax paper
- Microwave-safe bowl or double boiler for melting chocolate
- Fork or dipping tool for coating candies
- Airtight container for storage
Step-by-step directions
- Prepare the filling: In a large mixing bowl, combine the melted butter, powdered sugar, vanilla extract, and shredded coconut. Stir until all the ingredients are thoroughly incorporated, forming a thick, sticky mixture. This is the base of your candy, so take your time ensuring everything is evenly combined.
- Shape the candies: Line a baking sheet with parchment paper. Scoop out small portions of the filling mixture and roll them into bite-sized balls. Place each ball onto the prepared baking sheet, leaving a little space between them. This process may be slightly sticky, but lightly greasing your hands will help.
- Chill the filling: Transfer the baking sheet with the coconut balls to the refrigerator for at least one hour. Chilling helps the candies firm up, making them easier to coat in chocolate later. Skipping this step may cause the balls to fall apart during dipping.
- Melt the chocolate: Place your chosen chocolate (semi-sweet, dark, or milk) in a microwave-safe bowl. Heat in 30-second intervals, stirring between each, until smooth and fully melted. Alternatively, use a double boiler to gently melt the chocolate without scorching it.
- Dip the candies: Using a fork or dipping tool, carefully lower each chilled coconut ball into the melted chocolate. Ensure it’s fully coated, then lift it out and allow any excess chocolate to drip off. Place the coated candy back onto the parchment-lined baking sheet.
- Set and store: Once all candies are coated, let them sit at room temperature until the chocolate hardens. For faster results, you can refrigerate them for 20–30 minutes. Once set, store the candies in an airtight container until ready to enjoy.

Variations & substitutions
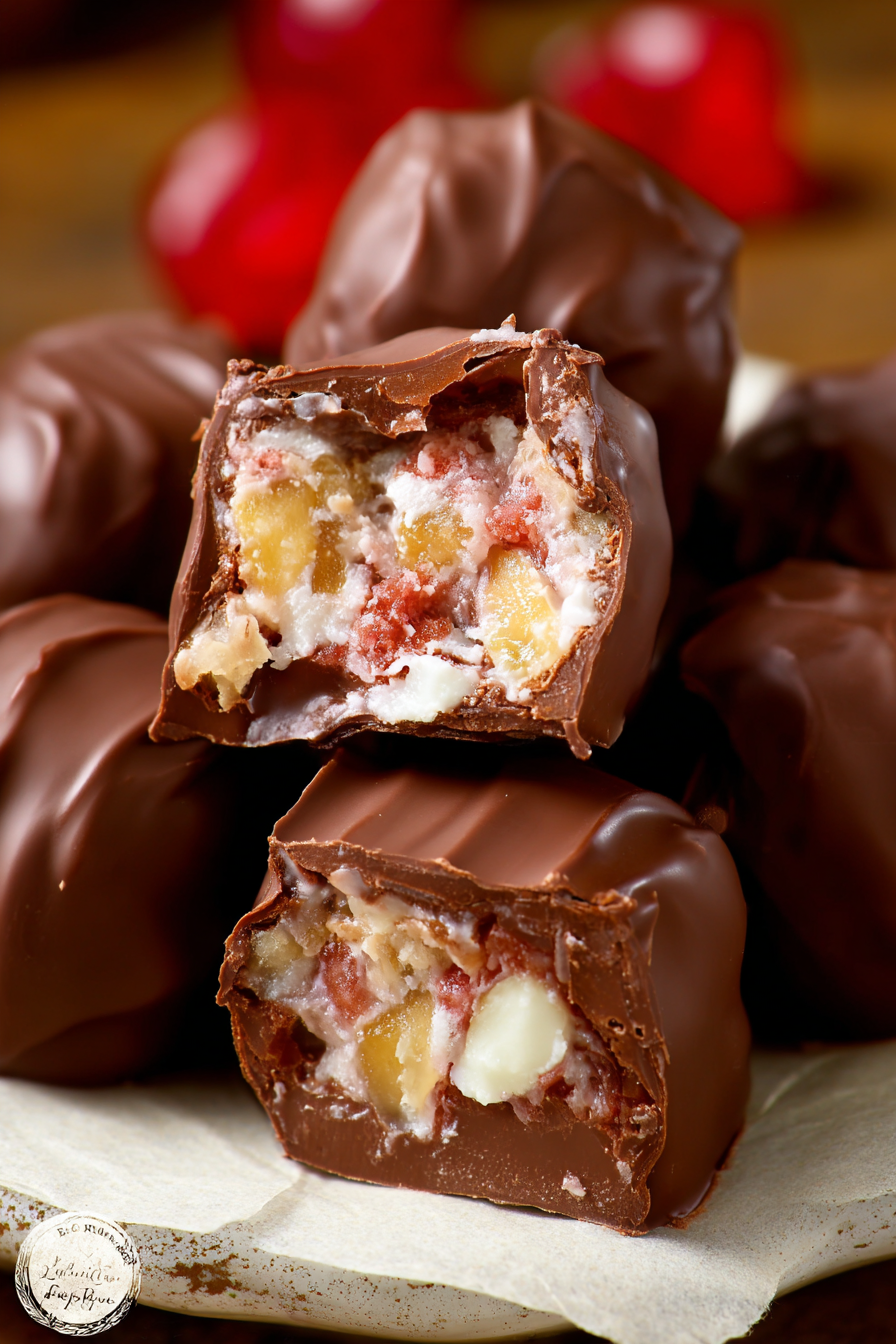
One of the best things about this recipe is how easily customizable it is. Instead of shredded sweetened coconut, you can use unsweetened coconut if you prefer a less sweet version. Adding chopped pecans or walnuts to the filling creates extra texture and nutty flavor. For a flavor twist, consider substituting almond extract for the vanilla. If you want to switch up the coating, try using white chocolate or even candy melts in festive colors to match holidays or special events.
💡 Expert Tips & Troubleshooting
- Chill the filling long enough—rushing this step can cause candies to fall apart when dipping.
- If the chocolate thickens while dipping, reheat it gently in short intervals.
- Use a fork or candy-dipping tool for a smoother coating and fewer messes.
- For perfectly round candies, use a small cookie scoop to portion the filling.
- Sprinkle with shredded coconut or crushed nuts while the chocolate is still wet for decoration.
Storage, freezing & make-ahead
Martha Washington Candies store beautifully, making them perfect for holiday prep. Keep them in an airtight container at room temperature for up to 5 days or in the refrigerator for 2 weeks. For longer storage, freeze them in a single layer, then transfer to a freezer-safe bag. They’ll keep for up to 2 months. Simply thaw them in the refrigerator before serving. Because they hold up well, these candies are a wonderful make-ahead option for busy seasons.
Serving ideas & pairings
These candies are versatile and can be served in countless ways. Arrange them on a holiday dessert platter alongside cookies and fudge for a festive display. They also make wonderful edible gifts when packaged in decorative tins or boxes. Pair them with coffee, tea, or hot chocolate for a cozy afternoon treat. For a more decadent pairing, serve them with a glass of red wine or dessert liqueur.
FAQ
Can I make these without coconut?
The coconut is traditional, but you can omit it and add more nuts or even crushed graham crackers for texture.
What type of chocolate works best?
Semi-sweet or dark chocolate balances the sweetness well, but milk chocolate is also delicious if you prefer a sweeter candy.
Can I make them nut-free?
Yes, simply skip any nut add-ins and double-check your chocolate brand to ensure it’s nut-free.
Do I need to temper the chocolate?
For home baking, tempering isn’t necessary. Just melting and cooling works fine, though tempered chocolate gives a shinier finish.
How many candies does this recipe make?
Depending on the size, you’ll typically get about 40–50 bite-sized candies from one batch.
Final thoughts
Martha Washington Candies are a timeless treat that brings joy to any occasion. With their creamy coconut filling and rich chocolate shell, they’re both nostalgic and satisfying. Whether you’re preparing them for the holidays, gifting them to friends, or indulging in a sweet bite for yourself, these candies are always a hit. Once you make them, they’re sure to become a cherished addition to your recipe collection.
Print
Martha Washington Candies
- Total Time: 1 hour 30 minutes (includes chilling)
- Yield: 40–50 candies
- Diet: Vegetarian
Description
Classic old-fashioned candies with a creamy coconut-vanilla filling coated in rich chocolate. Perfect for holidays, parties, or gifting.
Ingredients
- 1 cup butter, melted
- 1 pound powdered sugar
- 1 tablespoon vanilla extract
- 14 ounces shredded sweetened coconut
- 12 ounces semi-sweet chocolate, melted
Instructions
- In a large bowl, combine melted butter, powdered sugar, vanilla extract, and shredded coconut until well mixed.
- Shape the mixture into small bite-sized balls and place them on a parchment-lined baking sheet.
- Chill the coconut balls in the refrigerator for at least 1 hour until firm.
- Melt the chocolate in a microwave-safe bowl or using a double boiler until smooth.
- Dip each chilled ball into the melted chocolate, coating completely, and place back on the baking sheet.
- Let the candies set at room temperature or refrigerate until the chocolate hardens.
Notes
Store in an airtight container at room temperature for up to 5 days or refrigerate for up to 2 weeks. These candies also freeze well for up to 2 months.
- Prep Time: 30 minutes
- Cook Time: 0 minutes
- Category: Dessert
- Method: No-Bake
- Cuisine: American