Introduction
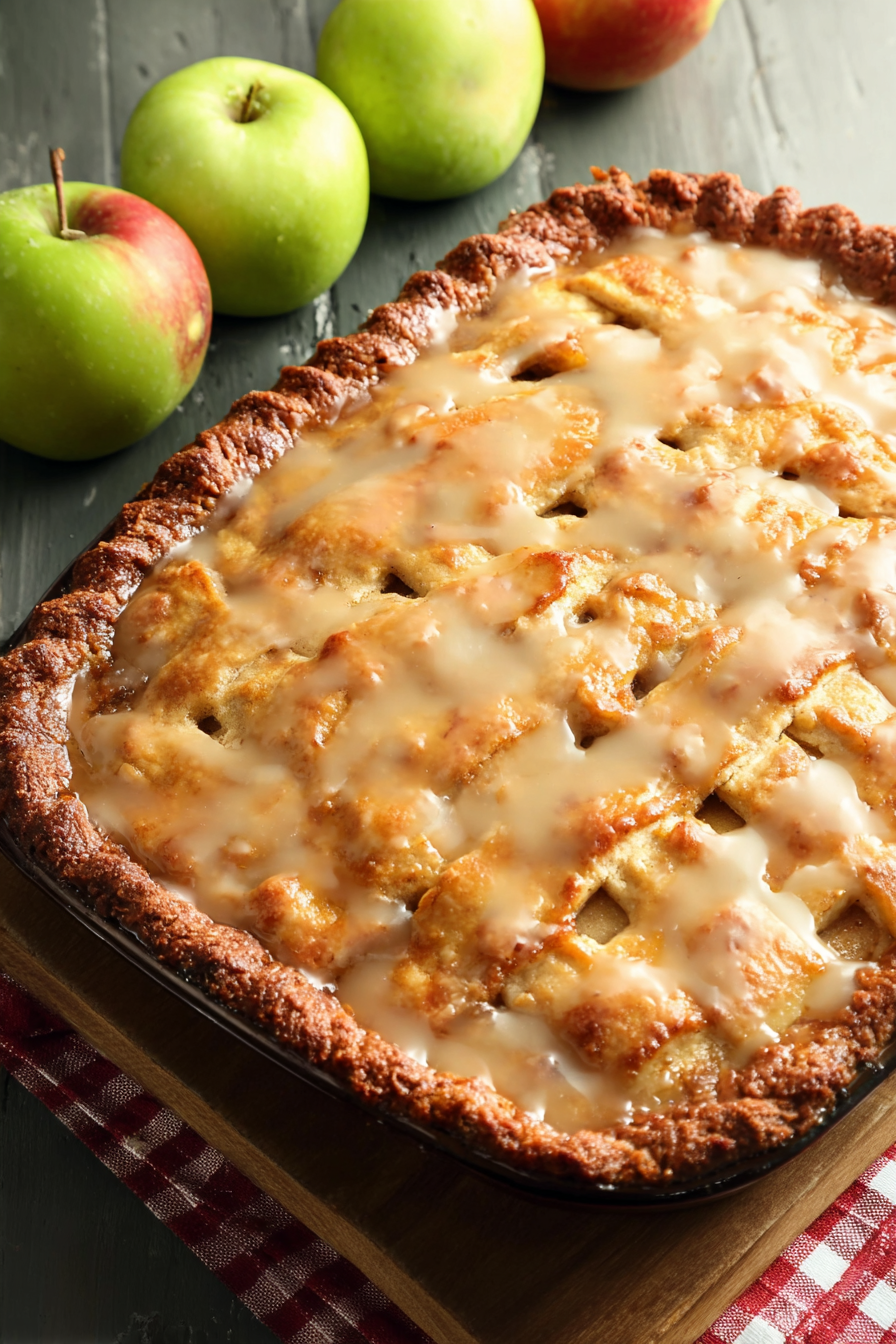
There’s something deeply comforting about apple pie, and Mom’s flat apple pie takes this classic dessert to a new level of simplicity and charm. Unlike a traditional pie that’s baked in a deep dish, this version is flatter, almost resembling a slab pie, making it perfect for slicing into squares and serving to a crowd. With its buttery crust, sweet apple filling, and a clever cornflake barrier that keeps the base from getting soggy, this recipe has stood the test of time. It’s the kind of pie that smells like home, tastes like love, and looks like it came straight from grandma’s kitchen.
My recipe story
This flat apple pie recipe has been passed down through generations in many families, including mine. My mother often baked it on chilly fall weekends when the orchard apples were fresh and abundant. Unlike fancy desserts, this pie wasn’t about perfection—it was about togetherness. I remember the smell of cinnamon, the crackle of cornflakes, and the golden crust that seemed almost magical when pulled from the oven. As kids, we didn’t care about presentation; we cared about grabbing the warmest square before anyone else did. Today, I bake it not just for its flavor but for the memories it brings to my own table.
💡 Why You’ll Love This Recipe
- Rustic and homey, perfect for casual family gatherings or holiday spreads.
- Flatter design makes slicing and serving easier than traditional apple pie.
- Unique cornflake layer prevents soggy crust, keeping each bite flaky.
- Uses simple pantry staples—no special ingredients required.
- Customizable with different spices, sweeteners, or apple varieties.
Ingredient breakdown
This recipe keeps things simple and traditional. The base crust comes together with flour, salt, shortening, and a milk-and-egg yolk mixture that ensures tenderness and structure. Shortening gives the crust its flakiness, while the milk enriches it, adding depth without heaviness.
The cornflakes are a clever addition—they form a thin layer between the crust and the apples, soaking up juices so your crust stays crisp. The apples themselves are the star, providing natural sweetness, tartness, and moisture. When baked, the fruit softens into a filling that balances perfectly against the flaky crust and crunchy cornflakes.
Don’t forget your spices—though not listed in the base recipe, cinnamon, nutmeg, or a pinch of allspice can easily be added to the apples to create that warm, cozy flavor we all associate with classic apple desserts.
Equipment you’ll need
- Large mixing bowl
- Pastry cutter or two knives (for cutting shortening into flour)
- Measuring cups and spoons
- Rolling pin
- Flat baking sheet or rectangular baking pan
- Parchment paper (optional, for easier cleanup)
- Sharp knife or apple slicer
Step-by-step directions
Step 1: Prepare the crust. In a large bowl, whisk together 3 3/4 cups all-purpose flour and 3/4 teaspoon salt. Cut in 1 1/2 cups shortening with a pastry cutter or fork until the mixture resembles coarse crumbs. Add the egg yolk and enough milk to make 1 cup liquid total, then gradually mix it in until the dough comes together. Divide the dough into two equal portions, wrap them in plastic wrap, and chill for at least 30 minutes.
Step 2: Roll out the dough. On a lightly floured surface, roll one portion of the dough into a rectangle that will fit your baking sheet. Place it on the prepared pan. This will be your bottom crust.
Step 3: Add the cornflakes. Sprinkle 2–3 handfuls of cornflakes evenly over the bottom crust. This may seem unusual, but the cornflakes serve as a moisture barrier, preventing the apple juices from soaking into the pastry.
Step 4: Prepare the apples. Peel, core, and slice 6–8 medium apples (Granny Smith, Honeycrisp, or a mix). Toss them with sugar to taste, along with a teaspoon of cinnamon and a pinch of nutmeg if desired. Spread the apple mixture evenly over the cornflakes.
Step 5: Add the top crust. Roll out the second portion of dough to the same size as the first and carefully place it over the apples. Seal the edges by pinching them together. Cut small slits on the surface to allow steam to escape.
Step 6: Bake the pie. Preheat the oven to 375°F (190°C). Bake the pie for 40–45 minutes or until the crust is golden brown and the apples are tender. Cool slightly before slicing into squares and serving.
Variations & substitutions
You can experiment with this pie in many ways. Swap apples for pears or peaches in summer months for a lighter version. Try using puff pastry for the crust if you want a flakier, lighter base. Add raisins or dried cranberries to the filling for extra sweetness. For a healthier twist, you could even reduce the sugar and let the apples’ natural flavors shine.
💡 Expert Tips & Troubleshooting
- Chill your dough before rolling to prevent it from becoming too sticky.
- Don’t skip the cornflakes—they’re the secret to a crisp crust.
- If your crust cracks while rolling, patch it with extra dough and press gently.
- Use a mix of tart and sweet apples for balanced flavor.
- Brush the top crust with milk or egg wash for a glossy, golden finish.
Storage, freezing & make-ahead
This pie can be stored at room temperature for up to 2 days, loosely covered with foil or plastic wrap. For longer storage, refrigerate it for up to 5 days. To freeze, wrap individual slices in plastic wrap and place in an airtight container—frozen pie can last up to 3 months. Reheat slices in the oven at 325°F (165°C) until warmed through for best texture.
Serving ideas & pairings
Mom’s flat apple pie pairs beautifully with a scoop of vanilla ice cream, a dollop of whipped cream, or even a drizzle of caramel sauce. For a cozy fall dessert, serve it warm alongside hot apple cider or spiced tea. During the holidays, pair it with mulled wine or a cup of strong coffee to balance the sweetness. Its flat, sliceable design also makes it ideal for potlucks and gatherings where everyone can grab a square.
FAQ
Can I use butter instead of shortening? Yes, but shortening provides extra flakiness. A half-butter, half-shortening blend works beautifully.
What are the best apples for this pie? Granny Smith, Honeycrisp, or a mix of tart and sweet apples yield the best flavor.
Do I need to pre-bake the crust? No, the cornflakes prevent sogginess, so pre-baking is not necessary.
Can I make this pie ahead of time? Absolutely! Bake a day in advance and store covered at room temperature until serving.
How do I keep the crust from burning? If the edges brown too quickly, cover them with foil during the last 15 minutes of baking.
Final thoughts
Mom’s flat apple pie is proof that simple ingredients and old-fashioned methods can create something extraordinary. It’s a dessert filled with comfort, history, and the flavors of home. Whether you’re baking it for a family gathering, a holiday celebration, or just to bring a little sweetness into an ordinary day, this pie will never disappoint. Try it once, and it’s bound to become a family tradition at your table too.
Print
mom’s flat apple pie
- Total Time: 1 hour 10 minutes
- Yield: 12–15 servings 1x
- Diet: Vegetarian
Description
A rustic, family-style apple pie with a flaky crust, juicy apples, and a crunchy cornflake layer that keeps every bite perfectly crisp.
Ingredients
- 3 3/4 cups all-purpose flour
- 3/4 teaspoon salt
- 1 1/2 cups shortening
- 1 egg yolk, plus enough milk to make 1 cup of liquid
- 2–3 handfuls cornflakes
- 6–8 medium apples, peeled, cored, and sliced
- 3/4–1 cup granulated sugar (adjust to taste)
- 1 teaspoon ground cinnamon
- Pinch of nutmeg (optional)
Instructions
- In a large bowl, combine flour and salt. Cut in shortening until mixture resembles coarse crumbs. Stir in egg yolk and milk mixture until dough forms. Divide in half and chill 30 minutes.
- Roll out one portion of dough to fit a large baking sheet. Place it on the sheet as the bottom crust.
- Sprinkle cornflakes evenly over the crust to create a barrier for the apple juices.
- Toss apple slices with sugar, cinnamon, and nutmeg. Spread evenly over the cornflakes.
- Roll out the second portion of dough and place over the apples. Seal edges and cut small slits on top for steam.
- Bake at 375°F (190°C) for 40–45 minutes, until crust is golden brown and apples are tender. Cool slightly before slicing into squares.
Notes
Best served warm with vanilla ice cream or whipped cream. Store covered at room temperature for 2 days or refrigerate up to 5 days. Reheat slices in the oven for best texture.
- Prep Time: 25 minutes
- Cook Time: 45 minutes
- Category: Dessert
- Method: Baking
- Cuisine: American