Introduction
No-bake desserts have a special place in my kitchen, especially when the weather is warm and turning on the oven feels like a chore. This No-Bake Pineapple Cream Dessert is a delightful combination of a buttery graham cracker crust, a luscious cream filling, and sweet, juicy pineapple that brings the taste of the tropics straight to your table. It’s light yet indulgent, simple yet elegant, and best of all—requires no baking at all. Whether you’re hosting a summer cookout, celebrating a special occasion, or just want a quick and impressive dessert, this recipe will become one of your go-to favorites.
My recipe story
This recipe was inspired by the no-bake pies and layered desserts my grandmother used to make. Growing up, there was always at least one creamy fruit dessert chilling in the refrigerator during the summer months. Pineapple was a frequent star because it paired so beautifully with cream and added a refreshing tang that cut through the richness. Over the years, I experimented with different versions—sometimes using whipped topping, other times cream cheese, and occasionally adding shredded coconut for texture. This version is my personal favorite: balanced, simple, and reliably delicious every single time. It’s a recipe that feels nostalgic but also timeless, perfect for passing down to the next generation.
💡 Why You’ll Love This Recipe
- No oven required—perfect for warm days when you want to avoid heat.
- Uses simple, pantry-friendly ingredients you likely already have on hand.
- Creamy, dreamy texture with a refreshing tropical pineapple flavor.
- Make-ahead friendly, so you can prepare it the day before serving.
- Versatile enough for casual family meals or elegant dinner parties.
Ingredient breakdown
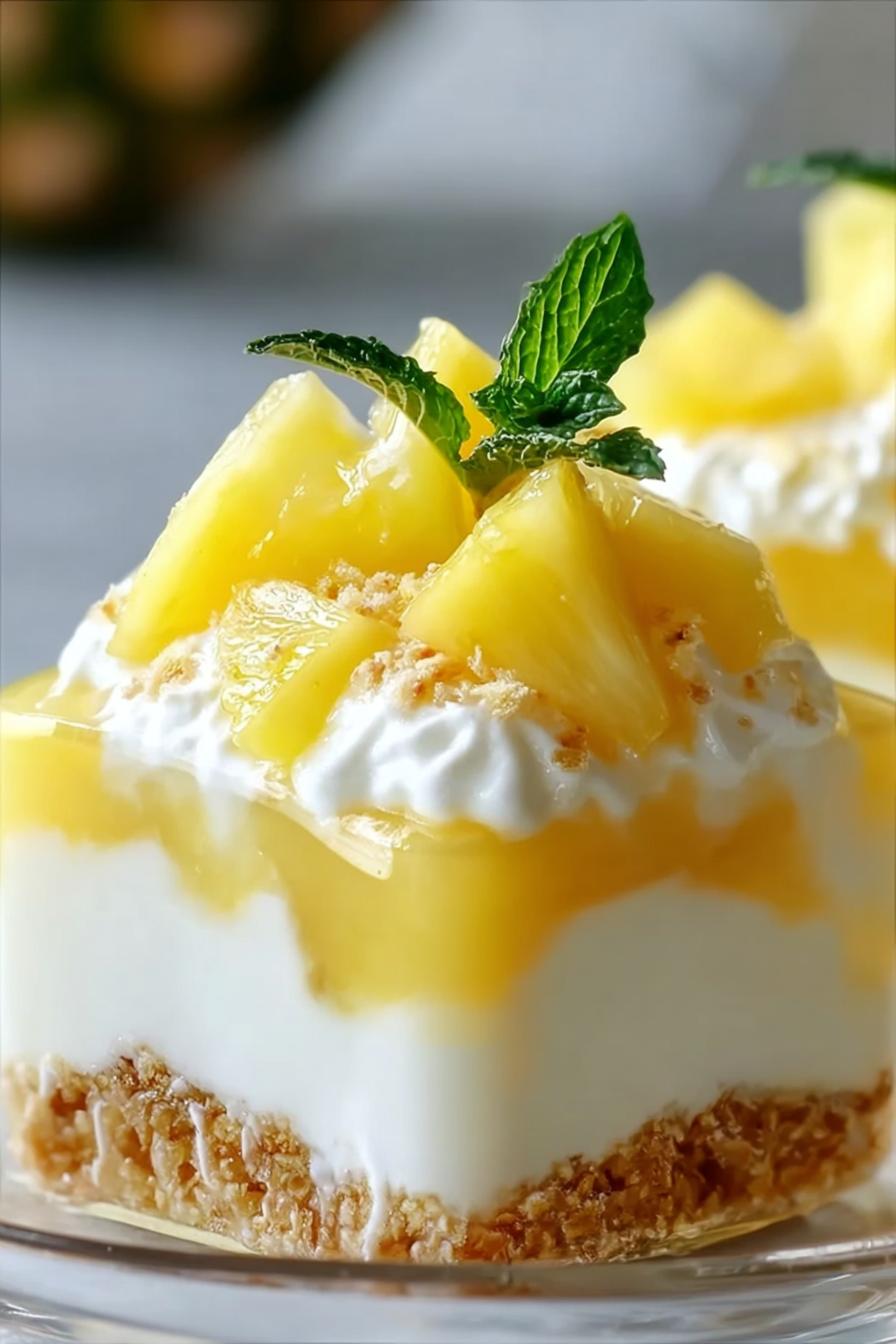
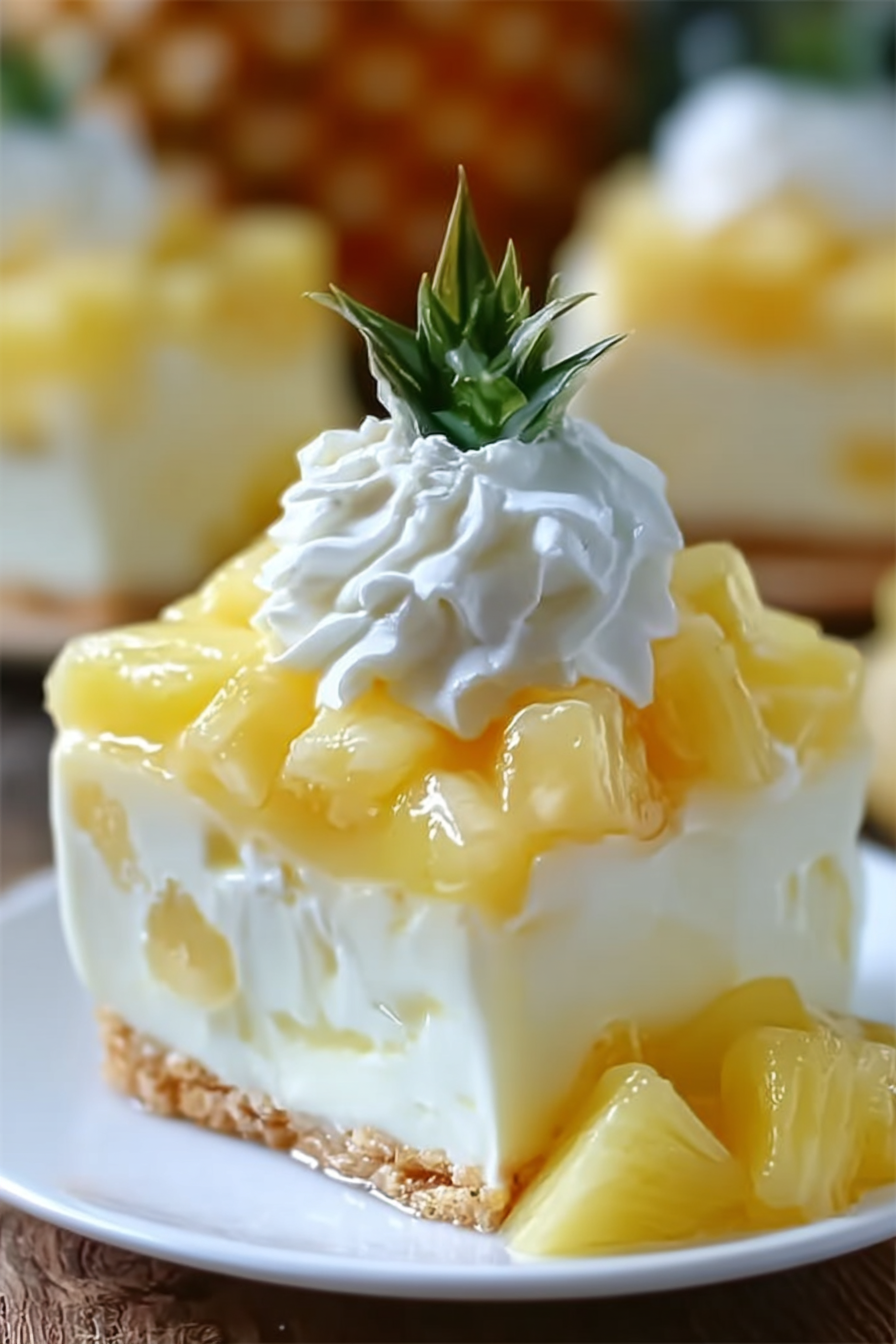
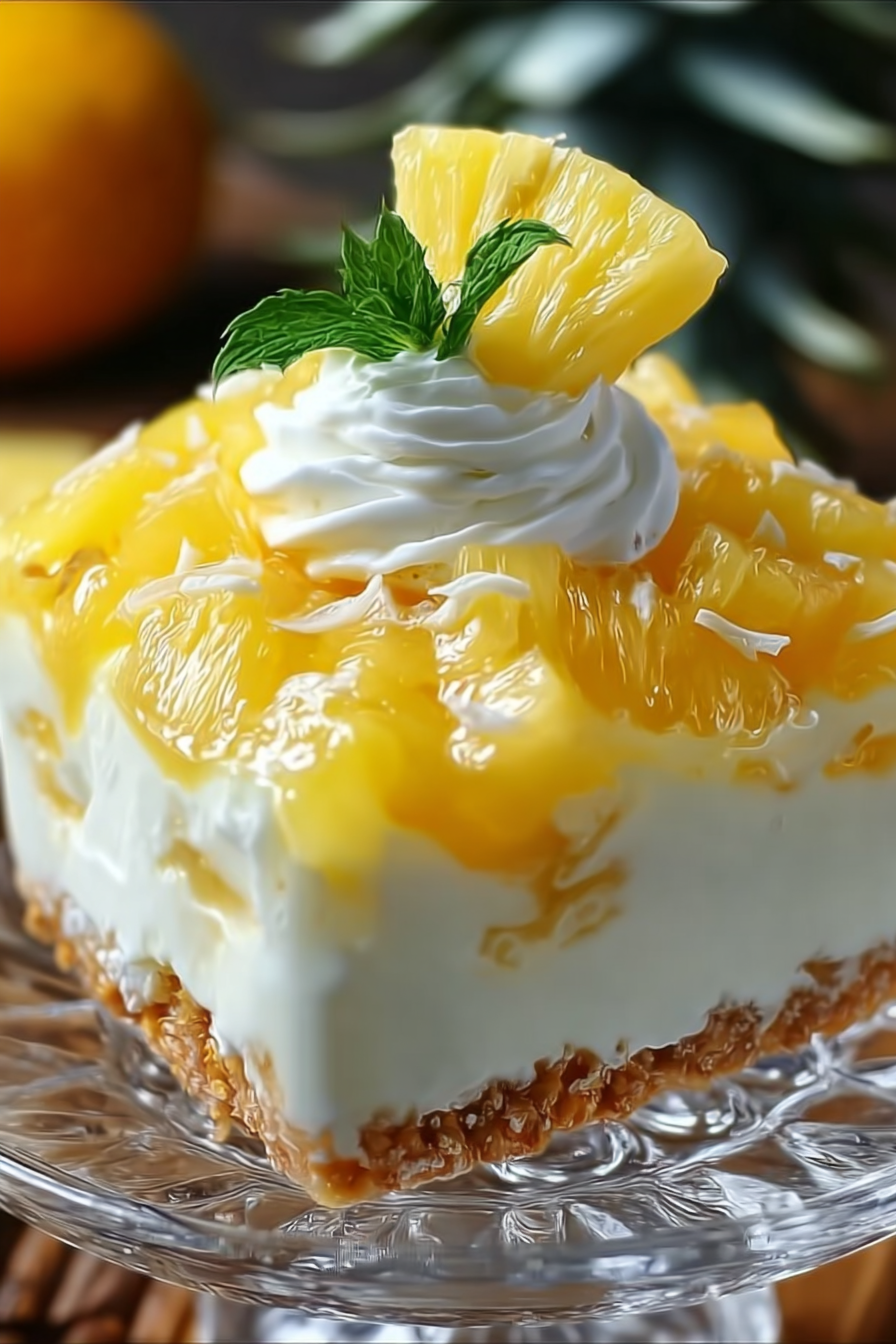
The beauty of this dessert lies in its simplicity. The crust is made with graham crackers, sugar, and melted butter—creating a firm but tender base that perfectly holds the creamy filling. You can even swap graham crackers for vanilla wafers or digestive biscuits for a slightly different flavor profile.
The filling is a luscious combination of cream cheese, powdered sugar, whipped topping, and crushed pineapple. The cream cheese provides a rich, tangy foundation, the powdered sugar sweetens without grittiness, and the whipped topping ensures an airy texture. The star, of course, is pineapple. Its natural sweetness and slight acidity cut through the creaminess and provide little bursts of tropical flavor in every bite. For best results, drain your pineapple well to prevent a soggy filling.
Finally, a sprinkle of crushed graham crackers or extra pineapple on top adds both beauty and texture. You can also garnish with a sprig of mint or toasted coconut flakes to enhance presentation.
Equipment you’ll need
- Mixing bowls (at least two)
- Hand mixer or stand mixer
- Rubber spatula
- Measuring cups and spoons
- 8×8-inch baking dish (or similar size)
- Refrigerator space for chilling
Step-by-step directions
Step 1: Prepare the crust. Start by crushing graham crackers into fine crumbs using a food processor or a resealable bag and rolling pin. Combine the crumbs with melted butter and a little sugar, then press firmly into the bottom of your baking dish. This layer should be even and compact to hold the creamy filling later. Place the dish in the refrigerator while you prepare the next layers, giving the crust time to firm up.
Step 2: Make the cream filling. In a mixing bowl, beat softened cream cheese until smooth and creamy. Add powdered sugar gradually, mixing until well combined. Fold in whipped topping gently to avoid deflating it, creating a light and fluffy mixture. This forms the base of your dessert filling, which should be silky and sweet with just the right tang.
Step 3: Add the pineapple. Drain crushed pineapple thoroughly, pressing lightly with a spoon to remove excess juice. Stir the pineapple into the cream mixture until evenly distributed. The goal is to maintain the cream’s airy texture while ensuring little bursts of pineapple flavor throughout. Taste and adjust sweetness if necessary.
Step 4: Assemble the dessert. Spread the pineapple cream filling evenly over the chilled crust, smoothing the top with a spatula. Make sure the filling covers the crust completely and sits in an even layer. At this stage, you can add optional toppings like a sprinkle of graham crumbs, extra pineapple chunks, or a dusting of shredded coconut.
Step 5: Chill and serve. Cover the dish with plastic wrap or foil and refrigerate for at least 4 hours, preferably overnight. This chilling period allows the dessert to set properly and develop its flavors. When ready to serve, cut into squares or slices and garnish with a mint sprig or whipped cream if desired. Enjoy the cool, creamy indulgence!
Variations & substitutions
This recipe is very adaptable. Swap crushed pineapple for diced mango or peaches to give the dessert a different fruity profile. If you prefer a tangier dessert, add a splash of lemon juice or zest to the cream mixture. For a lighter version, substitute Greek yogurt for part of the cream cheese. If you love coconut, fold in a handful of shredded coconut into the filling or sprinkle some toasted coconut on top. The crust can also be varied—vanilla wafers, shortbread cookies, or even chocolate graham crackers all work beautifully and change the flavor profile in fun ways.
💡 Expert Tips & Troubleshooting
- Drain the pineapple well—too much liquid can make the filling runny.
- Use softened cream cheese for a smooth, lump-free filling.
- Chill for at least 4 hours to ensure the dessert holds its shape.
- If the crust feels too crumbly, add a little more melted butter to help bind it.
- For cleaner slices, dip your knife in hot water and wipe dry before cutting.
Storage, freezing & make-ahead
This dessert stores beautifully in the refrigerator for up to 3 days. Keep it covered tightly with plastic wrap or in an airtight container to maintain freshness. If you’d like to make it ahead, prepare the dessert the night before serving—it will taste even better after chilling overnight. Freezing is also an option: wrap the dish tightly in foil and freeze for up to 1 month. Thaw overnight in the refrigerator before serving. Keep in mind that the texture may soften slightly after freezing, but the flavor remains delicious.
Serving ideas & pairings
This dessert is delightful on its own but can also be elevated with thoughtful pairings. A drizzle of caramel sauce adds richness, while fresh berries provide a tart contrast. Serve with iced tea, lemonade, or even a tropical cocktail like a piña colada for a complete summer experience. For a more elegant presentation, layer the dessert in individual parfait glasses and top each with a dollop of whipped cream and a pineapple wedge. It’s also a wonderful addition to potlucks and buffet tables since it travels well and appeals to a crowd.
FAQ
Can I use fresh pineapple instead of canned? Yes, but fresh pineapple should be finely chopped and drained thoroughly. Keep in mind it can sometimes cause cream mixtures to separate, so canned is more reliable.
Can I use homemade whipped cream instead of whipped topping? Absolutely! Just whip heavy cream with a little sugar until stiff peaks form. Fold it gently into the cream cheese mixture as directed.
Can I make this dessert in advance? Yes, in fact it’s best made ahead since it needs several hours to chill. You can prepare it the night before serving without any issues.
Can I make this gluten-free? Definitely—simply use gluten-free graham crackers or cookies for the crust.
How do I prevent the crust from falling apart? Press the crumb mixture firmly into the dish and add a little extra butter if needed. Chilling the crust before adding the filling also helps it set.
Final thoughts
No-Bake Pineapple Cream Dessert is the kind of recipe that makes entertaining effortless. It’s simple, refreshing, and universally loved—qualities every great dessert should have. With its creamy texture, sweet pineapple flavor, and easy preparation, it’s bound to become one of your family’s favorite summer treats. The best part is that it’s endlessly adaptable, meaning you can put your own twist on it each time you make it. Whether you’re serving it for a party, a family dinner, or just because you deserve a treat, this dessert is guaranteed to brighten the table and bring smiles all around.
Print
No-bake Pineapple Cream Dessert
- Total Time: 20 minutes plus chilling
- Yield: 12 servings
- Diet: Vegetarian
Description
A light and refreshing dessert with layers of pineapple, cream, and a buttery crust. Perfect for summer gatherings or quick sweet cravings.
Ingredients
- 2 cups crushed graham crackers
- 1/2 cup unsalted butter, melted
- 1/4 cup granulated sugar
- 1 can (20 oz) crushed pineapple, well-drained
- 8 oz cream cheese, softened
- 1/2 cup powdered sugar
- 2 cups whipped topping (such as Cool Whip)
- Pineapple chunks or extra crushed graham crackers, for garnish
Instructions
- In a bowl, mix crushed graham crackers, melted butter, and granulated sugar until combined. Press firmly into the bottom of a 9×13-inch dish to form the crust.
- In another bowl, beat cream cheese and powdered sugar until smooth and creamy. Fold in the whipped topping until well blended.
- Spread the cream mixture evenly over the graham cracker crust.
- Top with the drained crushed pineapple, spreading it out evenly across the cream layer.
- Chill in the refrigerator for at least 3–4 hours, or until firm and set.
- Garnish with pineapple chunks or extra graham cracker crumbs before serving.
Notes
Best served chilled. Can be made a day ahead for convenience. Store leftovers in the refrigerator for up to 3 days.
- Prep Time: 20 minutes
- Cook Time: 0 minutes
- Category: Dessert
- Method: No-Bake
- Cuisine: American