No Bake Zombie Brain Cheesecake: A Creepy, Creamy Halloween Showstopper
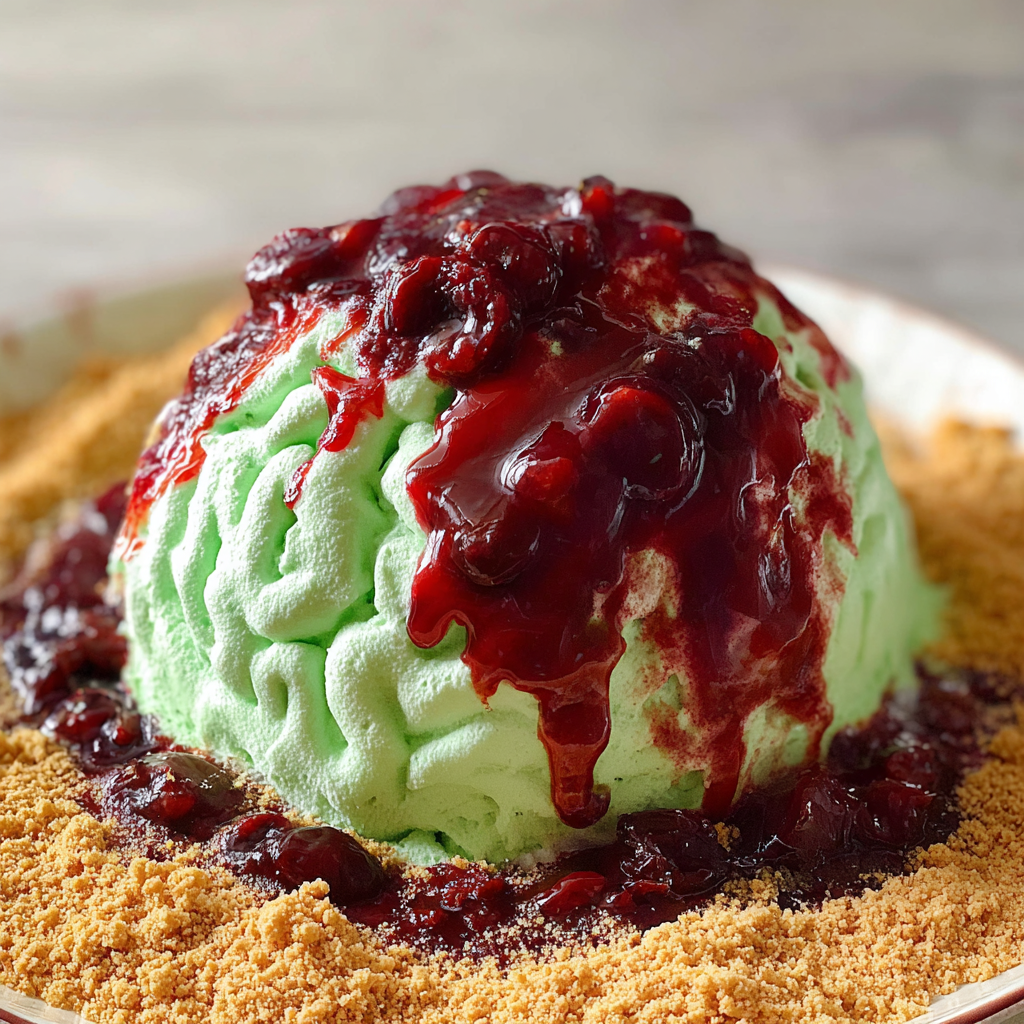
Halloween desserts should be as fun to look at as they are delicious to eat — and this No Bake Zombie Brain Cheesecake is exactly that. With its eerie green hue, fluffy cheesecake filling, and gory cherry “brain” topping, it’s a dessert that looks straight out of a haunted kitchen but tastes like a dream. Creamy, tangy, and sweet in perfect balance, this cheesecake is an easy no-bake recipe that’s perfect for Halloween parties, classroom celebrations, or a spooky night at home with your favorite scary movies.
What I love most about this recipe is how simple it is. There’s no oven involved, no finicky baking process, and no cracking cheesecake tops to worry about. You simply whip the cream, beat the cream cheese mixture, fold everything together, tint it zombie green, and top it with glossy cherry pie filling for a realistic (and deliciously gross) “brain” effect. The contrast between the light, fluffy filling and the sweet-tart cherry topping makes every bite irresistible.
If you enjoy playful, themed Halloween desserts that double as conversation starters, this cheesecake will be a hit. It’s kid-friendly, quick to assemble, and guaranteed to draw some laughs (and maybe a few mock screams!) at the dessert table. For more ghoulishly fun ideas, check out other Halloween recipes like Bloody Red Velvet Cupcakes or Mummy Brownies. But first — let’s bring this zombie to life!
Recipe Card
Print
No Bake Zombie Brain Cheesecake
Description
This No Bake Zombie Brain Cheesecake combines creamy, tangy cheesecake filling tinted zombie green with a gory cherry topping that looks just like brains! It’s creepy, festive, and absolutely delicious — the perfect Halloween dessert that’s fun for all ages.
Ingredients
- 16 oz fat-free cream cheese, softened
- ⅔ cup natural sweetener (or sugar substitute of your choice)
- 2 teaspoons vanilla extract
- 4 teaspoons fresh lemon juice
- Green food coloring (gel or liquid)
- 1½ cups heavy whipping cream
- 1 (21 oz) can cherry pie filling
Instructions
- Prepare the Cream Cheese Mixture:
In a large mixing bowl, beat the cream cheese with a hand or stand mixer until smooth and fluffy, about 2–3 minutes. Add the sweetener, vanilla extract, and lemon juice. Beat again until fully incorporated and creamy. - Tint the Cheesecake Green:
Add green food coloring a few drops at a time, mixing after each addition, until you achieve your desired zombie-green color. For an extra ghoulish effect, use a mix of neon and forest green. - Whip the Cream:
In a separate chilled bowl, whip the heavy cream on high speed until stiff peaks form (about 3–4 minutes). Don’t overbeat — it should hold shape but still look smooth and airy. - Fold It All Together:
Gently fold the whipped cream into the green cream cheese mixture with a spatula. Take your time — you want to keep the mixture light and fluffy while fully combining the two components. - Assemble the Cheesecake:
Spoon the filling into an 8- or 9-inch pie dish or springform pan. Smooth the top with a spatula, then cover with plastic wrap. - Chill:
Refrigerate for at least 4 hours, or until set. Overnight is even better for a firmer texture. - Add the “Brains”:
Just before serving, spread the cherry pie filling over the top of the cheesecake. The glossy cherries create a perfect “bloody brain” effect that’s both spooky and delicious. - Serve and Enjoy:
Slice, serve chilled, and prepare for compliments (and creepy giggles)!
Notes
Active time: 20 minutes
Chill time: 4+ hours
Total: 4 hours 20 minutes
If you prefer a crust, you can add a graham cracker or Oreo cookie crust before filling. Simply press 1½ cups crushed cookies mixed with ¼ cup melted butter into the bottom of your pan and chill before adding the filling.
Advanced Techniques
Achieving the Perfect “Zombie Green” Shade
Getting the right shade of zombie green is all about balance. I like to start with two drops of neon green food coloring and one tiny drop of black or blue to give depth. This makes the color more realistic — not too bright, not too pastel. For a creepier look, swirl in a bit of darker green without fully mixing it for a “veiny” effect.
Creating a Stable No-Bake Cheesecake
No-bake cheesecakes sometimes collapse if the mixture is too loose. To prevent that, make sure your whipped cream reaches stiff peaks before folding it into the cream cheese base. Chill thoroughly for several hours (or overnight). If you’re serving outdoors, pop it in the freezer for 15–20 minutes before setting it out — it’ll hold shape better.
Adding a Creepy “Brain” Swirl
For an even eerier look, drizzle a few spoonfuls of cherry pie filling through the green cheesecake before chilling. Use a knife to swirl gently, creating a marbled, brain-like effect. When you top it with more cherry filling later, the layered color will look terrifyingly realistic!
Enhancing Flavor with Hidden Depth
A teaspoon of almond extract or a touch of zest from your lemon can add extra complexity to the cheesecake. Almond gives a subtle sweetness that pairs beautifully with cherries. Just a few drops make a big difference without changing the spooky color.
Making Individual Mini Cheesecakes
For parties, serve Zombie Brain Cheesecake in mini cups or shot glasses. Layer crushed Oreos at the bottom, then spoon in the green filling and top with cherry pie filling. It’s neater, easier to serve, and just as creepy (plus — no slicing needed!).
Storage, Shelf Life, and Maintenance Tips
Refrigerating for Freshness
Store your No Bake Zombie Brain Cheesecake covered in the refrigerator for up to 4 days. Keep it tightly sealed to prevent the cream from absorbing fridge odors. I like using a cake dome or wrapping the pan in plastic wrap.
Freezing for Later (Yes, It Works!)
You can freeze the cheesecake without the cherry topping for up to 2 months. Wrap tightly in plastic wrap and aluminum foil. When ready to serve, thaw overnight in the fridge and top with cherry pie filling before serving for the best texture.
Preventing the Topping from Bleeding
To keep the cherry topping from seeping into the cheesecake layer, add it just before serving. If you need to assemble in advance, spoon a thin layer of whipped cream between the cheesecake and cherries as a barrier.
Serving the Cheesecake Chilled but Creamy
For the ideal texture, remove the cheesecake from the fridge about 10 minutes before serving. It’ll soften slightly and the flavors will bloom beautifully, making it even more decadent.
Avoiding Weeping or Separation
Overbeating whipped cream or using low-fat cream cheese can sometimes cause water separation. To avoid this, use full-fat dairy products and make sure all ingredients are well chilled before mixing. The result will be a smooth, stable filling that holds up perfectly.
Dietary Adaptations and Substitutions
Making It Sugar-Free
If you’re cutting back on sugar, use a sugar-free cherry pie filling and a natural sweetener like erythritol or monk fruit instead of sugar. You’ll still get the same creamy texture and fruity topping with far fewer calories.
Keto-Friendly Zombie Cheesecake
To make this No Bake Zombie Brain Cheesecake keto-friendly, use full-fat cream cheese, heavy whipping cream, and a low-carb sweetener. Replace the cherry pie filling with a keto cherry compote made from frozen cherries, sweetener, and xanthan gum for thickness.
Dairy-Free or Vegan Adaptation
For a vegan version, use dairy-free cream cheese (like Kite Hill or Miyoko’s), coconut cream in place of whipped cream, and a vegan cherry pie filling. The result is rich and flavorful, with a faint coconut undertone that pairs wonderfully with cherries.
Low-Fat and High-Protein Option
If you’re looking to lighten things up, you can replace half the cream cheese with Greek yogurt. It keeps the tang while reducing fat and adding protein. Just make sure to fold gently to keep the mixture airy.
Gluten-Free Adaptation
This cheesecake is naturally gluten-free unless you add a crust with gluten-based cookies. For a safe base, use gluten-free graham crackers or almond flour crust if desired.
FAQs About No Bake Zombie Brain Cheesecake
Can I Make This Cheesecake Ahead of Time?
Yes! This dessert is perfect for making ahead. You can prepare it up to two days in advance and keep it refrigerated until serving. Just wait to add the cherry topping until the last moment to keep the “brains” fresh and glossy.
Do I Need a Crust for This Recipe?
Nope! This cheesecake holds beautifully without a crust, making it lighter and faster to prepare. However, if you want more texture, a cookie or graham crust works wonderfully.
Can I Use Whipped Topping Instead of Whipped Cream?
Yes, you can substitute with whipped topping like Cool Whip if you’re short on time. It will give the cheesecake a slightly sweeter flavor and a firmer texture.
Why Isn’t My Cheesecake Setting Properly?
If your cheesecake seems too soft, it may not have chilled long enough, or your whipped cream wasn’t stiff enough before folding. Give it extra fridge time or pop it in the freezer for 20–30 minutes to firm up before serving.
Can I Use a Different Fruit Topping?
Absolutely! While cherry pie filling gives the best “brain” look, you can also use raspberry or strawberry pie filling for a similar effect. Blueberry or blackberry topping gives a fun twist if you want “alien brain” vibes!
Conclusion & Final Thoughts
The No Bake Zombie Brain Cheesecake is more than just a Halloween dessert — it’s an edible conversation piece. With its eerie green filling and “bloody” cherry topping, it’s equal parts creepy and charming, making it perfect for parties, potlucks, or family nights. But beneath its spooky exterior lies a luxuriously smooth, tangy cheesecake that melts in your mouth.
What makes this recipe truly special is how easy it is to customize. You can adjust the shade of green, make mini versions for individual servings, or tweak the sweetness to your liking. It’s the kind of dessert that looks wildly impressive but requires minimal effort — no oven, no water bath, and no stress.
When Halloween rolls around, I love filling my kitchen with laughter and creativity, and this cheesecake always delivers both. It’s silly, delicious, and surprisingly elegant in its own gory way. Serve it with a plastic brain on top for extra laughs, or just enjoy it as a fun, family-friendly dessert that celebrates the weird and wonderful spirit of Halloween.
So grab your mixer, summon your inner mad scientist, and whip up this No Bake Zombie Brain Cheesecake. It’s frightfully fun, devilishly delicious, and sure to bring your Halloween dessert table back from the dead!