1. Introduction to the Recipe
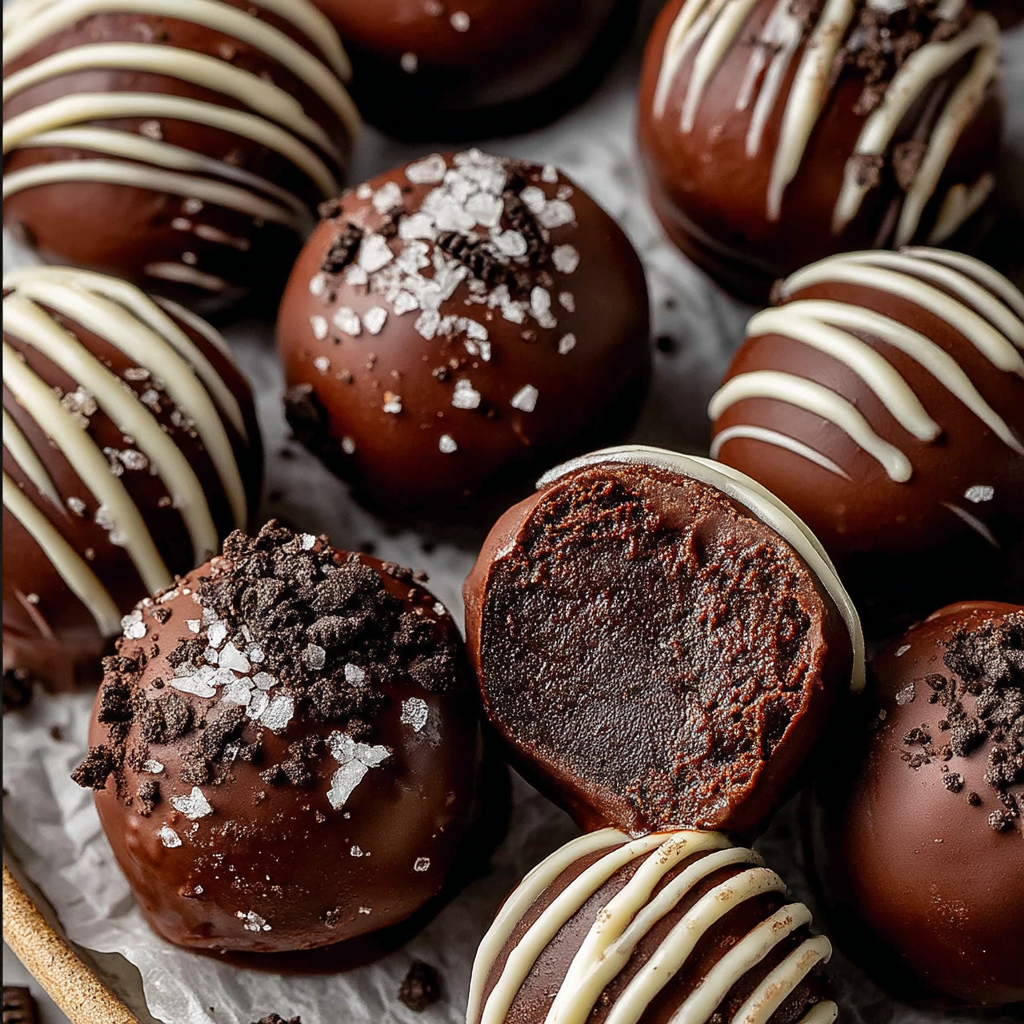
Welcome to an irresistible dessert idea: the Oreo Balls Recipe, where classic cookies meet creamy chocolate in every bite. If you’ve ever wondered how to turn beloved Oreo cookies into decadent, bite-sized truffles, this recipe is your answer. Combining crushed Oreos, melted butter, and just a splash of milk, then enveloped in dark, semi-sweet, or white chocolate, these treats are perfect for parties, gifts, or simply satisfying your sweet tooth.
You might enjoy exploring more cookie-based dessert ideas such as chocolate-covered strawberries for a lighter twist, or the famous no-bake cookie bars that use similar simplicity and flavor profiles. For insights on selecting the best chocolate for dipping, check this ingredient guide on chocolate types and tempering techniques. Also, someone interested in cookie texture might like this expert article on how to achieve chewy vs. crunchy cookies.
This Oreo Balls Recipe is appealing for several reasons: it’s quick (prep time under 30 minutes), uses minimal ingredients, requires no baking, and gives a striking contrast between the crunchy cookie base and smooth chocolate shell. Whether you prefer dark chocolate for richness, semi-sweet for balance, or white chocolate for sweetness, this recipe adapts. Moreover, the creamy filling contrasted with the crisp cookie bits makes every bite interesting.
In this article, you’ll find not only the basic recipe with ingredients and directions, but also advanced techniques to elevate your results, storage tips to maintain freshness, dietary adaptations for various needs, common FAQs, and concluding thoughts. Let’s dive into making perfect Oreo Balls you’ll want to share (or maybe keep all to yourself!).
2. Basic Recipe: Ingredients and Instructions
Print
Oreo Balls Recipe
Description
Try this easy Oreo Balls Recipe—rich, creamy, perfect bite-sized treats dipped in chocolate.
Ingredients
- 30 regular Oreo cookies (≈ 340 g)
- 3 tablespoons unsalted butter, melted and cooled (≈ 45 g)
- 2–5 tablespoons whole milk
- 8 ounces (≈ 225 g) dark, semi-sweet, or white chocolate, chopped*
- 1 teaspoon vegetable oil (optional, for smoother chocolate coating)
*If using chocolate chips, ensure they are high quality for best melting and flavor.
Instructions
- Prepare the Oreo crumbs
- Remove the cream filling? Actually, for this recipe, you’ll use the whole Oreo cookie (cream and all). Place all 30 cookies in a food processor and pulse until fine crumbs form.
- Mix the base
- In a mixing bowl, combine the Oreo crumbs with the melted, cooled butter. Mix thoroughly.
- Add 2 tablespoons of whole milk to start, and stir. If mixture is too stiff or dry, gradually add more milk (up to 5 tablespoons) until the mixture holds together, but is not soggy.
- Shape the balls
- Use a small cookie scoop or a tablespoon to portion out even amounts of the mixture.
- Roll each portion into a ball using your hands. Aim for roughly 1 to 1.5 inches in diameter.
- Place the balls on a baking sheet lined with parchment paper.
- Chill
- Refrigerate the Oreo balls for at least 30 minutes (or up to 1 hour) so they firm up. This helps them keep shape when dipping.
- Melt the chocolate coating
- In a microwave-safe bowl (or using a double boiler), melt the chopped chocolate. If desired, add the optional vegetable oil to thin the chocolate slightly for smoother dipping.
- Stir until chocolate is completely melted and smooth.
- Dip the balls
- Using a fork or dipping tool, dip each chilled Oreo ball into the melted chocolate, allowing excess chocolate to drip off. You may swirl or tap lightly on bowl edge.
- Return dipped balls to the parchment-lined baking sheet.
- Set and decorate (optional)
- If desired, drizzle contrasting chocolate (e.g., white over dark) or sprinkle crushed Oreos or sprinkles before the chocolate sets.
- Allow the chocolate to harden completely at room temperature or in the fridge.
- Serve
- Once set, serve at room temperature. Enjoy immediately or store using tips below.
Notes
Make sure the butter is cooled before mixing so it doesn’t melt the chocolate later.
Do not over-chill after dipping, which can cause chocolate bloom or cracking.
Use high-quality chocolate for coating for best taste and sheen.
Work in small batches once chocolate is melted — chocolate can seize if overheated or if water gets in.
Keywords: Oreo Balls Recipe
3. Advanced Techniques
Flavor Infusion with Extracts or Zests
To enhance your Oreo Balls Recipe, elevate flavor by incorporating subtle infusions. For example, adding vanilla extract, almond extract, or citrus zests (orange or lemon) to the Oreo base can deepen complexity. Use about ½ teaspoon extract of your choice added to the butter before mixing into Oreo crumbs. If using zest, finely grate enough from one organic citrus fruit and fold into crumbs. These additions provide fragrant notes that contrast nicely with the chocolate coating. Be careful not to overpower—extracts and zests are potent, so start small and taste the unmelted base to adjust. The result is more than just chocolate + cookie: it becomes a memorable flavor experience, especially for those who appreciate nuanced desserts.
Textural Contrast: Crunch and Soft Centers
Creating contrast in texture can take this recipe from good to great. While the crushed Oreos create softness with their crumb, you can introduce crunch by inserting a whole Oreo half, a nut (such as a roasted almond or pecan half), or even a crisp wafer into the center of each ball before dipping. Another technique: after shaping the base into balls, roll them in crushed nuts, crispy rice cereal, or finely chopped Oreos before or after the chocolate coating (while chocolate is still wet) to add a crunchy shell. The juxtaposition between soft interior and crunchy exterior gives more interest to each bite.
Chocolate Tempering for Shine and Snap
If you want glossy, professional-looking chocolate coating, tempering is essential. Instead of simply melting chocolate in the microwave, use a double-boiler or the seeding method: melt two-thirds of your chopped chocolate to around 45°C (113°F), then remove from heat and stir in the remaining third of chocolate to bring temperature down to ~27°C (80°F). Then gently reheat to ~31°C (88°F) for dark chocolate (or adjust according to white or milk chocolate specs). This process ensures the final coating has a crisp snap and shiny finish, resisting dullness or bloom. While more time-consuming, the visual and textural payoff is impressive.
Dipping Techniques for No Drips & Clean Finish
To get clean, even chocolate coats without drips or messy bottoms, use these tricks: after dipping the Oreo ball, tap the fork or dipping tool gently on the bowl’s edge to let excess chocolate fall back. Then, hold the ball above the bowl for a moment to allow extra chocolate to dribble off before placing on parchment. You can also spin the fork lightly to help even coverage. Keep a tray lined with parchment paper under each dipped ball, and consider chilling only once all are dipped, so the chocolate set uniformly. Additionally, rotating your tray in the refrigerator briefly helps set the bottom too.
Decoration & Finishing Touches
Decorations can turn simple Oreo balls into elegant treats. Drizzle contrasting melted chocolate (e.g. white chocolate over dark), dust lightly with cocoa powder or powdered sugar, sprinkle finely crushed Oreo bits, chopped nuts, or edible glitter. Another idea: dip only half the ball so you have “half-dipped” Oreo balls with a two-tone effect. Use piping bags or squeeze bottles for drizzles. Also, brush a small amount of oil onto the finished chocolate coating to give it sheen or polish. These finishing touches make them perfect for gifting, holidays, or special occasions.
See more advanced recipes at cookingwhite.com
4. Storage, Shelf Life, and Maintenance Tips
Room Temperature Storage
When stored at room temperature in an airtight container, Oreo Balls Recipe treats can last about 1–2 days if your climate is cool (< 25°C or about 77°F). Keep them away from direct sunlight, heat sources, or humidity, which can cause the chocolate to melt or the base to become soggy. Use wax or parchment paper between layers to prevent sticking. If you leave them out longer, the base may dry out or the chocolate may soften too much. Taste and texture are best when enjoyed within these first days.
Refrigerated Storage
For longer shelf life, refrigerate the Oreo balls. Place them in a single layer, or if stacking, use parchment paper between layers, inside an airtight container. In the fridge, they can last about 7–10 days. However, refrigeration may cause condensation when cold balls are taken out, which can lead to chocolate bloom (a whitish film) or softening of the coating. To avoid that, allow chilled treats to come to room temperature before opening the container.
Freezing for Long-Term Storage
To freeze Oreo balls, lay them in a single layer on a baking sheet to flash-freeze (1–2 hours), then transfer to a freezer-safe, airtight container or zip-top bag, with parchment between layers. In the freezer, they can last up to 3 months. Thaw by moving them into the refrigerator overnight, then bringing to room temperature before serving. Avoid thawing at room temperature immediately (especially in warm climates) to minimize moisture issues or chocolate condensation.
Maintaining Chocolate Quality
Chocolate coatings can lose their sheen or develop a “bloom” (grayish film) if exposed to fluctuating temperatures or moisture. To maintain gloss and snap: keep storage location stable in temperature; if refrigerating, ensure containers are moisture-proof; avoid warm then cold transitions. Also, if using tempered chocolate, once set, keep the treats out of very humid conditions. Proper melting and cooling of chocolate during preparation also helps its long-term appearance.
Preventing Stickiness and Moisture
The Oreo base absorbs moisture easily, which can make the balls sticky. To reduce stickiness, ensure the butter is completely cooled before mixing. Also, don’t overadd milk—add only enough to get a cohesive texture. After dipping, allow fully setting before packaging. If storing in fridge or freezer, wrap well or use airtight containers so that moisture from the surrounding air does not condense on the treats. If there is humidity, include a food-safe silica gel packet in the container (if available) to absorb moisture.
5. Dietary Adaptations and Substitutions
Vegan Adaptation
To make this Oreo Balls Recipe vegan: first, verify that the Oreos you use are vegan (many standard Oreo varieties are free from animal products, but double-check ingredients). Replace the butter with a vegan margarine or coconut oil (melted and cooled). Instead of whole milk, use plant-based milks (oat milk, almond milk, soy milk) to bind the base. For the chocolate coating, choose vegan chocolate that is dairy-free—dark chocolate with a high cocoa percentage often works. These swaps maintain structure, flavor, and texture, while ensuring the recipe suits a vegan diet.
Gluten-Free Version
To adapt for gluten intolerance or celiac disease: replace the regular Oreo cookies with certified gluten-free sandwich cookies of similar texture and flavor. Ensure all other ingredients (chocolate, butter, milk) are gluten-free in processing. The rest of the recipe remains largely unchanged. Note that gluten-free cookie crumbs can differ in moisture absorption, so you might need slightly less or more liquid to get the base to hold together—add milk in smaller increments to avoid making mixture too wet.
Lower Sugar / Reduced Sugar Option
If you want to reduce sugar content, look for reduced-sugar or “light” versions of sandwich cookies or use cookies with less sugar. Use dark chocolate with a high cacao percentage (70% or more) that has less sugar. Alternatively, choose sugar-free or no-added-sugar chocolate coatings (sweetened with stevia or erythritol), making sure they melt well. Keep in mind that sugar contributes to texture and sweetness, so results may taste less sweet or feel slightly denser. Adjust by balancing with flavor extracts or zest to compensate taste.
Nut-Free / Allergy-Safe Modifications
If nut allergies are a concern, avoid any decorations containing nuts or areas in facilities that process nuts. Use safe, nut-free chocolate, and instead of crushed nuts for texture, use crisp cereal, crushed-free cookies, or seeds if tolerated. Ensure that all utensils, bowls, and surfaces are clean and free of nut residue. Also verify that any optional decorative ingredients (sprinkles, etc.) are labeled nut-free.
Alternative Fats & Milk Substitutes
Beyond vegan substitutions, you might prefer using different fats or milks for flavor or health reasons. For example: use coconut oil in place of butter for a slightly tropical flavor; use ghee for richness (if not dairy-free); use lactose-free milk or plant-based milks for those with lactose intolerance. If using alternative fats, be careful that they solidify slightly when cooled, to help the base firm. Similarly, plant-based milks vary in thickness and water content, so adjust quantity to get right consistency—erring on less rather than more to avoid sogginess.
6. FAQs About the Recipe
Why are my Oreo balls too dry or crumbly?
If your Oreo Balls Recipe base is too dry or falling apart, it usually means insufficient binding. Ensure you’ve added enough butter, and that it’s melted properly. The milk also plays a key role—start with the minimum (2 tablespoons), then gradually add until the mixture holds together without being soggy. Be gentle when mixing: overmixing can create friction and dry out the crumbs. Also, check that the Oreo cookies aren’t stale—old cookies may absorb moisture differently, leading to dryness. Adjust accordingly.
Why is my chocolate coating dull or has white streaks?
A dull finish or white “bloom” on chocolate often comes from temperature fluctuations or moisture. If you melt chocolate too quickly, overheat it, or allow it to cool too slowly, the cocoa butter can separate, causing a whitish film when it re-solidifies. Also, storing in places with humidity can cause condensation. To prevent this, temper your chocolate for gloss and snap (see Chocolate Tempering technique above), ensure storage is stable, and avoid letting moisture touch the surface.
How can I prevent the balls from falling apart after dipping?
Key is chilling before dipping: if the base isn’t firm, the chocolate dipping process can cause them to deform or crumble. Refrigerate shaped balls for at least 30 minutes (or freeze briefly) so they hold shape. When dipping, work gently, and let excess chocolate drip off rather than heavily coating. Also, don’t overload bowls with too many balls at once so you can manage them individually. Use cool utensils and avoid contact with very warm surfaces.
Can I use other cookies instead of Oreos?
Absolutely. While Oreo cookies give a classic flavor and texture, you can use virtually any sandwich cookie or even plain chocolate or vanilla cookies. Just ensure texture is similar (firm enough to crumble). When substituting, taste for sweetness and flavor—other cookies may be sweeter, more buttery, or flavored; adjust other ingredients (butter, milk) accordingly. Be aware also of color—white chocolate with a pale cookie will look different than dark chocolate with a chocolate cookie.
Is it necessary to use whole milk? Can I skip milk altogether?
Milk in this recipe serves to moisten the Oreo crumb‐butter mixture so it holds shape. Whole milk is suggested because of its fat content, which helps richness and cohesion. You may substitute with lower‐fat milk or plant milk (as noted in adaptations), but you might need slightly more or adjust accordingly. If you skip milk completely, the texture will be very dry and may fall apart, unless your butter is sufficient and the blend is moist enough. It’s recommended to use at least a small amount of liquid binding.
7. Conclusion & Final Thoughts
In conclusion, the Oreo Balls Recipe offers something truly special: easy prep, minimal equipment, and extraordinary flavor packed into each bite. From the satisfying crunch of cookie crumbs to the creamy center and silky chocolate coating, this dessert combines textures and tastes in harmony. Whether you’re making treats for a party, baking gifts for friends, or simply craving a chocolate indulgence, these Oreo balls serve beautifully.
Key benefits include its versatility—you can choose dark, white, or semi-sweet chocolate; adapt for dietary needs; and decorate for any theme. Its simplicity means you don’t need an oven, which makes prep fast and easier clean-up. It’s also customizable, from flavor infusions to textural twists. Making them in advance is feasible, especially with the storage and freezing guidelines, so you can plan ahead for holidays or special gatherings.
What makes this recipe stand out is its balance: rich flavor without complexity, indulgence without a long ingredient list. Perfect for household cooks, dessert lovers, and even novice bakers who want impressive treats with minimal fuss. These Oreo balls work for birthdays, holiday parties, potlucks, or a cozy movie night.
I hope you enjoy making this Oreo Balls Recipe as much as you love eating them. With the advanced techniques, storage wisdom, substitutions, and troubleshooting guidance here, you’re well-equipped to make perfect Oreo balls that delight everyone. Happy cooking—and treat yourself to a batch (or two)!