Introduction to the Recipe
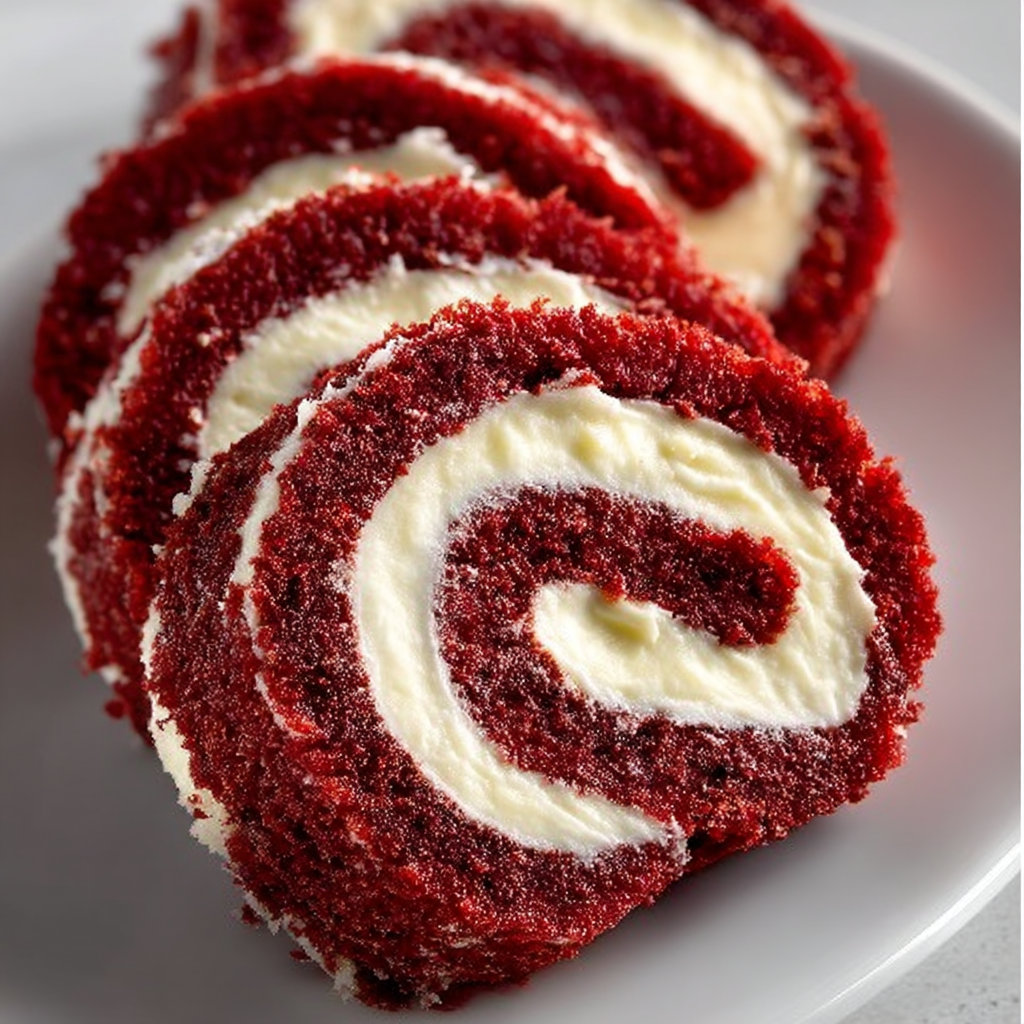
From birthdays to Valentine’s Day to cozy weekend dessert cravings, a Red Velvet Cake Roll is a show‑stopping twist on the classic layer cake. Instead of stacking tiers, you bake a thin sponge, spread on a luscious cream cheese filling, and roll it up into a swirl of color and flavor. The dramatic red sponge, subtle cocoa notes, and creamy filling are all wrapped into one elegant bite, making it a conversation piece on any dessert table.
This version of the Red Velvet Cake Roll uses staple ingredients—flour, cocoa, eggs, sugar, oil, buttermilk (or milk + vinegar), and red food coloring—and pairs that sponge with a rich cream cheese filling made from cream cheese, butter, powdered sugar, and vanilla. The vinegar and buttermilk lend the sponge a tender crumb, while the cocoa adds just enough chocolate depth without overpowering the signature red hue.
If you enjoy roulade-style cakes, you might also like this classic Swiss roll recipe or this tips guide to prevent cake roll cracks which helps with rolling techniques.
In what follows, you’ll find the complete ingredient list and clear step-by-step instructions, followed by advanced techniques to perfect your roll, storage guidance, dietary adaptations, and frequently asked questions. Whether this is your first time attempting a roulade or you want to polish your method, this article guides you toward a beautifully swirled, moist, and elegant Red Velvet Cake Roll.
Basic Recipe: Ingredients and Instructions
Print
Red Velvet Cake Roll Recipe — Perfect Swirl Cake
Description
Make an elegant Red Velvet Cake Roll filled with creamy cheese — beautifully swirled and perfect for special occasions.
Ingredients
For the Red Velvet Sponge Cake:
- ¾ cup (90 g) all-purpose flour (stir, spoon & level)
- ¼ cup (20 g) unsweetened cocoa powder
- 1 tsp baking powder
- ½ tsp salt
- 4 large eggs, separated
- ¾ cup (150 g) granulated sugar
- 1 Tbsp neutral oil (canola or vegetable)
- 2 Tbsp buttermilk (or 2 Tbsp milk + ½ tsp vinegar; let sit 5 minutes)
- 1 tsp white distilled vinegar
- 1 tsp vanilla extract
- 2 Tbsp red food coloring (one 1‑oz bottle)
- Powdered sugar (for dusting towel / cake)
For the Cream Cheese Filling:
- 8 oz (226 g) cream cheese, cold
- ½ cup (113 g) butter, room temperature
- 1 cup (120 g) powdered sugar
- 1 tsp vanilla extract
Instructions
- Preheat and prepare your pan and towel.
Preheat your oven to 350 °F (≈ 175 °C). Line a jelly roll pan (e.g. about 10×15 inch) with parchment paper, leaving an overhang on two opposite ends. Lightly grease the parchment. Have ready a clean kitchen towel or thin linen, sprinkled generously with powdered sugar (to prevent sticking when rolling). - Mix dry ingredients.
In a medium bowl, sift together flour, cocoa powder, baking powder, and salt. Set aside. - Beat egg whites.
In a clean, dry bowl, beat the egg whites until soft peaks form. Gradually add ½ of the granulated sugar (i.e. about ¾ of 150 g → 75 g) and beat until stiff peaks form. Set aside. - Beat yolks and mix wet ingredients.
In another bowl, combine the egg yolks and the remaining granulated sugar. Beat until pale and thick. Then mix in oil, buttermilk, vinegar, vanilla, and red food coloring until fully incorporated. - Combine dry and wet, fold into whites.
Alternately fold the dry flour mixture into the yolk mixture (in 2–3 additions), mixing gently until just combined. Then carefully fold in the beaten egg whites in 2 additions, using a spatula and folding motions—be careful not to deflate them too much. - Bake the sponge.
Spread the batter gently and evenly into the prepared pan. Bake for about 12–15 minutes, or until the top springs back when lightly touched and a toothpick inserted comes out clean. - Unmold and roll while warm.
As soon as the cake is out of the oven, loosen its edges. Invert it onto the sugared towel, peel off the parchment, and immediately roll the cake and towel together, starting from a short side. Let it cool rolled up (wrapped) on a rack. - Prepare the filling.
While the cake cools, beat together the cold cream cheese and room temperature butter until smooth. Gradually add powdered sugar and vanilla, beating until creamy and well blended. - Unroll, fill, and reroll.
Once the cake is cooled (but still pliable), gently unroll it. Spread the cream cheese filling evenly over the surface, leaving a small margin (~½ inch) at the edges. Then reroll the cake (without the towel this time), seam side down. - Chill and slice.
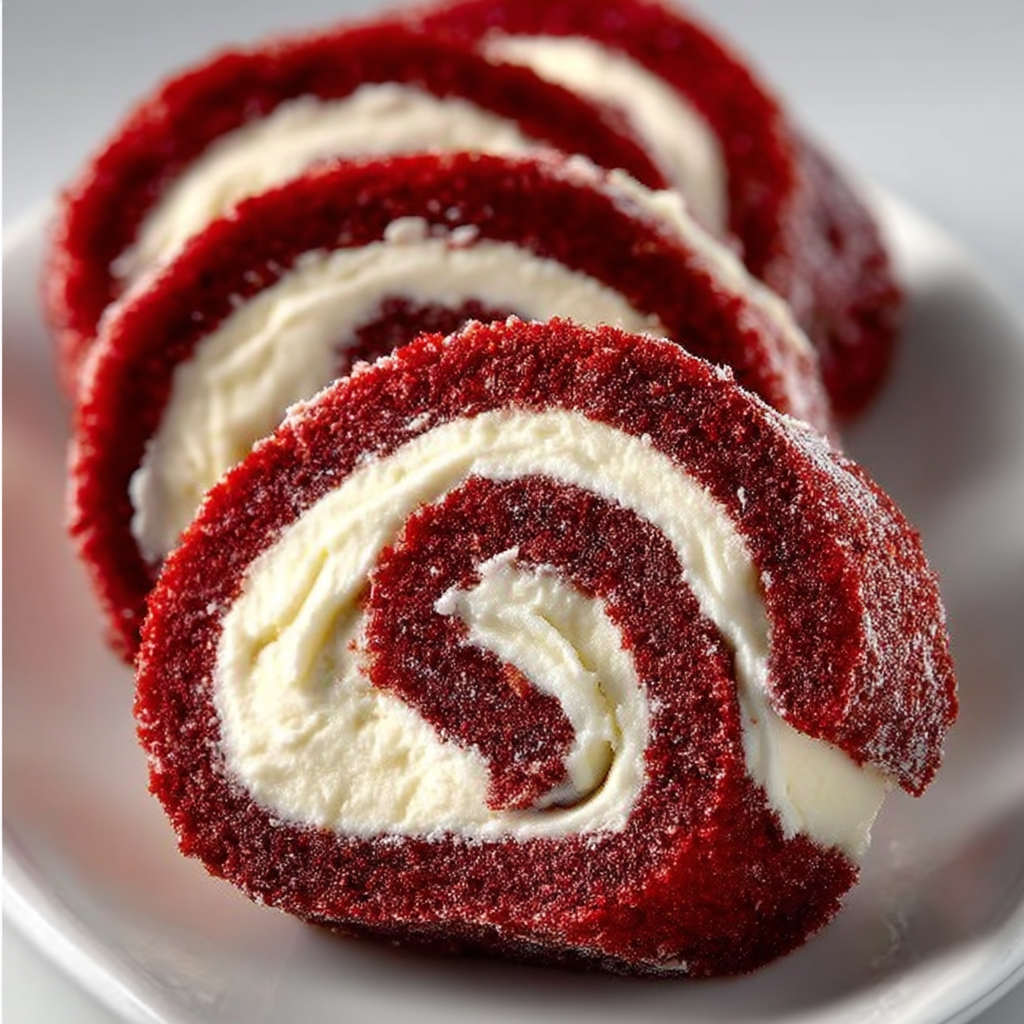
Wrap the roll in plastic wrap or parchment, and chill for at least 1 hour (seam down) to set. Before serving, trim the ends neatly and slice with a serrated knife into ~½‑inch slices. Optionally dust with powdered sugar.
Notes
Use gel or paste red food coloring for more vibrant results and less liquid.
Be sure your egg white bowl and beaters are completely dry—moisture can prevent stiff peaks.
Work gently when folding to preserve air in the batter.
Roll while the cake is still warm to reduce cracking.
If cracks appear during rerolling, press gently to hide them or trim them off before serving.
Keywords: Red Velvet Cake Roll
Advanced Techniques
Here are five advanced methods to refine your Red Velvet Cake Roll performance—improving texture, appearance, and reliability.
1. Scoring and “Pre-Rolling” to Prevent Cracks
Before filling, some bakers lightly score two shallow lines parallel to the roll direction on the inside surface. This “guide” helps the cake bend more uniformly rather than crack. Also, when rolling the cake while still warm (step 7), roll as tightly as possible without stress—this is called the “pre-roll.” Then unroll, apply filling, and reroll. This initial pre-roll trains the cake’s flexibility and reduces cracking during the final roll. Many successful recipes emphasize doing this immediately out of the oven.
2. Balanced Moisture: Oil, Buttermilk & Vinegar Synergy
The moisture and acidity balance in the sponge is key. Oil adds tenderness and flexibility (versus butter, which can stiffen). Buttermilk and vinegar contribute acidity, reacting with leaveners to produce a fine crumb and subtle tang. If your cake is drying or cracking, increase oil by a small amount (~½ tsp) or reduce bake time slightly. Conversely, if it’s too soft, reduce liquid slightly or chill longer before rolling. The right moisture keeps the sponge pliable and robust.
3. Using a Stabilized Cream Cheese Filling
Because the cake roll is cut thin, the filling should hold shape. To stabilize, you can whip the cream cheese and butter with a small amount of heavy cream or mascarpone (e.g. 1–2 Tbsp) to lighten without runniness. Alternatively, you can chill the filling before applying, so it’s firmer on contact. Another trick: make the filling slightly under-softened (i.e. keep it a bit stiff) so it doesn’t ooze. A more stabilized filling helps the swirl hold clean lines and avoids slippage.
4. Temperature Control When Rolling and Chilling
Temperature is critical. The cake should be warm enough to flex but not hot. If it cools too much before rolling, it cracks. If too warm when rerolling with filling, the filling may soften or slide. After rolling, chilling is essential: a cold seam-down roll helps “set” the structure. You can even partially freeze (~15 minutes) before slicing to get clean slices. Just ensure you thaw slightly before serving so textures are smooth.
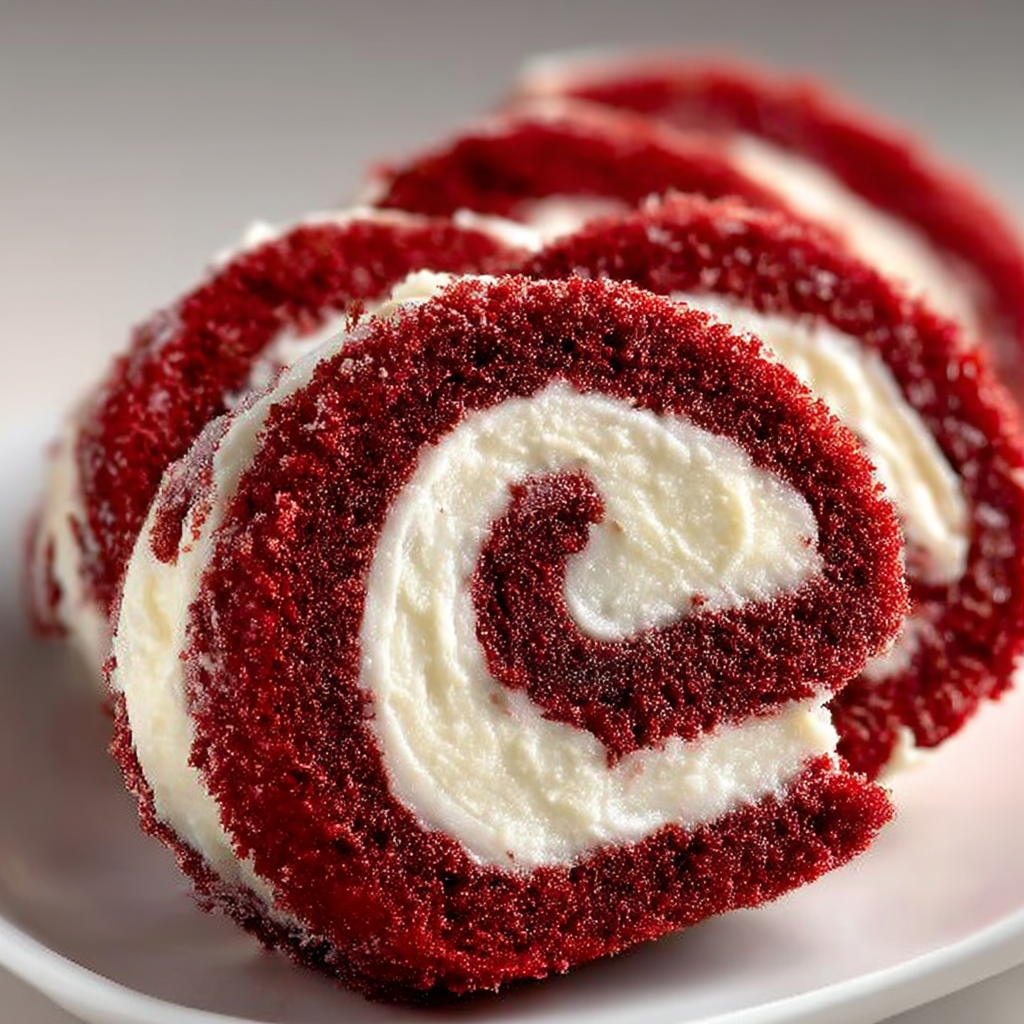
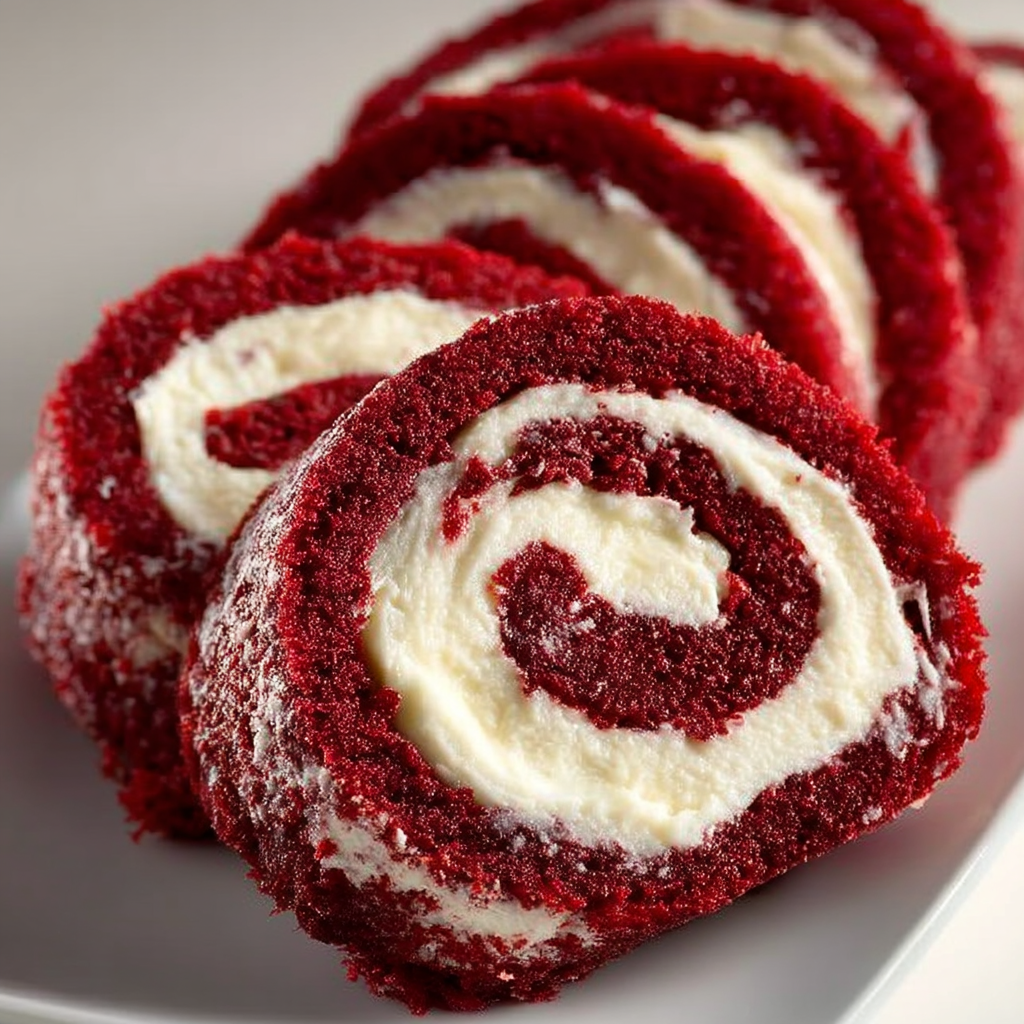
5. Decorative Finish & Slice Presentation
After rolling and chilling, you can enhance presentation. Dust with powdered sugar or sift cocoa powder over the top. You can pipe a thin border of extra filling or whipped cream along the edges for accent. Or lightly brush the surface with a thin glaze or melted white chocolate to give shine. When slicing, use a serrated knife and slice in a gentle sawing motion, wiping the blade between cuts to maintain clean edges. Presenting the roll with consistent slices reveals the swirl pattern beautifully.
Storage, Shelf Life, and Maintenance Tips
Below are five tips to keep your Red Velvet Cake Roll fresh, moist, and appealing over time.
1. Refrigeration as Primary Storage
Because of the cream cheese filling, your cake roll must be stored in the refrigerator. Wrap the roll tightly in plastic wrap and/or parchment to prevent drying or absorbing odors. Stored this way, it remains good for 3–4 days. Before serving, allow slices to rest ~15 minutes at room temperature for optimal texture.
2. Freezing Slices or Whole Roll
You can freeze either the entire roll (tightly wrapped) or individual slices (wrapped in plastic + foil). Freeze up to 1–2 months. To serve, thaw in the refrigerator (several hours or overnight). Then bring to near room temperature before unwrapping to avoid condensation on the surface.
3. Minimizing Moisture & Condensation
When removing from fridge/freezer, condensation can make the surface soggy. To avoid, leave the roll (or slices) wrapped while thawing, then unwrap just before serving. Use airtight, moisture‑resistant wrapping. Also, avoid frequent temperature fluctuations (moving between cold and warm repeatedly).
4. Preventing Crust Dryness on Cut Faces
To prevent the cut edges from drying out, store your slices with cut surfaces facing inward or touching one another. Alternatively, place a sheet of plastic wrap over the cut side before wrapping the whole cake. This reduces surface exposure and helps preserve moistness.
5. Freshening Before Serving
If the roll becomes slightly dry after a day or two, you can lightly brush the surface with a thin simple syrup (equal parts sugar + water, cooled) before serving. Or place a small slice of apple or piece of bread in the storage container (not touching the cake) overnight to help humidity—just be cautious about flavors. This can help restore a slight suppleness to the sponge.
Dietary Adaptations and Substitutions
Here are five ways to adapt the recipe to fit dietary needs or preferences.
1. Gluten-Free Red Velvet Cake Roll
Use a gluten-free all-purpose flour blend (with xanthan gum or binder) instead of wheat flour. Be sure it’s one suited for cakes (light, not heavy). You may need to reduce liquid slightly or add 1 Tbsp extra binder to maintain structure. Proceed carefully with folding so the sponge remains pliable.
2. Lower‑Sugar / Sugar‑Reduced Version
You can reduce granulated sugar modestly (e.g. 10–15 %) in the sponge, and use a powdered sugar substitute (like a powdered erythritol blend) in the filling. Be cautious: less sugar can affect texture and stability, so test small batches. Also, red food coloring sometimes responds differently in lower-sugar batters, so adjust color strength.
3. Dairy-Free / Vegan Adaptation
For a dairy-free version, substitute the butter and cream cheese with vegan butter and vegan cream cheese. Use plant-based milk + acid (e.g. soy or almond milk + vinegar) in place of buttermilk. Some vegan egg-replacer systems (like aquafaba) may help mimic the egg white lift, but cake rolls are challenging in vegan formats—expect adjustments. Use vegan red food coloring. The method remains largely similar, but texture may differ.
4. Reduced-Fat Variation
To lighten fat content, you might reduce the butter in the filling slightly or use part cream cheese + part Greek yogurt (full-fat) for creaminess. Be aware that making the filling too low-fat may yield a looser filling that slides.
5. Flavored Variants: Chocolate, Berry, or Mocha
You can vary the filling flavor without structural changes. For example, fold in some melted white chocolate or cocoa powder to make a chocolate-cream cheese swirl. Or incorporate pureed berries (strained) into the filling for a fruity swirl (reduce powdered sugar accordingly). For a coffee twist, add a bit of instant espresso powder to the filling. Just ensure the added moisture doesn’t destabilize the filling.
FAQs About the Recipe
1. Why did my cake crack when rolling?
Cracking usually means the cake cooled too much before rolling or the batter lacked flexibility. To avoid this, roll it while still warm (immediately after baking), use a towel (lightly sugared) to help, and don’t overbake. If cracks appear, you can press gently to close them or trim off the ends. Scoring and pre-rolling techniques (see above) help too.
2. The swirl pattern is messy—how can I get a neat spiral?
A clean swirl depends on even filling thickness, tight but gentle rolling, and chilling it well before slicing. Use an offset spatula for smooth, uniform filling, leaving narrow edge margins. Roll with controlled tension—don’t force. After rolling, refrigerate seam down to set. Slice with a serrated knife in a gentle sawing motion, wiping the blade between cuts.
3. The filling oozed or slid—what went wrong?
The filling may be too soft or applied too thick. Use a slightly firmer filling (chilled or stabilized). Don’t overload the cake with filling, and work quickly. Roll when the sponge is not too warm. After rolling, refrigerate to help the filling set. If needed, refrigerate for a bit longer before slicing.
4. Cake tastes dry or feels crumbly.
Dryness can be from overbaking, too much flour, or insufficient fat/moisture. Check oven accuracy, reduce bake time, or slightly increase oil or buttermilk. Also, ensure you mix tenderly—not overmixing flour. Brushing with simple syrup before filling can also add moisture.
5. How do I slice without tearing or compressing the cake?
Use a serrated knife, and slice in a gentle back-and-forth sawing motion—don’t press down. Wipe the blade between slices to keep clean cuts. Chill or even lightly freeze (10–15 minutes) before slicing to firm up the structure, which helps cleaner cuts.
Conclusion & Final Thoughts
A Red Velvet Cake Roll is more than just a dessert—it’s a delightful balance of artistry and flavor. With its vibrant red sponge, delicate cocoa hint, and creamy filling swirled in visual harmony, it serves as a centerpiece for celebrations or an impressive treat for any gathering. The rolling technique creates a dramatic spiral that reveals itself in each slice, making it both beautiful and delicious.
This recipe offers a solid foundation—not just a step-by-step method, but techniques and tips to elevate your results. You’ll benefit from strategies like scoring, pre-roll, stabilization of filling, temperature control, and presentation finesse. These help you manage common pitfalls like cracking, filling oozing, messy swirls, or dryness. The storage, adaptation, and FAQ sections further equip you to adapt this cake roll to your schedule, flavor preferences, or dietary needs.
Whether you’re baking for a special occasion or simply want to practice your roulade skills, this Red Velvet Cake Roll is a rewarding project. The contrast of soft sponge and tangy filling, the visual appeal of the spiral, and the customization possibilities (berry, mocha, chocolate, or reduced sugar) give you room to make it your own.
Go ahead and try it—trust your instincts, watch how the sponge behaves, and adjust gently. With practice, your roll will become smoother, more reliable, and more beautiful each time. If you’d like a printable recipe card, alternative filling ideas, or help converting measurements, just let me know—I’d be glad to assist further. Happy baking!