1. Introduction to the Recipe
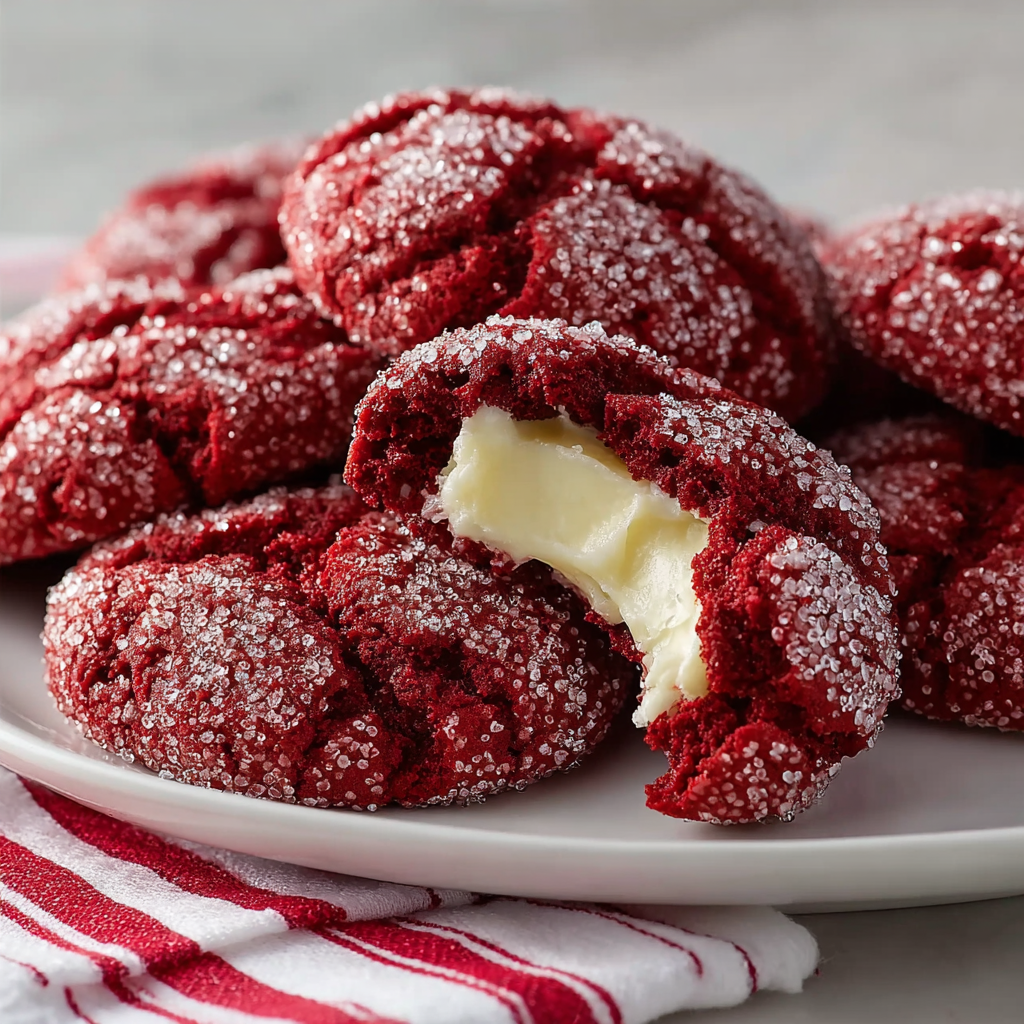
Few desserts capture the magic of indulgence like red velvet thumbprint cookies, a stunning twist on a classic American treat. Red velvet has always held a special place in the world of baking—its vibrant color, subtle cocoa flavor, and velvety crumb create an experience that feels nostalgic, luxurious, and irresistibly satisfying. When transformed into thumbprint cookies and filled with silky cream cheese frosting, this timeless favorite becomes a bite-sized treasure that’s perfect for holidays, parties, and every sweet craving in between.
These cookies offer a delightful balance of textures: crisp edges, a soft center, and a creamy filling that melts against the warmth of the freshly baked cookie. The red velvet base delivers that signature blend of mild cocoa and smooth vanilla, while the tangy cream cheese filling adds contrast and richness. Whether you’re preparing a dessert tray, crafting homemade gifts, or simply baking for fun, these red velvet thumbprint cookies instantly elevate any occasion with their bold color and melt-in-your-mouth appeal.
This recipe is simple enough for beginners yet rewarding for experienced bakers who appreciate the nuances of red velvet baking—proper acidity, the right cocoa balance, and achieving the perfect crumb. If you’re new to red velvet, or want to refine your technique, you may find these guides helpful:
• https://www.seriouseats.com/red-velvet-history-science
• https://www.kingarthurbaking.com/learn/guides/cookie-baking
With their festive appearance, creamy centers, and tender texture, red velvet thumbprint cookies deliver that perfect blend of beauty and flavor. They are eye-catching enough for holidays like Christmas and Valentine’s Day, but delicious enough to be enjoyed year-round. As soon as you take your first bite, you’ll understand why these cookies always become a fast favorite.
2. Basic Recipe: Ingredients and Instructions
Print
Red Velvet Thumbprint Cookies with Cream Cheese Filling
Description
Soft red velvet thumbprint cookies filled with creamy vanilla frosting—festive, tender, and perfect for holidays or special occasions.
Ingredients
For the Cookies
- 2 1/4 cups all-purpose flour
- 1/4 cup unsweetened cocoa powder
- 1 teaspoon baking soda
- 1/2 teaspoon salt
- 1 cup unsalted butter, softened
- 1 1/2 cups granulated sugar
- 2 large eggs, room temperature
- 1 teaspoon vanilla extract
- 2 tablespoons red food coloring
- 1/2 cup buttermilk
- 1/2 cup granulated sugar (for rolling)
For the Cream Cheese Filling
- 8 ounces cream cheese, softened
- 1/2 cup unsalted butter, softened
- 4 cups powdered sugar, sifted
- 1 teaspoon vanilla extract
Instructions
1. Preheat & Prepare.
Preheat oven to 350°F (177°C). Line baking sheets with parchment paper.
2. Mix dry ingredients.
Whisk together flour, cocoa powder, baking soda, and salt.
3. Cream butter & sugar.
Beat butter and sugar until light and fluffy, 2–3 minutes.
4. Add eggs & flavoring.
Mix in eggs, vanilla, and red food coloring until fully combined.
5. Combine wet & dry.
Alternate adding the dry mix and buttermilk, mixing just until combined.
6. Shape the cookies.
Roll dough into 1-inch balls. Coat each ball in granulated sugar and place on baking sheet.
7. Create thumbprints.
Use your thumb or a small spoon to press an indent into each cookie.
8. Bake.
Bake 9–11 minutes, then deepen the thumbprint gently while warm.
9. Make the filling.
Beat cream cheese and butter until smooth. Add powdered sugar gradually, then vanilla.
10. Fill cookies.
Pipe or spoon cream cheese filling into each cooled cookie.
Notes
Chill dough 15 minutes if it’s too soft to shape.
Re-make the thumbprint indent immediately after baking.
For deeper color, add a drop more red food coloring.
3. Advanced Techniques
1. Perfecting the Red Velvet Texture
Red velvet’s velvety crumb comes from a precise balance of acidity, fat, and cocoa. Using buttermilk introduces that essential tang while reacting with baking soda to create a tender crumb. Creaming the butter and sugar until pale adds air and gives the cookies lift. Avoid overmixing after adding flour; this prevents gluten development and ensures softness. Be sure your eggs are room temperature to help emulsify the batter smoothly. Each of these micro-techniques affects the final texture, giving your red velvet thumbprint cookies that signature soft and chewy bite.
2. Creating the Ideal Thumbprint Without Cracking
Thumbprint cookies are notorious for cracking around the edges, but this can be minimized with temperature control and shaping technique. Roll dough balls until perfectly smooth, warming the dough slightly with your hands. Press down gently with a rounded spoon or your thumb, turning your wrist slightly to widen the center instead of pressing straight down. If cracks form, smooth them lightly before baking. Press the indent again immediately after baking while cookies are warm. This approach preserves the structural integrity of each cookie and creates a perfect well for the cream cheese filling.
3. Achieving Bright, Even Red Coloring
Red velvet’s iconic look depends on achieving a bold, even color without streakiness. Always mix the food coloring into the wet ingredients before incorporating dry ingredients. This ensures uniform distribution throughout the dough. Gel coloring works best because it provides vibrant color without thinning the dough. A pinch of cocoa powder deepens the red without making the cookie brown. If aiming for a traditional Southern red velvet tone, choose a slightly deeper, crimson-red shade. Proper coloring brings visual impact and enhances the cookie’s presentation.
4. Making Ultra-Smooth Cream Cheese Filling
The filling should be silky, pipeable, and stable—but never runny. Start with fully softened cream cheese and butter; cold dairy will lead to lumps that are nearly impossible to smooth out later. Sift powdered sugar to avoid graininess, and add it slowly while the mixer runs on low. Beat the mixture on high for 1–2 minutes after fully incorporated to create a whipped, cloud-like texture. Chill if needed for a firmer pipe. These attention-to-detail techniques result in a luscious center that perfectly complements the cookie’s soft base.
5. Preventing Spreading and Maintaining Shape
Because these cookies are soft and moist, they can spread if the dough warms up too much. To prevent this, refrigerate the dough balls for 10–15 minutes before rolling them in sugar. Use parchment instead of silicone mats; parchment helps cookies hold their shape. Make sure your butter is softened—not melted—and verify that your oven temperature is accurate with an oven thermometer. If cookies still spread, add 1–2 tablespoons of flour. Consistency in dough texture ensures even, uniform thumbprints every time.
4. Storage, Shelf Life, and Maintenance Tips
1. Refrigeration for Optimal Freshness
Because the cream cheese filling contains dairy, these red velvet thumbprint cookies must be refrigerated once assembled. Store them in a single layer or separated with parchment to prevent sticking. They keep fresh for 4–5 days while maintaining their tender texture and creamy center. When serving, allow cookies to stand at room temperature for 10–15 minutes for the perfect soft bite. Refrigeration helps preserve flavor, prevents the filling from softening too much, and ensures food safety.
2. Freezing Cookies Successfully
Both the cookies and the filling can be frozen, but for best texture, freeze them separately. Freeze baked cookies undecorated for up to three months in airtight containers. Freeze the cream cheese filling in a separate sealed bag; thaw in the fridge and re-whip for smoothness. If freezing fully assembled cookies, expect the filling to soften slightly after thawing—but the flavor remains excellent. Flash-freeze cookies on a tray first to prevent sticking.
3. Storing Dough for Advance Baking
The dough can be refrigerated for 48 hours before baking. This actually improves flavor as ingredients meld, and it also helps prevent spreading. If the dough becomes too firm, let it sit out for 5 minutes before shaping. For longer storage, freeze shaped dough balls for up to two months. Bake from frozen and add an extra minute or two to the baking time. This is perfect for preparing holiday cookie batches in advance.
4. Maintaining Texture Over Time
Over time, cookies can absorb moisture from the cream cheese filling and soften. To counter this, store cookies with a small paper towel in the container to capture excess moisture. Always cool cookies fully before adding the filling, or steam will cause sogginess. If cookies soften during refrigeration, you can revive them by chilling the filling separately next time or adding a touch more flour to the dough.
5. Transporting Without Smudging the Filling
To transport these cookies for holidays or gifts, chill them first so the cream cheese center firms up. Use shallow containers to keep cookies in a single layer. If stacking is unavoidable, place parchment between each layer. Transport in an insulated carrier to maintain cool temperature and prevent filling from melting. This ensures your red velvet thumbprint cookies arrive as stunningly decorated as when they left your kitchen.
5. Dietary Adaptations and Substitutions
1. Gluten-Free Adaptation
Swap all-purpose flour for a high-quality gluten-free baking blend containing xanthan gum. Because red velvet relies on tender crumb, choose a blend designed for cookies rather than cakes. Gluten-free dough may absorb more liquid, so add up to 1–2 tablespoons additional flour if needed for a rollable texture. The filling is naturally gluten-free, making this adaptation easy and effective. Expect slightly less spreading and a slightly denser texture, but still beautifully delicious cookies.
2. Dairy-Free Version
Replace butter with plant-based alternatives and use coconut cream cheese or almond-based cream cheese for the filling. Choose dairy-free buttermilk by combining 1/2 cup plant milk with 1 teaspoon vinegar. Vegan butter softens differently, so refrigerate dough slightly longer to control spread. The cookies will have a subtle flavor difference but remain tender and rich. This version is perfect for those sensitive to dairy without sacrificing indulgence.
3. Egg-Free or Vegan Variation
Red velvet dough responds well to egg substitutes. Use 1/2 cup unsweetened applesauce or two flax eggs (2 tbsp flaxseed + 6 tbsp water). Buttermilk should be replaced with dairy-free acidic milk. For the filling, use vegan cream cheese and vegan butter. The cookies become slightly softer, but chilling the dough helps. This version keeps the red velvet flavor alive while accommodating vegan and egg-free diets.
4. Low-Sugar Modification
Reduce granulated sugar to 1 cup and powdered sugar in the filling to 2–2.5 cups. Add an extra teaspoon of vanilla to maintain flavor. Lower sugar slightly reduces spread and creates a more cake-like texture. For additional sweetness without adding sugar, include a splash of maple extract or vanilla bean paste. Though less sweet, the cookies remain flavorful thanks to cocoa, butter, and cream cheese.
5. Nut-Free Preparation
This recipe is naturally nut-free, but cross-contamination caution is essential for allergy-sensitive individuals. Ensure all ingredients are labeled nut-free, especially chocolate powders and food coloring. Avoid colored sprinkles that may be processed in facilities with nuts. Using clean, separate utensils ensures safety. These cookies make an excellent allergy-friendly treat because they maintain full richness and flavor without requiring nuts.
6. FAQs About the Recipe
1. Why did my cookies spread too much?
Excessive spreading usually means the dough was too warm or the butter was too soft. Refrigerating the dough before shaping significantly improves structure. Over-creaming the butter and sugar can also incorporate too much air, causing spread. Ensure flour is measured correctly using the spoon-and-level method; too little flour will cause cookies to flatten. If spread persists, add 1–2 tablespoons of flour to strengthen the dough.
2. Why are my cookies dry or crumbly?
Dry cookies often result from overbaking or adding too much flour. Bake the cookies just until the tops appear set; they will continue firming on the tray. Accurate flour measurement is crucial. Additionally, mixing dough too long after adding flour creates gluten that toughens the cookies. The buttermilk helps maintain moisture, so ensure it isn’t omitted or reduced. When properly mixed, red velvet thumbprint cookies remain incredibly soft.
3. Can I use gel food coloring?
Gel food coloring is actually ideal. It produces a vibrant red without thinning the dough, unlike liquid colorings. Start with 1 tablespoon gel coloring and adjust to your preferred intensity. Powdered coloring also works wonderfully but may require slightly more mixing to dissolve evenly. Always incorporate coloring into wet ingredients first to ensure even distribution and prevent streaks.
4. Can the cream cheese filling be flavored?
Absolutely! The filling is incredibly versatile. Add lemon zest for brightness, cocoa powder for a chocolate variation, or almond extract for a richer profile. You can also stir in crushed freeze-dried strawberries for a pink, berry-flavored center. Any added liquids should be used sparingly so the filling stays thick and pipeable. Flavor variations can transform the cookies for different seasons or celebrations.
5. Can I bake these cookies ahead for holidays?
Yes—these cookies are excellent for holiday prep. Bake unfilled cookies up to three days in advance and store in an airtight container. Prepare the cream cheese frosting and keep it refrigerated. Fill just before serving for the best texture. Alternatively, freeze unfilled cookies for up to three months. This makes red velvet thumbprint cookies ideal for large batches, dessert platters, and gift boxes.
7. Conclusion & Final Thoughts
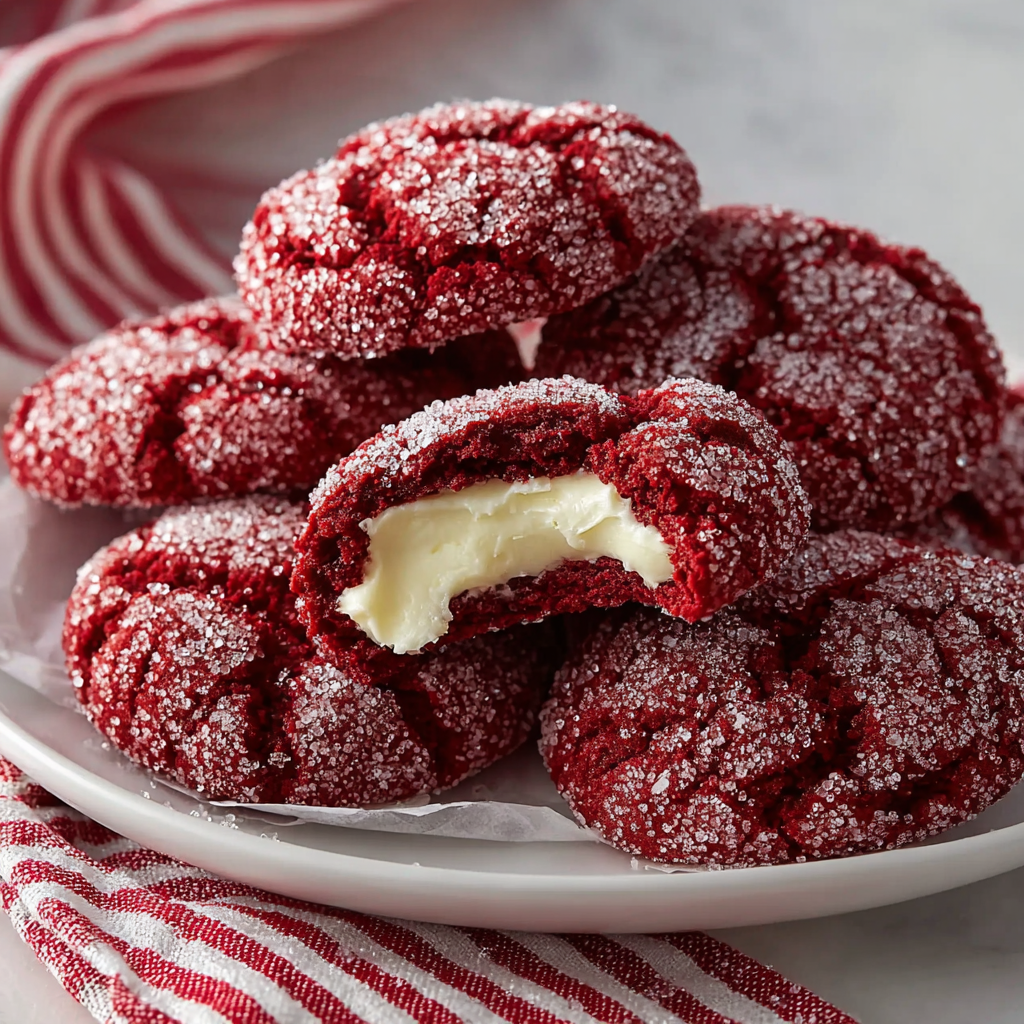
Red velvet thumbprint cookies bring elegance, festivity, and classic flavor together in one beautiful bite-sized dessert. They showcase everything people love about red velvet—the soft crumb, the hint of cocoa, the rich color, and the tang of buttermilk—while adding the joy of a creamy, decadent center that melts on the tongue. Whether you serve them for holidays, birthdays, tea parties, or as a special treat with coffee, these cookies deliver both beauty and indulgence in every bite.
What makes this recipe so rewarding is its versatility and impressive presentation. The bold red cookie and smooth white cream cheese filling create a stunning contrast that looks professionally crafted. Despite their bakery-worthy appearance, these cookies are simple enough for beginners and endlessly customizable for seasoned bakers. You can adjust the filling, color, flavoring, and decorations to match any celebration or personal preference.
Beyond aesthetics, these cookies offer a deeply satisfying texture—the soft cookie base, the slight crunch from rolling in sugar, and the creamy center work in harmony. They are delightful warm, chilled, or at room temperature, making them easy to serve at gatherings or gift in festive boxes.
Whether you’re baking for loved ones or bringing sweetness to a celebration, red velvet thumbprint cookies offer the perfect fusion of comfort, sophistication, and nostalgic flavor. Their aroma fills the kitchen with warmth, their color adds joy to dessert tables, and their taste leaves a lasting impression that keeps people returning for more. These cookies are not just a treat—they’re a celebration of indulgence, creativity, and the timeless allure of red velvet itself.