Introduction to the Recipe
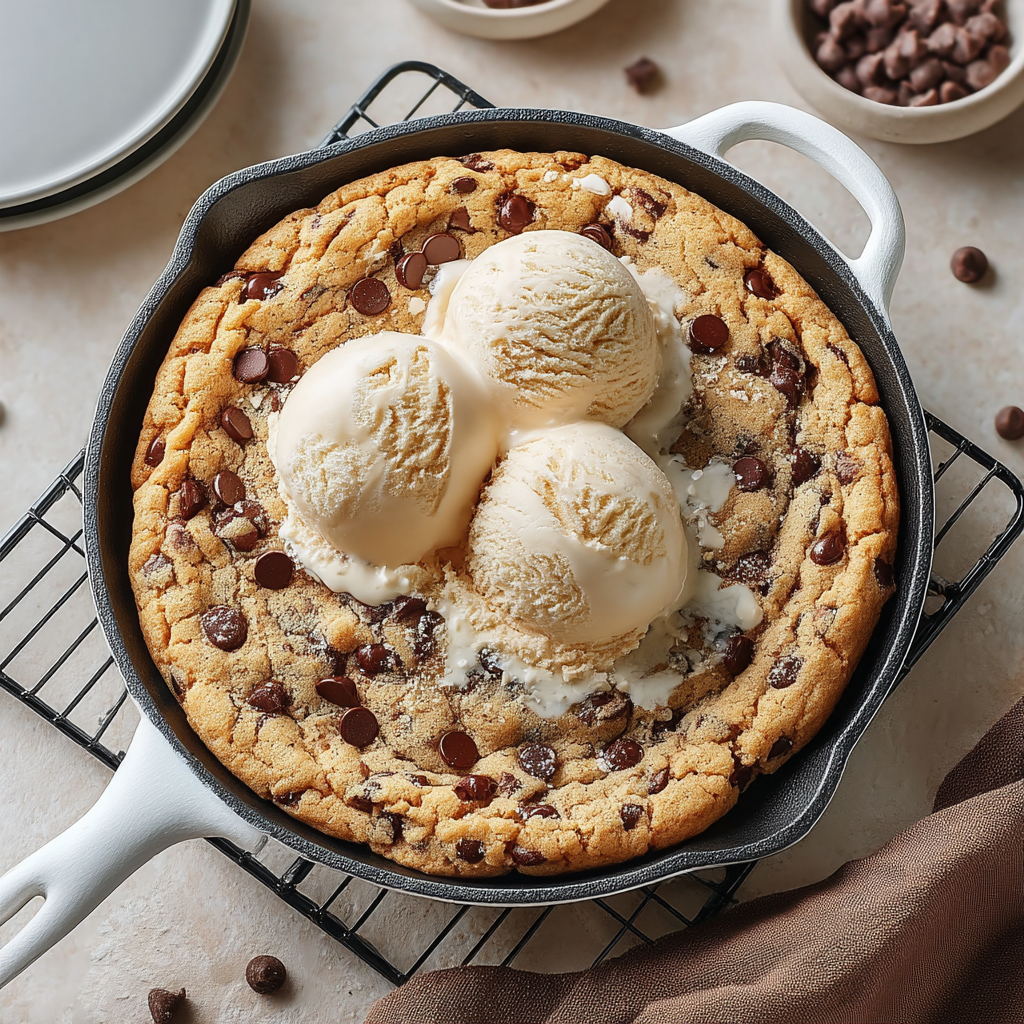
There’s something magical about a warm, gooey cookie fresh from the oven—especially when it’s the size of a skillet and topped with melting vanilla ice cream. This Skillet Cookie (Pizookie Recipe) delivers the best of both cookie and dessert worlds: crispy, buttery edges and a soft, molten center that begs to be scooped straight from the pan. Whether you’re celebrating something special or just craving an indulgent treat, this dessert hits every note.
Known popularly as a “Pizookie” (pizza + cookie), this oversized cookie is baked in a cast-iron skillet to achieve the perfect contrast of textures. It’s an ideal dessert to share—though no one would blame you for keeping it all to yourself. Made with pantry staples like brown sugar, butter, flour, and chocolate chips, the recipe is simple but the results are showstopping. Add a scoop of ice cream on top, and you’ve got a dessert that rivals any restaurant favorite.
Using both semisweet chocolate chips and chunks adds a rich, gooey texture throughout, while the combination of granulated and brown sugar gives it that chewy-soft bite with crisp edges. If you’ve never made a cookie in a skillet before, don’t worry—it’s easy, beginner-friendly, and incredibly forgiving.
Never baked in cast iron before? Here’s a guide to using and maintaining your cast iron skillet. Want to learn how to get perfectly chewy cookies every time? Check out this cookie science breakdown.
This Skillet Cookie (Pizookie Recipe) is the ultimate crowd-pleasing dessert—perfect for date nights, family gatherings, or spontaneous cravings.
Basic Recipe: Ingredients and Instructions
Print
Skillet Cookie (Pizookie Recipe)
Description
This Skillet Cookie (Pizookie Recipe) is gooey, crispy, and perfect with ice cream. Easy to make and crowd-pleasing!
Ingredients
-
2 sticks (226 grams) unsalted butter
-
1/2 cup (100 grams) granulated sugar
-
1 cup (200 grams) light brown sugar, packed
-
2 large eggs, at room temperature
-
1 large egg yolk, at room temperature
-
2 teaspoons vanilla extract
-
2 1/2 cups (318 grams) all-purpose flour
-
1 teaspoon baking soda
-
1 teaspoon fine sea salt
-
1 1/4 cups (213 grams) semisweet chocolate chips
-
2 oz (57 grams) semisweet chocolate, chopped
-
Vanilla ice cream, for serving
Instructions
-
Preheat the Oven
Preheat your oven to 350°F (175°C). Lightly grease a 10–12 inch oven-safe skillet (preferably cast iron). -
Brown the Butter (Optional but Recommended)
In a saucepan, melt the butter over medium heat. Continue cooking, stirring often, until it turns golden brown and smells nutty (about 5–7 minutes). Remove from heat and let cool slightly. -
Mix the Sugars and Butter
In a large bowl, whisk the browned butter (or just melted butter) with both sugars until combined and slightly cooled. -
Add Eggs and Vanilla
Add the eggs, egg yolk, and vanilla. Whisk until smooth and slightly thickened. -
Combine Dry Ingredients
In another bowl, whisk together the flour, baking soda, and salt. Gradually stir the dry mixture into the wet ingredients until a soft dough forms. -
Fold in Chocolate
Fold in chocolate chips and chopped chocolate chunks until evenly distributed. -
Spread in Skillet
Press the dough into your prepared skillet, spreading it evenly to the edges. -
Bake
Bake for 20–25 minutes or until the edges are golden brown and the center is just set but still soft. -
Cool Slightly and Serve
Let the cookie cool for 5–10 minutes before topping with vanilla ice cream. Serve directly from the skillet with spoons.
Notes
For a molten center, pull it out at 20 minutes; for a firmer cookie, bake up to 28 minutes.
Browning the butter adds a deep, nutty flavor that elevates the entire dish.
Don’t skip the egg yolk—it adds richness and helps bind the gooey texture.
Keywords: Skillet Cookie (Pizookie Recipe)
Advanced Techniques
Browning the Butter for Extra Flavor
Browning butter transforms the flavor from plain to gourmet. As the milk solids toast, they release a nutty aroma and rich, toffee-like taste. To do this, melt butter in a light-colored pan and stir continuously until it turns golden and smells fragrant. Let it cool before mixing with sugar. This step adds serious depth and enhances the cookie’s richness.
Using a Blend of Chocolate Types
Using both chips and chopped chocolate chunks ensures variety in each bite. Chips hold their shape, while chopped chocolate melts into gooey pockets. You can also mix milk chocolate with dark or even white chocolate for complexity. Use high-quality bars for the chopped chocolate to enhance meltability and flavor.
Underbaking for a Gooey Center
For that signature pizookie center, remove the skillet from the oven when the middle still looks slightly underdone. The cast iron retains heat and continues cooking the cookie even after it’s out of the oven. Let it rest for 5–10 minutes before serving to set slightly without losing the gooeyness.
Chilling the Dough for Enhanced Texture
If you have time, chill the dough for at least 30 minutes before baking. This step solidifies the fat and hydrates the flour, resulting in a thicker, chewier cookie with better flavor. It also prevents the dough from overspreading in the skillet during baking.
Infusing the Dough with Espresso or Sea Salt
Enhance the flavor complexity by adding 1/2 teaspoon of espresso powder to the dough—it deepens the chocolate flavor without making it taste like coffee. A light sprinkle of flaky sea salt on top right after baking also contrasts beautifully with the sweetness and adds gourmet appeal.
See more advanced recipes at cookingwhite.com
Storage, Shelf Life, and Maintenance Tips
Storing Leftovers
Let any leftovers cool completely, then cover the skillet tightly with foil or transfer slices to an airtight container. Store at room temperature for up to 3 days. Reheat gently in the oven at 300°F for 5–10 minutes to revive the texture.
Freezing Cookie Dough
You can freeze the dough directly in the skillet or in portions. Wrap the skillet tightly in plastic wrap and foil if freezing whole. To bake, thaw in the fridge overnight and bring to room temperature before baking. Or freeze dough balls and bake them individually for mini skillet cookies.
Microwaving vs. Oven Reheating
While microwaving is faster, it can make the cookie rubbery. For best results, reheat in the oven. If you’re only reheating a slice, microwave it on 50% power in 15-second intervals until just warmed. Always top with fresh ice cream before serving again.
Preventing Dryness
If you’re storing the cookie more than a day, wrap it well to avoid exposure to air. Place a slice of bread in the storage container to help retain moisture. The cookie will stay soft and chewy longer.
Skillet Maintenance After Baking
Cast iron needs care after baking sweets. Let the skillet cool, then rinse gently with warm water and a soft cloth—avoid soap if seasoned well. Dry thoroughly and re-oil lightly. This preserves your pan for both savory and sweet uses.
Dietary Adaptations and Substitutions
Gluten-Free Version
Substitute all-purpose flour with a 1:1 gluten-free baking flour that contains xanthan gum. Brands like Bob’s Red Mill or King Arthur work well. Check that your chocolate chips are also gluten-free. The result will be just as gooey and satisfying.
Dairy-Free Option
Replace butter with a vegan butter substitute or refined coconut oil (for no coconut flavor). Use dairy-free chocolate chips (like Enjoy Life brand) and top with a non-dairy vanilla ice cream. The texture may be slightly different but still indulgent.
Egg-Free Adaptation
For an egg-free version, replace each egg with 1/4 cup unsweetened applesauce or a commercial egg replacer. The texture will be a bit softer but still chewy and rich. You can also try flax eggs (1 tbsp flaxseed + 3 tbsp water per egg).
Vegan Pizookie
Combine the egg-free and dairy-free swaps above for a fully vegan treat. Use plant-based butter, dairy-free chocolate, and non-dairy ice cream. Add a splash of plant milk if the dough feels too stiff. Bake as usual and enjoy!
Low-Sugar Version
Reduce the sugar by 25–30% or use a sugar substitute like monk fruit or erythritol. Use sugar-free chocolate chips
and skip the ice cream or use a no-sugar-added version. The cookie may bake slightly differently, but the flavor holds up.
FAQs About the Recipe
Can I Make This Without a Cast Iron Skillet?
Yes! A heavy-duty oven-safe pan or even a round cake pan will work. You won’t get the same crispy edges as cast iron provides, but the cookie will still bake beautifully. Just make sure your pan is oven-safe up to 350°F.
How Do I Know When It’s Done Baking?
Look for golden edges and a center that’s just set. The middle should still jiggle slightly when you shake the pan. For a gooey center, pull it out around 22 minutes. For a firmer cookie, wait until the top looks fully dry and golden.
Can I Add Nuts or Other Mix-ins?
Absolutely. Add up to 1 cup of chopped nuts like walnuts, pecans, or macadamias. Dried fruit, white chocolate, peanut butter chips, or even crushed pretzels work well. Just don’t overload the dough to maintain the right texture.
Is This Recipe Good for Sharing?
Yes—this is a crowd-pleasing dessert meant to be shared! One 10-inch skillet serves 6–8 people easily, especially when topped with ice cream. For parties, serve with multiple spoons and dig in straight from the pan for a fun, communal experience.
Can I Make Individual Skillet Cookies?
Yes! Divide the dough between mini skillets or ramekins and reduce the baking time to 12–15 minutes. These personal-sized pizookies make a great dinner party or date night dessert with built-in portion control.
Conclusion & Final Thoughts
This Skillet Cookie (Pizookie Recipe) is the ultimate comfort dessert: simple to make, endlessly customizable, and always a hit. Whether you’re enjoying it warm with melty chocolate and ice cream or sneaking cold leftovers from the fridge, it’s an indulgence that never disappoints.
With a crisp, buttery edge and a gooey, molten center, every bite is a dream come true for cookie lovers. And because it’s made with basic pantry staples, you can whip it up on a whim whenever the craving strikes. It’s also perfect for birthdays, movie nights, dinner parties, or “just because” treats.
From browning the butter to selecting the best chocolate, every step in this recipe is designed to help you achieve pizookie perfection. And with variations for nearly every dietary need, it’s a dessert everyone can enjoy.
So grab your skillet, scoop your ice cream, and dig in—this Skillet Cookie (Pizookie Recipe) is sure to become your go-to dessert for any occasion.