Introduction
Halloween is the perfect time to unleash your creativity in the kitchen, and this Spider Cake is the ultimate centerpiece for any spooky celebration. Combining the cozy warmth of pumpkin spice with rich chocolate and a creamy, cocoa-infused frosting, this cake manages to be both frightfully fun and irresistibly delicious. With a moist, tender crumb and a spider-shaped design that will make your guests gasp with delight, it’s a dessert that captures everything we love about Halloween—playfulness, comfort, and a touch of eerie charm.
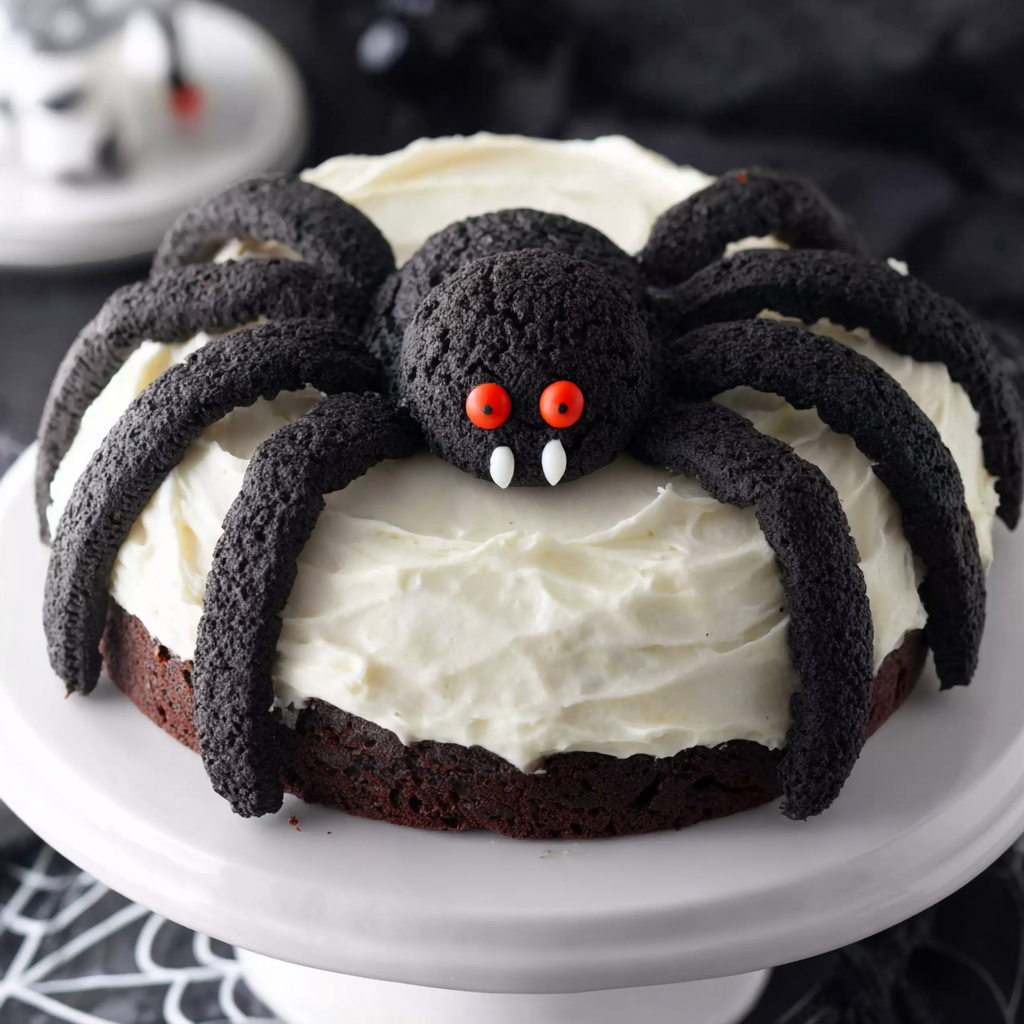
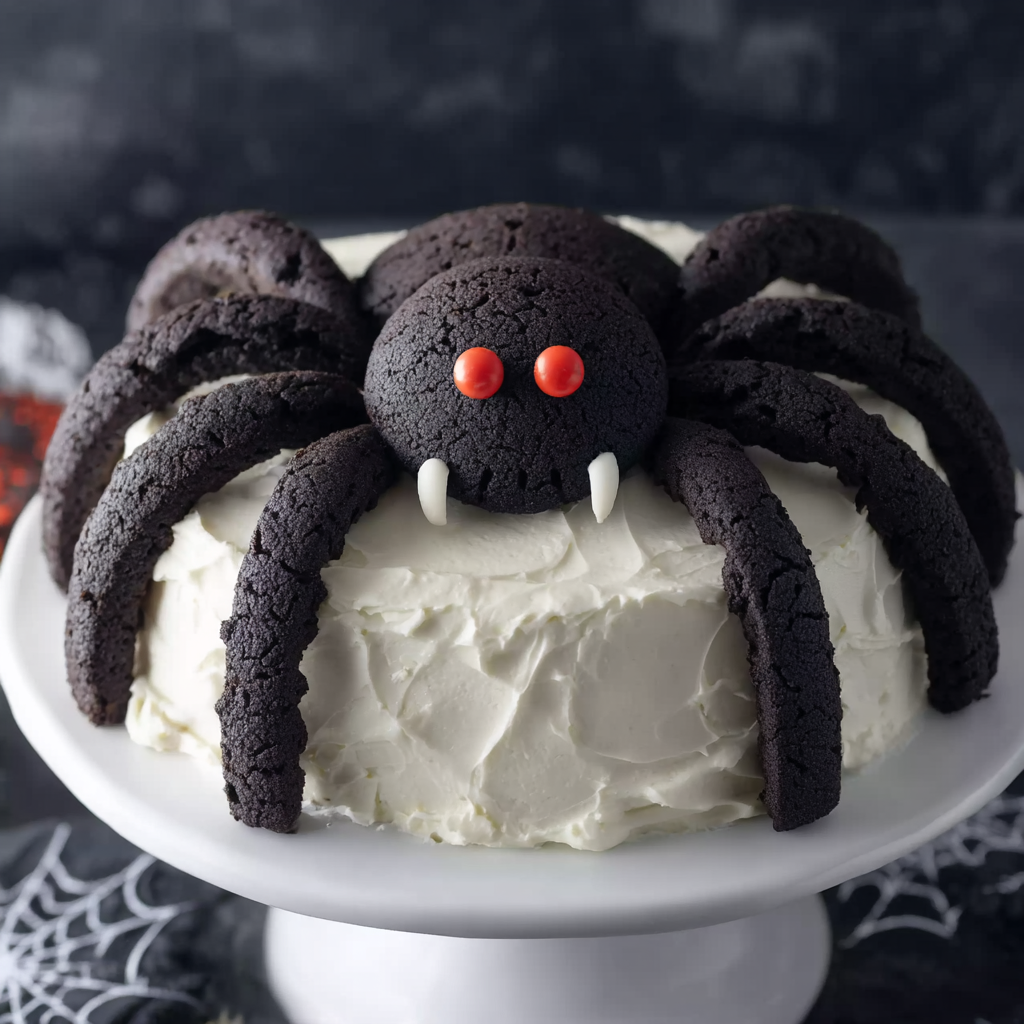
What makes this cake truly special is its flavor. It starts with a simple spice cake mix, which becomes incredibly moist and flavorful thanks to the addition of pumpkin spice pudding, sour cream, and mini chocolate chips. The result? A rich, dense cake that’s perfect for pairing with the smooth tang of cream cheese frosting. The frosting itself is turned jet-black with dark cocoa and a hint of food coloring, giving it a striking look that’s pure Halloween magic. Two bright red candies form the spider’s “eyes,” while the cake’s rounded shape and piped legs bring your creepy-crawly creation to life.
This Spider Cake has been a hit at my Halloween parties for years. It’s simple enough to make with kids but impressive enough to serve as the showstopper dessert on your holiday table. Plus, it’s surprisingly easy to decorate—no professional piping skills required! If you want more inspiration for Halloween desserts, check out Delish’s Halloween cake ideas or Food Network’s spooky dessert collection to keep the frightful fun going.
Let’s dive in and bake a spider that’s as sweet as it is spooky!
Recipe Card
Print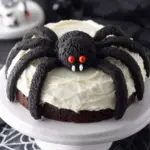
Spider Cake
Description
This Spider Cake is a festive Halloween dessert made with pumpkin spice cake, chocolate chips, and black cocoa frosting. It’s moist, rich, and decorated to look like a spooky spider—perfect for parties or fall gatherings.
Ingredients
For the Cake
- 1 box spice cake mix
- 1 (3.4 oz) box pumpkin spice instant pudding mix
- 1 cup sour cream
- 4 large eggs
- ½ cup water
- ½ cup oil (canola or vegetable)
- 1½ cups mini chocolate chips
For the Frosting and Decorations
- 16 oz cream cheese, softened
- ½ cup butter, softened
- ⅓ cup dark cocoa powder
- 3–4 cups powdered sugar
- 2 teaspoons vanilla extract
- Black food coloring
- 2 red hots (for eyes)
Instructions
- Preheat the oven:
Set your oven to 350°F (175°C). Grease and flour two oven-safe glass bowls—one large (about 1½ quarts) for the body and one smaller (about ¾ quart) for the head—or use round cake pans if preferred. - Mix the batter:
In a large bowl, combine cake mix, pudding mix, sour cream, eggs, water, and oil. Beat on medium speed for 2–3 minutes until smooth and creamy. Stir in the mini chocolate chips. - Bake the cakes:
Pour the batter evenly between the prepared bowls (or pans). Bake for 30–35 minutes or until a toothpick inserted in the center comes out clean. Let the cakes cool completely on a wire rack. - Prepare the frosting:
In a large mixing bowl, beat softened butter and cream cheese together until fluffy. Add cocoa powder and vanilla, mixing until smooth. Gradually add powdered sugar (starting with 3 cups) until you reach a spreadable consistency. Add black food coloring until you achieve a rich, dark black tone. - Assemble the spider:
Place the larger cake (body) on a serving platter. Use a bit of frosting to attach the smaller cake (head) to the body. Frost the entire spider generously with black frosting, smoothing it evenly. - Add the decorations:
Place two red hots on the smaller cake for eyes. For legs, you can use black licorice twists, pretzel sticks dipped in black candy melts, or pipe legs directly with remaining frosting. Get creative with your spider’s pose! - Chill before serving:
Refrigerate for at least 30 minutes to set the frosting. Serve slightly chilled or at room temperature for the best texture.
Notes
Active prep: 20 minutes
Cooling and decorating: about 20 minutes
You can make this cake a day ahead and refrigerate it—just let it come to room temperature before serving. For a more pronounced pumpkin flavor, add ½ teaspoon pumpkin pie spice to the batter.
Advanced Techniques
Achieving the Perfect Black Frosting
Getting a deep black frosting can be tricky! Start with dark cocoa powder—like Hershey’s Special Dark—so you need less food coloring. Add black gel color gradually and let the frosting sit for 30 minutes; the color will deepen over time. This prevents the bitter taste that can come from using too much dye.
Creating Realistic Spider Legs
For an easy and impressive spider shape, I like to use black licorice strings or chocolate-covered pretzel rods as legs. Bend them slightly to give a crawling effect. You can also pipe legs using a round tip and thick frosting for a sturdier look. Dust lightly with edible black glitter to give your spider a “fuzzy” appearance!
Keeping the Cake Moist and Flavorful
The sour cream and pudding mix are your best friends here—they keep the cake moist for days. Don’t overbake; remove it as soon as a toothpick comes out mostly clean (a few moist crumbs are perfect). Wrap cooled cakes in plastic wrap before frosting to lock in moisture if you’re decorating later.
Balancing Pumpkin Spice and Chocolate
Pumpkin spice and chocolate might sound like an odd couple, but they complement each other beautifully. The warmth of cinnamon and nutmeg brings out the richness of the cocoa. If you prefer a stronger spice kick, add a pinch of ground ginger or allspice to the batter.
Decorating Like a Pro
To make your Spider Cake stand out, use a small piping bag to create texture on the spider’s back. Try swirling short strokes of frosting to mimic fur, or use a fork to lightly texture the surface. For a dramatic touch, place the spider on a “web” made of white icing or melted white chocolate.
Storage, Shelf Life, and Maintenance Tips
Storing the Spider Cake Overnight
Store your decorated cake in the refrigerator, covered loosely with plastic wrap or in a cake dome. It’ll stay fresh for up to 4 days. Because it has cream cheese frosting, always keep it chilled when not serving.
Freezing the Cake for Future Events
You can freeze the unfrosted cakes for up to 3 months. Wrap them tightly in plastic wrap and foil. When ready to use, thaw overnight in the refrigerator and frost once completely defrosted.
Refreshing the Frosting After Storage
If your frosting stiffens in the fridge, let the cake sit at room temperature for about 30 minutes before serving. You can also smooth out any imperfections by gently running a warm spatula over the frosting.
Preventing Condensation on the Frosting
When moving the cake from cold to room temperature, condensation can form. To avoid this, keep the cake covered loosely while it comes to temperature—this allows gradual moisture release and prevents streaks on your black frosting.
Transporting the Cake Without Damage
For parties or potlucks, place the cake on a sturdy board and refrigerate before transport to firm up the frosting. Cover with a deep container or cake carrier to prevent smudging. If your spider has tall legs, attach them after you arrive.
Dietary Adaptations and Substitutions
Making Gluten-Free Spider Cake
Use a gluten-free spice cake mix and pudding mix (Jell-O brand pudding mixes are usually gluten-free). The rest of the ingredients are naturally gluten-free, so the swap is seamless. You’ll still get the same moist, tender texture.
Dairy-Free or Vegan Version
Substitute the sour cream with dairy-free yogurt, the butter with vegan margarine, and the cream cheese with a vegan alternative like Kite Hill. For the eggs, mix ¼ cup unsweetened applesauce per egg or use flaxseed “eggs.” The flavor remains rich and satisfying.
Lower-Sugar Version
Reduce powdered sugar in the frosting to 2½ cups and replace half with a sugar-free sweetener like Swerve. You can also use sugar-free pudding mix in the cake batter to cut sweetness while maintaining structure.
Nut-Free Adaptation
This cake is naturally nut-free, but always check your chocolate chips and food coloring to ensure they’re processed in nut-free facilities if serving guests with allergies.
Pumpkin-Free Variation
If pumpkin spice isn’t your thing, swap the pudding mix for vanilla or chocolate instant pudding and add ½ teaspoon cinnamon for a milder fall flavor. You’ll still get the moist texture and cozy aroma.

FAQs About Spider Cake
Can I Make the Cake in Regular Round Pans?
Absolutely! Use one 9-inch and one 6-inch round pan for the body and head. You can still arrange them together to form a spider shape, then decorate as usual.
What’s the Best Way to Tint the Frosting Black Without Using Too Much Food Coloring?
Start with dark cocoa and add black gel coloring a little at a time. The color will deepen as the frosting rests. Using a small amount of blue or purple gel alongside black can also enhance the depth of color.
Can I Use a Different Cake Flavor?
Definitely! Chocolate, red velvet, or even vanilla work beautifully. The black frosting ties everything together, so choose your favorite base flavor and have fun with it.
How Do I Make Mini Spider Cupcakes Instead?
Use the same batter and divide it into cupcake liners. Bake for 18–20 minutes, frost with black frosting, and add mini candy eyes and licorice legs for bite-sized spiders—perfect for kids’ parties!
Can I Make the Cake Without Food Coloring?
Yes! The dark cocoa gives a natural deep brown color. If you prefer a fully natural look, skip the black dye and embrace a chocolate-brown spider—it’ll still be adorable and delicious.
Conclusion & Final Thoughts
Halloween baking is about more than just sweet treats—it’s about fun, creativity, and bringing a bit of magic into the kitchen. This Spider Cake captures that spirit perfectly. It’s spooky without being scary, indulgent without being overly fussy, and bursting with warm autumn flavor. From the tender, pumpkin-spiced cake to the smooth, rich black frosting, every bite is a celebration of the season.
What I love most about this recipe is how approachable it is. Even if you’re not a seasoned baker, you can pull this off easily. The decorations are forgiving—every spider looks a little different, and that’s part of the charm! Kids love helping with the eyes and legs, and adults can’t resist snapping photos before cutting into it.
So whether you’re hosting a Halloween bash, attending a costume potluck, or just baking for fun, make this Spider Cake your star attraction. It’s festive, flavorful, and guaranteed to get everyone talking (and maybe squealing a little). When you see those glowing red eyes staring back from the dessert table, you’ll know you’ve baked up a true Halloween hit—one that’s creepy, cute, and absolutely delicious!