Spooky Cookies: A Deliciously Creepy Halloween Treat
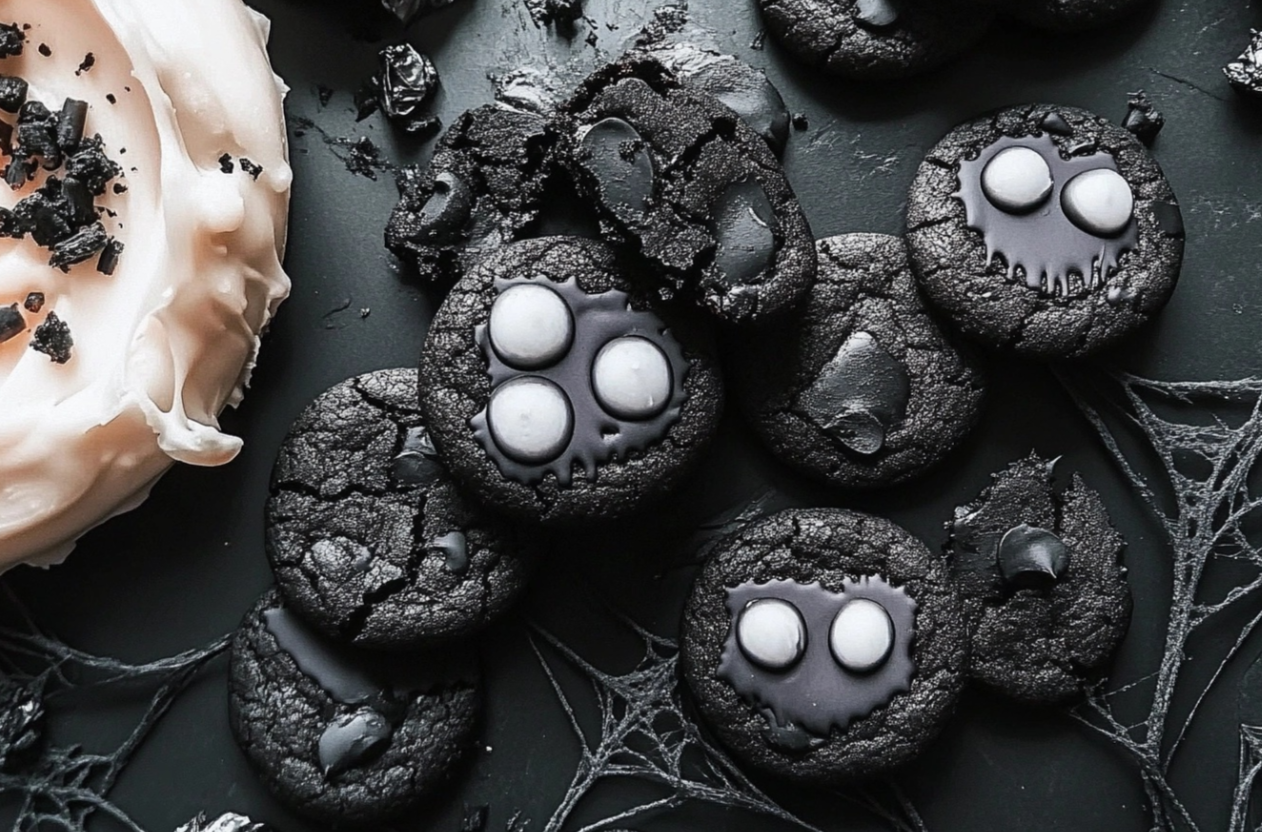
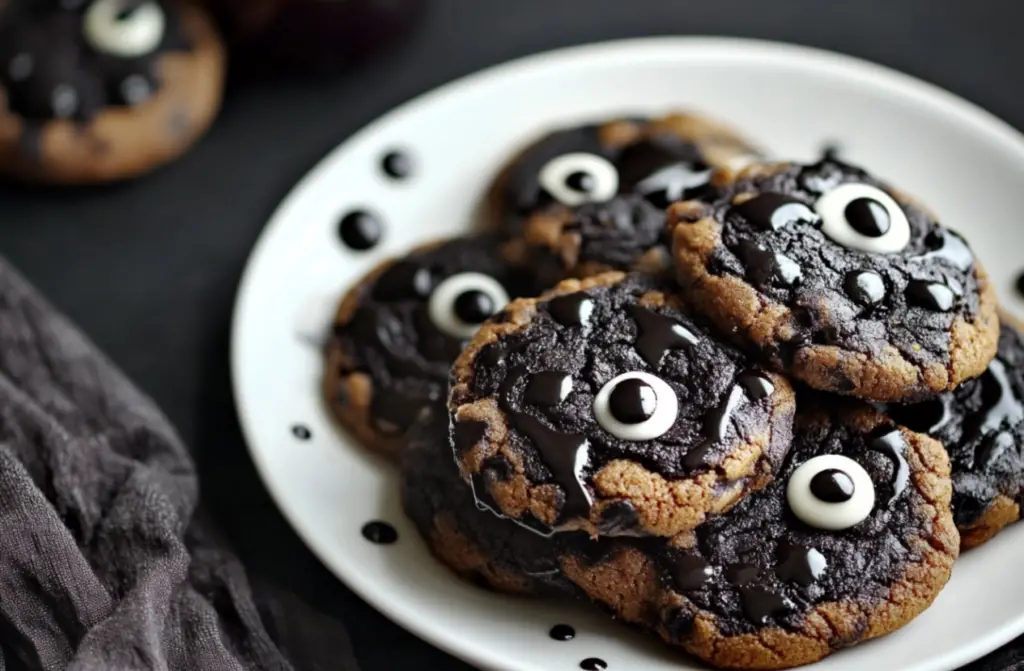
Looking for a fun and delicious way to celebrate Halloween? Spooky cookies are the perfect solution. These dark, eerie treats are not only visually stunning with their candy eyeball toppings, but they also offer a rich, fudgy taste that’s sure to please. Whether you’re hosting a Halloween party or just looking for a unique way to indulge, these cookies will add a touch of spooky sweetness to your celebration.
Why Spooky Cookies Are Perfect for Halloween Parties
Halloween is all about fun, fright, and sweet treats, making spooky cookies the perfect addition to your table. The dark cocoa, soft texture, and creepy candy eyeballs make them an instant hit with both kids and adults. For more Halloween cookie inspiration, check out this collection of Halloween cookie ideas to discover other themed treats that could pair perfectly with your spooky cookies.
Elevate Your Halloween Baking with Spooky Cookies
If you want to make your spooky cookies stand out, consider adding a few advanced techniques. Try chilling the dough to prevent spreading, or experiment with using different candy eyeballs for extra spookiness. These cookies are versatile, and with the right texture, they can steal the show at any event. For additional tips on achieving the perfect cookie texture, visit this guide on baking perfect cookies. It’s full of insights that will help you take your baking to the next level.
With just a little effort, your spooky cookies can be the highlight of your Halloween celebration, satisfying both taste buds and spooky cravings alike.
Basic Recipe for Spooky Cookies
Print
Spooky Cookies Recipe
- Total Time: 27 minutes
- Yield: 24 cookies 1x
- Diet: Vegetarian
Description
- Deliciously soft and fudgy cookies with a dark cocoa flavor, topped with creepy candy eyeballs to make them the perfect Halloween treat.
Ingredients
- ½ cup unsalted butter, room temperature
- ½ cup granulated sugar
- ½ cup dark brown sugar, packed
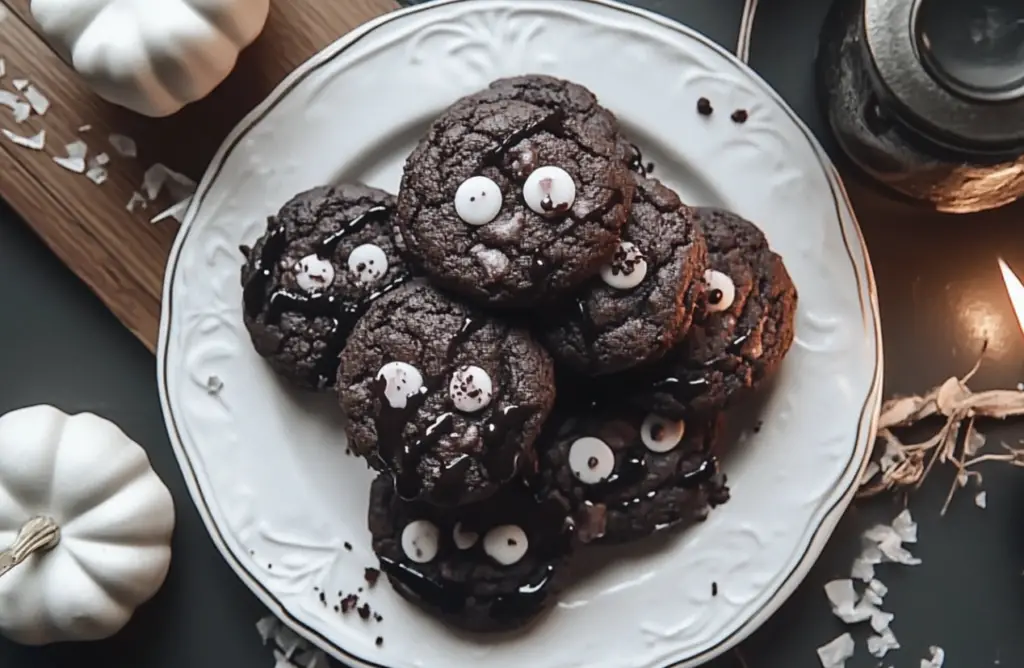
- Optional: black food coloring
- 1 large egg, preferably room temperature
- 1 teaspoon vanilla extract
- 1 cup all-purpose flour
- ½ cup + 2 Tbsp. Hershey’s Special Dark Cocoa Powder
- 1 teaspoon baking soda
- ¼ teaspoon salt
- 2 Tbsp. milk
- 1 1/2 cups chocolate chips (semi-sweet)
- Candy Eyeballs for topping the cookies
Instructions
- Preheat oven to 350°F (177°C) and line a baking sheet with parchment paper.
- In a large bowl, cream together butter, granulated sugar, and brown sugar until light and fluffy.
- Add the egg and vanilla extract, mixing until fully combined. If using, mix in black food coloring.
- In a separate bowl, whisk together flour, cocoa powder, baking soda, and salt.
- Gradually add the dry ingredients to the wet mixture, alternating with the milk, until a smooth dough forms.
- Stir in the chocolate chips.
- Scoop out tablespoon-sized portions of dough and place them on the prepared baking sheet. Top each cookie with candy eyeballs.
- Bake for 10-12 minutes, until the edges are set but the centers remain soft.
- Allow cookies to cool on the baking sheet for a few minutes before transferring them to a wire rack to cool completely.
Notes
- For a more intense color, black food coloring is optional.
- Store in an airtight container for up to one week.
- Prep Time: 15 minutes
- Cook Time: 12 minutes
- Category: Dessert
- Method: Baking
- Cuisine: American
Nutrition
- Serving Size: 1 cookie
- Calories: 150
- Sugar: 12g
- Sodium: 85mg
- Fat: 7g
- Saturated Fat: 4g
- Unsaturated Fat: 2g
- Trans Fat: 0g
- Carbohydrates: 20g
- Fiber: 1g
- Protein: 2g
- Cholesterol: 20mg
Keywords: Spooky Cookies
STEPS
Step 1
Line 2 baking sheets with parchment paper or silicone baking mats. In the bowl of an electric mixer, combine the butter and sugars. Optional add black food coloring to get a deeper shade of black in the cookies. Beat together on medium-high speed until light and fluffy, 2-3 minutes. Blend in the egg and vanilla, scrape down the bowl if needed.
Step 2
In a separate bowl, whisk together the flour, cocoa powder, baking soda, and salt. Slowly add the dry ingredients into the wet ingredients in the mixer on low speed just until incorporated. Mix in the milk on the lowest speed and fold in the chocolate chips.
Step 3
Roll about 2 tablespoons of dough into balls and place on the baking sheets. Flatten slightly. Top cookies with candy eyeballs. Place cookie sheet in freezer for 10-15 minutes. (Alternately you can chill the dough for at least 2 hours or up to 36.)
Step 4
Bake at 350˚ F for 10-11 minutes. Let cool on the baking sheets for about 5 minutes, then transfer to a wire rack to cool completely.
Advanced Baking Techniques for Perfect Spooky Cookies
Mastering the art of spooky cookies requires more than just following a recipe. To make these cookies truly stand out, a few advanced techniques can elevate your baking game and ensure that your cookies are the highlight of the Halloween season.
Chill the Dough for Thicker, Chewier Cookies
One of the easiest ways to enhance your spooky cookies is by chilling the dough before baking. Allowing the dough to rest in the refrigerator for at least 30 minutes helps solidify the fat in the butter, which prevents excessive spreading. This simple trick results in thicker, chewier cookies with a soft center and crispy edges—just the texture you’re looking for in a perfect cookie.
Perfecting the Texture of Your Spooky Cookies
Achieving the right texture in your cookies comes down to proper mixing techniques. Start by creaming the butter and sugars until they are light and fluffy, which usually takes about 3 to 5 minutes. This step helps create tiny air pockets in the dough, ensuring a softer, lighter texture. After adding the dry ingredients, avoid overmixing the dough, as this can result in tough cookies. Gently fold in the chocolate chips and other add-ins to maintain the integrity of the dough.
Customization Tips for More Festive Spooky Cookies
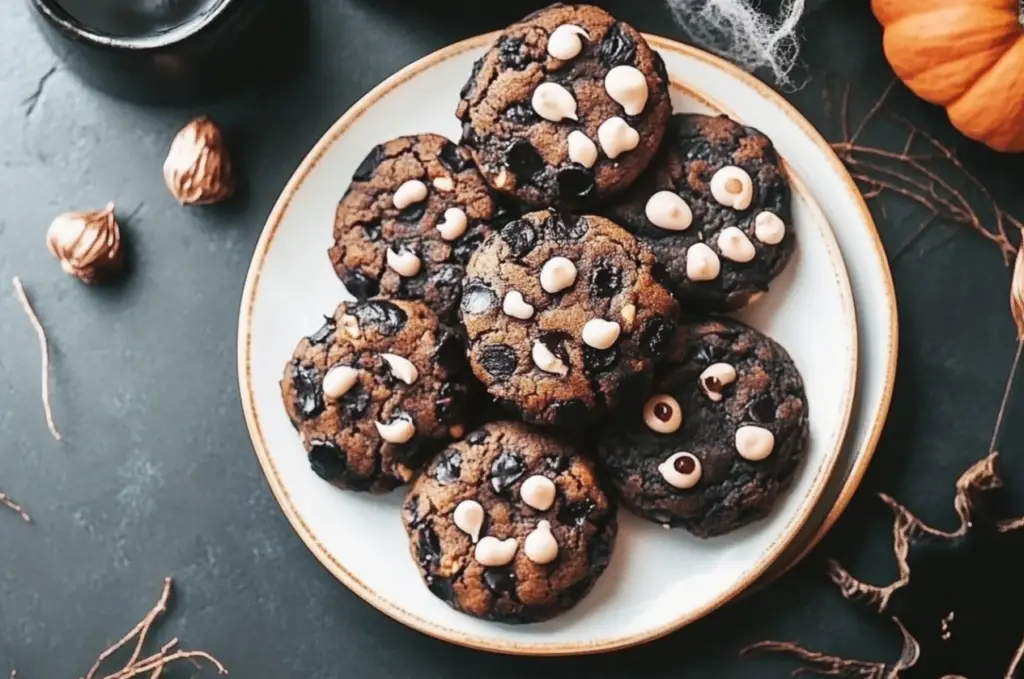
Another way to enhance your spooky cookies is by experimenting with various Halloween-themed toppings. In addition to candy eyeballs, consider adding colored sprinkles, candy fangs, or even using different chocolate chip varieties like white or dark chocolate. These small customizations can make your cookies more festive and fun for the season, giving them a personalized touch.
By incorporating these advanced techniques, you can create spooky cookies that not only look amazing but taste even better.
Maintenance and Storage Tips for Spooky Cookies
To keep your spooky cookies fresh and delicious, proper storage is essential. Whether you plan to serve them immediately or save them for later, following these storage tips will ensure they maintain their spooky charm and soft texture.
Short-Term Storage for Maximum Freshness
If you plan to enjoy your spooky cookies within a few days, store them in an airtight container at room temperature. This will help maintain their moisture and keep them soft. If your cookies tend to dry out, you can add a slice of bread to the container. The bread will release moisture, which will keep the cookies fresh without altering their flavor.
Freezing Spooky Cookies for Longer Storage
For longer-term storage, you can easily freeze your spooky cookies without compromising their taste or texture. To freeze baked cookies, allow them to cool completely, then place them in a single layer on a baking sheet. Once frozen, transfer the cookies to a freezer-safe container or bag. This way, they can be stored for up to three months. To enjoy, simply thaw them at room temperature or reheat them in the oven for a few minutes to restore their soft, chewy texture.
Reheating for Freshness
When reheating, place your spooky cookies in the microwave for 5 to 10 seconds to bring back that fresh-from-the-oven warmth. Be careful not to overheat them, as they can become too soft or lose their chewy texture. For an oven option, place them in a preheated oven for 3 to 5 minutes.
By following these simple storage and reheating tips, you’ll enjoy your spooky cookies as if they were just freshly baked.
Dietary Adaptations for Spooky Cookies
Not everyone can enjoy traditional spooky cookies, but with a few easy swaps, these cookies can fit a variety of diets. Whether you’re gluten-free, vegan, or looking for a low-sugar option, these adaptations will ensure everyone at your Halloween party can indulge.
Gluten-Free Spooky Cookies
For a gluten-free version, replace the all-purpose flour with a gluten-free baking blend. Make sure the blend includes xanthan gum, which helps give structure to the cookies. Without it, the cookies might crumble or fall apart. The texture remains chewy, and the spooky look is just as fun. You can enjoy gluten-free spooky cookies without sacrificing flavor or visual appeal.
Vegan Spooky Cookies
To make your spooky cookies vegan, swap the butter for plant-based butter, and use a flaxseed egg replacement (1 tablespoon of flaxseed meal mixed with 3 tablespoons of water). Let the mixture sit for a few minutes to thicken before adding it to the dough. Additionally, opt for vegan chocolate chips and be sure to omit or replace the candy eyeballs with a vegan-friendly option.
Low-Sugar Spooky Cookies
For those who need a low-sugar option, consider using a sugar substitute like erythritol or monk fruit sweetener in place of the granulated sugar and brown sugar. Adjust the amounts according to the sweetness levels of the substitute you choose. You can also find sugar-free chocolate chips to cut down on overall sugar content without compromising the spooky fun.
With these simple adjustments, your spooky cookies can accommodate a range of dietary needs, allowing everyone to enjoy this spooky treat.
Popular FAQs About Spooky Cookies
When baking spooky cookies, a few common questions tend to arise. To help you achieve the best results, here are answers to some frequently asked questions that will make your cookies both spooky and delicious.
Can I Make the Dough Ahead of Time?
Yes, you can! Making the dough ahead of time is a great way to save time, especially if you’re prepping for a Halloween event. You can refrigerate the spooky cookie dough for up to 48 hours before baking. Chilling the dough not only enhances the flavor but also prevents the cookies from spreading too much during baking. Just be sure to let the dough sit at room temperature for a few minutes before scooping and baking.
How Do I Keep My Cookies from Spreading?
One of the most common issues with spooky cookies is excessive spreading during baking. To prevent this, make sure your butter is at room temperature and not melted. Additionally, chilling the dough for 30 minutes to an hour before baking will help the cookies hold their shape better. If you still have issues, try adding an extra tablespoon of flour to the dough to stiffen it slightly.
What Can I Use Instead of Candy Eyeballs?
If you don’t have candy eyeballs, don’t worry! You can get creative with other toppings. Use white chocolate chips, mini marshmallows, or even round candies to create spooky faces on your spooky cookies. For an extra eerie touch, use a bit of melted chocolate or frosting to draw creepy designs.
These tips will help you troubleshoot common issues and customize your spooky cookies for a truly festive and fun Halloween experience.
Conclusion: Enjoying Your Spooky Cookies
After following these tips and techniques, you’re ready to create the ultimate batch of spooky cookies for your Halloween festivities. These delicious treats are not only easy to make but also a fun way to get creative in the kitchen. Whether you’re baking for a Halloween party or simply enjoying a cozy night in, spooky cookies bring a festive and eerie charm that everyone will love.
A Fun and Spooky Treat for Everyone
The best part about spooky cookies is that they’re customizable for any occasion. You can experiment with different toppings, like candy eyeballs or colorful sprinkles, to give your cookies a unique and personal touch. Plus, with simple dietary adaptations, such as gluten-free or vegan versions, you can ensure that all your guests can indulge in these creepy creations.
Perfect for Halloween or Any Spooky Event
With their dark cocoa flavor and creepy designs, spooky cookies are the perfect dessert for Halloween. However, they’re versatile enough to be made for any spooky-themed event. From children’s parties to adult gatherings, these cookies add a sweet yet spooky touch to any celebration. They’re sure to be a crowd-pleaser, leaving everyone impressed by both the flavor and the eerie appearance.
In conclusion, spooky cookies are more than just a dessert – they’re a fun, festive experience. With easy storage tips, dietary adaptations, and advanced techniques, you’ll master the art of making them in no time. Happy baking, and enjoy your hauntingly delicious treats!