Halloween Twinkie Mummies: A Spooky Delight
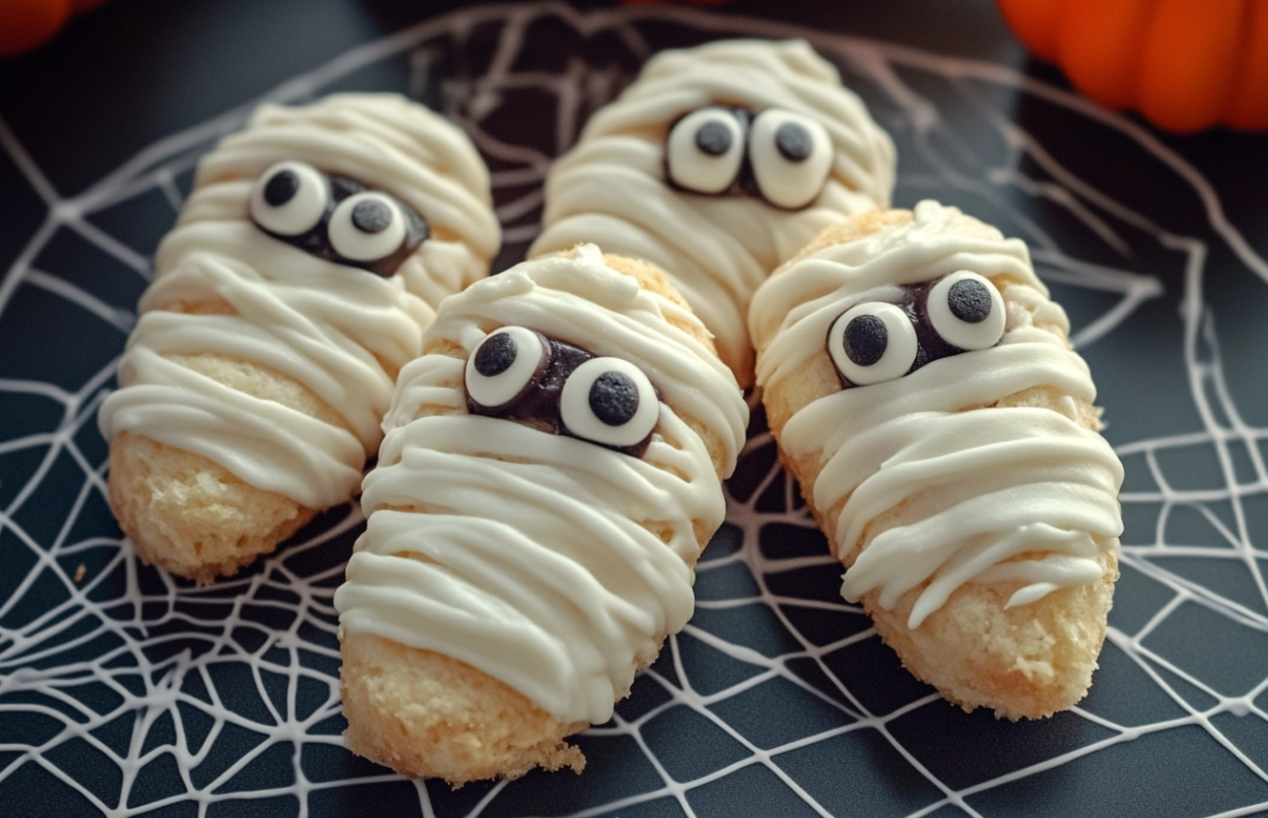
Looking for a fun and easy way to celebrate Halloween? These Halloween Twinkie Mummies are perfect for a quick, spooky treat. Not only are they delicious, but they also bring a playful Halloween twist to any party. Made with Twinkies and covered in white chocolate, they’re bound to be a hit for kids and adults alike.
Halloween Twinkie Mummies: Quick and Easy Steps
Creating Halloween Twinkie Mummies is simple and fast, making it the ideal last-minute treat. Start by gathering a few basic ingredients, including Twinkies, white chocolate chips, and edible eyes. Melt the white chocolate and dip each Twinkie to create a smooth coating. For more spooky snack ideas, check out these quick Halloween treats.
Perfect Party Treat: Halloween Twinkie Mummies
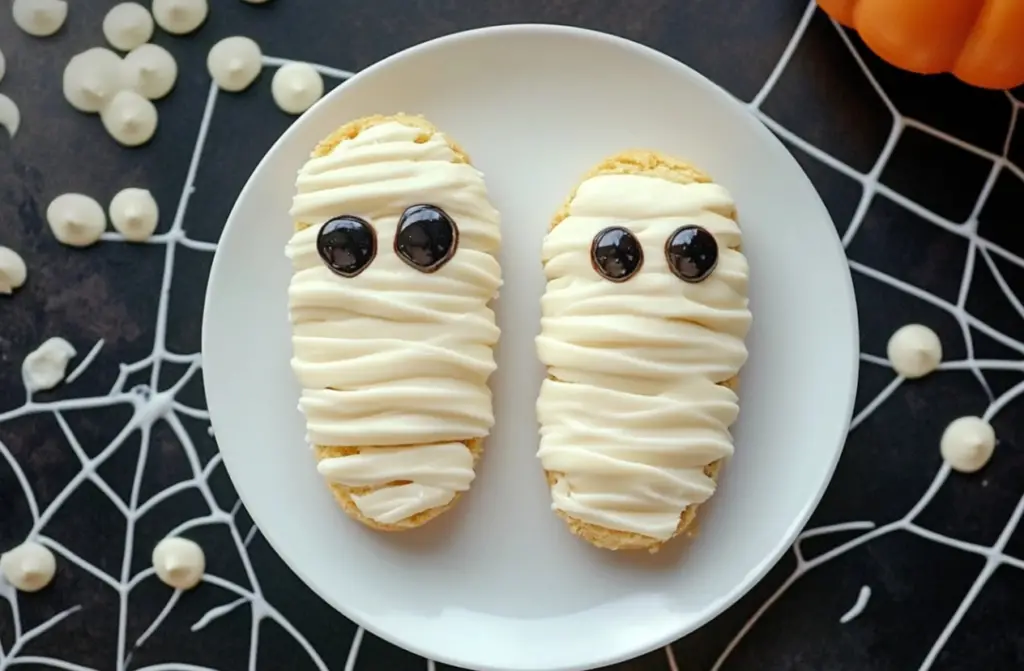
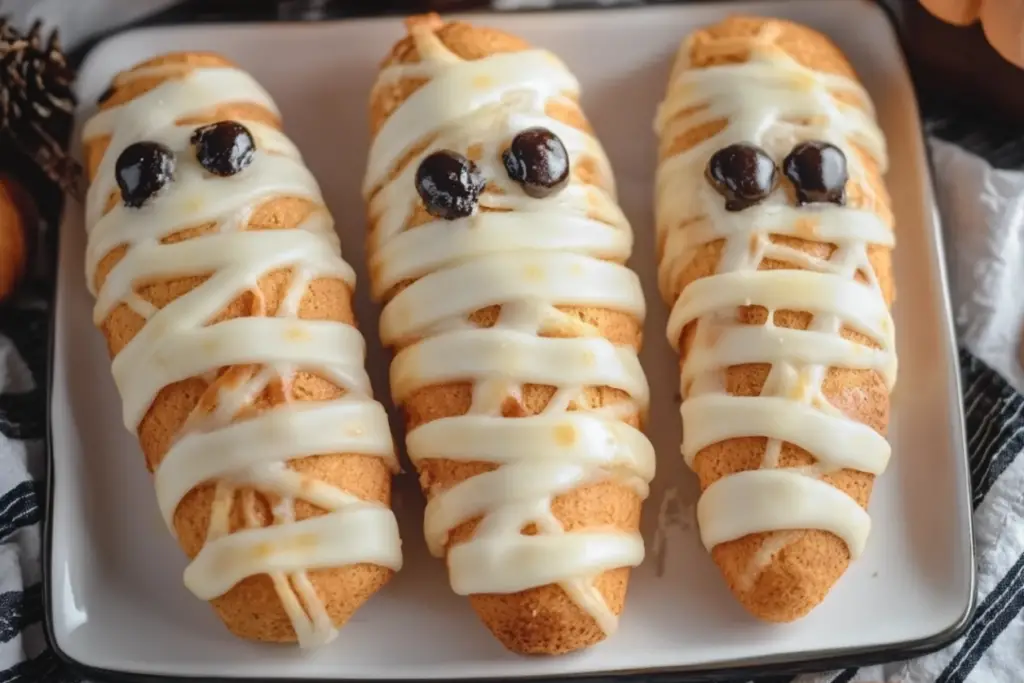
Once your Twinkies are coated, it’s time to add the fun details. Using a disposable piping bag, drizzle white chocolate over each Twinkie to create the look of mummy bandages. Add two edible eyes to complete the mummy’s face, and you’re done! These treats are as fun to make as they are to eat. Need more ideas for your Halloween spread? Try these no-bake Halloween treats.
Halloween Twinkie Mummies: A Party Favorite
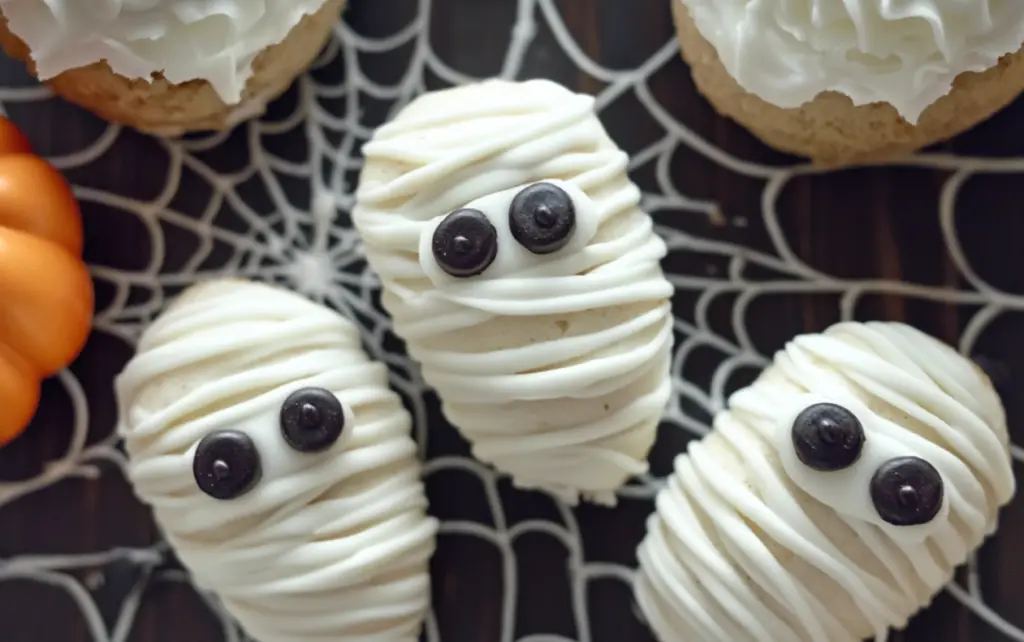
With Halloween Twinkie Mummies, you can turn a simple dessert into a festive showstopper. These mummy treats take just minutes to make but will leave a lasting impression on your guests.
The Basic Recipe
Print
Halloween Twinkie Mummies
- Total Time: 20 minutes
- Yield: 8 mummies 1x
- Diet: Vegetarian
Description
Halloween Twinkie Mummies are cute, spooky treats made with Twinkies coated in white chocolate and adorned with edible eyes. These fun and festive treats are perfect for Halloween parties, school events, or family get-togethers. This easy-to-follow recipe takes less than 20 minutes and requires minimal ingredients, making it a fantastic option for last-minute Halloween snacks.
Ingredients
- 1 box of Twinkies
- 1 bag of Ghirardelli white chocolate melting chips
- 1 package of small edible eyes
- 1 disposable piping bag (or a Ziplock sandwich bag)
- 1 cookie sheet fitted with wax paper
Instructions
- Prepare the Workspace: Line a cookie sheet with wax paper and set it aside.
- Melt the White Chocolate: In a microwave-safe bowl, melt the Ghirardelli white chocolate chips in 20-second intervals, stirring between each, until fully melted and smooth.
- Coat the Twinkies: Using a fork or skewer, dip each Twinkie into the melted white chocolate, ensuring it is fully covered. Place each coated Twinkie onto the wax paper-lined cookie sheet.
- Add Eyes: While the chocolate is still warm, place two small edible eyes on the upper part of the Twinkie to form the mummy’s face.
- Create Mummy Wraps: Transfer the remaining melted white chocolate into a disposable piping bag or Ziplock sandwich bag. Snip a small corner of the bag and drizzle thin lines of white chocolate over each Twinkie to create the mummy wrap effect.
- Set and Serve: Allow the mummies to set in the refrigerator for 5-10 minutes or until the chocolate hardens. Serve and enjoy!
Notes
- If you don’t have a piping bag, you can use a small ziplock bag and cut a tiny corner to drizzle the chocolate.
- Make these Twinkies ahead of time and store them in the fridge for up to 3 days.
- You can add spooky sprinkles or other decorations for added flair!
- Prep Time: 10 minutes
- Cook Time: 10 minutes (including chilling time)
- Category: Dessert, Snacks
- Method: No-Bake
- Cuisine: American
Nutrition
- Serving Size: 1 mummy
- Calories: 220 kcal
- Sugar: 18g
- Sodium: 150mg
- Fat: 11g
- Saturated Fat: 6g
- Unsaturated Fat: 4g
- Trans Fat: 0g
- Carbohydrates: 28g
- Fiber: 1g
- Protein: 2g
- Cholesterol: 30mg
Keywords: Halloween Twinkie Mummies
STEPS
Step 1
Step 2
Step 3
Step 4
Step 5
Advanced Techniques for Halloween Twinkie Mummies
To elevate your Halloween Twinkie Mummies, try adding creative elements to make them even more impressive. One popular technique is using colored chocolate to create different mummy styles. Instead of plain white chocolate, melt orange or purple candy melts to add a unique twist. This extra color makes the mummies stand out and gives them a festive, Halloween flair.
Halloween Twinkie Mummies with Extra Decoration
If you’re feeling adventurous, add additional decorations to your Twinkie mummies. Sprinkles, edible glitter, or even small Halloween-themed candies can give your treats more personality. You can also try using food coloring markers to draw spooky faces or patterns on the mummies for added character. These small details turn an already delightful treat into a memorable part of any Halloween spread.
Mix and Match Ingredients for Creative Twinkie Mummies
Another way to customize your Halloween Twinkie Mummies is by experimenting with different ingredients. Try using dark chocolate for a contrasting look or swap out the Twinkies for a similar sponge cake product. You could even use a gluten-free alternative if needed. These substitutions allow you to cater to different dietary needs without sacrificing taste or creativity.
With these techniques, your Halloween Twinkie Mummies will be both visually stunning and a huge hit at your party.

Maintenance Tips for Halloween Twinkie Mummies
Properly storing your Halloween Twinkie Mummies ensures they stay fresh and delicious for days. After creating these spooky treats, allow the chocolate coating to harden fully before storing. This step prevents the mummies from sticking together or becoming messy when stored in a container.
Storing Halloween Twinkie Mummies
For the best results, store your Halloween Twinkie Mummies in an airtight container. Place them in the refrigerator to maintain their shape and keep the chocolate firm. They’ll stay fresh for up to three days, making them a convenient option for prepping ahead of time. If you’re planning for a party, you can prepare them a day or two in advance without worrying about them losing quality.
Freezing Halloween Twinkie Mummies
If you want to save your Halloween Twinkie Mummies for later, freezing is an excellent option. Wrap each mummy individually in plastic wrap and place them in an airtight freezer-safe container. They can be stored in the freezer for up to one month. When you’re ready to enjoy them, simply thaw in the refrigerator overnight or at room temperature for a few hours.
Serving Halloween Twinkie Mummies
When serving your Halloween Twinkie Mummies, remove them from the fridge about 10 minutes before eating. This allows the chocolate to soften slightly, making them easier to bite into. However, don’t leave them out for too long, especially in warm temperatures, as the chocolate may melt.
Dietary Adaptations for Halloween Twinkie Mummies
Customizing your Halloween Twinkie Mummies for different diets is easier than you think. Whether you need to accommodate gluten-free, dairy-free, or vegan diets, there are plenty of ingredient swaps available that won’t compromise the spooky charm or deliciousness of the treats.
Gluten-Free Halloween Twinkie Mummies
To make gluten-free Halloween Twinkie Mummies, simply substitute regular Twinkies with a gluten-free sponge cake or gluten-free snack cakes. These alternatives maintain the soft, spongy texture without the gluten. You can still use white chocolate for coating, but double-check that it’s gluten-free. The rest of the ingredients, including the edible eyes and decorations, are usually gluten-free, making it a seamless transition for those with dietary restrictions.
Vegan Halloween Twinkie Mummies
For a vegan twist on Halloween Twinkie Mummies, use a dairy-free sponge cake or vegan Twinkie alternative. Instead of regular white chocolate, opt for vegan white chocolate chips to achieve the same creamy coating. Make sure to check the labels of your edible eyes or choose a plant-based version to complete the look. These simple substitutions make it easy to create a vegan-friendly version of this fun treat.
Low-Sugar Halloween Twinkie Mummies
If you want to reduce the sugar content in your Halloween Twinkie Mummies, consider using a low-sugar or sugar-free cake base. You can also replace the traditional white chocolate with a sugar-free version. The result is a treat that’s just as delicious but with significantly lower sugar, perfect for those watching their sugar intake without giving up festive fun.
FAQs about Halloween Twinkie Mummies
Here are some common questions that arise when making Halloween Twinkie Mummies, with answers that will help you create the perfect spooky treats every time.
How Long Do Halloween Twinkie Mummies Last?
Halloween Twinkie Mummies can last up to three days if stored in an airtight container in the refrigerator. The white chocolate coating helps preserve the cake, ensuring that your mummies stay fresh and tasty. If you want to make them ahead of time, they can also be frozen for up to one month.
Can I Use Homemade Cake Instead of Twinkies?
Yes, you can definitely use homemade sponge cake or even cake bars to replace the Twinkies. Just make sure the cake is firm enough to hold its shape during dipping. Cut the cake into rectangular shapes similar to Twinkies, and follow the same steps to coat them in white chocolate and add the mummy decorations.
What If I Don’t Have a Piping Bag for the Mummy Wrap?
If you don’t have a piping bag, a simple ziplock sandwich bag will do the trick. Fill the bag with melted white chocolate, snip off a small corner, and drizzle over the mummies to create the bandages. This method is easy and works just as well, ensuring that your Halloween Twinkie Mummies look just as spooky.
Can I Use Dark Chocolate Instead?
Yes, using dark chocolate gives the Halloween Twinkie Mummies a different, eerie look. While white chocolate is traditional for the mummy effect, dark chocolate adds a unique twist while still delivering that delicious flavor.
Fun Variations for Halloween Twinkie Mummies
Halloween Twinkie Mummies are a versatile treat that can easily be adapted for a variety of fun, festive themes. By changing a few ingredients or decorations, you can give these spooky treats an entirely new look, perfect for any Halloween event or party.
Colorful Halloween Twinkie Mummies
For a more vibrant take on Halloween Twinkie Mummies, use colored candy melts instead of white chocolate. Choose colors like orange, purple, or green to give the mummies a more playful, less traditional appearance. You can mix and match colors to make each mummy unique. This twist will add an extra layer of fun, especially for children’s Halloween parties, where bright and bold colors often stand out.
Halloween Twinkie Mummies with Additional Toppings
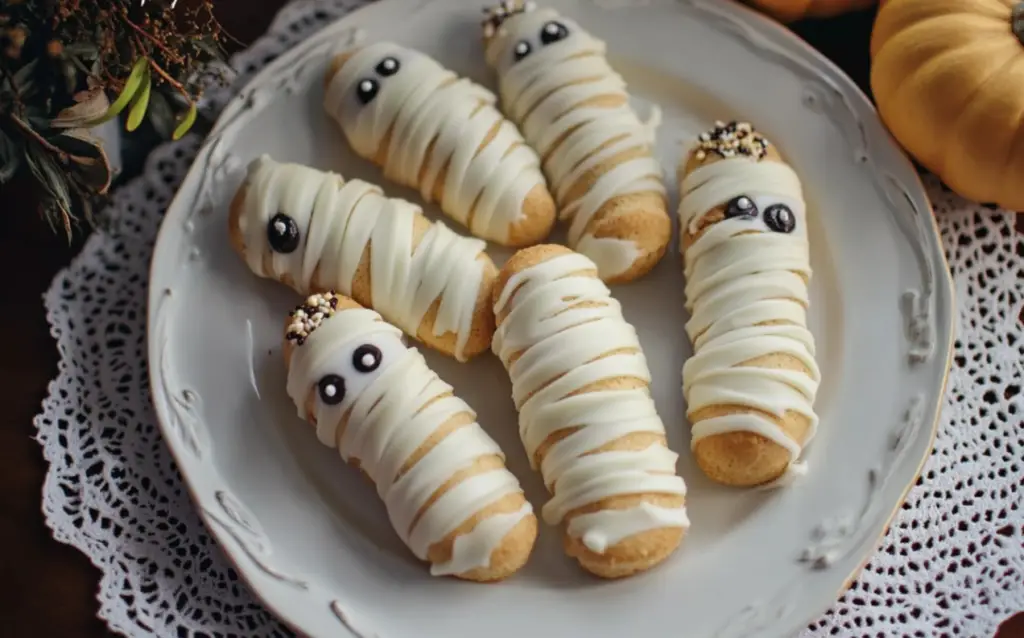
Another variation to try is adding extra toppings like crushed cookies, sprinkles, or edible glitter. These added textures and flavors make the mummies even more exciting to eat and look at. Crushed Oreos can create a dirt-like effect, making the mummies appear as though they’ve just emerged from the ground. Edible glitter can add a magical, spooky sparkle that captures the Halloween spirit.
Mini Halloween Twinkie Mummies
For a bite-sized version, consider cutting the Twinkies in half to make mini mummies. These smaller treats are perfect for parties, where guests may want to sample multiple snacks. Mini mummies also make a great addition to a Halloween dessert spread, offering variety in size and shape while still delivering the same delicious flavor.