Witch Hat Cupcakes: A Spooky Halloween Treat
Why Witch Hat Cupcakes Are the Perfect Halloween Dessert
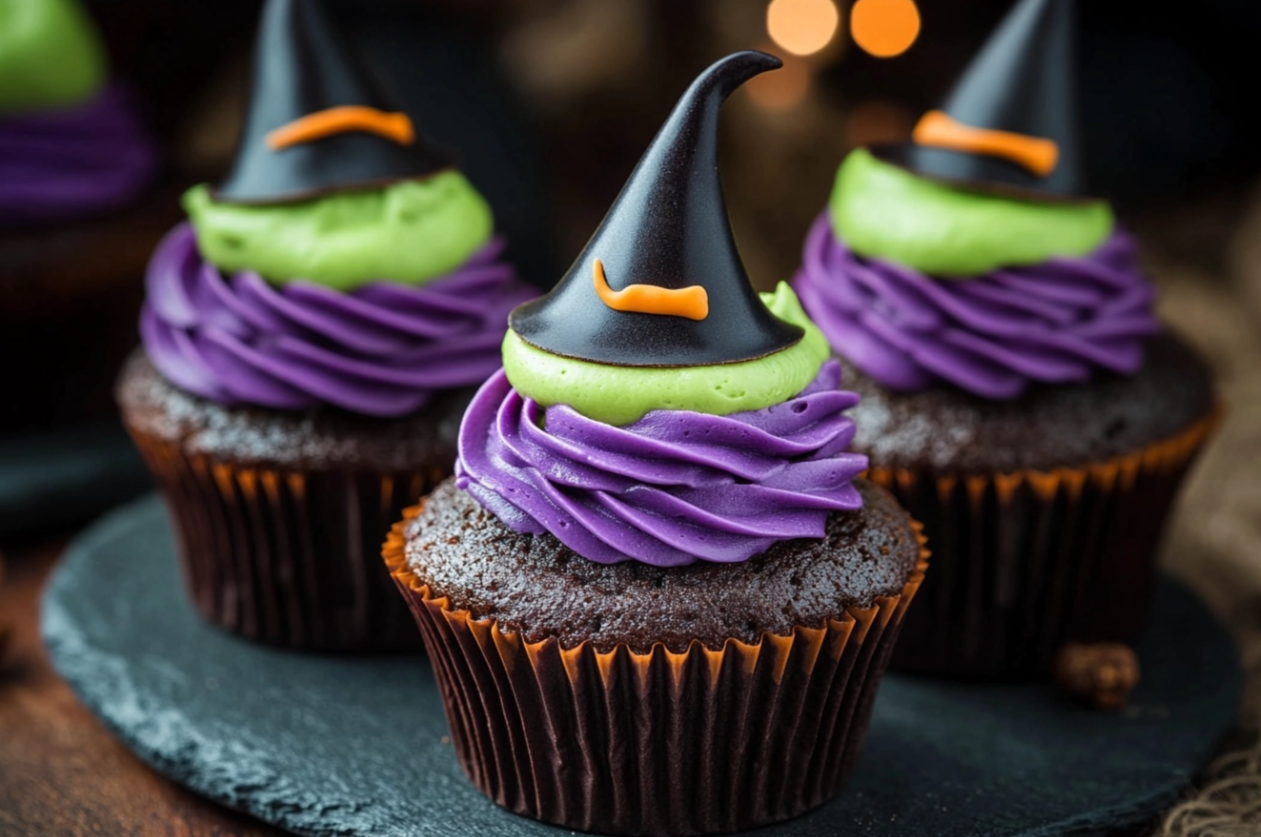
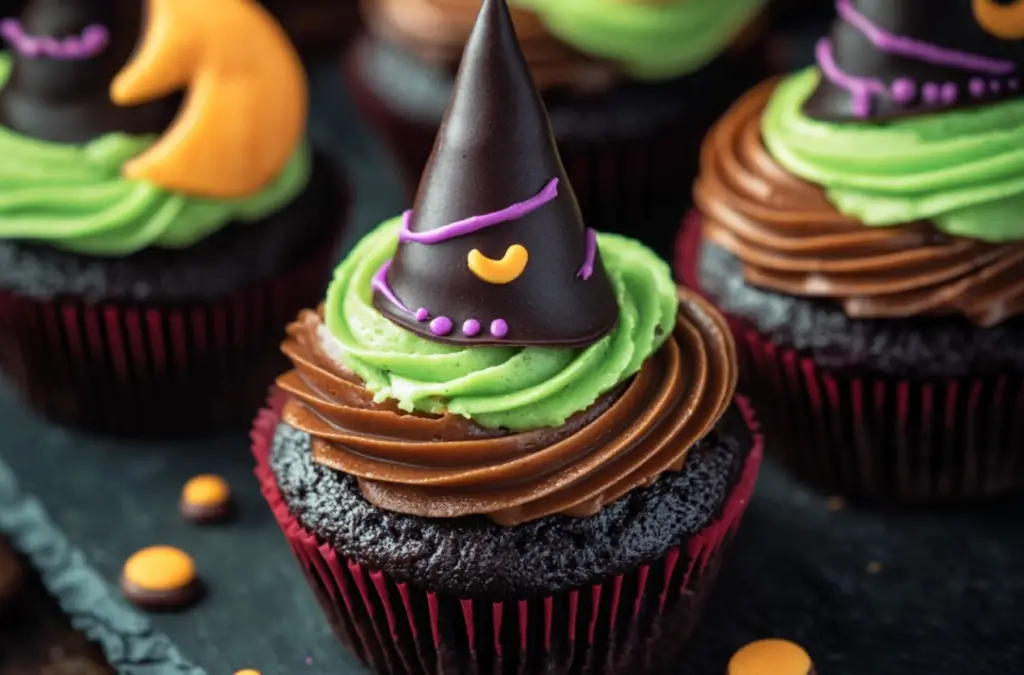
Looking for a fun and festive dessert to impress your guests? Witch Hat Cupcakes are the perfect addition to any Halloween celebration. Not only are they delicious, but their whimsical design will delight both kids and adults alike. This recipe combines moist chocolate cupcakes with a rich vanilla buttercream frosting, topped with an adorable Oreo and Hershey Kiss hat.
Easy to Make and Customize
These Witch Hat Cupcakes are simple enough for even beginner bakers to master. The ingredients are easily accessible, and with a few basic tools, you’ll have a spooky dessert in no time. You can also customize the frosting colors and decorations to match your party theme. If you’re looking for more inspiration for decorating Halloween treats, check out these decorating tips to take your cupcakes to the next level.
Kid-Friendly and Crowd-Pleasing
One of the best things about Witch Hat Cupcakes is that they are kid-friendly and fun to make. Let the little ones help with the decorating for a creative family activity. For those with dietary restrictions, you can easily adapt the recipe. Want more ideas for spooky desserts? Try these top Halloween desserts to make your party unforgettable.
These cupcakes will be the highlight of your Halloween table, and guests will be coming back for more.
The Basic Recipe – Witch Hat Cupcakes
Print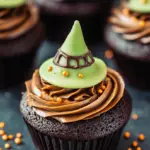
Witch Hat Cupcakes
- Total Time: 35 minutes
- Yield: 16 cupcakes 1x
- Diet: Vegetarian
Description
These spooky cupcakes are perfect for Halloween, featuring rich chocolate cupcakes topped with vibrant vanilla buttercream frosting and whimsical witch hat decorations made from Oreo Thins and Hershey Kisses.
Ingredients
- Chocolate Cupcakes:
- 1 cup all-purpose flour
- 1/2 cup unsweetened cocoa powder
- 1/2 teaspoon baking powder
- 1/2 teaspoon salt
- 1 cup granulated sugar
- 3/4 cup vegetable oil
- 1 large egg
- 3/4 cup milk
- 1 teaspoon vanilla extract
- Vanilla Buttercream Frosting:
- 1 cup unsalted butter, softened
- 1/2 teaspoon vanilla extract
- 1 3/4 cups powdered sugar
- 1 tablespoon heavy whipping cream (optional)
- Gel food coloring, green and orange
- Hat Decorations:
- 16 Oreo Thins Chocolate Sandwich Cookies (1 per cupcake)
- 16 Hershey Kisses (1 per cupcake)
Instructions
- Preheat your oven to 350°F (175°C) and line a cupcake tin with 16 cupcake liners.
- In a large bowl, whisk together flour, cocoa powder, baking powder, salt, and sugar.
- Add vegetable oil, egg, milk, and vanilla extract, and mix until smooth.
- Pour the batter evenly into the cupcake liners, filling each about 3/4 full.
- Bake for 18-20 minutes or until a toothpick inserted into the center comes out clean. Allow cupcakes to cool completely.
- For the buttercream frosting, beat butter until creamy. Add vanilla extract, powdered sugar, and whipping cream, and mix until smooth.
- Divide the frosting into two bowls. Add green food coloring to one and orange to the other. Mix until the colors are vibrant.
- Frost the cooled cupcakes using green frosting.
- To make the witch hats, attach a Hershey Kiss to the center of each Oreo Thin with a small dab of frosting. Place one witch hat on top of each cupcake.
Notes
- Make sure the cupcakes are fully cooled before decorating.
- Add sprinkles or edible glitter for an extra magical touch.
- Prep Time: 15 minutes
- Cook Time: 20 minutes
- Category: Dessert
- Method: Baking
- Cuisine: American
Nutrition
- Serving Size: 1 cupcake
- Calories: 320 kcal
- Sugar: 28g
- Sodium: 150mg
- Fat: 16g
- Saturated Fat: 8g
- Unsaturated Fat: 7g
- Trans Fat: 0g
- Carbohydrates: 42g
- Fiber: 2g
- Protein: 4g
- Cholesterol: 35mg
Keywords: Witch Hat Cupcakes
STEPS
Step 1
Preheat your oven to 350°F (175°C) and line a cupcake tin with 16 cupcake liners.
Step 2
In a large bowl, whisk together flour, cocoa powder, baking powder, salt, and sugar.
Step 3
Add vegetable oil, egg, milk, and vanilla extract, and mix until smooth.
Step 4
Pour the batter evenly into the cupcake liners, filling each about 3/4 full.
Step 5
Bake for 18-20 minutes or until a toothpick inserted into the center comes out clean. Allow cupcakes to cool completely.
Step 6
For the buttercream frosting, beat butter until creamy. Add vanilla extract, powdered sugar, and whipping cream, and mix until smooth.
Step 7
Divide the frosting into two bowls. Add green food coloring to one and orange to the other. Mix until the colors are vibrant.
Step 8
Frost the cooled cupcakes using green frosting.
Step 9
To make the witch hats, attach a Hershey Kiss to the center of each Oreo Thin with a small dab of frosting. Place one witch hat on top of each cupcake.

Advanced Techniques for Perfect Witch Hat Cupcakes
Mastering the Art of Frosting
Achieving the perfect frosting swirl on your Witch Hat Cupcakes can be easier than you think. Use a piping bag fitted with a star tip to create smooth, even swirls. Start at the center and work your way outward, applying even pressure for a consistent look. If you’re new to using a piping bag, practice on a plate first to get comfortable. This technique ensures your cupcakes look just as good as they taste.
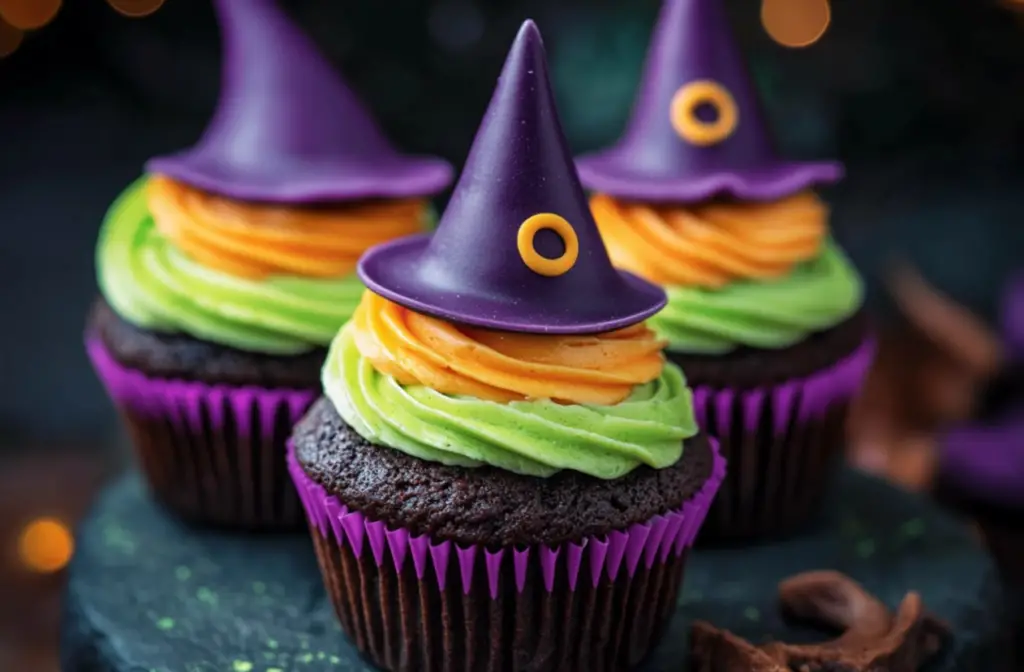
Achieving Vibrant Halloween Colors
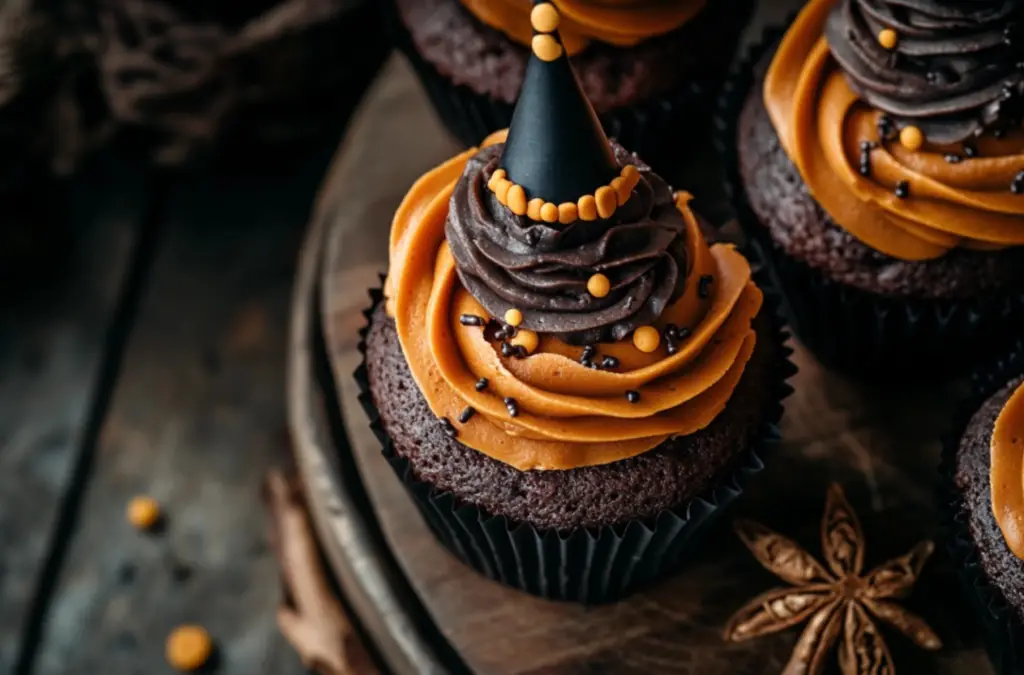
To make your Witch Hat Cupcakes pop, the key is to use gel food coloring for the buttercream. Gel coloring provides rich, vibrant colors without altering the frosting’s texture. For the best results, add the coloring gradually until you reach the desired shade. You can go for a traditional witch hat color palette of green and orange, or customize it with purples and blacks for a more dramatic effect.
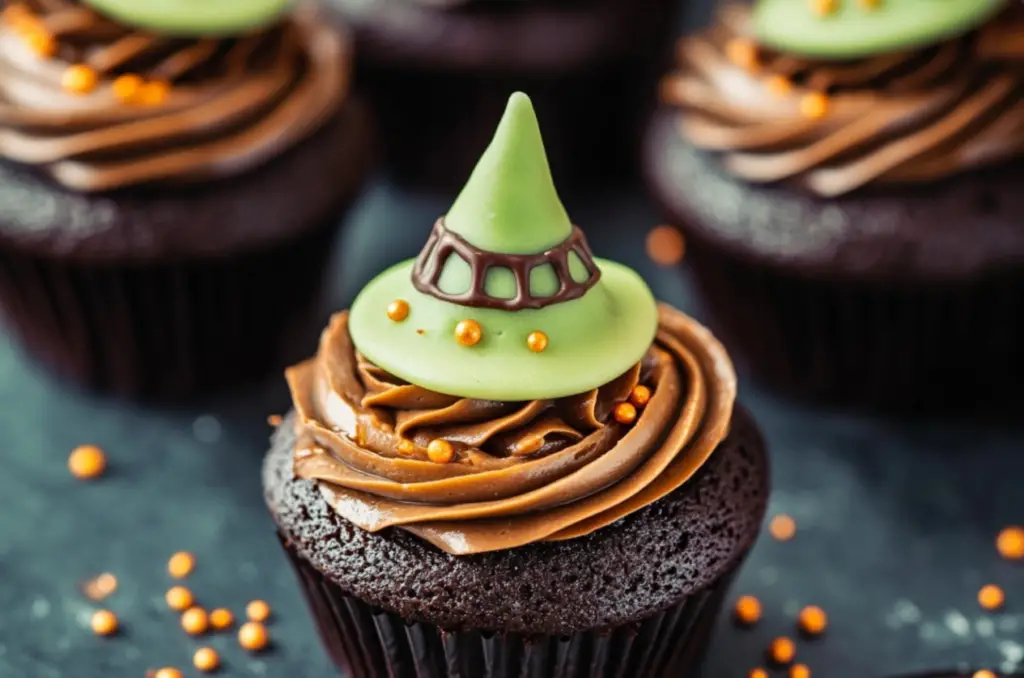
Creating the Perfect Witch Hat Decoration
When assembling the witch hats, a little extra care will make your cupcakes stand out. Place a small dollop of frosting in the center of each Oreo Thin before adding the Hershey Kiss to ensure it stays firmly in place. You can also use a bit of colored frosting to pipe a “ribbon” around the base of the hat, adding an extra touch of detail. This step makes all the difference when you want your Witch Hat Cupcakes to impress.
By mastering these techniques, your cupcakes will have a professional finish that looks like it came from a bakery. Small adjustments and attention to detail can transform a simple cupcake into a Halloween showstopper, making your Witch Hat Cupcakes a true centerpiece at any gathering.
Maintenance Tips for Witch Hat Cupcakes
Storing for Maximum Freshness
To ensure your Witch Hat Cupcakes stay fresh and delicious, proper storage is essential. Store the decorated cupcakes in an airtight container at room temperature for up to two days. If you need to keep them longer, refrigerate them, but remember to bring them back to room temperature before serving for the best texture and flavor. This way, your cupcakes remain moist without losing their rich chocolate flavor.
Freezing for Future Enjoyment
If you want to prepare your Witch Hat Cupcakes in advance, you can freeze them. Freeze the unfrosted cupcakes in an airtight container for up to three months. When you’re ready to serve, thaw the cupcakes at room temperature and decorate them fresh. Freezing the frosting separately ensures it stays smooth and creamy when it’s time to use.
Preventing Soggy Witch Hats
One common issue with Witch Hat Cupcakes is that the cookie decorations can get soggy over time. To avoid this, assemble the witch hats just before serving. Keep the cupcakes and cookies separate until the last minute, and only add the hats right before they’re presented. This simple tip ensures the hats stay crispy and crunchy, giving your guests the best possible experience.
By following these storage and freezing tips, you can easily plan ahead without compromising the quality of your Witch Hat Cupcakes. These tricks will help you keep your cupcakes fresh and delicious, ensuring your Halloween treats look and taste their best when it’s time to serve.
Dietary Adaptations for Witch Hat Cupcakes
Gluten-Free Option
For those who need a gluten-free version of Witch Hat Cupcakes, a simple substitution will do the trick. Replace the all-purpose flour with a 1:1 gluten-free flour blend. Make sure the blend contains xanthan gum for better texture and stability. The rest of the recipe stays the same, so you won’t miss out on any of the deliciousness. These cupcakes will still turn out moist and rich, perfect for anyone avoiding gluten.
Dairy-Free and Vegan Substitutions
Creating a dairy-free or vegan version of Witch Hat Cupcakes is easy with a few swaps. For the buttercream frosting, use plant-based butter and dairy-free milk, like almond or oat milk. Replace the egg in the cupcake batter with a flaxseed egg (1 tablespoon of ground flaxseed mixed with 3 tablespoons of water). These adjustments ensure that the cupcakes maintain their flavor and texture without any animal products.
Lower-Sugar Alternatives
For a healthier spin, you can reduce the sugar content in your Witch Hat Cupcakes without sacrificing taste. Substitute granulated sugar with a lower-glycemic option like coconut sugar or a sugar substitute such as erythritol. Both work well in the cupcake batter, though you may need to adjust the liquid balance slightly to maintain the right consistency. The result is a more diet-friendly treat that doesn’t compromise on flavor.
By making these simple adaptations, your Witch Hat Cupcakes can cater to a variety of dietary needs, ensuring that everyone can enjoy these festive Halloween treats without worry.
Seasonal and Occasional Variations for Witch Hat Cupcakes
Halloween-Themed Designs
Witch Hat Cupcakes are perfect for Halloween, but you can take them to the next level by experimenting with different spooky designs. Swap out the traditional green and orange frosting for darker, more dramatic colors like black and purple. Add edible glitter or candy eyeballs to create an extra eerie effect. These tweaks will make your cupcakes the highlight of any Halloween dessert table.
Christmas Twist on the Witch Hat Cupcakes
Transform your Witch Hat Cupcakes into a festive Christmas treat by swapping the witch hats for Santa hats. Use red and white frosting to create a cheerful Santa hat on top of the cupcake, with a small marshmallow or edible pearl as the pom-pom. This simple change keeps the essence of the recipe while making it suitable for the holiday season.
Birthday Party Fun
For birthdays, turn your Witch Hat Cupcakes into whimsical party hats by adding colorful sprinkles and mini flag toppers. You can easily adjust the frosting colors to match the party theme, and use different types of candy to replace the witch hats. The base recipe remains the same, but the decorations can transform these cupcakes to fit any celebration.
Other Occasions
The versatility of Witch Hat Cupcakes allows you to adapt them for nearly any occasion. Whether it’s a baby shower, a themed event, or a seasonal gathering, a few decorative changes make these cupcakes the perfect choice. From pastel colors to elegant designs, the possibilities are endless when it comes to customizing this delicious treat for any celebration.
Frequently Asked Questions About Witch Hat Cupcakes
How Far in Advance Can I Make Witch Hat Cupcakes?
You can bake the cupcakes up to two days in advance. Store them in an airtight container at room temperature. However, it’s best to wait until the day of the event to add the frosting and decorations to maintain their freshness. For longer storage, freeze the cupcakes and decorate them after thawing.
Can I Use Store-Bought Frosting Instead of Homemade?
Yes, store-bought frosting works well if you’re short on time. To enhance the flavor, you can mix in a teaspoon of vanilla extract or a pinch of salt. However, making homemade buttercream ensures a creamier texture and more control over the frosting’s consistency and color.
What If I Don’t Have Hershey Kisses for the Hats?
If you don’t have Hershey Kisses, don’t worry! You can use mini chocolate chips, chocolate-dipped marshmallows, or even mold your own witch hats with fondant. The key is to maintain the same playful look, so any round, pointed candy can serve as a substitute.
Can I Make Mini Witch Hat Cupcakes?
Absolutely! Mini Witch Hat Cupcakes are a fun option, especially for serving at parties. To make them, simply use a mini cupcake tin and reduce the baking time by about 5 minutes. Be sure to check for doneness using a toothpick.
By addressing these common questions, you’ll be well-prepared to make your Witch Hat Cupcakes a hit for any occasion.