1. Introduction to the Recipe
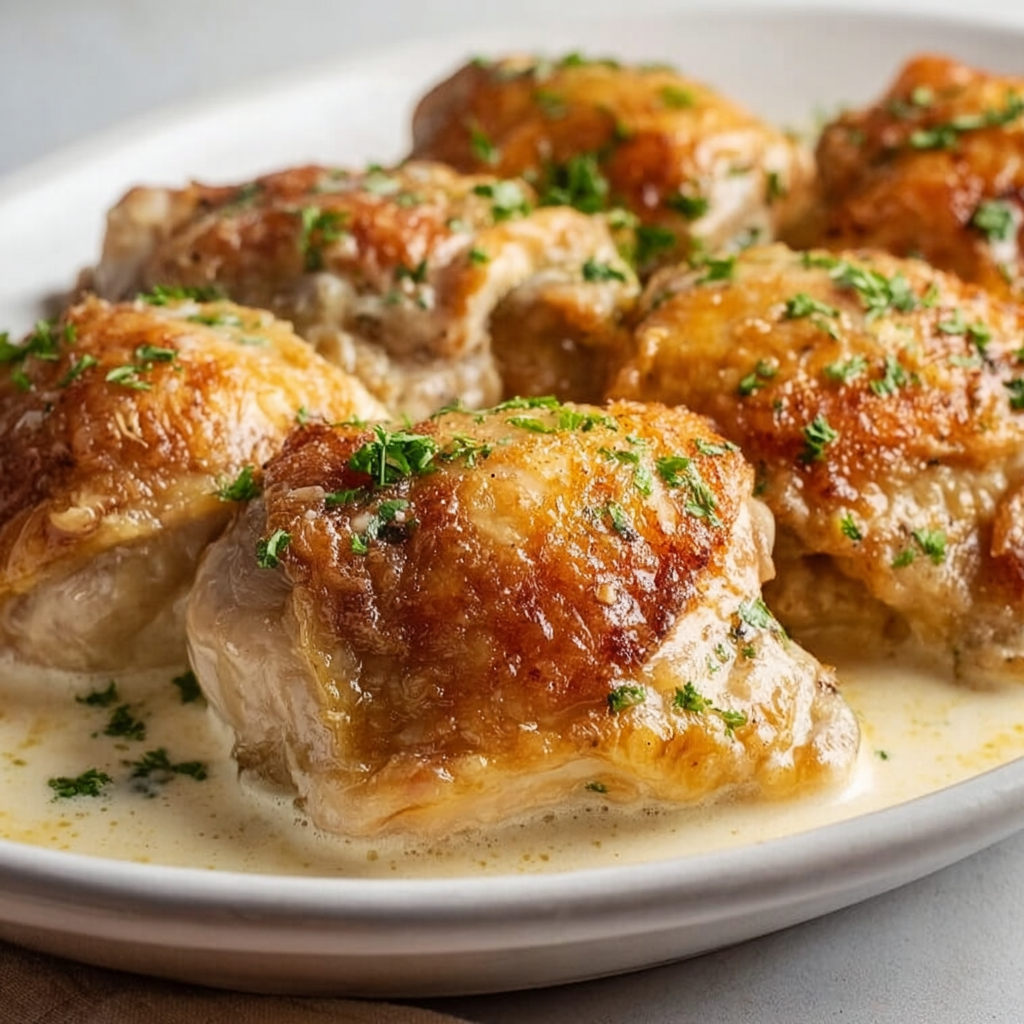
If you’ve ever craved warm, comforting, old-fashioned home cooking, this Amish Chicken recipe delivers everything you love about simple farmhouse meals—tender chicken, rich gravy, aromatic seasonings, and minimal fuss. Rooted in Amish and Mennonite kitchen traditions, this dish is beloved for its pure ingredients and slow-baked flavor. It features bone-in, skin-on chicken thighs coated in a seasoned flour mixture, then baked in a bath of heavy cream and water that transforms into the most luxurious gravy. The result is melt-in-your-mouth chicken with a buttery, seasoned sauce that begs to be spooned over mashed potatoes, buttered noodles, rice, or fresh biscuits.
What makes Amish Chicken so appealing is its simplicity. It uses pantry staples—flour, cream, smoked paprika, garlic powder, and onion powder—combined in a way that creates deep flavor without requiring complicated techniques. Unlike fried chicken or multi-step gravies, this dish relies on the oven to do the majority of the work. The cream and water mixture slowly bastes the chicken, keeping it moist while creating a silky, savory gravy in the baking pan. This slow, gentle cooking method is typical of Amish recipes, which rely on patience, quality ingredients, and straightforward methods to produce incredibly comforting results.
If you’re interested in exploring more about traditional Amish cooking techniques, resources like
Amish Kitchen Traditions
and
Beginner Comfort Food Guides
offer valuable insights into rustic cooking methods, seasoning approaches, and classic slow-bake recipes.
These guides are helpful if you’d like to deepen your understanding of how Amish dishes achieve their characteristic flavor. Combined with the simplicity of this recipe, you’ll quickly discover why Amish Chicken is cherished for both its heartwarming taste and its ability to feed families with minimal equipment and fuss.
Whether you’re preparing a cozy Sunday dinner, hosting a potluck, or just craving a deeply satisfying comfort dish, this Amish Chicken recipe gives you tender meat, golden skin, and an unforgettable creamy gravy made from the simplest ingredients.
2. Basic Recipe: Ingredients and Instructions
Print
Tender Baked Amish Chicken in Creamy Gravy
Description
Tender Amish Chicken baked in creamy seasoned gravy—easy comfort food with rich flavor and simple ingredients.
Ingredients
Chicken
- 1 cup all-purpose flour, spooned and leveled
- 1 tablespoon kosher salt
- 2 teaspoons smoked paprika
- 1 ½ teaspoons garlic powder
- 1 ½ teaspoons onion powder
- 1 teaspoon fresh cracked black pepper
- 8 bone-in, skin-on chicken thighs
- 1 ¼ cups cold heavy cream
- 1 ¼ cups water
Garnish
- 2 teaspoons fresh parsley, chopped
Instructions
- Preheat the Oven
Set your oven to 375°F (190°C). Lightly grease a baking dish or dutch oven. - Season the Flour
In a shallow bowl, whisk together flour, salt, smoked paprika, garlic powder, onion powder, and black pepper. - Coat the Chicken
Pat chicken thighs dry. Dredge each thigh in the seasoned flour, coating all sides. Shake off any excess. - Arrange in the Baking Dish
Place chicken thighs skin-side up in the dish. Don’t overlap pieces. - Mix the Cream and Water
In a bowl, whisk cold heavy cream and water until fully combined. - Pour the Cream Mixture Over the Chicken
Carefully pour the cream mixture around the chicken—not directly onto the skin—to keep the tops crispy. - Bake the Chicken
Bake uncovered for 50–60 minutes, or until the chicken is cooked through and the skin is golden. - Broil if Needed
For crispier skin, broil the chicken for 2–3 minutes at the end. - Garnish and Serve
Sprinkle with chopped parsley and serve warm with gravy from the pan.
Notes
Keeping the heavy cream cold helps the gravy set properly.
For thicker gravy, whisk in 1 tablespoon extra flour before pouring the cream mixture.
If chicken skin browns too quickly, loosely tent with foil halfway through.
Use bone-in thighs for moisture and flavor—breasts dry out more easily.
3. Advanced Techniques
1. Building a Deep Flavor Base with Layered Seasonings
Although Amish cooking traditionally uses simple ingredients, you can build richer complexity by layering seasoning during preparation. Start by seasoning the chicken—not just the flour—with a bit of salt and pepper. Allowing the thighs to sit for 10 minutes after seasoning helps the salt penetrate the meat. Then coat each thigh thoroughly in the seasoned flour. You can also increase the savory depth by adding a teaspoon of poultry seasoning or dried thyme to the flour mixture. This enhances the aroma and flavor of the final dish without straying from the traditional Amish approach.
2. Creating a Silky, Lump-Free Pan Gravy
The magic of Amish Chicken lies in its gravy. To create a smooth texture, ensure your cream and water mixture is whisked until completely unified. Cold cream is essential, as it helps prevent splitting during the initial bake. If you want a thicker gravy, whisk one tablespoon of the seasoned flour into the cream mixture before pouring it into the pan. After the chicken finishes baking, you can also remove the thighs temporarily and whisk the pan drippings to eliminate any flour clumps. This creates a silky, rich gravy perfect for drizzling over sides.
3. Enhancing Browning While Keeping the Meat Tender
Getting crispy skin while keeping the interior juicy requires managing temperature and moisture. Arrange the chicken skin-side up and avoid pouring liquid directly over the tops—this prevents soggy skin. During the last 15 minutes of baking, tilt the pan slightly and spoon some of the cream mixture over the exposed meat edges (not the skin). This lightly bastes the chicken while preserving crispiness. Finally, broiling the chicken for 2–3 minutes adds deep caramelization without drying out the meat.
4. Using Dutch Oven Techniques for Extra Moisture Retention
A Dutch oven creates a more humid environment, which produces exceptionally tender chicken. Start by baking the dish uncovered so the skin crisps properly. For the final 20 minutes, partially cover the pot to trap steam and deepen moisture levels in the meat. The Dutch oven also helps evenly distribute heat, preventing hot spots that can overcook the chicken thighs. If you prefer a pot roast–style texture, cover the dish for the entire bake—your gravy will be softer and more abundant.
5. Customizing the Recipe with Vegetables and Stock Enhancements
For a one-pan dinner, nestle hearty vegetables such as baby potatoes, carrots, onions, or parsnips around the chicken before pouring in the cream mixture. These vegetables absorb the seasoned gravy as they cook, creating an incredibly flavorful side with minimal effort. If you want a slightly lighter flavor, replace ½ cup of water with low-sodium chicken broth for added savoriness. The vegetables deepen the dish’s rustic appeal and create a meal reminiscent of classic Amish Sunday dinners.

4. Storage, Shelf Life, and Maintenance Tips
1. Refrigerating the Chicken for Best Next-Day Flavor
Store leftover Amish chicken in an airtight container with its gravy. Refrigerated, it stays fresh for up to 4 days. The gravy thickens overnight, making it even more flavorful the next day. Reheat gently on the stovetop, adding a splash of cream or water to loosen the sauce as needed. Avoid microwaving for long periods, as this can toughen the chicken skin.
2. Freezing for Long-Term Storage
This dish freezes beautifully. Place fully cooled chicken and gravy into freezer-safe containers or freezer bags. Freeze for up to 2 months. When ready to enjoy, thaw in the refrigerator overnight. Warm in a covered baking dish at 325°F until heated through. The creamy gravy may separate slightly, but whisking it during reheating restores its texture.
3. Keeping Skin Crisp During Storage
To maintain crispy skin, store chicken separately from the gravy. When reheating, place the chicken thighs on a parchment-lined sheet and warm them in the oven at 375°F for 10–12 minutes. Heat the gravy separately on the stovetop and ladle it over the chicken just before serving. This ensures the best texture combination.
4. Preventing Cream-Based Gravy from Curdling
Curdling can occur if reheated at high temperatures. Always reheat slowly over medium-low heat, never boiling the gravy. Stir gently but consistently. If separation occurs, whisk in a tablespoon of cold cream to bring the mixture back together.
5. Storing Components Separately for Meal Prep
For meal prepping, bake the chicken as directed but keep the gravy in a separate container. This prevents the chicken from sitting in liquid and becoming too soft. When ready to serve, simply reheat both portions and assemble. This is ideal for weekly lunches or fast family dinners.

5. Dietary Adaptations and Substitutions
1. Gluten-Free Amish Chicken
Substitute the all-purpose flour with a quality 1:1 gluten-free flour blend. Ensure the blend contains xanthan gum for proper texture. The seasoned coating fries up slightly crisp, and the gravy thickens beautifully even without gluten, maintaining the comfort-food feel.
2. Dairy-Free Adaptation
Replace the heavy cream with full-fat coconut milk for creaminess without dairy. Use equal parts coconut milk and water. The flavor remains rich, slightly sweet, and savory. Choose refined coconut oil instead of butter in the pan if needed.
3. Low-Sodium Version
Reduce kosher salt to 1 teaspoon in the flour mixture and use unsalted butter if greasing the pan. Add fresh herbs like thyme or rosemary to boost flavor without relying on salt. This keeps the dish savory while dramatically reducing sodium content.
4. Low-Carb or Keto-Friendly Version
Replace flour with a mixture of almond flour and grated parmesan cheese. Use heavy cream only (no water) for a richer, thicker gravy. This produces an exceptionally savory and keto-friendly chicken dish that pairs well with cauliflower mash or roasted vegetables.
5. Vegetarian Adaptation (Using Plant-Based Chicken Pieces)
Use plant-based chicken thighs or cutlets. Reduce cooking time as needed—most plant-based proteins cook faster. The cream mixture still creates a rich gravy. This allows non-meat eaters to enjoy the cozy flavor profile of Amish cooking.

6. FAQs About the Recipe
1. Can I Use Boneless Chicken Instead of Bone-In?
Yes, but the cooking time will be shorter—around 30–40 minutes. Bone-in chicken provides superior flavor and moisture, so expect boneless cuts to be slightly less rich. Keep an eye on internal temperature to avoid overcooking.
2. Why Is My Gravy Too Thin?
Different brands of cream and the fat content can affect thickness. For thicker gravy, add an extra tablespoon of flour to the seasoning mixture or reduce the water by ¼ cup. You can also simmer the gravy in a saucepan after baking.
3. Can I Add Vegetables to the Dish?
Absolutely! Carrots, potatoes, onions, and parsnips all cook beautifully in the gravy. Place them under or around the chicken for a complete one-pan Amish dinner.
4. Why Did My Cream Curdle?
Curdling occurs when cream is heated too quickly or at high heat. Using cold heavy cream prevents early curdling. Ensure your oven is not running too hot, and avoid broiling for more than a couple of minutes.
5. What’s the Best Side Dish for Amish Chicken?
Mashed potatoes, Amish-style butter noodles, white rice, roasted vegetables, biscuits, or buttery rolls are all excellent choices. The gravy complements starchy sides extremely well.
7. Conclusion & Final Thoughts
This Amish Chicken recipe embodies everything that makes rustic comfort food so beloved—tender meat, hearty flavors, simple ingredients, and a creamy gravy that transforms ordinary chicken into something extraordinary. It’s the kind of dish that feels like home, bringing warmth, tradition, and timeless flavor to your table. With its minimal prep, budget-friendly ingredients, and deeply satisfying taste, this recipe is ideal for weeknight dinners, lazy Sunday meals, family gatherings, or potlucks.
What sets this recipe apart is its wonderful balance of ease and elegance. There’s no need for complicated techniques or extensive hands-on cooking. Instead, the oven works its magic, allowing the sauce to thicken naturally while the chicken stays juicy and flavorful. The finished dish looks beautifully rustic, smells incredible, and tastes like it came straight from an Amish farmhouse kitchen.
Whether you’re new to Amish-style cooking or already a fan of slow-baked, comforting dishes, this recipe delivers reliable, delicious results every time. It’s flexible enough for modifications, approachable enough for new cooks, and hearty enough to please even the hungriest family members. Serve it with mashed potatoes or noodles and enjoy every comforting bite.