Introduction
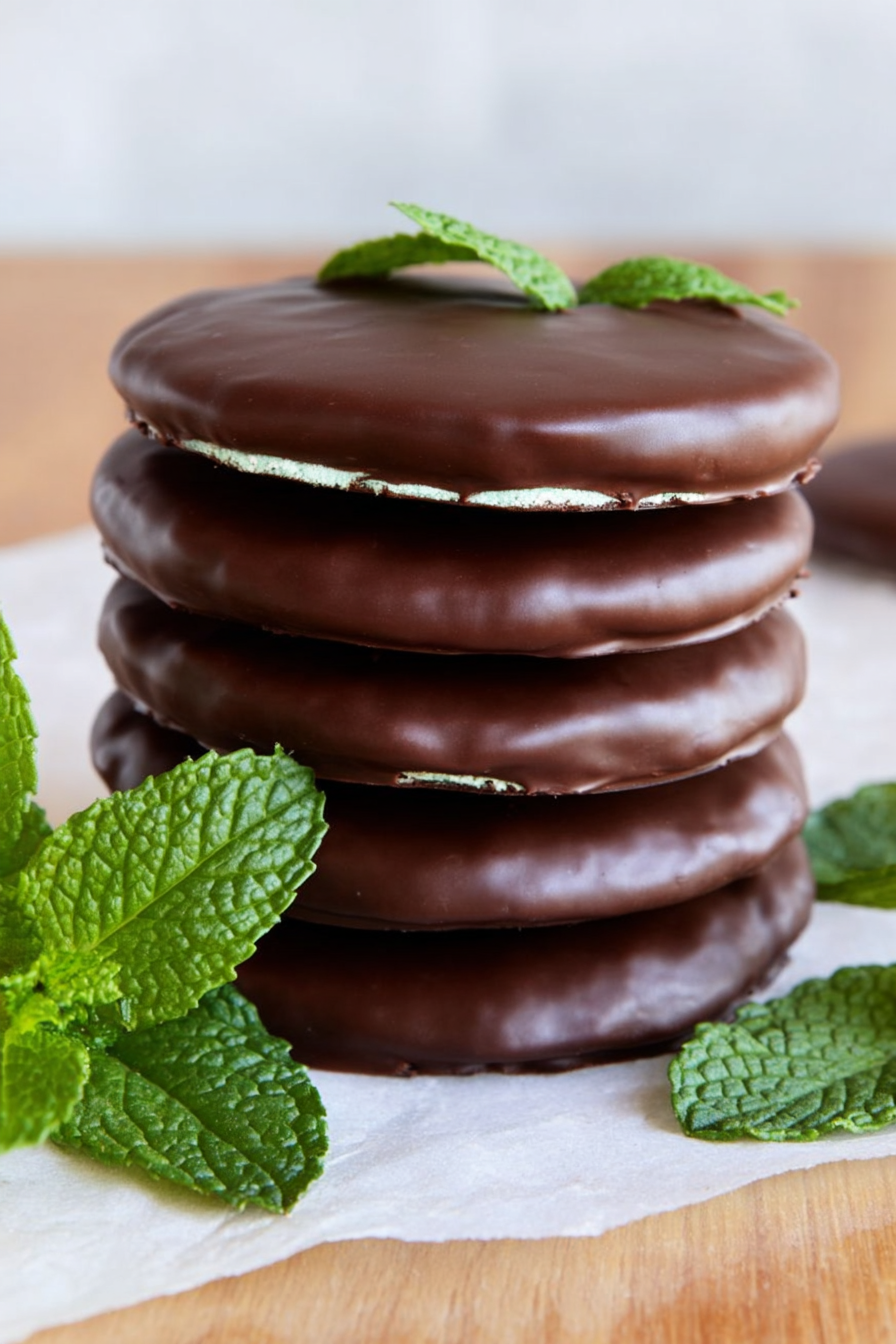
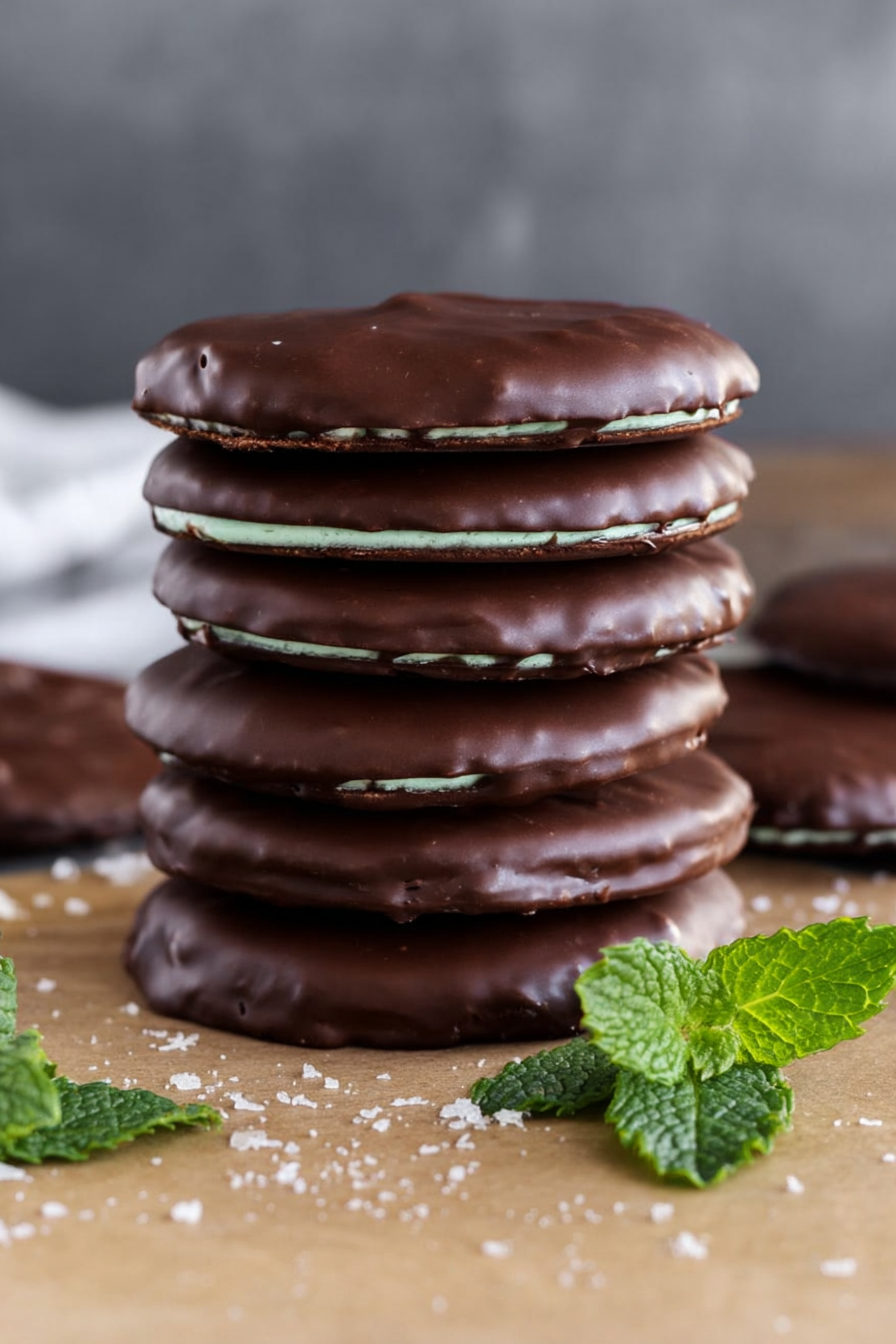
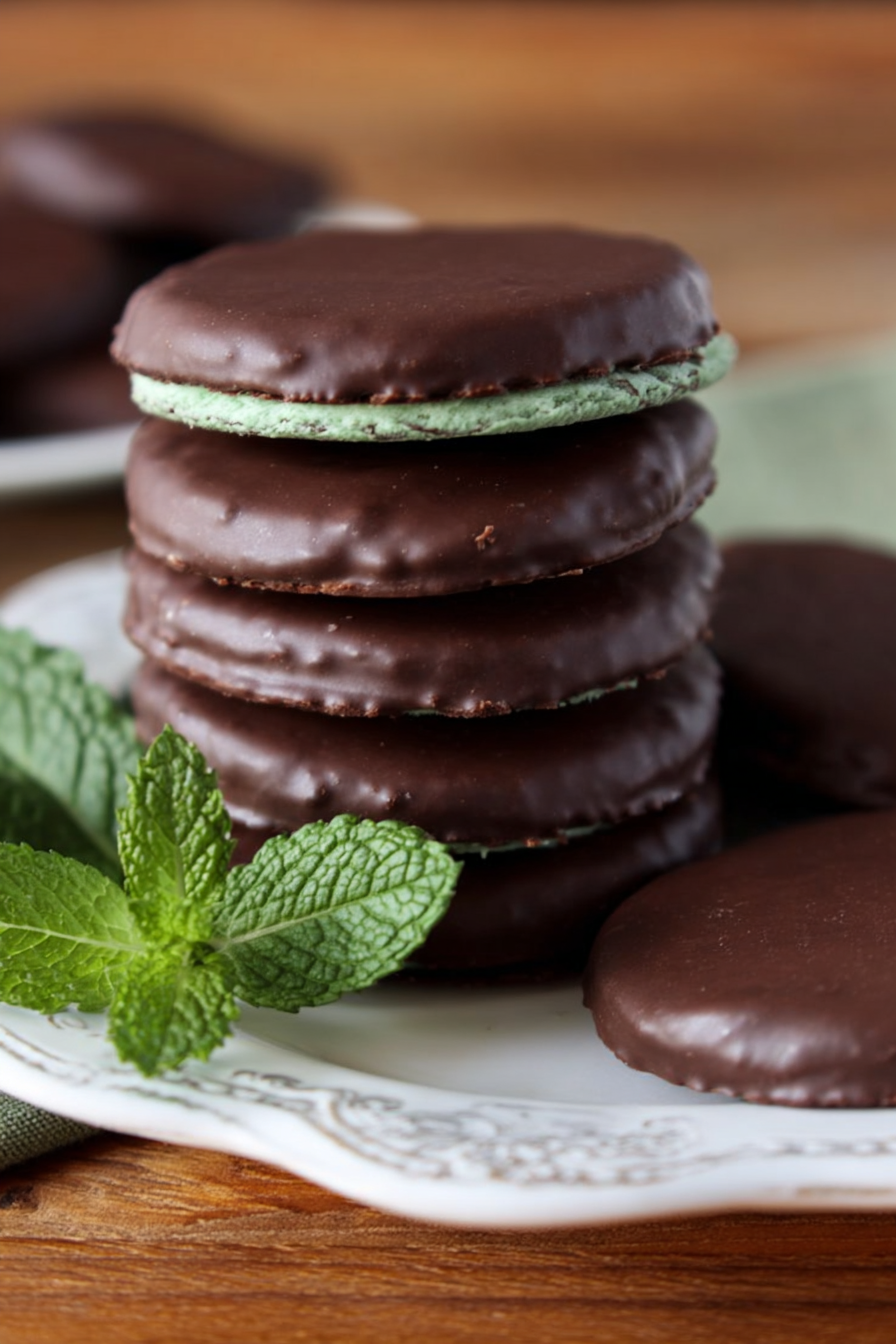
If you’ve ever found yourself eagerly awaiting Girl Scout cookie season just for a box of Thin Mints, you are not alone. This classic cookie is a favorite for a reason — a crisp chocolate wafer covered in smooth mint-chocolate coating that practically melts in your mouth. The good news is you don’t have to wait months to enjoy them. This homemade Thin Mint Cookie recipe is simple, delicious, and easy to make in your own kitchen. Plus, they freeze beautifully, so you can keep a stash on hand all year long.
My recipe story
I have always been a big fan of the chocolate-and-mint combination, so naturally, Thin Mints were my cookie of choice growing up. But one year, I missed cookie season completely, and I was determined to find a solution. That’s when I began experimenting with my own homemade version. After several batches, tweaking the cocoa powder, balancing the mint extract, and perfecting the chocolate coating, I landed on this recipe. Now, these cookies are a regular part of my baking rotation, especially during the holidays when I love gifting them to friends and family.
💡 Why You’ll Love This Recipe
- No waiting for cookie season — enjoy Thin Mints year-round.
- Made with simple pantry ingredients you probably already have.
- Perfectly crisp texture with a smooth, glossy chocolate coating.
- Customizable mint intensity — make them mild or extra minty.
- Freezer-friendly for long-term storage and last-minute cravings.
Ingredient breakdown
The beauty of these Thin Mint Cookies lies in their simplicity. The cookie base is made from a chocolate shortbread-style dough, which is easy to roll, cut, and bake. Cocoa powder is the star ingredient here, delivering that deep, rich chocolate flavor we all love. A touch of vanilla helps round out the flavor, while butter and sugar give the cookies structure and sweetness.
The mint-chocolate coating is what takes these cookies from good to irresistible. High-quality dark or semisweet chocolate is melted and flavored with peppermint extract to give you that refreshing cooling sensation with every bite. You can adjust the peppermint extract depending on how strong you like your mint flavor — start with a little, taste, and add more if needed.
Equipment you’ll need
- Mixing bowls
- Electric mixer or hand whisk
- Rolling pin
- Round cookie cutter (about 2 inches)
- Baking sheet
- Cooling rack
- Double boiler or microwave-safe bowl (for melting chocolate)
- Parchment paper or silicone baking mat
Step-by-step directions
Step 1: Make the cookie dough
In a large mixing bowl, cream together softened butter and sugar until light and fluffy. Beat in the vanilla extract. In a separate bowl, whisk together flour, cocoa powder, and a pinch of salt. Gradually add the dry ingredients to the butter mixture until a dough forms. If the dough feels too crumbly, add a tablespoon of milk to help it come together.
Step 2: Roll and cut the cookies
Divide the dough into two portions and roll each portion between two sheets of parchment paper to about 1/4-inch thickness. Use a round cookie cutter to cut out circles, placing them on a lined baking sheet. Gather any scraps, re-roll, and cut until all dough is used.
Step 3: Bake the cookies
Preheat your oven to 350°F (175°C). Bake the cookies for about 10-12 minutes, or until they are firm to the touch. Keep an eye on them — overbaking can make them too hard. Allow them to cool completely on a wire rack before moving on to the next step.
Step 4: Prepare the mint-chocolate coating
Melt your chocolate using a double boiler or in short intervals in the microwave, stirring between each interval until smooth. Stir in the peppermint extract until fully incorporated. Taste and adjust the mint flavor if needed.
Step 5: Dip and coat
Using a fork, dip each cooled cookie into the melted chocolate, tapping off any excess. Place the coated cookies on parchment paper and let them set at room temperature until the chocolate is firm. For faster results, place them in the refrigerator for 15-20 minutes.
Variations & substitutions
You can easily customize these cookies to your taste. For a darker, more intense flavor, use dark cocoa powder instead of regular cocoa. If you prefer a less sweet cookie, try using bittersweet chocolate for the coating. You can also experiment with different extracts — a touch of almond extract adds a unique twist, or you can skip the peppermint altogether for a classic chocolate-dipped cookie. For a gluten-free version, substitute with a 1:1 gluten-free baking flour.
💡 Expert Tips & Troubleshooting
- Chill the dough before cutting to make handling easier and to keep the cookies from spreading during baking.
- If your chocolate coating is too thick, add 1 teaspoon of coconut oil to thin it for a smoother dip.
- Work in batches when dipping cookies so the chocolate doesn’t harden before you finish.
- Store cookies in a single layer until fully set to avoid smudging the chocolate coating.
Storage, freezing & make-ahead
These cookies store well in an airtight container at room temperature for up to 5 days. For longer storage, place them in a freezer-safe bag or container and freeze for up to 3 months. To enjoy, simply thaw them at room temperature for about 10-15 minutes, or eat them straight from the freezer if you like them extra crisp.
Serving ideas & pairings
Thin Mint Cookies pair beautifully with a cup of coffee, hot chocolate, or even a tall glass of cold milk. For a fun dessert idea, crumble them over ice cream, use them to make a no-bake pie crust, or crush them into milkshakes for a refreshing treat. They also make an excellent gift — simply package them in a decorative tin or cellophane bag tied with a ribbon.
FAQ
Can I use mint chocolate chips instead of peppermint extract?
Yes! Simply melt the mint chocolate chips and omit the peppermint extract. This gives a milder, sweeter mint flavor.
Why did my cookies turn out soft?
They likely needed a few extra minutes in the oven. Make sure to bake until the cookies are just firm to the touch.
How do I make them vegan?
Use vegan butter, dairy-free chocolate, and a plant-based milk if needed. The result is just as delicious.
Can I make the dough ahead of time?
Absolutely! You can refrigerate the dough for up to 3 days or freeze it for up to a month. Just thaw slightly before rolling.
What’s the best way to melt chocolate?
Use a double boiler for smooth, even melting. If using a microwave, heat in 20-second intervals, stirring after each one to prevent scorching.
Final thoughts
Making homemade Thin Mint Cookies is not only satisfying but also surprisingly easy. With a simple chocolate cookie base, a refreshing mint-chocolate coating, and just a bit of patience, you can recreate a favorite treat that everyone will love. Whether you’re stocking up for the holidays, making an edible gift, or just indulging in a personal craving, this recipe is a keeper. Once you try it, you may never go back to store-bought Thin Mints again!
Print
Thin Mint Cookies
- Total Time: hour (includes cooling and coating time)
- Yield: About 24 cookies 1x
- Diet: Vegetarian
Description
Crisp, chocolatey cookies coated in a smooth peppermint-chocolate shell. These homemade Thin Mints are perfect for year-round snacking.
Ingredients
-
1 cup unsalted butter, softened
-
1 cup granulated sugar
-
1 teaspoon vanilla extract
-
1 1/2 cups all-purpose flour
-
3/4 cup unsweetened cocoa powder
-
1/4 teaspoon salt
-
1 tablespoon milk (if needed, to bring dough together)
-
12 ounces semisweet or dark chocolate, chopped
-
1 teaspoon peppermint extract
Instructions
tions:
- Cream butter and sugar together until light and fluffy, then mix in vanilla extract.
- In a separate bowl, whisk flour, cocoa powder, and salt, then add to wet ingredients until a dough forms. Add milk if needed.
- Roll dough between parchment paper to ¼-inch thickness, cut into circles, and place on a lined baking sheet.
- Bake at 350°F (175°C) for 10–12 minutes, then cool completely on a wire rack.
- Melt chocolate in a double boiler or microwave, stir in peppermint extract, then dip cooled cookies to coat fully.
- Place coated cookies on parchment paper to set, or refrigerate for 15–20 minutes for quicker setting.
Notes
Store cookies in an airtight container for up to 5 days or freeze for up to 3 months. Serve chilled for the classic Thin Mint crunch.
- Prep Time: 25 minutes
- Cook Time: 12 minutes
- Category: Dessert
- Method: Baking
- Cuisine: American