1. Introduction to the Recipe
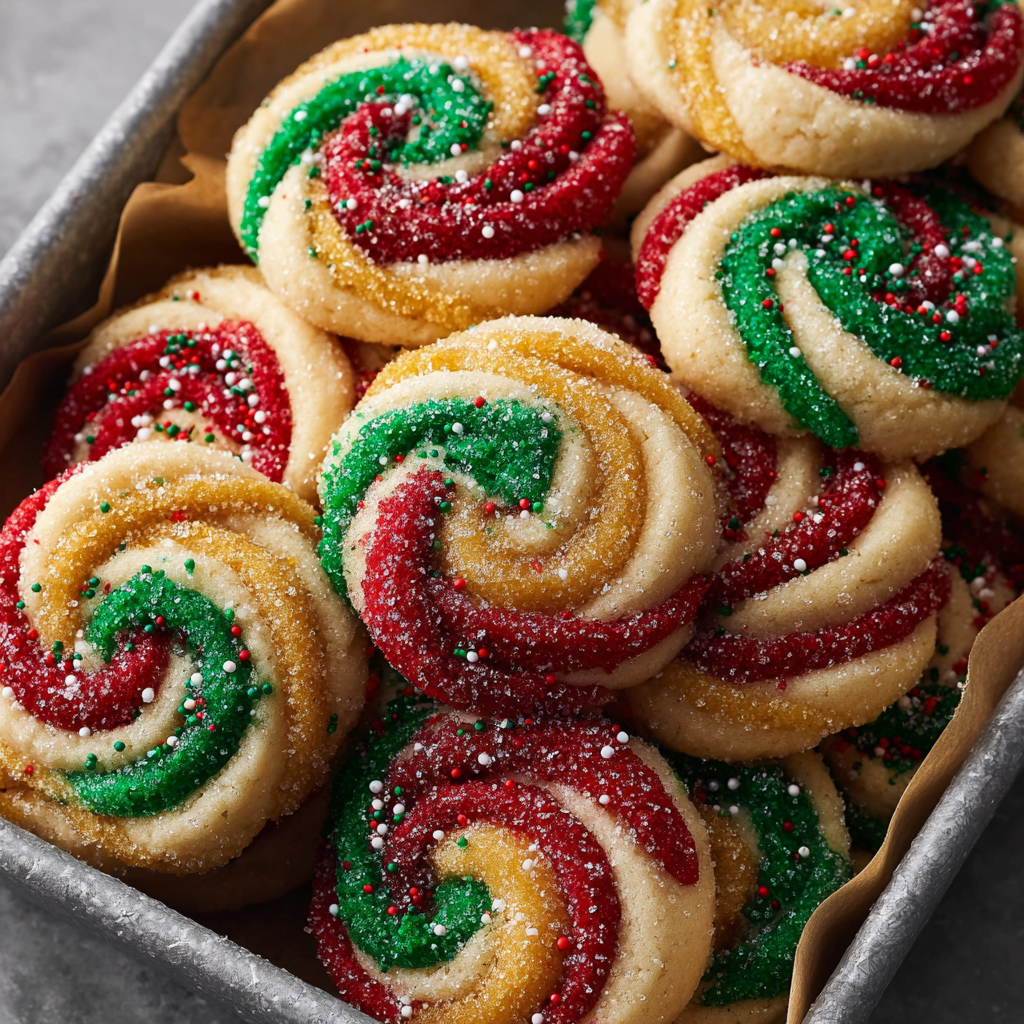
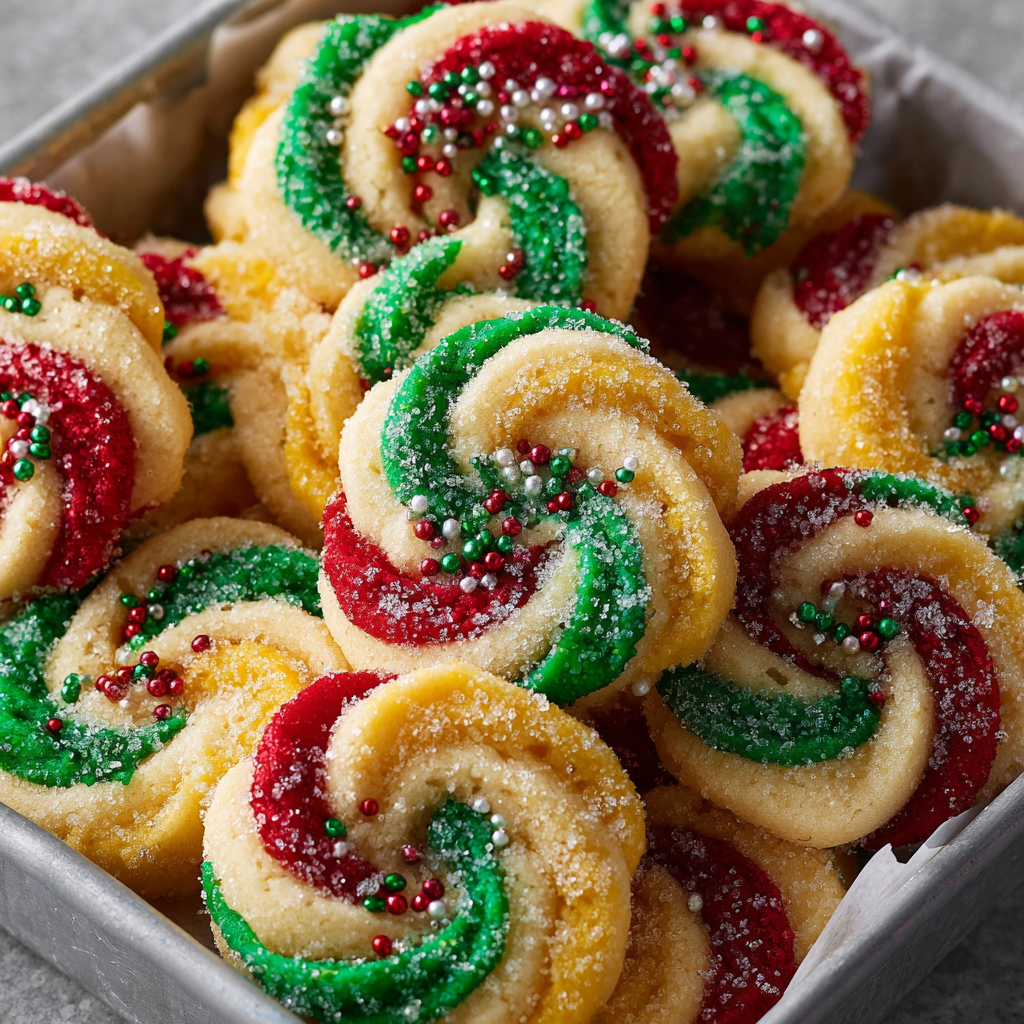
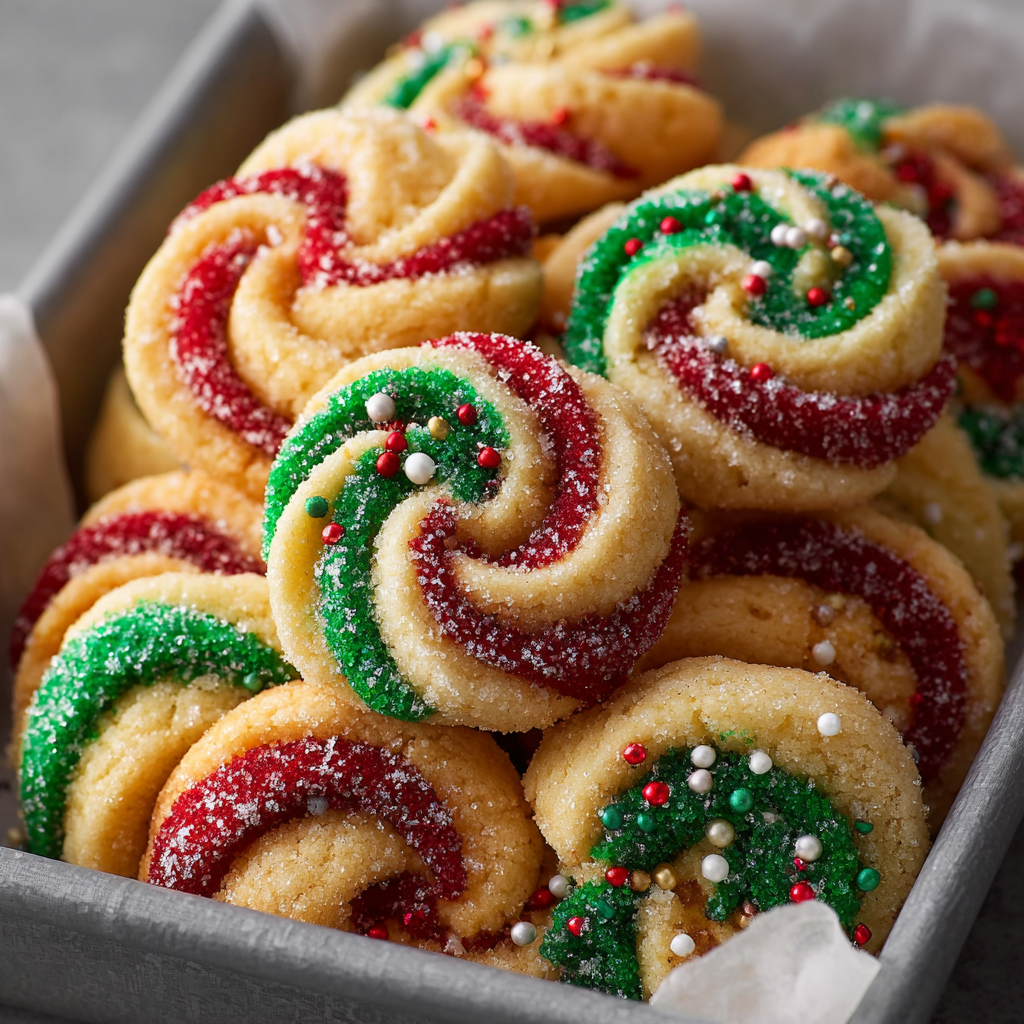
Few holiday treats capture both creativity and nostalgia as beautifully as Twisted Christmas Cookies. These vibrant, swirled delights are a playful twist on classic butter cookies, transforming simple pantry ingredients into a festive masterpiece. Whether you’re preparing a holiday cookie box, planning a Christmas baking party, or simply want a cheerful dessert to brighten your table, these cookies bring color, flavor, and unmistakable holiday cheer to every bite. With rich butter, warm vanilla, fragrant almond extract, and the option of bright orange zest, this recipe creates a dough that is both aromatic and incredibly easy to shape into elegant twists. Their soft texture pairs beautifully with a crisp, lightly sweet royal icing that you can tint in red, green, gold, or snowy white for the ultimate holiday palette.
If you’re new to making shaped or decorated cookies, especially ones that involve colored dough, this recipe is delightfully beginner-friendly. It offers enough structure to maintain its shape while baking but stays soft enough to twist easily without cracking. For those who love experimenting with décor, these cookies become a blank canvas for sprinkles, edible glitter, crushed candy canes, or metallic shimmer dust. To enhance your baking experience, you may want to explore additional resources such as a general cookie baking guide on mixing and shaping techniques (such as found on or tips for handling royal icing for detailed designs. These can help elevate your Twisted Christmas Cookies from fun and festive to absolutely dazzling.
Incorporating the focus Twisted Christmas Cookies naturally throughout this introduction emphasizes the uniqueness of this recipe, while also giving readers a sense of the joy and creativity it brings to holiday celebrations. With its blend of classic flavors and playful presentation, this recipe is ideal for bakers of all skill levels looking for a cheerful, delicious, and visually stunning addition to their holiday traditions.
2. Basic Recipe: Ingredients and Instructions
Print
Twisted Christmas Cookies – Festive Swirled Holiday Treats
Description
Festive Twisted Christmas Cookies with icing—easy, colorful holiday treats bursting with flavor. Make perfect Twisted Christmas Cookies.
Ingredients
For the Cookies
- 1 cup white sugar
- 14 oz (400g) butter, softened
- 2 eggs
- 2 tsp vanilla extract
- 1 tsp almond extract
- Zest of 1 orange (optional)
- 6 cups plain flour
For the Icing
- 6 tbsp meringue powder
- 8 tbsp water
- 2 tsp lemon juice
- 7 cups powdered sugar, sifted
- Extra water, as needed
- Gel food coloring (red, green, gold, white)
- Sprinkles, edible glitter, or crushed candy canes
Instructions
1. Prepare the dough:
Cream the softened butter and sugar together until light and fluffy. Add eggs, vanilla, almond extract, and orange zest (if using). Mix until combined.
2. Add the flour:
Slowly incorporate the flour, mixing until a soft, smooth dough forms. If needed, chill for 10 minutes to firm slightly.
3. Color the dough:
Divide the dough into sections and tint each one with gel food coloring. Keep one portion white if you want contrast.
4. Shape the twists:
Roll colored dough into long ropes, then twist two or more colors together. Cut into 4–5 inch lengths and place on parchment-lined trays.
5. Bake:
Bake at 350°F (175°C) for 10–12 minutes, or until the edges are just lightly golden.
6. Make the icing:
Combine meringue powder and water, whisking until foamy. Add lemon juice and powdered sugar. Adjust to desired consistency with extra water.
7. Decorate:
Dip or drizzle cookies with icing. Add sprinkles or candy before icing sets.
Notes
Chill dough if it becomes too soft to twist.
Use gel (not liquid) coloring to avoid altering dough texture.
For crisper cookies, bake an extra 1–2 minutes.
Ensure cookies cool completely before icing to prevent melting.
3. Advanced Techniques
1. Mastering Dough Elasticity for Perfect Twists
Creating beautifully uniform Twisted Christmas Cookies requires a dough that is pliable yet firm enough to hold shape. Understanding dough elasticity will greatly improve the outcome. Start by thoroughly creaming your butter and sugar, as under-mixing can lead to a crumbly dough that cracks easily when twisted. On the other hand, over-mixing flour can develop too much gluten, making the dough tough and resistant to shaping. If your dough feels dry, a teaspoon of milk can restore flexibility. Conversely, if the dough feels too sticky or warm, a brief refrigeration will help it regain structure. Working with small sections at a time prevents colors from becoming too soft while you shape them. Managing elasticity this way ensures consistent twists every time.
2. Color Layering for More Dramatic Swirls
While simple two-color twists look stunning, advanced bakers can experiment with multi-layer color patterns. Start with three or four colored dough portions. Roll each into thin sheets and stack them, alternating colors. Chill briefly, then slice strips and roll each strip into ropes. This method yields deeply marbled, candy-cane-like patterns. The key to success is using gel food color to maintain dough structure, preventing streaking or bleeding during baking. Keeping the dough cool during the layering process helps maintain clear definition between colors. This layered approach produces cookies with dramatic visual depth, perfect for gifting or festive displays.
3. Royal Icing Consistency Control for Professional Finish
Achieving bakery-level icing results requires understanding icing consistencies. For outlining details, use thicker icing that forms a soft peak when lifted. For flooding the tops of cookies, thin the icing gradually until it settles smoothly within 10 seconds. Add water using a spray bottle for precise thinning. Keeping icing covered with a damp towel prevents crusting, especially if working in a dry environment. Use piping bottles or fine-tip bags for control. Practicing consistency control not only improves the appearance of the cookies but also keeps your Twisted Christmas Cookies looking polished and professional.
4. Flavor Layering Beyond the Basic Extracts
While vanilla, almond, and orange zest create a wonderful classic flavor, you can elevate your cookies by layering deeper or more complex notes. Add a hint of cardamom, cinnamon, or nutmeg to give the dough a warming holiday spice profile. Citrus oils like tangerine or bergamot can also add a luxurious aroma. For a richer butter flavor, brown half the butter and cool before adding it to the dough. This adds depth without compromising structure. Flavor layering helps turn a simple recipe into a signature masterpiece with unique aromatic qualities.
5. Precision Shaping for Uniform Baking
Uniform cookie size ensures even baking, preventing some cookies from burning while others remain underdone. To achieve consistent thickness, roll dough ropes on a silicone mat using faintly marked guides or place wooden dowels on either side of the dough as thickness bars. When twisting, apply even pressure and avoid stretching one color more than another. Keeping twists similar lengths and diameters improves not only final appearance but also ensures perfectly soft centers and lightly crisp edges every time.
4. Storage, Shelf Life, and Maintenance Tips
1. Room-Temperature Storage for Fresh Texture
These cookies stay fresh for up to one week when stored at room temperature in an airtight container. Separate layers using parchment paper to prevent icing from smudging. Keeping them out of direct sunlight prevents color fading, especially when using red or green coloring. A silica gel food-grade packet can be added to absorb humidity in very moist climates. This method maintains ideal softness and preserves decorative toppers like edible glitter or candy cane pieces.
2. Freezing the Dough for Make-Ahead Convenience
Twisted Christmas Cookies are excellent candidates for make-ahead holiday baking. To freeze dough, shape it into ropes, wrap tightly in plastic, and store for up to two months. When ready to bake, thaw just enough to twist without cracking. Freezing preserves flavor remarkably well and allows you to break up holiday baking into manageable sessions. Having pre-colored, pre-portioned dough ready to go can be a major time-saver during busy festive weeks.
3. Freezing Fully Baked Cookies
Baked cookies freeze beautifully for up to three months. Freeze them undecorated for best results. Stack them in airtight containers with parchment between each layer. When thawing, let them come to room temperature before icing to prevent condensation from affecting texture. This technique ensures you can prepare large batches ahead of events like school parties or holiday gatherings without compromising quality.
4. Maintaining Icing Quality Over Time
Royal icing tends to dry out if improperly stored. Keep leftover icing in airtight containers with a piece of plastic wrap pressed directly onto the surface to prevent crusting. Refrigerate for up to one week or freeze for up to three months. Re-mix icing before use to restore consistency. Proper icing care ensures your decorative work stays vibrant and smooth.
5. Reviving Slightly Stale Cookies
If cookies begin to dry out, place a slice of fresh bread or apple in the storage container for a few hours. The cookies will absorb moisture and regain tenderness. Avoid leaving moisture sources too long to prevent sogginess. This method works particularly well if you baked the cookies a few days before icing or gifting them.
5. Dietary Adaptations and Substitutions
1. Vegan Adaptation Options
To create vegan Twisted Christmas Cookies, substitute butter with a high-quality vegan block butter—not margarine—to maintain structure. Replace eggs with 2 tablespoons aquafaba per egg or store-bought vegan egg replacer. Ensure your coloring and sprinkles are vegan-certified. Use a vegan royal icing mix or make a simple glaze with powdered sugar, water, and lemon juice. Texture remains impressively close to the original with these substitutions.
2. Gluten-Free Version
A gluten-free adaptation requires choosing a reliable 1:1 gluten-free flour blend that contains xanthan gum. Because gluten-free dough tends to be more fragile, chilling is essential. Add an extra tablespoon of milk if dough feels crumbly. The cookies will taste slightly different but still hold their twisted shape beautifully.
3. Low-Sugar or Reduced-Sugar Variation
To reduce sugar, decrease cookie sugar by 20–30% and use powdered erythritol or allulose in the icing. Keep in mind that sugar contributes to structure, so do not remove too much. Reduced-sugar versions maintain sweetness while offering a lighter, less-rich flavor profile.
4. Nut-Free Adjustment
Simply omit almond extract and replace with additional vanilla or orange zest. This creates a safe version for nut-allergy households without sacrificing flavor. Make sure decorations are nut-free as well.
5. Dairy-Free Approach
Replace butter with a dairy-free baking stick, which provides the necessary firmness. Avoid soft tub-style spreads as they contain too much moisture. Choose a dairy-free milk alternative only if the dough needs loosening.

6. FAQs About the Recipe
1. Why is my dough cracking when I twist it?
Dough cracks when it’s too cold, too dry, or over-mixed. Allow colored dough to warm slightly in your hands, or add a teaspoon of milk to improve pliability. Chilling too long can also stiffen the fats. Work quickly but gently to maintain elasticity.
2. How do I keep the colors from blending together?
Use gel food coloring and avoid over-kneading once color is added. Over-mixing can cause colors to bleed. Keep dough cool between steps and twist gently to preserve distinct stripes.
3. Why are my cookies spreading too much?
Excess spreading typically occurs when butter is too soft. Chill shaped twists for 10–15 minutes before baking. Ensure your oven is fully preheated for stable results.
4. How do I get vibrant icing colors?
Start with gel coloring and allow icing to rest for 10 minutes after mixing, which enhances depth. Darker shades deepen over time, so add color gradually to avoid overpigmenting.
5. Can I use natural food coloring?
Yes, but natural colors may produce softer hues and slightly alter texture. Powders (like beet or spirulina) work better than liquids. Expect more subtle tones, perfect for rustic holiday styles.
7. Conclusion & Final Thoughts
Creating Twisted Christmas Cookies isn’t just about baking—it’s about bringing holiday joy, creativity, and color into your kitchen. These festive swirls combine nostalgic flavors with a playful presentation that brightens dessert tables, cookie exchanges, and homemade gift boxes. What makes this recipe so special is its balance of simplicity and artistry: beginners can master the twists easily, while experienced bakers can elevate them with advanced color techniques, detailed icing, or customized flavor variations. With endless decorating possibilities and adaptable dough, these cookies encourage experimentation and personalization. Whether you choose bold candy-cane stripes, soft pastel holiday tones, or shimmering gold and white elegance, each batch becomes a reflection of your festive spirit.
Beyond their visual charm, the cookies offer buttery richness, soft crumb texture, and the option of fragrant citrus or cozy almond. They store beautifully, freeze well, and adapt seamlessly to dietary needs, making them an inclusive treat for any celebration. As you enjoy making or sharing them, you’ll find that Twisted Christmas Cookies become more than just a recipe—they become a cherished holiday tradition. With every swirl and sparkle, they bring warmth to gatherings, smiles to children, and a touch of magic to the season.
Enjoy baking, decorating, gifting, and savoring these irresistible holiday cookies!