1. Introduction to the Recipe
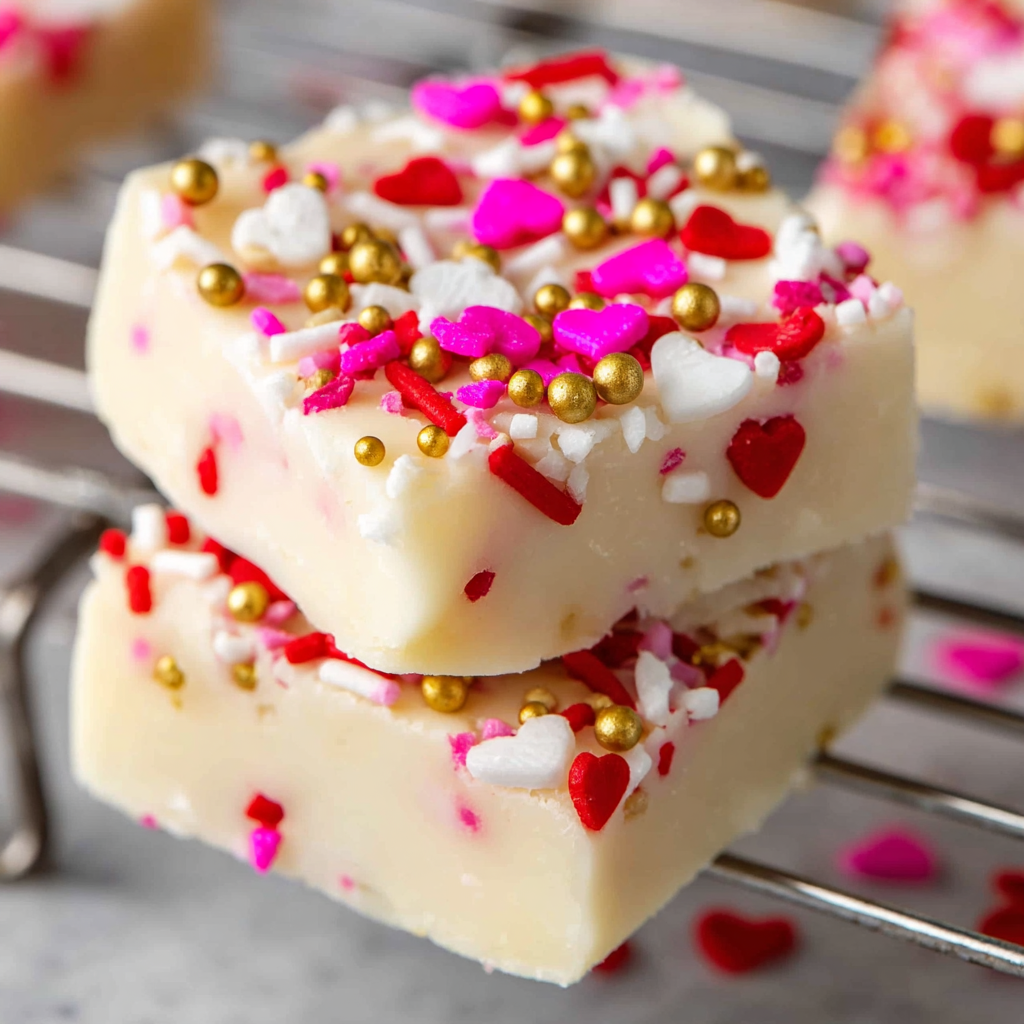
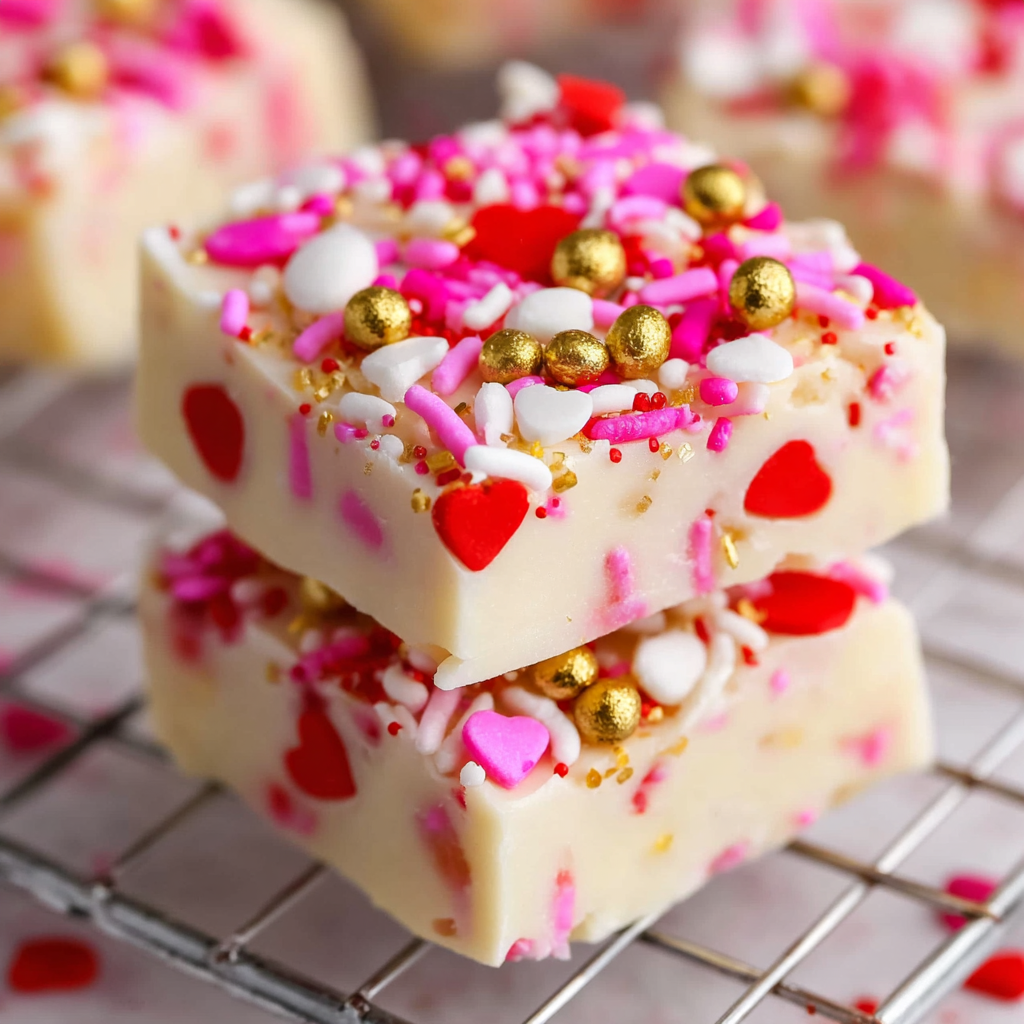
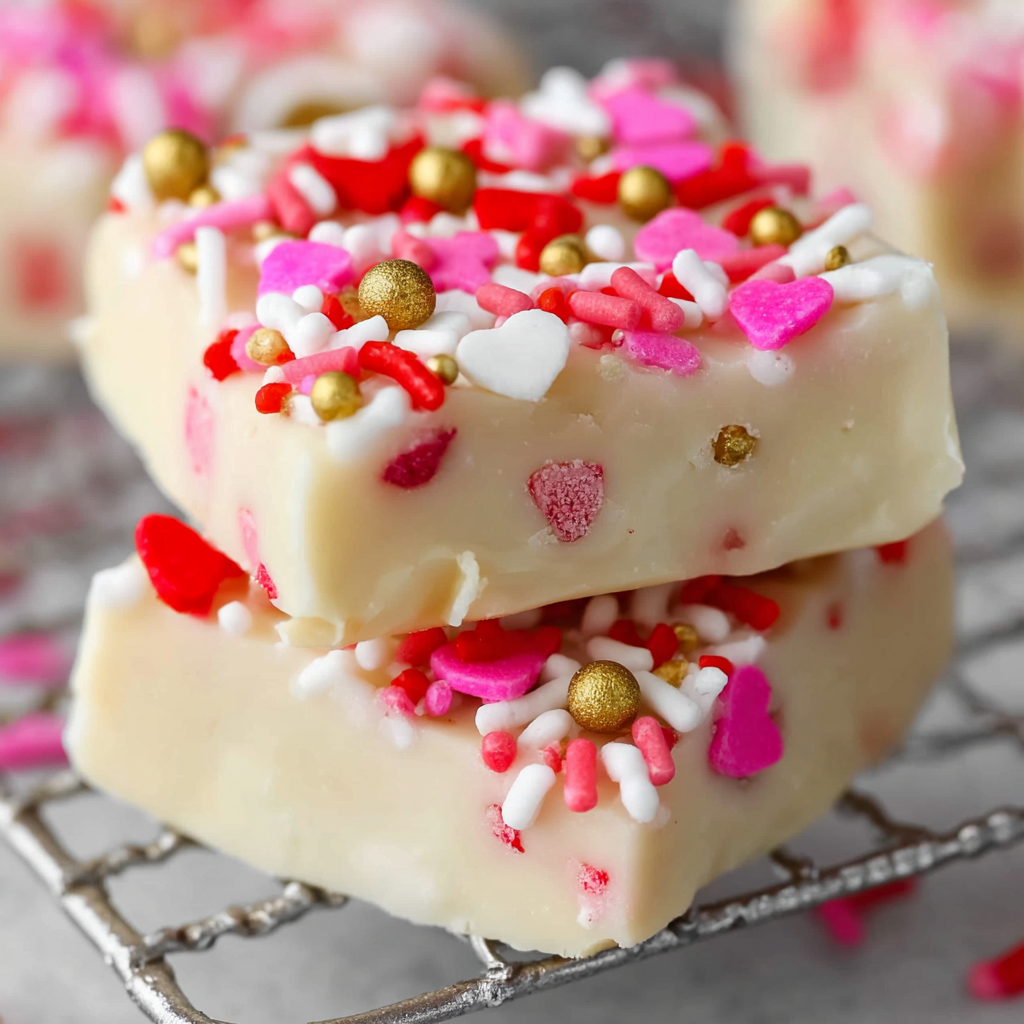
White Chocolate Fudge is one of the most luxurious and irresistibly creamy treats you can make with almost no effort at all. This classic confection has been a holiday favorite for generations because it’s simple, fast, and wonderfully adaptable. With just three core ingredients—white chocolate chips, sweetened condensed milk, and vanilla extract—you can produce a decadent fudge that tastes like it came straight from a gourmet candy shop. Whether you’re preparing homemade gifts, building a dessert platter, or simply craving something sweet and nostalgic, this fudge delivers richness and flavor in every smooth bite.
One of the reasons White Chocolate Fudge has remained so popular is its versatility. The base recipe is perfectly sweet, velvety, and melt-in-your-mouth soft, yet firm enough to slice into neat squares. But the real magic comes from how customizable it is. You can fold in crushed peppermint candies for a holiday twist, chopped nuts for crunch, dried cranberries for tartness, or crushed Oreos for a cookies-and-cream sensation. It is the ultimate “canvas” dessert—simple enough for beginners, yet offering endless creative freedom. If you’re looking to expand your candy-making skills, resources like AllRecipes (https://www.allrecipes.com) and Taste of Home (https://www.tasteofhome.com) offer excellent candy-making tips and variations that pair beautifully with this fudge recipe.
On top of its rich flavor and creamy texture, White Chocolate Fudge is also incredibly convenient. It requires no candy thermometer, no advanced skills, and only a few minutes of stovetop time before it chills to perfection. It stores beautifully, freezes brilliantly, and looks stunning in gift boxes, cookie tins, or holiday platters. Whether you’re making it for Christmas, Valentine’s Day, birthdays, bake sales, or simple weekday indulgence, this fast and foolproof fudge is guaranteed to become a cherished favorite in your dessert rotation.
2. Basic Recipe: Ingredients and Instructions
Print
Easy White Chocolate Fudge – Creamy, Rich & Foolproof
Description
Creamy, rich White Chocolate Fudge made with sweetened condensed milk and delicious mix-in options for the easiest holiday candy ever.
Ingredients
Base Fudge
- 28 ounces sweetened condensed milk (2 cans)
- 4 cups white chocolate chips (two 12-ounce bags)
- 1 teaspoon vanilla extract
Optional Mix-Ins
(Choose 1–2 cups total depending on preference)
- Crushed peppermint candy
- Crushed Oreos
- Toasted chopped nuts (walnuts, pecans, almonds)
- Dried cranberries or dried cherries
- Mini marshmallows
- Funfetti or holiday sprinkles
Instructions
- Prepare the Pan
Line an 8×8 or 9×9 inch pan with parchment paper, leaving an overhang for easy removal. - Melt the Base Ingredients
In a medium saucepan, combine the sweetened condensed milk and white chocolate chips. Heat over medium-low, stirring constantly, until the mixture is fully melted and smooth. - Add Vanilla
Remove the saucepan from heat and stir in the vanilla extract. - Fold in Mix-Ins (Optional)
Add your chosen mix-ins while the mixture is still warm. Stir gently until evenly distributed. - Transfer to the Pan
Spread the fudge mixture into the prepared pan using a spatula. Smooth the top. - Decorate (Optional)
Add sprinkles, crushed candy, or toppings before the fudge sets. - Chill
Refrigerate for at least 3–4 hours or until firm. - Cut and Serve
Lift the fudge out of the pan using parchment paper. Slice into squares using a sharp knife.
Notes
For clean cuts, warm the knife with hot water and wipe between slices.
If using peppermint, crush it just before adding to avoid “melting dust.”
Use high-quality white chocolate chips—they melt more smoothly and yield creamier fudge.
A 9×13 pan makes thinner fudge; an 8×8 creates thick, bakery-style squares.
3. Advanced Techniques
1. Mastering the Texture Through Slow Heating
One of the hallmarks of excellent White Chocolate Fudge is achieving a silky texture without graininess. White chocolate burns more easily than dark or milk chocolate, so slow and steady heat is essential. Keep the flame on low to medium-low and stir continuously, ensuring the mixture melts evenly. Avoid simmering or boiling the mixture at any point. If the chocolate begins to look chalky or thick, remove it from the heat immediately. This slow-heat method produces a perfectly smooth, creamy fudge every time and gives you more control over the final texture.
2. Balancing Sweetness and Mix-Ins for Professional Results
Because white chocolate and sweetened condensed milk are naturally very sweet, choosing the right mix-ins can make or break the final product. Opt for mix-ins that add contrast—such as toasted nuts, dried cranberries, or salted caramel bits—to balance the richness. If you prefer very sweet fudge, Oreos, marshmallows, or sprinkles work perfectly. Adding a tiny pinch of sea salt into the melted mixture can also elevate the overall flavor. Professional candy makers often use this method to cut through sweetness while enhancing depth.
3. Perfecting the Firmness for Clean Cutting
Getting crisp, clean edges depends on firmness, which in turn depends on the chocolate-to-milk ratio. This recipe is balanced for ideal consistency, but if you want firmer fudge, simply add an extra ½ cup of white chocolate chips. For softer, more melt-in-your-mouth fudge, reduce the chips by ½ cup. Allow the fudge to chill completely before cutting—a minimum of 3 hours, ideally overnight. Using a warmed knife or a chef’s knife lightly coated with oil ensures clean, crumb-free slices.
4. Using Double-Boiler Technique to Prevent Scorching
If you want total control over melting, use a double boiler instead of direct heat. Place a heatproof bowl over a pot of simmering water and melt the chocolate with the condensed milk slowly. This method prevents scorching, reduces the risk of gritty texture, and melts chocolate more evenly. It’s especially helpful if using artisan white chocolate, which can be more sensitive to heat. Although it takes a little longer, it ensures a silky smooth result worthy of gourmet candy shops.
5. Flavor Enhancement Through Extracts and Emulsions
Vanilla is traditional, but using high-quality extracts or flavor emulsions can elevate White Chocolate Fudge to a new level. Almond extract adds nostalgic bakery flavor, peppermint extract turns it into holiday fudge, lemon extract creates brightness, and coconut extract gives a tropical twist. Emulsions work exceptionally well because they maintain flavor after chilling. Add no more than ¼–½ teaspoon at a time to avoid overpowering the delicate white chocolate.

4. Storage, Shelf Life, and Maintenance Tips
1. Refrigerator Storage for Maximum Freshness
Store your White Chocolate Fudge in an airtight container in the fridge for up to 2 weeks. Because the fudge contains dairy, refrigeration protects the texture and prevents microbial growth. Adding parchment between layers prevents pieces from sticking. Refrigerated fudge stays firm and slices beautifully while retaining its rich, creamy mouthfeel.
2. Freezing for Long-Term Use
This fudge freezes exceptionally well, making it perfect for holiday prep. Freeze whole blocks or pre-cut squares by wrapping tightly with plastic wrap and placing them in a freezer bag or airtight container. They will remain fresh for up to 3 months. When ready to serve, thaw in the fridge overnight. Freezing does not alter the texture if the fudge is well-wrapped.
3. Preventing Sugar Bloom and Moisture Damage
When stored improperly, fudge can develop a dull, powdery surface from sugar bloom. To avoid this, always cool the fudge fully before covering or storing. Warm fudge traps steam, which crystallizes on the surface as it chills. Use airtight containers and avoid storing fudge near strong-smelling foods. Keeping the temperature consistent also helps maintain its glossy finish.
4. Transporting Fudge While Maintaining Shape
White Chocolate Fudge is perfect for gifting, but it should be packed carefully. Use a sturdy container with parchment layers to prevent shifting. If transporting in warm weather, include an ice pack in a cooler bag to prevent softening. For shipping, wrap each piece individually in wax paper and place them in snug boxes to avoid movement during transit.
5. Maintaining Flavor and Freshness Over Time
To preserve peak flavor, store fudge away from air, heat, humidity, and odors. White chocolate absorbs smells quickly, so keep it away from foods like onions, citrus, or cheese. If fudge becomes too firm after several days, let it sit at room temperature for 10 minutes before serving to restore creaminess.
5. Dietary Adaptations and Substitutions
1. Gluten-Free White Chocolate Fudge
This recipe is naturally gluten-free as long as you choose gluten-free mix-ins. Most white chocolate chips and sweetened condensed milk are already gluten-free, but always verify labels for hidden wheat additives. If using Oreos, switch to gluten-free versions. This makes the fudge ideal for holiday parties where gluten sensitivity is a concern.
2. Dairy-Free or Vegan Adaptations
To make vegan or dairy-free White Chocolate Fudge, use coconut-based condensed milk and dairy-free white chocolate chips. Many brands now offer vegan white chocolate made from cocoa butter without milk solids. Choose plant-based sprinkles or mix-ins, as some contain confectioner’s glaze. The texture remains creamy and smooth.
3. Lower-Sugar and Keto-Friendly Variations
For a lower-sugar option, replace sweetened condensed milk with sugar-free condensed milk alternatives and use sugar-free white chocolate. Monk fruit or erythritol-sweetened chocolate melts well and provides sweetness without the spike. Add chopped nuts or unsweetened coconut to enhance texture without adding sugar.
4. Nut-Free Options for Allergy-Safe Fudge
The base recipe contains no nuts, making it ideal for nut-free environments. Avoid almond extract and always check chocolate chip packaging to ensure it was processed in a nut-free facility. Use safe mix-ins like sprinkles, marshmallows, or crushed cookies produced in nut-free environments.
5. Flavor Alternatives for Dietary Restrictions
If avoiding artificial coloring or additives, choose natural sprinkles, dried fruit, or pure extracts. If avoiding refined sugar, consider coconut sweetened condensed milk paired with natural chocolate. This offers a clean-label variation without sacrificing flavor or texture.
6. FAQs About the Recipe
1. Why Did My Fudge Turn Out Grainy?
Graininess usually occurs when white chocolate overheats or when moisture gets into the mixture. Always melt the chocolate slowly and avoid exposing it to steam. Stir constantly and remove from heat as soon as the mixture becomes glossy and smooth. Using high-quality white chocolate also prevents grainy texture.
2. Why Didn’t My Fudge Set Properly?
If your fudge is too soft, it may need more chocolate. Next time, add ½ to 1 cup more white chocolate chips. Also, ensure the fudge is fully chilled for at least 3 hours. Using a smaller pan produces thicker pieces that firm more reliably.
3. Can I Use a Microwave Instead of Stovetop?
Yes! Combine the sweetened condensed milk and white chocolate in a microwave-safe bowl and heat in 20-second intervals, stirring each time. This method works extremely well but requires careful attention to avoid overheating.
4. Can I Double the Recipe?
Absolutely. Double all ingredients and use a 9×13 pan. Ensure the chocolate melts evenly by using a larger pot or double boiler. Doubling is perfect for parties, gifting, or holiday dessert boxes.
5. How Long Does White Chocolate Fudge Last?
In the refrigerator, homemade fudge lasts about 2 weeks. In the freezer, it lasts up to 3 months if well-wrapped. At room temperature, keep it only 3–4 days due to the dairy content.
7. Conclusion & Final Thoughts
White Chocolate Fudge is the perfect blend of simplicity, flavor, and effortless elegance. With its velvety smooth texture and customizable flavor options, it’s a dessert that appeals to both beginners and seasoned home cooks alike. Whether you’re preparing it for the holidays, assembling beautiful edible gifts, or just treating yourself to something sweet, this fudge always delivers impressive results. The combination of white chocolate and sweetened condensed milk creates a melt-in-your-mouth consistency that feels luxurious, while the mix-ins allow you to personalize every batch uniquely.
Beyond its incredible flavor, this recipe is wonderfully practical. It requires minimal equipment, no candy thermometer, and only a few basic ingredients. It chills quickly, slices beautifully, and maintains excellent texture for weeks with proper storage. The adaptability also means you can prepare multiple versions from a single base—peppermint for a festive touch, cranberries for tart contrast, cookies and cream for kids, or toasted nuts for adults. It’s a recipe that evolves effortlessly with seasons, holidays, and personal preferences.
In the end, White Chocolate Fudge stands out not just as a dessert but as a versatile, dependable, gift-worthy treat that brings comfort and joy with every creamy bite. Add it to your holiday candy rotation, pair it with other fudge varieties, or enjoy it as a standalone indulgence—it’s guaranteed to satisfy every sweet craving and become a beloved staple in your kitchen.