Zombie Dirt Pudding Cups: A Fun Halloween Treat
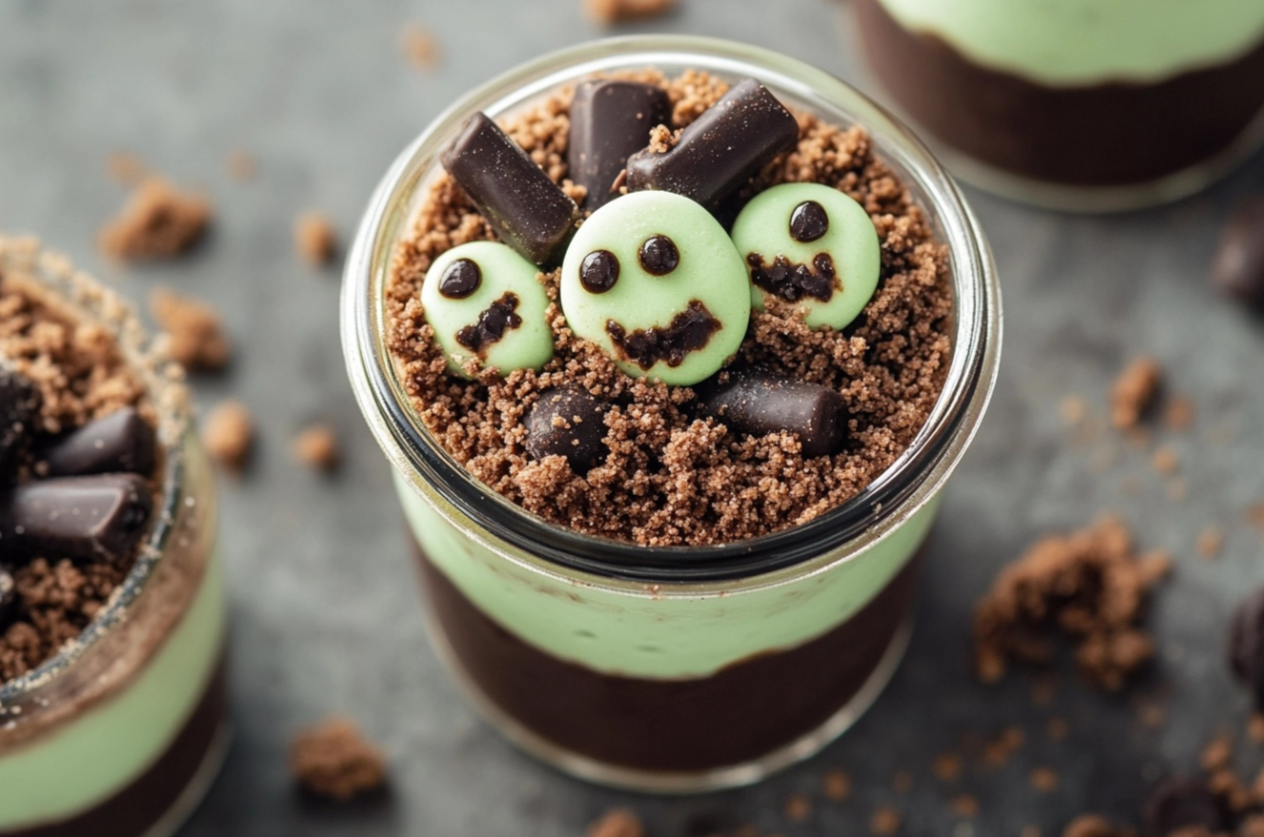
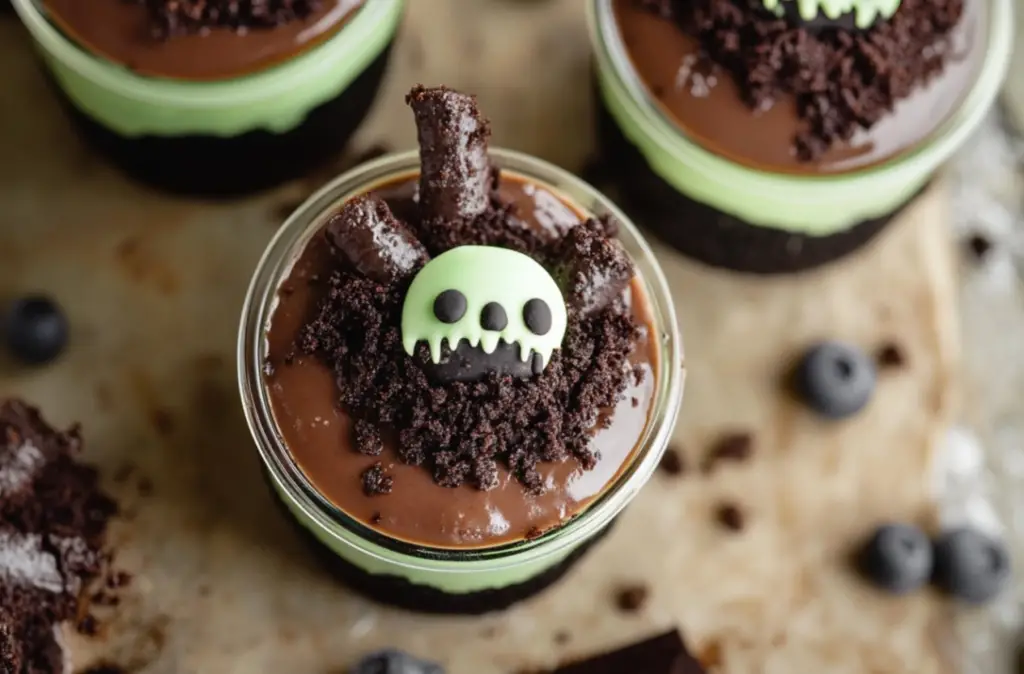
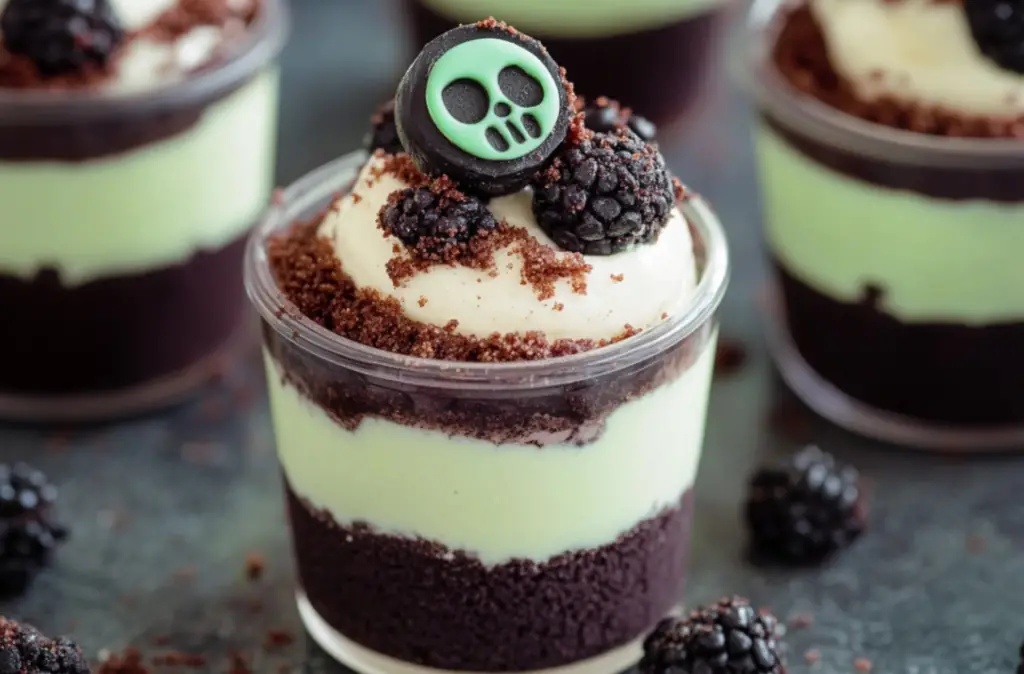
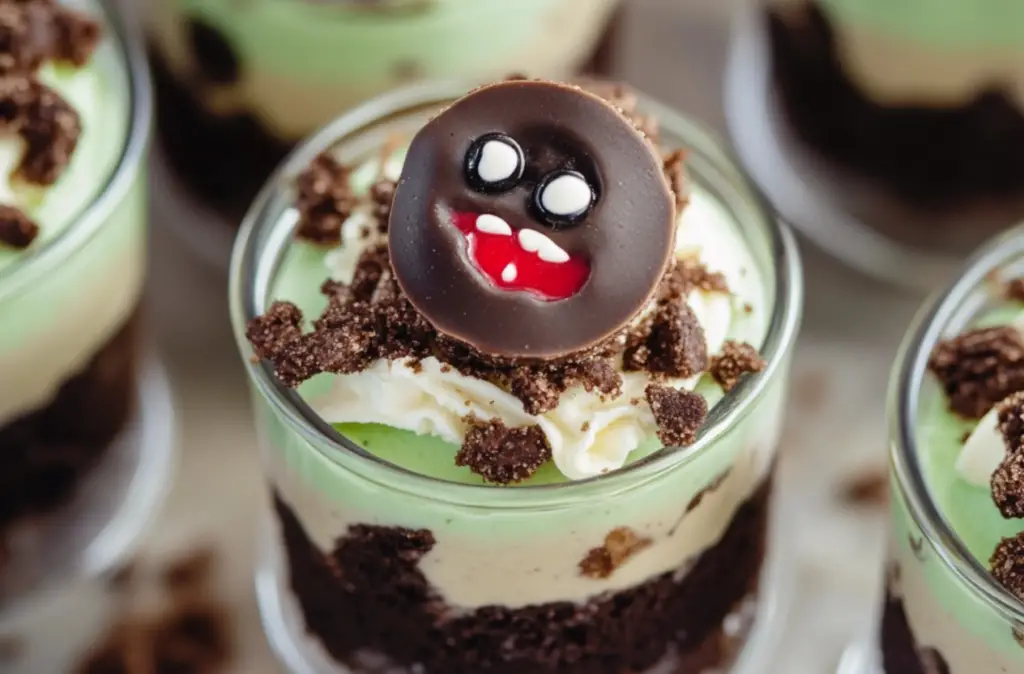
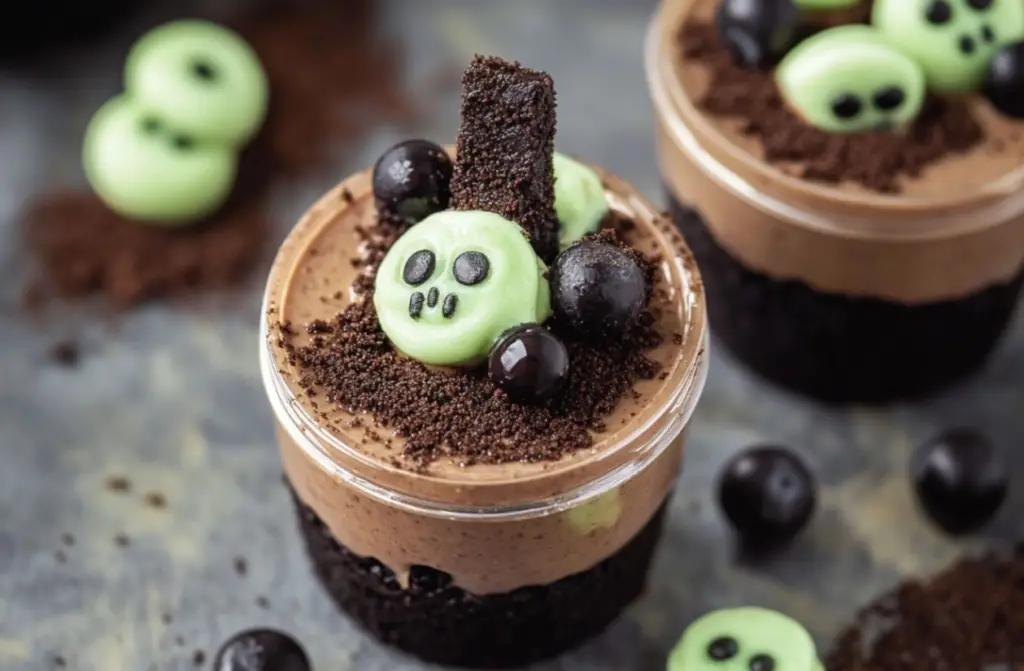
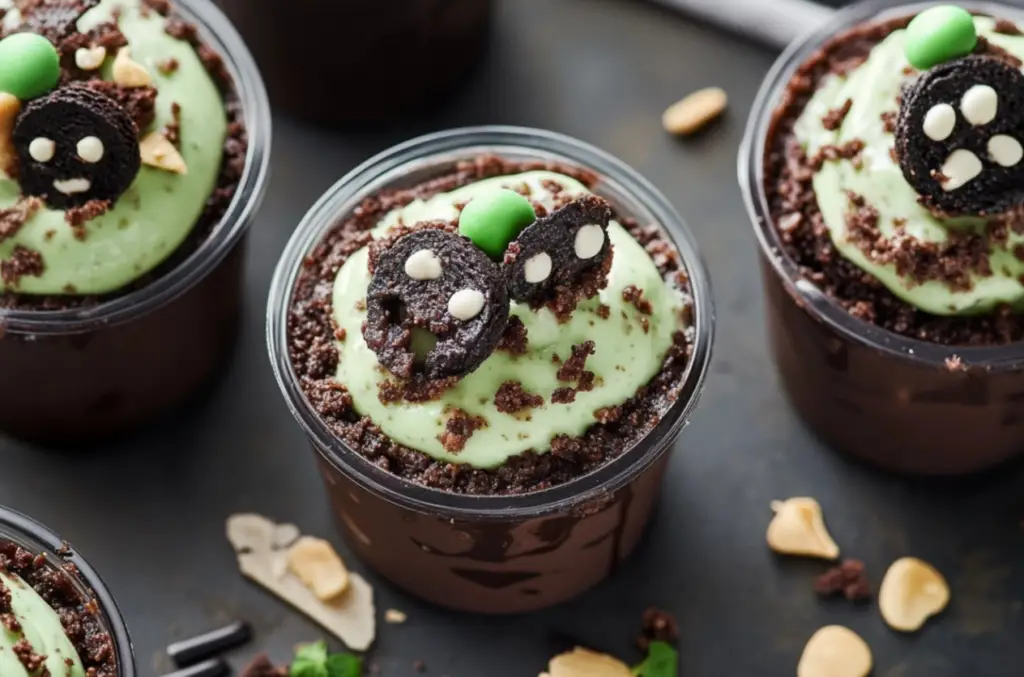
Zombie Dirt Pudding Cups are the ultimate Halloween dessert to surprise your guests with. These eerie, creamy pudding cups are made with layers of crushed Mint Creme Oreos, spooky green pudding, and topped with candy eyeballs. It’s a simple, no-bake dessert that both kids and adults will love. This spooky treat is perfect for Halloween parties, giving your dessert table a fun and ghoulish twist.
Perfect for Halloween Parties
Looking for an easy, creative dessert for your Halloween party? Zombie Dirt Pudding Cups are the answer. With minimal preparation, this creepy treat will impress guests with its green pudding and playful candy accents. You can customize the toppings, like using Halloween sprinkles or gummy worms for an extra spooky touch. For more ideas to elevate your party, check out these DIY Halloween Treats. These dirt pudding cups are not only delicious but also a fantastic way to get kids involved in the kitchen.
A Kid-Friendly and Easy Dessert
Zombie Dirt Pudding Cups are ideal for kids’ parties. The combination of cool mint Oreos and pudding is easy to assemble, making it perfect for little hands. This recipe requires no baking and can be made in less than 15 minutes. The green color makes it festive and spooky, ideal for a fun treat. For more family-friendly desserts, check out Kid-Friendly Desserts. Whether you’re planning a classroom party or a spooky night at home, this recipe is sure to be a hit.
Basic Recipe for Zombie Dirt Pudding Cups
Print
Zombie Dirt Pudding Cups
- Total Time: 15 minutes
- Yield: 6-8 servings 1x
- Diet: Vegetarian
Description
These spooky and creamy Zombie Dirt Pudding Cups are the perfect Halloween treat. With layers of mint Oreo cookies, smooth white chocolate pudding, and ghoulish candy eyeballs, they’re both fun to make and delicious to eat.
Ingredients
- 1 package (18.7 oz) Mint Creme Oreo Cookies (family-size)
- 1 box (3.3 oz) white chocolate instant pudding mix
- 2 cups half and half (or whole milk)
- 6–8 drops green gel food coloring
- 8 ounces Cool Whip thawed
- 12 large candy eyeballs
- 12 small candy eyeballs
- Bone, skeleton, or Halloween mix sprinkles (optional garnish)
Instructions
- Crush Oreo cookies into fine crumbs using a food processor or place in a resealable bag and crush with a rolling pin.
- In a large bowl, whisk the pudding mix and half and half until combined. Add green food coloring until you reach the desired “zombie” shade.
- Fold in the Cool Whip to create a fluffy and smooth texture.
- Layer the cups: Begin with a layer of crushed Oreos, followed by a layer of green pudding mixture. Repeat until cups are filled.
- Top with remaining Oreos and garnish with candy eyeballs and optional Halloween sprinkles.
Notes
For a thicker pudding, chill for 1-2 hours before serving. Store in the fridge for up to 24 hours.
- Prep Time: 10 minutes
- Cook Time: 5 minutes
- Category: Dessert
- Method: No-bake
- Cuisine: American, Halloween-themed
Nutrition
- Serving Size: 1 cup
- Calories: 350 per serving
- Sugar: 40g
- Sodium: 250mg
- Fat: 16g
- Saturated Fat: 8g
- Unsaturated Fat: 5g
- Trans Fat: 0g
- Carbohydrates: 55g
- Fiber: 2g
- Protein: 4g
- Cholesterol: 15mg
Keywords: Zombie Dirt Pudding Cups
STEPS
Step 1
Crush Oreo cookies into fine crumbs using a food processor or place in a resealable bag and crush with a rolling pin.
Step 2
In a large bowl, whisk the pudding mix and half and half until combined. Add green food coloring until you reach the desired “zombie” shade.
Step 3
Fold in the Cool Whip to create a fluffy and smooth texture.
Step 4
Layer the cups: Begin with a layer of crushed Oreos, followed by a layer of green pudding mixture. Repeat until cups are filled.
Step 5
Top with remaining Oreos and garnish with candy eyeballs and optional Halloween sprinkles.
Advanced Techniques for Zombie Dirt Pudding Cups
When it comes to making Zombie Dirt Pudding Cups, there are several ways to elevate this simple dessert into something even more impressive. These advanced techniques will help you take the recipe to the next level.
Enhancing Flavor in Zombie Dirt Pudding Cups
To add an extra layer of flavor, consider switching out the pudding mix. White chocolate pudding works great, but chocolate pudding will give it a richer taste. You can also try mixing in flavored extracts, like peppermint extract, to complement the mint Oreo cookies. For an adult twist, a splash of Bailey’s or Kahlua in the pudding adds a sophisticated touch. Don’t forget to adjust the food coloring to keep that vibrant green.
Creating a Spookier Presentation
The look of your Zombie Dirt Pudding Cups can be made even creepier with just a few changes. For example, add gummy worms on top of the crushed Oreos for a more unsettling “dirt” effect. Alternatively, drizzle some chocolate syrup in between the pudding layers to create a muddy, gooey appearance. This will not only enhance the presentation but also add another burst of flavor.
Layering Like a Pro
To ensure the layers stay visually distinct, carefully spoon each layer of pudding and crushed Oreos into the cup. Use a piping bag for more precision, especially with the pudding. If you want your Zombie Dirt Pudding Cups to look extra neat, refrigerate the pudding between layers to prevent them from blending together. This technique creates a sharp contrast between the bright green pudding and the dark cookie crumbs, making the dessert stand out.
Maintenance and Storage Tips for Zombie Dirt Pudding Cups
When making Zombie Dirt Pudding Cups, knowing how to store and maintain them is key to keeping their spooky charm intact.
Properly Storing Leftovers
If you have leftover Zombie Dirt Pudding Cups, you’ll want to keep them fresh. Store the assembled cups in an airtight container in the refrigerator. This prevents the pudding from becoming watery and keeps the Oreos from getting too soggy. These dessert cups will stay fresh for up to 2-3 days, though they’re best enjoyed within 24 hours for maximum flavor and texture.
Freezing Zombie Dirt Pudding Cups
Although Zombie Dirt Pudding Cups are best served fresh, certain components can be frozen for later use. For example, you can freeze the pudding mixture in an airtight container. When you’re ready to assemble the cups, thaw the pudding in the fridge overnight and layer with freshly crushed Oreos. Freezing the entire assembled cup isn’t recommended, as the Oreos will lose their crunch and the toppings may not thaw well.
Reviving the Look Before Serving
If you’ve stored your Zombie Dirt Pudding Cups for more than a day, you might notice that the candy eyeballs or sprinkles sink into the pudding. To revive their spooky appearance, simply add fresh candy garnishes just before serving. This quick step ensures the dessert looks just as creepy and fun as it did when first made. By waiting to add these final touches, you’ll maintain the visual appeal, making the Zombie Dirt Pudding Cups a perfect party treat.
Dietary Adaptations for Zombie Dirt Pudding Cups
Zombie Dirt Pudding Cups are versatile, making them easy to adapt for various dietary needs. Whether you’re catering to gluten-free, dairy-free, or low-sugar diets, there are simple swaps you can make without sacrificing taste.
Gluten-Free Zombie Dirt Pudding Cups
For those who need a gluten-free option, it’s easy to modify this recipe. Simply use gluten-free Oreos, which are widely available and taste just as delicious. Be sure to check the pudding mix label to ensure it’s gluten-free, as some brands may contain trace amounts of gluten. With these substitutions, your Zombie Dirt Pudding Cups will still be just as spooky and satisfying.
Dairy-Free Zombie Dirt Pudding Cups
To make Zombie Dirt Pudding Cups dairy-free, replace the half and half with a non-dairy alternative like almond milk or coconut milk. You’ll also need to substitute the Cool Whip with a dairy-free whipped topping, which can easily be found in most grocery stores. These swaps ensure that even those with lactose intolerance or following a vegan diet can enjoy the creepy fun of this dessert.
Low-Sugar Zombie Dirt Pudding Cups
If you’re looking to reduce the sugar content, you can use a sugar-free pudding mix and sugar-free whipped topping. Additionally, opt for reduced-sugar Oreos or use a low-carb cookie alternative. This allows you to enjoy Zombie Dirt Pudding Cups without the added sugar overload, making it a great choice for those who are watching their sugar intake or managing diabetes.
These simple modifications make this dessert accessible to nearly everyone, ensuring no one misses out on the fun.
Fun Facts and Halloween Party Presentation Ideas for Zombie Dirt Pudding Cups
Zombie Dirt Pudding Cups are not only delicious but also a conversation starter at any Halloween party. Adding a bit of history and creativity can elevate their charm.
The History of Dirt Pudding
Dirt pudding has been a beloved children’s dessert for decades. Originating as a playful treat in the 1980s, the combination of chocolate pudding, crumbled cookies, and gummy worms made it a staple at birthday parties. Zombie Dirt Pudding Cups are a fun Halloween twist on this classic, using mint Oreos and candy eyeballs to give them a spooky, creepy vibe perfect for the season.
Spooky Presentation Ideas for Zombie Dirt Pudding Cups
When serving Zombie Dirt Pudding Cups at a Halloween party, presentation is key. Use clear cups to highlight the eerie green layers of pudding and crumbled cookies. For a more dramatic effect, serve them in mini cauldrons or skull-shaped cups. You can also stick spooky decorations, like mini plastic skeletons or witch hats, into the pudding for a fun touch. Adding gummy worms crawling out of the “dirt” will give the cups a creepy, yet fun appearance.
Make It Interactive for Guests
Take your Zombie Dirt Pudding Cups to the next level by creating a DIY dessert bar. Set out bowls of toppings like candy eyeballs, gummy worms, and Halloween sprinkles, and let guests build their own creepy creation. This interactive experience is great for kids and adults alike and adds a personalized touch to your Halloween party. It’s a simple way to turn a basic dessert into something memorable and fun for everyone.
FAQs and Troubleshooting for Zombie Dirt Pudding Cups
Even with a simple recipe like Zombie Dirt Pudding Cups, a few common questions and issues may arise. Here are answers to help you troubleshoot and perfect your spooky treat.
What if My Pudding is Too Runny?
If your Zombie Dirt Pudding Cups pudding turns out too runny, it’s likely because it hasn’t set properly. To fix this, refrigerate the pudding for at least 30 minutes to firm it up. If it’s still runny, reduce the amount of liquid next time or use whole milk for a thicker consistency. Instant pudding usually thickens within minutes, so patience is key.
Can I Make Zombie Dirt Pudding Cups Ahead of Time?
Yes, Zombie Dirt Pudding Cups can be prepared ahead of time, making them a perfect dessert for parties. Assemble the pudding cups a day before your event and store them in the fridge. Just be sure to wait until right before serving to add the candy eyeballs and other garnishes to keep them from sinking into the pudding.
What Are Some Good Oreo Substitutes?
If you can’t find mint Oreos or want to switch things up, there are several alternatives. Chocolate graham crackers, gingersnaps, or any other chocolate cookie work well in Zombie Dirt Pudding Cups. For a less sweet version, try using a dark chocolate cookie to balance the richness of the pudding.
How Can I Make the Pudding Less Sweet?
To reduce the sweetness in Zombie Dirt Pudding Cups, opt for a sugar-free pudding mix or use less Cool Whip. Cutting back on the candy garnishes can also help balance the flavor, making the dessert more suitable for those who prefer something less sugary.